
Related Manuals for Bissell PowerForce Compact Turbo 2690 Series


Summary of Contents for Bissell PowerForce Compact Turbo 2690 Series
-
Page 1: User Guide
POWERFORCE ® COMPACT TURBO ___________ USER GUIDE 2690 SERIES More of a video person? Look for this icon and go online for an instructional how-to video at www.BISSELL.com/ videos... -
Page 2: Safety Instructions
If it still does not fit, contact a qualified electrician to install a proper outlet. Do not change the plug in any way. SAVE THESE INSTRUCTIONS This model is for household use only. www.BISSELL.com... -
Page 3: Table Of Contents
Thanks for buying a BISSELL® vacuum! We love to clean and we’re excited to share one of our innovative products with you. We want your vacuum to work like new for the years to come, so this guide has tips on how to use, maintain and, if there’s a problem, troubleshoot. -
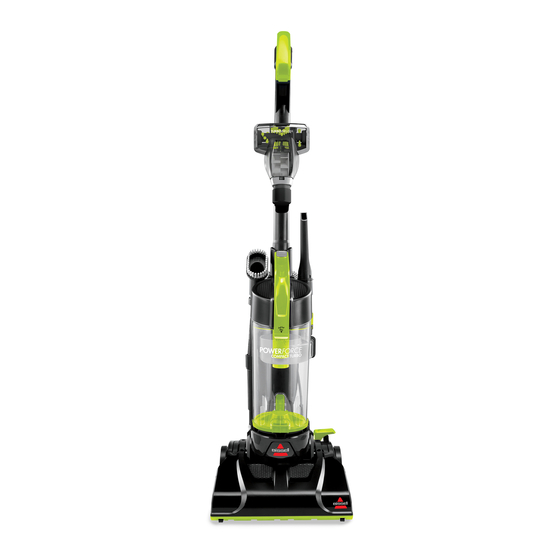
Page 4: Product View
6 Carrying Handle 17 Power Cord 7 Accessory Holder 18 Power Switch Pedal 8 Dirt Tank 19 Hose Holder 9 Dirt Tank Empty Button 20 Foot Hose 10 Handle Recline Pedal 21 Product Rating Label & Serial Number 11 Cord Hook www.BISSELL.com... -
Page 5: Assembly
TurboBrush Crevice Tool Dusting Brush Tool holder to handle by Tool lining up the hole in the TurboBrush holder with the indent on the handle, Attach tools by inserting them onto the on-unit and snapping into place. tool holders. www.BISSELL.com... - Page 6 To turn the unit OFF, tables, chairs, or beds. step again on the red Power Switch Pedal. NOTE: Some berber carpets have a tendency to fuzz with wear. Repeated strokes in the same area may enhance this condition. www.BISSELL.com...
- Page 7 ATTENTION: The Brush Roll will continue to rotate while using your vacuum for above floor cleaning. To prevent carpet damage, do not lean on the vacuum or let the power foot tilt forward. www.BISSELL.com...
-
Page 8: Emptying The Dirt Tank
NOTE: The Dirt Tank may be washed in warm water with a mild detergent. Rinse and dry thoroughly before re-attaching it. This is not dishwasher safe. www.BISSELL.com... - Page 9 Dirt Tank. Tank and separator can be washed with hand-warm water. Mild Remove hose by twisting to unlock and pulling up. Check inlet for any clogging detergent may be used. Rinse well and before reassembling. let air dry completely. www.BISSELL.com...
-
Page 10: Cleaning The Filter
Rinse well, then air dry completely with the locating features in the tank lid. before returning to Dirt Tank lid. NOTE: If the filter is still excessively dirty, damaged or torn, it will need to be replaced. Pre-Motor Replacement Filter Style FF100. www.BISSELL.com... - Page 11 Remove debris from this area. When finished cleaning, align Brush Roll with belt turning by hand several times in the direction of the motor to Replace the brush cover and 5 screws. align the belt on the Brush Roll. www.BISSELL.com...
- Page 12 When finished, align Brush Roll with belt turning by hand several times in the direction of the motor to align the Replace the brush cover and 5 screws. belt on the Brush Roll. www.BISSELL.com...
- Page 13 The faceplate will not clockwise until slot dislodged, align the two close properly if all parts appears then separate clips on each side and are not aligned correctly. faceplate. Carefully pop into place. remove brush, replace belt and brush if needed. www.BISSELL.com...
-
Page 14: Troubleshooting
Check drive belt area and remove obstructions. Replace drive belt if necessary. Brush Roll bristles are worn. Replace Brush Roll. Brush Roll is jammed. Remove Brush Roll and clean debris from brush and ends. Check drive belt for any damage. www.BISSELL.com... -
Page 15: Operations
Care by E-mail or telephone as described it was sold. below. BISSELL is not liable for incidental or It may be necessary to obtain some of your consequential damages of any nature personal information, such as a mailing associated with the use of this product. - Page 16 NOTE: Please keep your original sales receipt. It provides proof of purchase date in the event of a warranty claim. See Warranty page for details. Parts & Supplies For Parts and Supplies, go to www.BISSELL.com and enter your model number in the search field. We can’t wait to hear from you!
- Page 17 POWERFORCE ® COMPACT TURBO ___________ GUÍA DEL USUARIO SERIE 2690 ¿Es una persona que prefiere vídeos? Busque este icono y vaya en línea a ver un vídeo instructivo en www.BISSELL.com/ videos...
-
Page 18: Instrucciones Importantes De Seguridad
Este enchufe entra en un tomacorriente polarizado en una sola posición. Si el enchufe no entra bien en el tomacorriente, inviértalo. Si aun así no entra, comuníquese con un electricista calificado para que instale un tomacorriente apropiado. No modifique el enchufe de manera alguna. GUARDE ESTAS INSTRUCCIONES Este modelo es solamente para uso doméstico. www.BISSELL.com... - Page 19 ¡Muchas gracias por comprar una aspiradora BISSELL®! Nos gusta mucho limpiar y nos entusiasma compartir uno de nuestros productos innovadores con usted. Queremos que su limpiadora profunda portátil funcione como nueva en los próximos años, por lo que esta guía contiene sugerencias sobre el uso, mantenimiento y, si hay un problema, la identificación de fallas.
-
Page 20: Diagrama Del Producto
9 Botón de vaciado del tanque de suciedad 20 Manguera de la base 10 Pedal para reclinar el mango 21 Rótulo de calificación del producto y 11 Gancho del cordón número de serie 12 Liberación del tubo de extensión www.BISSELL.com... - Page 21 Cepillo para polvo herramienta TurboBrush® TurboBrush para espacios alineando el agujero en el pequeños soporte del TurboBrush con la muesca en el mango, y Fije las herramientas insertándolas en los portaherramientas de calzando a presión en su sitio. la unidad. www.BISSELL.com...
- Page 22 Para apagar (OFF) la muebles bajos como mesas, unidad pise nuevamente el sillas o camas. interruptor de pedal rojo. NOTA: Algunas alfombras berber tienden a formar pelusas con el uso. Las pasadas repetidas en la misma área puede aumentar esta condición. www.BISSELL.com...
- Page 23 ATENCIÓN: El cepillo giratorio seguirá girando mientras usa la aspiradora para limpiar arriba del nivel del piso. Para evitar daños a la alfombra, no se apoye en la aspiradora ni deje que el cabezal motorizado se incline hacia adelante. www.BISSELL.com...
- Page 24 NOTA: Se puede lavar el tanque de suciedad en agua tibia con un detergente suave. Enjuague y seque bien antes de volver a instalarlo. Esto no es apto para lavavajillas. www.BISSELL.com...
- Page 25 Se puede desbloquear y tirando hacia arriba. Verifique usar un detergente suave si desea. Enjuague que la entrada no esté obstruida antes de bien y deje secar completamente al aire. volver a armar. www.BISSELL.com...
-
Page 26: Limpieza Del Filtro
NOTA: Si el filtro todavía está excesivamente sucio, dañado o rasgado, será necesario reemplazarlo. Filtro de reemplazo antes del motor estilo FF100. www.BISSELL.com... - Page 27 Cuando termine de limpiar, alinee el cepillo giratorio con la correa girando a mano varias veces en la dirección del motor para alinear Vuelva a colocar la cubierta del cepillo la correa en el cepillo giratorio. y 5 tornillos. www.BISSELL.com...
- Page 28 Cuando haya terminado, alinee el cepillo giratorio con la correa girando a mano varias Vuelva a instalar la cubierta del cepillo veces en la dirección del motor para alinear y 5 tornillos. la correa en el cepillo giratorio. www.BISSELL.com...
- Page 29 Extraiga cuidadosamente el presión en su lugar. correctamente. cepillo, reemplace la correa y el cepillo si es necesario. www.BISSELL.com...
- Page 30 Las cerdas del cepillo giratorio Cambie el cepillo giratorio. están gastadas. El cepillo giratorio está atascado. Saque el cepillo giratorio y limpie la suciedad del cepillo y de los extremos. Inspeccione la correa de accionamiento para ver que no esté dañada. www.BISSELL.com...
- Page 31 La responsabilidad de con los términos de esta garantía. Todos los datos BISSELL no será mayor que el precio de compra del personales se gestionarán de conformidad con la producto.
- Page 32 ¡Visite www.BISSELL.com/registration! O visite el sitio Web de BISSELL: www.bissell.com Al comunicarse con BISSELL, tenga disponible el número de modelo de la aspiradora Anote el número de modelo: ___________________ Anote la fecha de compra: ___________________ NOTA: Guarde el recibo original de compra.
Need help?
Do you have a question about the PowerForce Compact Turbo 2690 Series and is the answer not in the manual?
Questions and answers
Boswell power force compact turbo vacuum will not start
The Bissell PowerForce Compact Turbo 2690 Series vacuum may not start due to the following possible causes:
1. The power cord is not plugged in – Ensure the plug is securely connected to an electrical outlet.
2. A blown fuse or tripped circuit breaker – Check and replace the fuse or reset the circuit breaker if needed.
3. The dirt tank is full – Empty the dirt tank.
4. A dirty filter – Inspect the filter and clean or remove any dirt.
5. The hose is not securely connected – Ensure the hose is properly attached at both ends.
6. The dirt tank is not correctly positioned – Make sure the dirt tank is fully inserted and latched.
7. A vacuum path obstruction – Check for blockages in the air passage or intake area.
Following these steps should help resolve the issue.
This answer is automatically generated