ELGi EG Series Operation And Maintenance Manual
Electric powered screw air compressor
Hide thumbs
Also See for EG Series:
- Operation, maintenance and parts manual (134 pages) ,
- Operation, maintenance and parts manual (60 pages)

Related Manuals for ELGi EG Series


Summary of Contents for ELGi EG Series
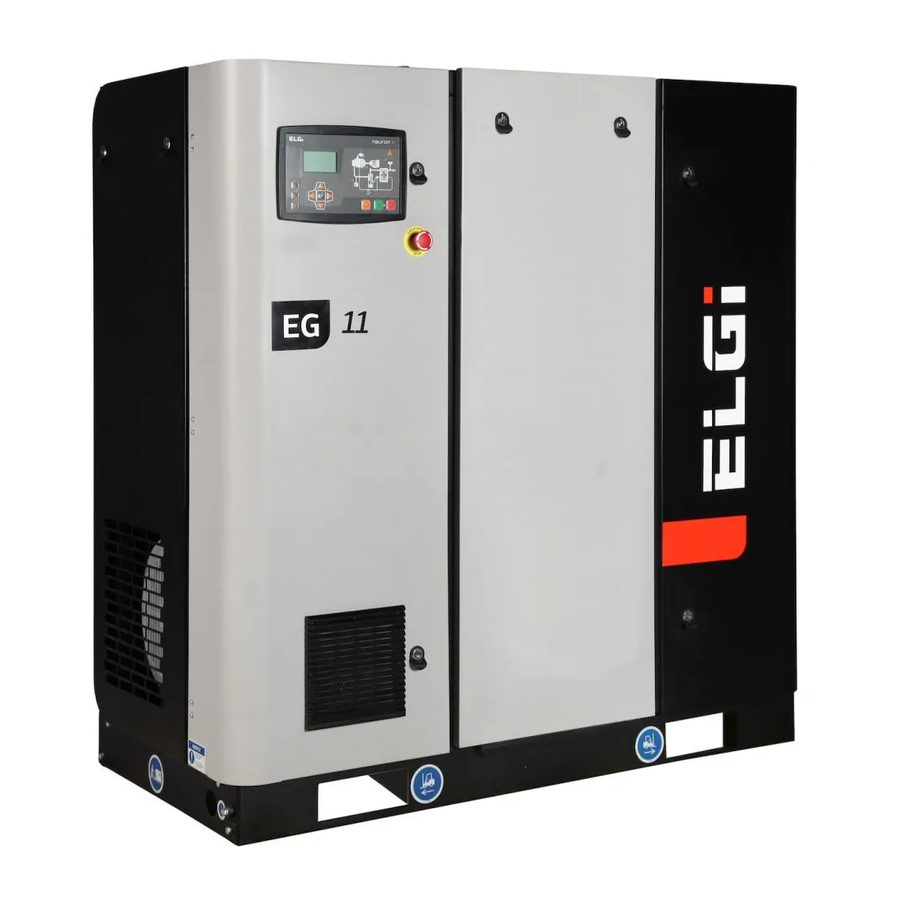
- Page 1 EG SERIES ELECTRIC POWERED SCREW AIR COMPRESSOR EG 11 to EG 22 (15 HP to 30 HP) Standard and Standard + VFD 208 - 230V / 460V, 3Ph, 60Hz OPERATION AND MAINTENANCE MANUAL...
- Page 2 Part / Document No. 019400022 Rev R08 Print Status April 2017...
- Page 3 List of Contents OPERATION AND MAINTENANCE MANUAL Introduction Salient Features Safety Operating Precautions Technical Specifications Commissioning Process Installation Disposal Of Packing Functional Description Maintenance Maintenance Schedule Decommissioning Dismantling And Putting Out Of Service Disposal Of Consumables And Replaced Parts Troubleshooting Conversion Tables Torque Values Service Log Book...
- Page 4 Operation and Maintenance Manual Machine Identification and Sale Record Owner’s Name : ________________________________________________________ Phone Number : ________________________________________________________ Contact : ________________________________________________________ E Mail Address : ________________________________________________________ Model : ________________________________________________________ Serial Number : ________________________________________________________ Year of manufacture : ________________________________________________________ Motor : ______________HP/kW _____________________________________ Capacity _____________________cfm _______________________________ Rated Pressure...
- Page 5 Using the Manual This operation and maintenance manual has been specially designed to get the most out of your Elgi EG Series compressor. Before you start using your compressor, go through this manual thoroughly. It contains vital information on operation as well as useful tips that will help you to maintain your compressor as good as new for years to come.
- Page 6 Message from the Managing Director Dear Elgi Customer, It gives me great pleasure to welcome you to the family of users of EG Series compressors from Elgi , among the most sophisticated rotary screw air compressors available in the world today.
- Page 7 EG Series Your EG Series compressor belongs to a family of rotary screw compressors from Elgi. The compressor has only two moving parts the rotors which are separated by a thin film of oil, so that there is no wear. This also means that the reliability of the compressor is unsurpassed.
-
Page 8: Pressure Release
Operation and Maintenance Manual Safety The operator should follow the instructions, procedures and decals given in this manual for safe operation The maintenance personnel should be adequately trained, and have read and completely understood this operation and maintenance manual Compressed air and electricity can be dangerous. To prevent injury before attempting any maintenance, be sure to disconnect the power at the source and the compressor is relieved of all pressure Ensure that all the protective covers are in place and that the canopy/doors are closed during operation Remove red colored brackets at the airend, motor and shroud while commissioning the compressor... -
Page 9: Moving Parts
Read the manual in detail and follow the instructions Clean the air compressor package regularly Keep the air filter clean Use only genuine Elgi spares Use only clean and recommended lubricants Maintain correct oil level and use proper tools Attend immediately to anything unusual in the air compressor... - Page 10 1499 1521 Weight 1410 1521 1565 1576 Oil recommended ELGI Airlube UT Synthetic Air outlet port size inch 1” NPT Thread NOTE: C - Standard Compressor, CV - Standard Compressor with Variable Frequency Drive Tolerance for S.No:3 will be +4...
- Page 11 Commissioning Process Before the new EG Series compressor is operated for the first time, it needs to be installed at your site according to Elgi’s Installation specifications. The servicing technician carries out a series of checks on the machine and the systems to which it is connected to ensure that it is in a condition to function safely and as desired.
- Page 12 Operation and Maintenance Manual Make sure the entire lifting, rigging and supporting structure has been inspected, is in good condition and has a rated capacity of at least the net weight of the compressor. If you are unsure of the weight, then weigh the compressor before lifting it.
- Page 13 Installation GA drawing – EG 11 to EG 22 (15 HP to 30 HP) NOTE: A minimum of 3.3 ft clearance is required on all sides of compressor and 6.6 ft clearance above the unit.
- Page 14 To eliminate transmission of vibrations, provide a soft bellows connector between the duct and the compressor Contact Elgi in case you need to provide a duct connection or filter fitment on the compressor The compressor is to be located such that the hot air from other machines is not directed towards it Provide adequate lights for easy reading of displays and see the parts clearly when doors / panels are opened.
- Page 15 Electricals You must provide a lockable main switch with pre-connected slow-blow main fuses as per industrial safety regulations. The power supply should be 460 Volts 3 phase with Earth (PE). The fuse and cable specifications for 460 V, 60 Hz ,3 PH power supplies are listed in the table below.
- Page 16 Operation and Maintenance Manual Air Pipe Lines Use the table below as guidance for selecting pipes for your system Commercial steel pipe size for compressed air line / air pressure losses in 100 ft length Free 1/2 inches 3/4 inches 1 inches 1 1/4 inches 1/2 inches...
-
Page 17: The Compressor
Connect the earthing line to the point provided on the base frame at the side of Connect the compressor to the air network the compressor Use Elgi recommended Air lube UT Synthetic oil for optimum performance of the compressor CONTROL PANEL EARTHING POINT DETAIL - A 7302 italy change view 7.14... - Page 18 Installation Operation and Maintenance Manual Oil Fill Procedure Oil Fill Procedure OIL FILLING Oil filling port PORT (OVER (Over fill cap) FILL CAP) OIL SIGHT Oil level sight glass GLASS NOTE • Suspended particulate matter should be less than 150 spm to achieve the specified Fill oil in the oil tank up to over fill cap consumable life •...
- Page 19 If any abnormal noise is heard when the compressor runs, switch it off immediately and contact the Elgi service engineer for remedy All the points listed earlier should be followed, when the compressor is re-installed at a different location If the compressor has been stored for an extended period before commissioning, contact the Elgi distributor.
- Page 20 Flush the Tank, airend with compressor oil and replace the separator element before using the compressor again Disposal of Packing The wood used to make the shipping crates of the EG Series compressors is biodegradable. The polyethylene covers wrapped around the compressor and the polystyrene packing provided around the electrical panels are not recyclable.
- Page 21 Compression in a EG Series compressor At the heart of the EG Series compressor is the compressor unit or airend, driven by an electrical motor. There are two counter- rotating, intermeshed helical screw elements in the airend, the male rotor and the female rotor.
- Page 22 Functional Description Operation and Maintenance Manual Air Intake System Air Intake System Air is provided to the airend by the air intake system Air is provided to the airend by the air intake system AIR FILTER CLOG Air Filter Clog INDICATOR Indicator AIR FILTER...
- Page 23 COOLER Elgi Air lube UT Synthetic oil with the right amounts of additives 12.4 under strict quality control checks, ensures satisfactory compressor performance A good record of the operating temperature of the compressor is 13.6...
-
Page 24: Electrical System
Safety System and Interlocking Devices Your EG Series compressor is equipped with the following devices for reliability and safety: Discharge Temperature Sensor This is provided to shut down the compressor if the discharge air– oil mixture temperature reaches a preset value of 230... -
Page 25: Safety Valve
Fig 25 TEMPERATURE SENSOR PRESSURE Temperature sensor Pressure sensor SENSOR Pressure sensor wire routing Pressure sensor PRESSURE TEMPERATURE Temperature sensor SENSOR SENSOR MOUNTING mounting Minimum Pressure Valve This valve is fitted at the outlet of the oil separator and opens at a defined set pressure. This facilitates proper air and oil separation and oil circulation to the airend Safety Valve The safety valve relieves the pressure in the air–oil receiver tank when it exceeds 175 psi.g. - Page 26 Operation and Maintenance Manual Capacity control system with Variable Frequency Drive Machine: When the machine is switched ON, the speed of the motor gradually increases with in 30 seconds (Ramp up time) with the help of VFD, after which the solenoid valve energizes and opens the intake valve and closes the blow down valve. Thus the machine is started with much reduced load on the motor.
- Page 27 Maintenance The maintenance of EG Series compressors is minimal but important. The indicators on the control panel of the compressor gives warnings for servicing the suction filter or oil filter element. Maintenance Schedule Daily : Prior to starting the machine, it is necessary to check the oil level in the Air Oil Sump (see Starting the compressor in the Operation section).If the level is low add the required amount of oil.
- Page 28 Return the separator to its original position & hand rotate it in clockwise direction Ensure there are no oil leaks from the mating surface. In case of leakage, check the gasket After tightening by hand, rotate it further ng by hand, rotate it further AIR OIL SEPARATOR SHELL OPEN ELGI ELGI 16.1...
- Page 29 Oil Change Procedure Switch Off the Compressor and wait for 5 mintues until the compressed air in the system vented out Drain oil from the oil tank through the drain ball valve Drain oil from the cooler through the drain Drain oil from the airend discharge pipe after...
- Page 30 Operation and Maintenance Manual Maintenance Suction Pre-filter Cartridge Removal Procedure 1. Slide Upward Hold the pre-filter between the louvers and slide upwards slightly until the pre-filter bottom edge is visible 2. Slide Downward When the pre-filter bottom edge is visible, slant pre-filter forward...
-
Page 31: Compressed Air
Maintenance Cooler Prefilter -Accessory (Optional) Cooler Prefilter -Accessory (Optional) Maintenance Cooler pre filter assembly Handle Pre-filter frame Pre-filter element Cooler Prefilter Cleaning & Maintenance Instructions Lift upward & Take out the Cooler Pre filter from the Compressor. Hold or fix the Cooler Prefilter assembly in cleaning area. Clean pre-filter with compressed air at less than 2.5 bar g from the reverse or back side of the Cooler Prefilter. -
Page 32: Air Filter
Assemble the coupling guard Periodic inspection of tightening of screws be done every three months Disconnect all power at the source before attempting maintenance or adjustments. WARNING If you need to reduce the operating pressure to save energy, contact Elgi’s Service Engineer. WARNING... - Page 33 Remove the old MPV kit and replace it with a new one Grease the new MPV kit Assemble the MPV kit, and then reinstall the spring and the cap Minimum Pressure Valve (MPV) Isolate the machine from the service line vent the separator tank pressure and allow if to cool for few minutes Tighten the bolts Release the receiver tank and downstream pressure Unscrew the four bolts...
-
Page 34: Electric Motor
Operation and Maintenance Manual Electric Motor Frequent Checks Check the insulation of the motor winding Remove moisture from the motor Check the junction box terminals and cable connectors Grease the motor Greasing Intervals & Recommended Grease Refer maintenance chart NOTE: If the compressor is lying idle for more than a year, fresh grease should be applied after removing the old grease The compressor motor IR (Insulation Resistance) value should be verified before starting Intake Valve... -
Page 35: Service Kits
Intake Valve Service Kits: Intake Valve Service Kits HAK50 90-663868 HAK50 90-663868 3 CONTROL DISC POSITION DURING HAKG 3 control disc position ASSEMBLY During assembly Detail: Rotary drive unit DETAIL: ROTARY DRIVE UNIT NOTE: Schematic Diagrams Only Note: Schematic diagrams only! 16.11... - Page 36 Maintenance Operation and Maintenance Manual Blow-Down Valve Blow-Down Valve Complete Service and Dismantling Complete Service and Dismantling Dismantle valve completely from the compressor. Unscrew out locking screws (2) Take out piston unit (4).along with Gasket (5) Dismantle valve completely from the Cleaning compressor.
- Page 37 Use compressed air at less than 100 psi g to clean the outer surface of the cooler. Supply the jet of air in opposite direction of cooling airflow direction, through the cut out shown in figure below Close the cooler inspection cover and LH panel Do not get rid of the cotton in the cooler fins by burning it.
-
Page 38: Oil Service
3 and 9 o’clock position. ELGI recommend that once the seal is broken, all the products should be used immediately. Users are not encouraged to reuse or recycle any of these leftover fluids as there might be possibility of contamination. - Page 39 7. Elgi introduced oil sampling kit in airend oil injection line from oil filter outlet line itself from September 2014 onwards supplied units, which can be used for draining oil for lab test. Step 2: Flushing For flushing clean/ non-varnished machines presently using: Mineral/ PAO oils 1.
- Page 40 Follow ELGI Recommended sampling frequencies and the sampling guidelines noted on the lubricant analysis reports to determine when the next sample should be taken and sent in for analysis.
- Page 41 1. Rotate the compressor shaft once in 7 days and ensure free rotation of shaft. # The above life time guidelines applicable only to standard operating and regular maintenance conditions recommended in product manual. In the event of changes in the conditions,consult ELGI.
- Page 42 Operation and Maintenance Manual Decommissioning, Dismantling and Putting Out of Service Waste Disposal Use of the compressor generates substantial waste. The residues from industrial, agricultural, crafts, commercial and service activities must be treated as waste, which needs to be disposed of properly. Deteriorated or obsolete machines are also classified as waste.
-
Page 43: Troubleshooting
Troubleshooting Problem: Machine Not Starting Check Remedy Main disconnect switch open Close the switch Line fuse blown Replace fuse Control transformer blown Replace fuse Reset. If trouble persists, check if motor Motor starter overload tripped starter contacts are functioning or not Low incoming voltage Do alternate arrangement Wire loose connection/... - Page 44 Operation and Maintenance Manual Troubleshooting Problem : High Discharge Temperature Trip Check Remedy Clean cooler and check for proper Cooling air flow restricted ventilation Cooler plugged Clean the cooler pipes Ambient temperature Provide sufficient forced ventilation is too high Low oil level Add oil to correct the level Fan Motor Failure Replace the Fan...
- Page 45 Troubleshooting Problem: Excessive Oil In Service Line / Consumption Check Remedy Clogged return line strainer or orifice Clean strainer and orifice Separator element damage or not Change separator element functioning properly Check all pipe connection Leak in lubrication system for leakage Excess oil foaming Drain and change the oil Oil level too high...
- Page 46 Operation and Maintenance Manual Troubleshooting Problem : Machine not building up full discharge pressure Check Remedy Check for service line leaks or Too much air demand open valve Dirty air filter Change element Pressure regulator valve out of Adjust regulator valve as per this adjustment instruction given in manual Check diaphragm and replace if...
- Page 47 Conversion Tables Description Multiply by From Length (l) Inches Millimetres 25.4 Metres Inches 39.37 Feet Millimetres 304.8 Metres Feet 3.281 Inches Thou 1000 Millimetres Micrometres 1000 Area (A) Square metres Square feet 10.765 Square feet Square inches Square inches Square Millimetres 645.16 Volume (V) Cubic metres...
- Page 48 Operation and Maintenance Manual Torque Values The tightening torque values for bolts and screws used in Elgi compressors are provided in this section for reference. The tolerance for the torque values is ±10 percent Metric hexagonal head bolts and screws...
- Page 49 Service Log Book - Record of Maintenance...
- Page 50 Operation and Maintenance Manual...
- Page 51 Electrical Systems and Controls 22,24 Service Log Book Foundation Technical Specification 10,11 Functional Description Thermal Valve Trouble Shooting EG Series and Salient Features Torque Values Handling the Compressor Using the Manual Unpacking Installation Installation- GA Diagram Ventilation and Exhausting Hot Air Intake Valve...
- Page 53 Neuron II Manual Version : 1.8 April 2015...
- Page 55 INDEX Abbreviations Used 1. Technical Specification 2. Installation Instruction 2.1. Equipment’s Safety 2.1.1. Static Discharge Warning 2.1.2. Assembly 2.1.3. Do not expose to direct sunlight 2.1.4. Must be protected from rain 2.1.5. Do not install equipment on structures subject to continuous vibration 2.1.6.
- Page 56 Controller Manual 7.4.3 Change Password 7.5 Customer care 7.6 Admin 8. Data Interface 8.1 Analog output 8.2 DCS Port 9. Construction 9.1 Dimension Drawing 10.0 10. Example – scheduler setting 11.0 11. Modbus Details 12.0 12. Revision Details...
- Page 57 Abbreviations Used Dis. Pressure Discharge Pressure Dis. Temperature Discharge Temperature DPAF Differential Pressure Air Filter DPOF Differential Pressure Oil Filter High sump pressure Temp Temperature Air Filter Oil Filter Minimum Maximum Variable Frequency Drive Analog Output Unload Enable Disable Load Stop Fault Standby...
- Page 58 0 to 45°C Storage temp -10 to 70°C Relative Humidity <95% @ 40°C without condensation. Altitude Certification ETL, CE Overvoltage category CLASS III For Technical support/assistance contact ELGI Customer Care Toll Free: (web site name only available in menu) E-mail: ccs@elgi.com...
-
Page 59: Analog Inputs
Digital Inputs: Number of Channel Input Voltage 24VDC Input Current 2.4 mA Input Resistance 10000 ohm Switching Threshold Low 120µs Switching Threshold High 90µs Isolation optically isolated 2500Vrms Usage Emergency Stop, Motor overload, Cooler over Load, DPAF or Remote Load/Unload, DPOF, Motor Reverse Rotation, Remote on/off &... - Page 60 Controller Manual 1 x PT1000 Range -10 to 150°C Resolution 1°C Accuracy ±2°C Usage Ambient or Dryer Temperature, Software Selectable Analog output: Number of Channel Range 1 to 5VDC Resolution 0.1V Accuracy +/-0.1V Usage Discharge Pressure and Discharge Temperature Communication Portsv Port1 RS485, MODBUS RTU (for DCS interface) Port2...
-
Page 61: Power Supply
not exceed the admissible temperature for the nominal use, specified in the data sheet. Not to use in wet condition. The devices may be installed only outside of explosion hazardous areas! 2.1.3. Do not expose to direct sunlight Since the electronic circuits must not be subjected to uncontrolled temperatures. Place the cabinet in shade. 2.1.4. - Page 62 Controller Manual 3. Front view Dis Pr.: Dis .Tr.: Run Load Date Time 128x64 Graphical Display Air Oil Separator change indication LED Navigation Keys Cooler Fault LED Enter Key Auto Mode Enabled indication LED Start key High Pressure fault LED LED (Green –...
- Page 63 3.1 Terminal Connection X01 – Power Supply 24VAC, Earth, Neutral X02 – Relay Outputs (5 Ports) X03 – Relay Outputs (3 Ports) X04 – Digital Inputs (8 Ports) X05 – Analog Inputs (4 Ports) X06 – Analog Outputs (2 Ports) X07 –...
- Page 64 Controller Manual 70 + Modbus Parameters for DCS controls Dryer Integration Power OFF 120 Sec Delay High, Low Dew Point warnings 4.6. Safeguard The ‘Smart Logic’ of NEURON II automatically decides the start delay required to ensure minimum wait time between successive starts of the compressor and dryer thereby increasing their lifetime.
- Page 65 5.0 Input Output Description 5.1 - X01: Power supply Function Active state 24V AC Phase 24 VAC P Earth Earth 24V AC Neutral 24 VAC N 5.2 - X02: Relays Function Active state Common - Load Relay Common Load Relay Load / Unload Load when Energized Common - Fan Relay...
- Page 66 Controller Manual 5.6 - X06: Analog outputs and VFD Function Type Protocol / Range VFD Interface** VFD A RS485 A Modbus RTU Protocol VFD Interface** VFD B RS485 B Supply Ground For 5V 0VDC Dis. Pressure Output (0 to 16 bar/psi) Voltage 1 to 5v Dis.Temperature (-10 to 150 Deg C/Deg F)
- Page 67 Message 1 - Compressor Status message Status Description Ready Ready for Start Star Motor Running in Star Motor Running in Delta Run Load Compressor in Load Run Unload Compressor in Unload Stop Busy Stop Sequence in Progress Emergency Stop Emergency Stop Push Switch is ON During the Start, if the Sump Pressure is higher than the set start sump pressure value, Start Inhibit xx.x you will see this message.
- Page 68 Controller Manual Message 3 - Compressor Warning messages Warning Description DPAF If DPAF Digital Input is Open and DPAF ON in factory settting DPOF If DPOF Digital Input is Open and DPOF ON in factory Dryer Probe Failure When Ch-4 analog sensor input fails Low Dew Point When Ch-4 Dew point temp.
- Page 69 7. DTR Delay From Delta change over to Load delay time. Default 10 sec delay given in the factory. 8. RTS Delay Normal Stop of compressor will Unload and wait for this delay time to Stop the Compressor. Default 10 sec delay given in the factory.
- Page 70 Controller Manual VFD Operation as follows 1. Machine will be run at Minimum speed (default 750RPM) up to RUN LOAD condition when start up. 2. Machine will be run at Unload speed when machine in Unload, it may be Remote Unload or DCS unload or when Dis. Pr is >= UnLoad Pressure 3.
- Page 71 7.1.1 Operator LEVEL 1 LEVEL 2 LEVEL 3 LEVEL 4 View Operator Mode Control mode Local / Remote / DCS Auto Restart ON/ OFF Pressure Unit PSI / Bar/psi Temperature Unit Fahrenheit / Centigrade Pressure Unload pressure X X . X b or p (bar/psi or psi) Load pressure X X .
- Page 72 Controller Manual 7.1.3 Day Report Use ▲, ▼ to select the Record number (1 to 30). LEVEL 1 LEVEL 2 LEVEL 3 View Day report Date: DD/MM/YY X X Hours X X Hours UL: X X Hours X X Hours X X Hours Sby: X X Hours STC: X X X...
- Page 73 7.2 Operator Password required. Machine Scheduler Maintenance Operator Language Change Password VFD Control 7.2.1 Machine S.no Item Option Default Unit Mode Control mode loc/rem/dcs Auto Restart on / off Pr Unit bar / psi/psi bar/psi Tr Unit cen / fah Pressure Unload >...
- Page 74 Controller Manual 7.2.2 Schedule Enable Pressure Schedule, and then use ▲, ▼ to select the schedule number (1 to 32). (one schedule should be in Sunday (first day of the week) 00:00 Hrs) Then Press “Enter” to set the following S.no Item Option...
- Page 75 VFD Speed Control Min Speed: Compressor remains in Min Speed upto until the start “Run Load” condition during start. PI Speed Control: In “Run Load”, Compressor operates at calculated Speed between Min speed to Max speed depends on air utilization/Usage. Unload Speed: Compressor runs at settable Unload speed during Unload.
- Page 76 Controller Manual 7.2.6 Change Password Procedure for changing the password 1. Enter the old Password 2. If old password is correct, next screen is displayed. If wrong means Incorrect password message will be displayed. 3. Enter the New password 4. Enter the New password again 5.
- Page 77 7.3.2 Relay Select the Programmable Relay 1 or 2 using the ▲, ▼keys. Then Press “Enter” to assign the any one of the following functionality for the relay. S.no Item Default: Warn Load Relay 1 = Warn Service Relay 2 = Trip Standby Trip Note: If Dryer is enabled then Programmable Relay 2 is not user...
- Page 78 Controller Manual 7.3.6 Self Test Self Test for testing the Controller Display, Mimic Led’s, Keys, Analog and Digital Input/Outputs. Follow the instructions displayed in the screen. Warning!!! Self Test should be conducted only when the compressor wiring is totally disconnected from the controller. Do NOT perform self test when the controller is connected to the compressor.
- Page 79 7.4.1 Machine Item Option Default Unit Compressor Info Manual Rating Entry 10 digit alphanumeric Fab No Editable alpha numeric DPAF on/off DPOF on/off Max. Pressure Settings Max UL Pressure >= 4.5 bar/psi <= 15.5 bar/psi 7.5 bar/psi bar/psi/psi >= Max Unload High Sump <= Max Unload pressure +0.5...
- Page 80 Dis. Pr : 6.0 bar/psi Dis. Tr : 32 °C Status S/W Version URL www.elgi.com e-mail: ccs@elgi.com 7.6 Admin Password required. Admin menu is used for Analog Input Calibration, Analog Output Offset Adjustment , Report Resets (Day Report/Fault Report/ Cumulative/Service hours/Password).
- Page 81 8.0 Data Interface Neuron II has two types of Data Interface Analog output DCS Port 8.1 Analog output Two Channels are available as analog output. Channel - 1 for Discharge Pressure values from 0.0 to16.0 bar/psi, converted into 1 to 5V. Channel - 2 for Discharge temperature value from -10 to 150 Deg C/ Deg F, converted into 1 to 5V NOTE: If in case of Analog Input probe failure, analog output would be OV by default.
- Page 82 Controller Manual 10.0 Example – scheduler setting Page 1/2 The settings are considered When 1 End customer usage is 6 bar 2 Pressure variation in the air pipe is less than 0.1b 3 All the 3 compressor are connected in a sigle/Common Header 4 All the 3 compressor are connected in a Common receiver Pressure schedule settings in Neuron-2 Comp-1...
- Page 83 Page 2/2 Weekly utilization Air Demand: 100% Air Demand: 75% Air Demand: 50% Air Demand: 25% Comp-> Day-1 Day-2 Day-3 Day-4 Day-5 Day-6 Avg Utl% 100 Conclusion Equal Utilization of all the 3 Compressor based on Pressure demand It reduces the power consuption since the compressors are utilised based on the demand. Weekly Air Demand VS All the Compressor Utlization Air Demand 100% Air Demand 75%...
- Page 84 Controller Manual 11.0 MODBUS Details Modbus address Table will be available on request 12.0 Revision Details Version Date Changes April 2009 Initial Draft July 2009 Pilot Batch S/W Version 1.1 Nov 2013 1.1PK3 release 1 Jan 2014 1.1PK3 release 2 May 2014 1.1PK3 VFD additions 1.
- Page 85 EG SERIES ELECTRIC POWERED SCREW AIR COMPRESSOR EG 11 to EG 22 (15 HP to 30 HP) Standard and Standard + VFD 208 - 230V / 460V, 3Ph, 60Hz PARTS MANUAL...
- Page 87 PARTS MANUAL Drive System Air Inlet & Control System Discharge System Cooler Box Sub Assy Cooling System Moisture Separator Sub Assy Base and Canopy Assy Airend Assembly RDS Kit Hose Parts List Spare Kit Insurance Kit Details VFD Settings Electrical Drawings P &...
- Page 88 Parts Manual DRIVE SYSTEM E18 (25 HP) -100 & 125 PSI g & E22 (30 HP) - 100,125 & 150 PSI g...
- Page 89 DRIVE SYSTEM E18 (25 HP) -100 & 125 PSI g & E22 (30 HP) - 100,125 & 150 PSI g S.NO PART NO. DESCRIPTION QTY. B005106400007 MOTOR 18 kW (25hp) B005106400008 MOTOR 22 kW (30HP) ADAPTER RING AND AIR END ASSY X990459 AIREND ASSY -18kW - 100 &...
- Page 90 Parts Manual DRIVE SYSTEM E11-E15 (15 - 20 HP) - 100, 125 150 & 175 PSI g E18 (25 HP) - 150 & 175 PSI g, E22 - 175 PSI g...
- Page 91 DRIVE SYSTEM E11-E15 (15 - 20 HP) - 100, 125 150 & 175 PSI g E18 (25 HP) - 150 & 175 PSI g, E22 - 175 PSI g S.NO PART NO. DESCRIPTION 015402509 MOTOR MOUNTING FLANGE 000983143 SCR SOC HD M12 X 30 10.9 ZYP5-8u B001401300003 ANTI VIBRATION MOUNT B005106400005...
- Page 92 Parts Manual AIR INLET & CONTROL SYSYTEM INTAKE SUB ASSY...
- Page 93 AIR INLET & CONTROL SYSYTEM EG 18 (25 HP) - 100 & 125 PSI g, EG 22 (30 HP) - 100, 125 & 150 PSI g S.NO PART NO. DESCRIPTION QTY. 015403271 O RING 015310676 ADAPTER INTAKE VALVE 000906214 HEX BOLD M16 X 40 000996116 SPRING WASHER M16 B015401070003...
- Page 94 Parts Manual AIR INLET & CONTROL SYSYTEM INTAKE SUB ASSY...
- Page 95 AIR INLET & CONTROL SYSTEM EG 11 - EG 15 (15 - 20 HP) - 100, 125, 150 & 175 PSI g EG 18 (25 HP) - 150 & 175 PSI g, EG 22 - 175 PSI g S.NO PART NO. DESCRIPTION QTY.
- Page 96 Parts Manual DISCHARGE SYSTEM...
- Page 97 DISCHARGE SYSTEM S.NO PART NO. DESCRIPTION QTY. 015306841 SEPERATOR TANK ASSY ASME 000959387 1/2” BSP BONDED SEAL WASHER 000996112 SPRING WASHER M12 000906184 HEX BOLT M12 X 45 000996110 SPRING WASHER M10 000959439 1” BSP BONDED SEAL WASHER 015301535 SEPERATOR BLOCK BODY B312717 1/2”...
- Page 98 Parts Manual COOLER BOX SUB ASSY...
- Page 99 COOLER BOX SUB ASSY S.NO PART NO. DESCRIPTION QTY. 015312750 COOLER BOX ASSY COOLER INSPECTION COVER 000983064 SCR SOC HD M6X20 10.9 ZYP 000996106 SPRING WASHER M6 015402391 COOLER BOX MOUNTING BRACKET COOLER BOX TOP COVER 018400036 350 FAN- 3-230/400V +/- 10 D/Y 60 Hz (15-22 kW) 018400036 350 FAN- 3-230/400V +/- 10 D/Y 60 Hz (11 kW) 000996058...
- Page 100 Parts Manual COOLING SYSTEM COOLER SUB ASSY COOLER SUB ASSY 31.16 31.16...
-
Page 101: Cooling System
COOLING SYSTEM S.NO PART NO. DESCRIPTION QTY. B007705830009 AFTER COOLER & OIL AIR COOLER ASSEMBLY (18-22 kW) B007700690022 AFTER COOLER & OIL AIR COOLER ASSEMBLY (11-15 kW) B010506780004 CONNECTOR 3/4 W/O NUT B010506780005 CONNECTOR 1 1/4 W/O NUT 000983083 SCR SOC HD M8 X 20 10.9 ZYP 000996108 WASHER SPRING REC SEC M8 000996058... - Page 102 Parts Manual EG11 - EG18 MOISTURE SEPARATOR SUB ASSY EG11 - EG18 MOISTURE SEPARATOR SUB ASSY...
- Page 103 MOISTURE SEPARATOR SUB ASSY EG11 - EG 18 S.NO PART NO. DESCRIPTION QTY. 015313383 MS Inlet Hose with flange 000996108 M8 spring washer 000906117 M8X30 Bolt 035400026 O - RING 37.5 x 3 015313170 MS Inlet Pipe 000959438 3/4” Dowty washer B000305480003 Moisture separator MS 150 000906121...
- Page 104 Parts Manual EG22 MOISTURE SEPARATOR SUB ASSY EG22 MOISTURE SEPARATOR SUB ASSY...
- Page 105 MOISTURE SEPARATOR SUB ASSY EG 22 S.NO PART NO. DESCRIPTION QTY. 015313383 MS Inlet Hose with flange 000996108 M8 spring washer 000906117 M8X30 Bolt 035400026 O - RING 37.5 x 3 B000305480002 Moisture separator MS365 015313154 MS Outlet Pipe with flange 000906121 M8 X 50 bolt 000996008...
- Page 106 Parts Manual BASE AND CANOPY ASSY...
- Page 107 BASE AND CANOPY ASSY S.NO PART NO. DESCRIPTION QTY. REMARKS 015312736 BASE ASSEMBLY 015312739 FRONT PILLAR – TANK 015313384 REAR PILLAR-BALL VALVE 015312741 REAR PILLAR - MOTOR 015312738 FRONT PILLAR - MIDDLE 015312737 CONTROL PANEL ASSY B011604790005 HINGE - DOOR RH & LH 015312747 DOOR RH 015312746...
- Page 108 Parts Manual Airend Assembly - 159 DD AIREND ASSEMBLY -159 DD 25 HP - 100, 125 PSI, 30 HP- 100,125 & 150 PSI 25hp - 100, 125 PSI, 30hp - 100, 125 & 150 PSI 31.24...
- Page 109 AIREND ASSEMBLY -159 DD 25 HP - 100, 125 PSI, 30 HP- 100,125 & 150 PSI S.NO PART NO. DESCRIPTION QTY. 01 33 3619 4 MALE ROTOR 01 33 3619 5 FEMALE ROTOR 99 03 0149 0 HOUSING, ROOTOR 01 33 3616 9 HOUSING, BEARING/DISCHARGE 01 33 3617 1 COVER, BEARING HOUSING...
- Page 110 Parts Manual AIREND ASSEMBLY -102 - GD Airend Assembly - 102- GD 15HP & 20 HP - 100 TO 175 PSI, 25HP - 150 & 175 PSI, 30HP - 175 PSI 15 hp & 20hp - 100 to 175 PSI, 25 hp - 150 & 175 PSI, 30hp - 175 PSI 31.28...
- Page 111 AIREND ASSEMBLY -102 - GD 15HP & 20 HP - 100 TO 175 PSI, 25HP - 150 & 175 PSI, 30HP - 175 PSI S.NO PART NO. DESCRIPTION QTY. 01 33 3608 9 MALE ROTOR 01 33 3609 0 FEMALE ROTOR 01 33 3606 7 HOUSING, ROTOR 01 33 3607 0...
- Page 112 Parts Manual AIREND ASSEMBLY -102 - GD Airend Assembly - 102- GD 15HP & 20 HP - 100 TO 175 PSI, 25HP - 150 & 175 PSI, 30HP - 175 PSI 15 hp & 20hp - 100 to 175 PSI, 25 hp - 150 & 175 PSI, 30hp - 175 PSI 31.28...
- Page 113 AIREND ASSEMBLY -102 - GD 15HP & 20 HP - 100 TO 175 PSI, 25HP - 150 & 175 PSI, 30HP - 175 PSI S.NO PART NO. DESCRIPTION QTY. 00 09 8308 4 HEX SOCKET HEAD SCREW 01 34 3609 2 99 04 0034 0 RETAINER, GEAR 00 09 8311 3...
- Page 114 Parts Manual RDS KIT 008941151 000959442 015403668 S.NO PART NO. DESCRIPTION QTY. 008941151 SWITCH REVERSE ROTATION 000959442 M14 BONDED SEAL WASHER 015403668 RDS MOUNTING CONNECTOR...
- Page 115 015403871 for gear driven 102 models (Scavenge line to injection hose) 015403998 (Scavenge line to A/E) 015315241 (Scavenge line to injection hose for 159 and 159s models) 015316335 (Scavenge 015314496 for gear line to A/E for 159 and driven 102 models 159s models) PULSE LINE, OIL RETURN LINE ASSY.
- Page 116 Parts Manual HOSE PARTS LIST Hose cooler to MOS- 015313383 Hose tank to oil cooler-015312499 Hose Oil cooler to Tank-015312500 Hose MPV to cooler - 015312497 Oil injection hose- 015312501 HOSE PARTS LIST FOR STANDARD VERSION AND STD + VFD VERSION S.NO PART NO.
- Page 117 SPARE KIT DETAILS FOR E11 (15 HP) - E22 (30 HP) S.NO DESCRIPTION PART NUMBERS INTAKE VALVE KIT B009401070007 BLOWN DOWN VALVE KIT B015401070004 DRIVE COUPLING ELEMENT 18kW TO 22kW B011201170002 DRIVE COUPLING ELEMENT 11kW TO 15kW B011201170003 O-RING AND GASKET KIT 159 AIREND 012447599 O-RING AND GASKET KIT 102 AIREND 012447699...
- Page 118 Parts Manual SS Tube with fittings Kit For 102 MODELS (EG11-EG15-100,125,150,175),(EG18- 150,175),(EG22-175) Kit Part number 012474809 S.NO DESCRIPTION PART NUMBERS 000959916 ELBOW 1/8 TO 6mm OD 015306425 PIPE SET- AIR PIPE 015402615 PIPE -BLOWN DOWN OIL PIPE15kW 015403609 ELBOW; TMS; 1/4 015403610 TEE;...
- Page 119 Insurance Kit Details EG 11 to EG 22 (15 HP to 30 HP) - 60Hz Models 11,15 18 C 18 C 22 C 22 C & C & CV & CV & CV & CV CV 175 100,125 150,175 100,125, MODELS 150 PSI Kit No...
- Page 120 Parts Manual VFD SETTING PROCEDURE Brief introduction about VFD in Global Series Compressor. In the VFD model compressors, the Variable Frequency Drive (VFD) is integrated with the compressor. i.e. the main motor is controlled through VFD instead of star delta starter. Hardware (wiring) details The wiring integrations with VFD and control panel/controller are shown in the drawing and the purpose of each connection is given below...
- Page 121 Software details (programming details) Based on the compressor rating VFD parameter’s are pre programmed in Setup1 Location. (The setting details are given in Annexure 1) & in the compressor controller. During installation & commissioning the PI can be tuned at site to have smooth speed control according to the customer demand. Except PI settings in the controller no other setting is required to change, and similarly in VFD all settings are pre programmed and not required to change any of the settings.
-
Page 122: Trouble Shooting
Parts Manual Trouble Shooting Fault Description Details to be checked The PI settings in the controller to be reduced to have the speed response for the pressure variation. The compressor does not develop the required pressure (under rating of compressor) The motor runs at full speed always run at max speed of the motor. - Page 123 What is the significance of AO scale setting in the controller? The AO scaling is referring to 1V corresponds to min speed and 5V corresponds to max speed, based on this scaling range and Analogue input reference VFD calculates the required speed/frequency at which the compressor motor need to run. The AO scaling values in the controller settings and in the drive parameter 614,615 need to be same.
- Page 124 Parts Manual Annexure 1 Name Setup 1 Language English Motor Speed Unit Active Set-up Set-up 1 Display Line 1.1 Small Motor Voltage Display Line 1.2 Small Motor current Display Line 1.3 Small Speed [RPM] Display Line 2 Large Analog Input 53 Display Line 3 Large Frequency [Hand on] Key on LCP...
- Page 125 Name Setup 1 Terminal 53 High Voltage Terminal 53 Low Ref./Feedb. Value *** (Edit from NII Controller) Terminal 53 High Ref./Feedb. Value *** (Edit from NII Controller) Protocol Modbus RTU FC Port Baud rate 9600 Parity/Stop bits No Parity,1 Stop bit 843-[0] PCD read Configuration (1603) –...
- Page 126 Parts Manual...
- Page 128 Parts Manual...
- Page 130 Parts Manual...
- Page 132 Parts Manual...
- Page 134 Parts Manual...
- Page 136 Parts Manual...
- Page 138 Parts Manual...
- Page 140 Parts Manual...
- Page 142 Parts Manual...
- Page 144 Parts Manual...
- Page 146 Parts Manual...
- Page 148 Parts Manual...
- Page 150 Parts Manual...
- Page 152 Parts Manual...
- Page 154 Parts Manual...
- Page 156 Parts Manual...
- Page 158 Parts Manual...
- Page 160 Parts Manual...
- Page 162 Parts Manual...
- Page 164 Parts Manual...
- Page 166 Parts Manual...
- Page 168 Parts Manual...
- Page 170 6. In no event ELGi shall be liable for any claims or loss having a value higher than the original purchase price of the product sold by ELGi or its network of authorised dealers.
- Page 171 Notes...
- Page 172 Notes...
- Page 173 Notes...
- Page 174 Notes...
- Page 175 Notes...
- Page 176 Notes...
- Page 181 RS 485 RS 485...
Need help?
Do you have a question about the EG Series and is the answer not in the manual?
Questions and answers
Main motor overload Password
The main motor overload issue for the ELGi EG Series is likely caused by the unit running the compressor for a long period under conditions of "NN Overload." This can occur if the air requirement exceeds the compressor's capacity, the working pressure is lower than required application pressure, or if there's an excess pressure drop in the pipeline.
This answer is automatically generated
oil sump capacity
Why is not rasing by itself automatic only manual wall
Oil vomiting through air filter while unloading