Table of Contents
Advertisement
Available languages
Available languages
Advertisement
Table of Contents

Related Manuals for Toro PowerPlex 88542


Summary of Contents for Toro PowerPlex 88542
- Page 1 Form No. 3417-977 Rev C PowerPlex™ 40V MAX Standard Battery Pack/Charger 88540 , 88541, 88542 Batería/cargador estándar PowerPlex™ 40 V MAX 88540 , 88541, 88542 Batterie/chargeur standard PowerPlex™ 40 V MAX 88540 , 88541, 88542 *3417-977* C www.Toro.com.
- Page 2 Form No. 3417-974 Rev C PowerPlex ™ 40V MAX Standard Battery Pack/Charger Model No. 88540—Serial No. 318000001 and Up Model No. 88541—Serial No. 318000001 and Up Model No. 88542—Serial No. 318000001 and Up *3417-974* C Register at www.Toro.com. Original Instructions (EN)
- Page 3 Warning operating the product properly and safely. • Use the battery charger indoors only. You may contact Toro directly at www.Toro.com for product and accessory information, help finding a • Do not recharge non-rechargeable batteries. dealer, complete warranty details, or to register your •...
- Page 4 • Do not heat the battery pack above 70°C (158°F) or incinerate it. • Replace the battery pack with a genuine Toro battery pack only; using another battery pack may cause a fire or explosion. • Keep battery packs out of the reach of children and in the original packaging until they are ready to use.
-
Page 5: Safety And Instructional Decals
Safety and Instructional Decals Safety decals and instructions are easily visible to the operator and are located near any area of potential danger. Replace any decal that is damaged or missing. Symbol Designation/Explanation Class II For indoor use only Before charging, read the instructions Current fuse Correct disposal of this product... -
Page 6: Product Overview
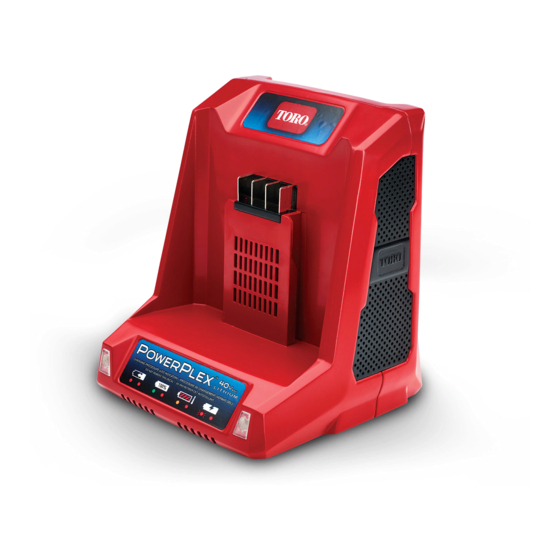
Setup Product Overview Mounting the Battery Specifications Charger (Optional) Battery Charger If desired, mount the battery charger securely on a Model 88542 wall using the wall-mount key holes on the back of Type 40V MAX Lithium-Ion Battery the charger. Charger Input 100 to 120V AC 50/60Hz Max Mount it indoors (such as a garage or other dry place),... -
Page 7: Operation
Operation Charging the Battery Pack Important: The battery pack is not fully charged when you purchase it. Before using the tool for the first time, place the battery pack in the charger and charge it until the LED display indicates the battery pack is fully charged. -
Page 8: Installing The Battery Pack
Installing the Battery Pack Important: Operate the battery pack only in temperatures that are within the appropriate range; refer to Specifications (page Make sure that the vents on the battery are clear of any dust and debris. Line up the cavity in the battery pack with the tongue on the tool. -
Page 9: Maintenance
For more information on recycling lithium-ion battery packs and to locate the battery recycling facility closest to you, visit www.Call2Recycle.org (US and Canada only). If you are located outside of the US and Canada, please contact your authorized Toro distributor. -
Page 10: Troubleshooting
Troubleshooting Perform only the steps described in these instructions. All further inspection, maintenance, and repair work must be performed by an authorized service center or a similarly qualified specialist if you cannot solve the problem yourself. Problem Possible Cause Corrective Action The flashlight does not turn on (battery 1. - Page 11 Problem Possible Cause Corrective Action 1 LED indicator is blinking on the battery 1. The battery pack voltage is low. 1. Place the battery pack on the charger. pack. It is difficult to remove the battery pack 1. The battery pack/tool is new or there 1.
- Page 13 40 V MAX Nº de modelo 88540—Nº de serie 318000001 y superiores Nº de modelo 88541—Nº de serie 318000001 y superiores Nº de modelo 88542—Nº de serie 318000001 y superiores *3417-975* C Registre su producto en www.Toro.com. Traducción del original (ES)
- Page 14 Usted puede ponerse en contacto directamente con • No recargue baterías no recargables. Toro en www.Toro.com si desea información sobre • Antes de utilizar, compruebe si el voltaje de productos y accesorios, si necesita localizar un salida y la corriente del cargador de baterías son distribuidor, buscar datos completos sobre su garantía...
- Page 15 • No caliente la batería a más de 70 °C (158 °F) ni la incinere. • Sustituya la batería únicamente con una batería Toro genuina; el uso de otra batería podría provocar un incendio o una explosión. • Mantenga las baterías fuera del alcance de los niños y en el embalaje original hasta...
- Page 16 Pegatinas de seguridad e instrucciones Las pegatinas de seguridad e instrucciones están a la vista del operador y están ubicadas cerca de cualquier zona de peligro potencial. Sustituya cualquier pegatina que esté dañada o que falte. Símbolo Designación/explicación Clase II Para uso en espacios interiores únicamente Antes de cargar, lea las...
-
Page 17: Montaje
Montaje El producto Cómo montar el cargador Especificaciones de la batería (opcional) Cargador de batería Si lo desea, monte el cargador de la batería Modelo 88542 firmemente en la pared utilizando los orificios de Tipo Cargador de batería de iones montaje en pared en la parte trasera del cargador. -
Page 18: Operación
Operación Carga de la batería Importante: En el momento de la compra la batería no está totalmente cargada. Antes de usar la herramienta por primera vez, coloque la batería en el cargador y cárguela hasta que el indicador LED indique que la batería está completamente cargada. -
Page 19: Instalación De La Batería
Instalación de la batería Importante: Utilice la batería solo a temperaturas que estén dentro del intervalo apropiado; consulte Especificaciones (página Compruebe que los orificios de ventilación de la batería están libres de polvo y residuos. Alinee el hueco de la batería con la lengüeta de la herramienta. -
Page 20: Mantenimiento
únicamente). Si se encuentra fuera de EE.UU. o Canadá, póngase en contacto con Para limpiar la superficie del equipo, pase un paño su distribuidor Toro autorizado. seco únicamente. No desmonte el equipo; si está dañado, póngase en contacto con un Servicio Técnico Autorizado. -
Page 21: Solución De Problemas
Solución de problemas Realice solo los pasos descritos en estas instrucciones. Cualquier otro trabajo de inspección, mantenimiento o reparación debe ser realizado por un Servicio Técnico Autorizado o por un especialista autorizado si no puede solucionar el problema usted mismo. Problema Posible causa Acción correctora... - Page 22 Problema Posible causa Acción correctora 1 indicador LED de la batería parpadea. 1. El voltaje de la batería es bajo. 1. Coloque la batería en el cargador. Es difícil retirar la batería de la 1. La batería/herramienta es nueva 1. Limpie los terminales de la batería herramienta.
- Page 23 40 V MAX N° de modèle 88540—N° de série 318000001 et suivants N° de modèle 88541—N° de série 318000001 et suivants N° de modèle 88542—N° de série 318000001 et suivants *3417-976* C Enregistrez votre produit à www.Toro.com. Traduction du texte d'origine (FR)
- Page 24 Vous êtes responsable de l'utilisation sûre et correcte Attention du produit. • Utilisez le chargeur de batteries uniquement à Vous pouvez contacter Toro directement sur l’intérieur. www.Toro.com pour tout renseignement concernant • Ne rechargez pas les batteries non rechargeables. un produit ou un accessoire, pour obtenir l'adresse •...
- Page 25 à 70 ºC (158 ºF) et ne l'incinérez pas. • Remplacez la batterie par une batterie Toro d'origine uniquement; l'utilisation de toute autre batterie pourrait entraîner un incendie ou une explosion. • Conservez les batteries hors de la portée des enfants et dans leur emballage d'origine jusqu'à...
- Page 26 Autocollants de sécurité et d'instruction Des autocollants de sécurité et des instructions bien visibles par l'opérateur sont placés près de tous les endroits potentiellement dangereux. Remplacez tout autocollant endommagé ou manquant. Symbole Désignation/Explication Classe II Réservé exclusivement à une utilisation en intérieur Avant de charger, lire toutes les instructions Fusible existant...
-
Page 27: Mise En Service
Mise en service Vue d'ensemble du produit Montage du chargeur de batterie (option) Caractéristiques Si vous le souhaitez, fixez le chargeur de batterie techniques solidement à un mur à l'aide des fentes de fixation murale situées au dos. Chargeur de batterie Montez-le à... -
Page 28: Charge De La Batterie
Utilisation Charge de la batterie Important: Quand vous l'achetez, la batterie n'est pas complètement chargée. Avant d'utiliser l'outil pour la première fois, placez la batterie dans le chargeur et chargez-la jusqu'à ce que les diodes indiquent que la batterie est complètement chargée. -
Page 29: Mise En Place De La Batterie
Mise en place de la batterie Important: Utilisez la batterie uniquement à des températures comprises dans la plage adéquate; voir Caractéristiques techniques (page Assurez-vous que les évents sur la batterie sont exempts de toute poussière et tout débris. Alignez le creux de la batterie sur la languette de l'outil. -
Page 30: Entretien
Hors des États-Unis et du Canada, veuillez contacter votre dépositaire Pour nettoyer la surface de l'équipement, il suffit de Toro agréé. l'essuyer avec un chiffon sec. Ne démontez pas l'équipement; s'il est endommagé, adressez-vous à votre dépositaire-réparateur agréé. -
Page 31: Dépistage Des Défauts
Dépistage des défauts Effectuez uniquement les opérations décrites dans cette notice. Tout autre travail d'inspection, d'entretien ou de réparation doit être réalisé par un centre d'entretien agréé ou autre spécialiste qualifié si vous n'arrivez pas à résoudre le problème vous-même. Problème Cause possible Mesure corrective... - Page 32 Problème Cause possible Mesure corrective Une diode clignote sur la batterie. 1. La tension de la batterie est faible. 1. Placez la batterie sur le chargeur. Il est difficile de retirer la batterie de l'outil. 1. La batterie/l'outil sont neufs, ou les 1.