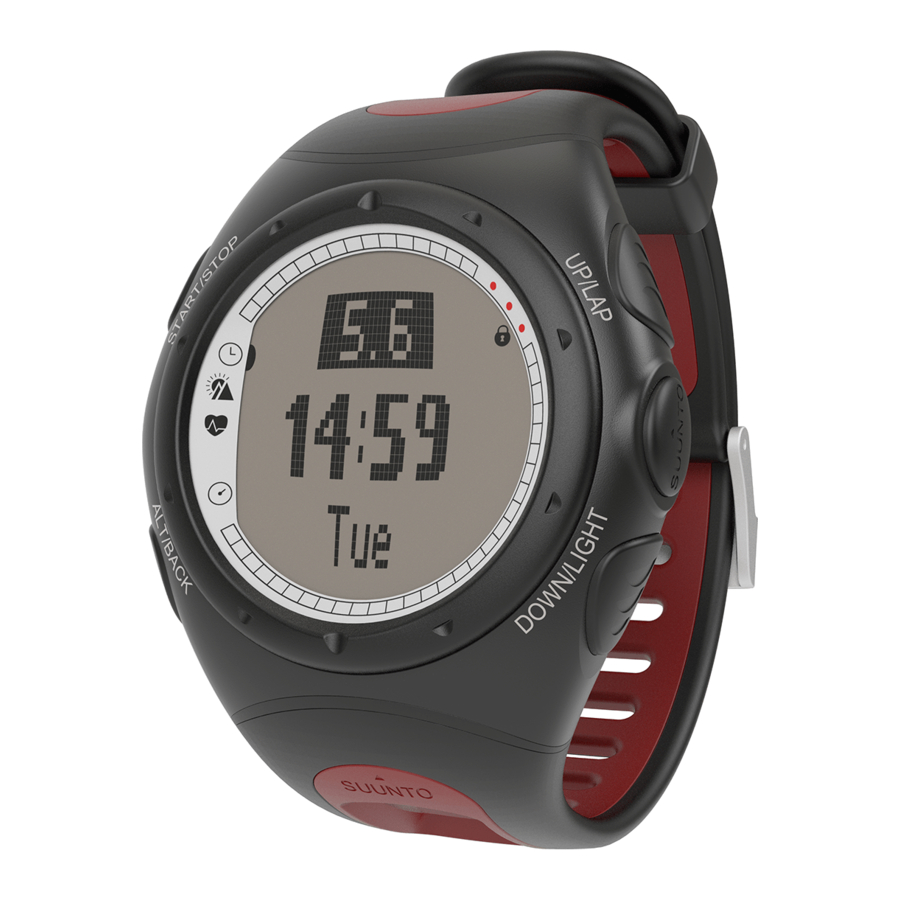
Suunto T6 User Manual
Wristop personal trainer with heart rate monitor
Hide thumbs
Also See for T6:
- Brief introduction (4 pages) ,
- User manual (288 pages) ,
- Quick manual (252 pages)
Table of Contents
Advertisement
Quick Links
Advertisement
Table of Contents

Related Manuals for Suunto T6


Summary of Contents for Suunto T6
-
Page 3: Table Of Contents
1.9.1. Activating the heart rate transmitter belt ...14 1.9.2. Warnings ...15 1.10. WIRELESS SPEED AND DISTANCE SENSORS ...15 1.10.1. Activating the wireless speed and distance sensor ...15 2. HOW TO USE YOUR SUUNTO T6 ...16 2.1. DISPLAY AND BUTTONS ...16 2.2. KEY LOCK ...17 2.3. MENUS ...18 2.3.1. - Page 4 3.2.1. Main display ... 21 3.2.2. Alarm ... 22 3.2.3. Time ... 23 3.2.4. Date ... 24 3.2.5. General ... 24 3.2.6. Units ... 27 3.3. ALTI/BARO MODE ... 32 3.3.1. Use (Alti/Baro) ... 32 3.3.2. Alti use ... 33 3.3.3.
- Page 5 5.4. SYSTEM REQUIREMENTS ...66 5.5. PC-INTERFACE ...67 5.6. INSTALLATION ...67 5.6.1. Installing Suunto Training Manager ...67 5.6.2. Installing USB drivers for Suunto sport instruments ...67 5.7. UNINSTALLING USB DRIVERS FOR SUUNTO SPORT INSTRUMENTS 71 6. SUUNTOSPORTS.COM ...72 6.1. GETTING STARTED ...72 6.2.
- Page 6 6.4. COMMUNITIES ... 74 6.5. SPORT FORUMS ... 75 7. TECHNICAL SPECIFICATIONS ... 76 8. INTELLECTUAL PROPERTY ... 79 8.1. COPYRIGHT ... 79 8.2. TRADEMARK ... 79 8.3. PATENT NOTICE ... 79 9. DISCLAIMERS ... 80 9.1. USER’S RESPONSIBILITY ... 80 9.2.
-
Page 7: General Information
When you set the target effect for your training, you can use the software to calculate the time and heart rate to reach it. During a training session, Suunto t6 helps you reach the target by offering several control functions, such as heart rate limits, real time average heart rate, and a customizable display of stopwatch, lap time, interval timer and altitude. -
Page 8: Checklist
Suunto t6. You find the guidebook on the CD supplied with the Suunto t6. 1.1. CHECKLIST Make sure the package contains the following items: • Suunto t6 • Transmitter belt (Suunto ANT-transmission compatible) • PC-interface cable •... -
Page 9: Suunto T6 Features
1.3. SUUNTO T6 FEATURES The Suunto t6 has the following features. Time mode • Time, calendar, alarm, adjustment of units and general settings Alti/Baro mode • Altitude, vertical speed, cumulative ascent and descent • Temperature, air pressure, weather memory Training mode •... -
Page 10: Care And Maintenance
"Warranty, Care and Maintenance - Wristop Computers" leaflet. 1.6. WATER RESISTANCE Your Suunto t6 is water resistant up to 100 m/330 ft and the transmitter belt to 20m/ 66ft according to ISO 2281 standard (www.iso.ch). This means that you can use your Suunto t6 for swimming and other water sports activities but it must not be used for scuba diving or freediving. -
Page 11: Replacing The Battery
Suunto t6 and the transmitter belt impossible. 1.7. REPLACING THE BATTERY Your Suunto t6 operates on a 3-Volt lithium cell, type: CR 2032. The life expectancy is approximately 12 months in the Time mode or 300 hours of heart rate transmission in ideal operating temperatures. - Page 12 O-ring) before you start replacing the battery. 1. Insert a coin into the slot or a Suunto battery-opening coin into the slot or holes located in the battery compartment cover on the backside of your device.
- Page 13 NOTE: When the battery has been replaced, ensure that the battery compartment is correctly closed. This helps your Suunto device remain water-resistant. Careless bat- tery replacement may void the warranty.
-
Page 14: Replacing The Battery Of The Transmitter Belt
300 hours of use in ideal operating temperatures. If your Suunto t6 is not receiving a signal when the transmitter belt is active, you might need to replace the battery. To replace the battery: 1. -
Page 15: Heart Rate Transmitter Belt
5. Wear the Suunto t6 like you would wear an ordinary watch. 6. In the Training mode, long press ALT/BACK to connect your Suunto t6 to the heart rate transmitter belt. Wait for acknowledgement that the transmitter belt has been found. -
Page 16: Warnings
Suunto t6. This manual includes instructions that are related to Suunto t6 functions that are visible only if a speed and distance sensor is paired with your Suunto t6. Before taking the wireless speed and distance sensor into use, pair it (see section 3.4.7. -
Page 17: How To Use Your Suunto T6
2. HOW TO USE YOUR SUUNTO T6 2.1. DISPLAY AND BUTTONS... -
Page 18: Key Lock
2.2. KEY LOCK The key lock prevents you from accidentally pushing the buttons. To activate the key lock: 1. Press ENTER. 2. Press START/STOP within 2 seconds. The buttons are locked and the key lock symbol is displayed in the upper right corner. If you try to press a button, the message ‘... -
Page 19: Menus
2.3. MENUS... -
Page 20: Basic Menu Structure
2.3.1. Basic menu structure The menus are organized hierarchically under the modes. When you select a mode with UP/DOWN, first the icon of the mode is displayed, then its main display opens. If the stopwatch is on, switch between the modes with DOWN/LIGHT. When you scroll from one mode to another quickly, only the icons of the modes are displayed. -
Page 21: Navigating In The Menus
2.3.3. Navigating in the menus To navigate in the menus: 1. Scroll the menu items with the UP/DOWN buttons. The name of the new mode is displayed for a short while before the main display opens. The indicator bar on the left side of the display tells you what the currently active mode is. -
Page 22: Modes
3. MODES 3.1. GENERAL INFORMATION Suunto t6 has four different modes: TIME, ALTI/BARO, TRAINING and SPD/DST. You can switch between the modes with the UP/DOWN buttons. If the stopwatch is on, switch between the modes with DOWN/LIGHT. The mode indicator on the left side of the display indicates the active mode. -
Page 23: Alarm
3.2.2. Alarm You can set three different time alarms. When the alarm is set, the time alarm symbol appears on the main display. If the time is set to 12-hour format, the letter A is displayed for AM. PM is not separately indicated. -
Page 24: Time
Acknowledging alarms When you hear the alarm, you can acknowledge it by pressing any of the Suunto t6 buttons. If you do not acknowledge the alarm, it will automatically stop sounding after 30 seconds. 3.2.3. Time The current time is displayed on the second row of the Time mode’s main display. -
Page 25: Date
The current weekday can be displayed as a shortcut on the third row of the Time mode’s main display. Scroll to the weekday with ALT/BACK. 3.2.5. General The general menu contains several general settings for your Suunto t6. Setting the tones Tones are the sounds that indicate that you have successfully pressed a button. You can set the tones on or off. - Page 26 3. Change the field to either On or Off with UP/DOWN and press ENTER. Setting the light With the light setting you can adjust the backlight of the Suunto t6 display. It has three possible settings: • Normal: The light switches on when you press DOWN/LIGHT for more than 2 seconds or when an alarm is activated.
- Page 27 Sensor With this function you can calibrate the air pressure sensor of your Suunto t6. Normally there is no need for this but if a certified reference barometer verifies that your Suunto t6 does not display correct values, you can adjust the offset with this function.
-
Page 28: Units
3.2.6. Units The Units menu includes the unit and format settings used with all Suunto t6 functions. They have an effect on how the information is displayed in the modes. Setting the time format The time format setting defines the format in which the time is displayed. The possible formats are: •... - Page 29 The possible formats are: •Bpm: beats per minute. •%: percentage of a maximum heart rate. You can set your maximum heart rate for the Suunto t6 using the Suunto Training Manager. To change the heart rate format: 1.In the Time menu, scroll to Units and press ENTER.
- Page 30 Setting the barometric pressure unit The Pres setting defines the unit in which the barometric pressure is displayed. The possible formats are: • hPa: hectopascal (i.e. 1013 hPa) • inHg: inches of mercury (i.e. 29.90 inHg). To change the barometric pressure unit: 1.
- Page 31 Setting the ascent/descent rate unit 2. Scroll to Asc and press ENTER. The vertical speed unit field is activated. 3. Select the desired unit with UP/DOWN and press ENTER. Setting the distance unit The Ascent/Descent rate setting defines the format in which rates of ascent and descent are displayed.
- Page 32 Setting the speed unit The SPD setting defines the format in which the speed is displayed (if you have paired a wireless speed and distance sensor). The possible formats are: • km/h: kilometers per hour • mph: miles per hour •...
-
Page 33: Alti/Baro Mode
3.3.1. Use (Alti/Baro) With this function you can set your Suunto t6 to display either barometric or altitude- related information. It also defines whether the Training logbook records an altitude profile or not. -
Page 34: Alti Use
To change the Use setting: 1. In the Alti/Baro menu, scroll to Use and press ENTER. 2. Select Alti or Baro with UP/DOWN and press ENTER. 3.3.2. Alti use When you select Alti, the following main display opens. It has three rows: Vertical speed: The first row displays the vertical speed, i.e. -
Page 35: Baro Use
This is because the sensor is in direct contact with your skin. You have to keep your Suunto t6 away from your body temperature for at least 15 minutes before the outdoor temperature measurement is accurate. When you mea- sure the water temperature, less time away from the body is required. -
Page 36: Reference Altitude And Barometric Pressure
If you do not have accurate altitude information, you can use the current sea-level barometric pressure as the reference value. Your Suunto t6 has a factory-set reference altitude that corresponds to the standard barometric pressure (1013 hPa/ 29.90inHg at sea level). - Page 37 Setting the sea level barometric pressure To set the sea level barometric pressure: 1.In the Alti/Baro menu, scroll to Refer and press ENTER. 2.Select Sea level with UP/DOWN and press ENTER. 3.Change the pressure with UP/DOWN and press ENTER. The sea level barometric pressure is now set and you return to the Reference menu.
-
Page 38: Memory
3.3.5. Memory With this function you can view weather information regarding the last 48 hours. The following information is displayed: • Maximum sea level air pressure, time and weekday • Minimum sea level air pressure, time and weekday • Maximum temperature, time and weekday •... -
Page 39: Training Mode
3.4. TRAINING MODE Heart rate The first row displays your current Heart Rate. Stopwatch The second row displays the stopwatch. Shortcuts The third row displays alternatively 6 different functions. Change the displayed information with ALT/BACK. • Laptime/Timer: Displays the current lap time or timer. •... -
Page 40: Stopwatch
3.4.2. Connect Connect is the first item in the Training menu. Press ENTER and choose Connect to connect your Suunto t6 to the HR transmitter belt or a wireless speed and distance sensor. Your Suunto t6 displays the message ‘... -
Page 41: Logbook
NOTE: You can also connect your Suunto t6 to your HR transmitter belt or a wireless speed and distance sensor by long pressing ALT/BACK in the Training mode. 3.4.3. Logbook With this function you can view and erase logbook information. Logbook information is recorded whenever the stopwatch is activated in the Training and Speed/Distance modes. - Page 42 The content of a log depends on the Alti/Baro selection and what sensors have been connected to your Suunto t6 when you start the stopwatch. This allows you to record different combinations of information in the log.
-
Page 43: Hr Limits
NOTE: When the stopwatch is on, you cannot view or erase the logs. 3.4.4. HR limits With this function you can set limits for your target heart rate zone and receive an alarm to notify when your heart rate is above or below the set limits. You can toggle between HR limits on and off, by long pressing ENTER in the main modes. -
Page 44: Timers
Refer to chapter 4 for more information on timers. NOTE: When a timer or Autolap is on, Suunto t6 stores information to the log accord- ing to the settings that were valid when you activated the stopwatch. If you adjust the settings after activating the stopwatch, Suunto t6 will still use the old settings. - Page 45 NOTE: Interval 1 can be set to alert in a range between 0.05 and 59.59. For interval 2 the range is between 0.00 and 59.59. NOTE: After the timer reaches zero for interval 1, your Suunto t6 automatically switches to interval 2 and starts the countdown of the interval. If interval 2 is set to zero, it goes back to countdown for interval 1.
- Page 46 Countdown The Countdown functions as a start timer. It measures remaining time and upon reaching zero, it alerts you at the start and automatically starts the timer/log. If Countdown is active, number is displayed on the right hand side of the Training mode display.
-
Page 47: History
History is a cumulative of several logs. With this function you can view and reset the history information stored in the Suunto t6 memory. The bottom row of the History display shows the date when the History was last reset. -
Page 48: Pair
3. Press ENTER to confirm the history reset. Press ALT/BACK to return without resetting the history. 3.4.7. Pair With this function you can pair the Suunto t6 with the transmitter belt, a wireless speed and distance sensor or both. Transmitter belt To pair the transmitter belt: 1. - Page 49 NOTE: The transmitter belt is already paired with the device when it leaves the fac- tory. However, if you use either another device or transmitter belt or if you encounter problems with the heart rate measurement, you need to pair it again. Wireless speed and distance sensor To pair the wireless speed and distance sensor: 1.
-
Page 50: Spd/Dst Mode
3.5. SPD/DST MODE The Speed/Distance mode is available when you pair your Suunto t6 with an external speed distance sensor. These sensors are designed, for instance, for running and cycling and they will be available at your Suunto dealer. This mode displays the speed and distance information of your activity and offers a combination of distance- based training tools. -
Page 51: Connect
HR transmitter belt and wireless speed and distance sensor. NOTE: You can also connect your Suunto t6 to your HR transmitter belt or a wireless speed and distance sensor by long pressing ALT/BACK in the SPD/DST mode. -
Page 52: Autolap
NOTE: Autolap can be set to alert in a range between 0.0 and 99.9. NOTE: When a timer or Autolap is on, Suunto t6 stores information to the log accord- ing to the settings that were valid when you activated the stopwatch. If you adjust the settings after activating the stopwatch, Suunto t6 will still use the old settings. -
Page 53: Distance Intervals
2. If distance interval 2 is set to zero, it goes back to dis- tance interval 1. NOTE: When a timer or Autolap is on, Suunto t6 stores information to the log accord- ing to the settings that were valid when you activated the stopwatch. If you adjust the settings after activating the stopwatch, Suunto t6 will still use the old settings. -
Page 54: Speed Limits
4. Set the low speed limit with UP/DOWN and press ENTER. NOTE: HR limits and speed limits cannot be used at the same time. Suunto t6 alerts you according to the limits activated last. Long pressing ENTER toggles between the limits being On and Off. -
Page 55: Calibrating The Wireless Speed And Distance Sensor
3.5.6. Calibrating the wireless speed and distance sensor Alternatively, you can provide the calibration factor manually by scrolling with the UP/ DOWN buttons. More information on calibrating your wireless speed and distance sensor can be found in the User’s Guide for the wireless speed and distance sensor. 3.5.7. -
Page 56: Using Suunto T6 In Training
Using heart rate and speed limits in training Suunto t6 assists you in staying within the target HR or speed zones during your training. Whenever your heart rate or speed drops below or exceeds the set zone limits, Suunto t6 alerts you - making it easier to fully benefit from your training. - Page 57 You can make the most out of your training by choosing the most suitable training method in your Suunto t6. The use of time or distance intervals and heart rate limits can greatly contribute to the overall effectiveness of your training.
- Page 58 The figure below illustrates different training possibilities. Note that only one method of training can be activated at a time.
- Page 59 Warm-up is intended for distinguishing a separate warm-up period in the beginning of the training. Data measured during warm-up is stored in the memory. Suunto t6 offers you the possibility to start your training session with a warm-up and move on to normal training or time interval training.
-
Page 60: Training Example
The heart rate limits alert her during her training, whenever her heart rate is too slow or too fast. After completing each interval, the interval timer alerts her and Suunto t6 displays and stores lap information, Then Rita presses START/STOP to stop the Stopwatch and stop the recording of the log. -
Page 61: Suunto Training Manager
You can use Suunto Training Manager to transfer information, such as training logs, from the Suunto t6 memory. When you have transferred the data, you can easily view and organize it, design training programs and sessions, send them to the Web and add them in the calendar. - Page 62 (yes/no), and activity level. NOTE: For more information on the Suunto Training Manager features and parame- ters, refer to Suunto Training Guidebook available on the Suunto t6 CD. Training statistics Suunto Training Manager enables you to manage your training logs and training plans: •...
-
Page 63: Suunto Training Manager Windows
5.2. SUUNTO TRAINING MANAGER WINDOWS The Suunto Training Manager display is divided into five separate windows. These are marked in the figure below and their functions are briefly introduced in the following sections. For more detailed instructions, refer to Suunto Training Manager... -
Page 64: T6 Device Window (1)
5.2.1. t6 Device window (1) The t6 Device window displays the content of your Suunto t6. In this window you establish the connection between your Suunto t6 and Suunto Training Manager. After reading the data, Suunto Training Manager displays the logs stored in the device in the t6 Device window. -
Page 65: Properties Window (4)
• Published logs: Contains all the Suunto t6 logs published in SuuntoSports.com • Published training programs: Contains all the Suunto t6 training programs published in SuuntoSports.com You can view logs and training programs and transfer them to and from Suunto Training Manager. window... -
Page 66: Following Your Training Progress
5.3. FOLLOWING YOUR TRAINING PROGRESS... -
Page 67: System Requirements
Suunto Training Manager gives you a comprehensive overview of your training progress. To open the training overview: 1. Select a time period in the Calendar view. 2. Press the Training Effect button in the Graph window. The Graph window displays the lengths of your individual training sessions and their EPOC values correlated to the training effect level. -
Page 68: Pc-Interface
The interface cable is delivered in the same package with your Suunto t6. The PC interface cable is plugged to the USB port of your computer, and the other end of the cable clips on to your Suunto t6 with three docking points. - Page 69 The device should have been installed as Suunto USB Serial Port (COMx), attached to Suunto sports Instrument. WINDOWS 2000 The installation is in two parts. First you install the drivers for the Suunto sports instrument and then for the virtual USB serial port.
-
Page 70: Windows Xp/Vista
The device should have been installed as Suunto USB Serial Port (COMx), attached to Suunto sports Instrument. WINDOWS XP/VISTA The installation is in two parts. First you install the drivers for the Suunto sports instrument and then for the virtual USB serial port. - Page 71 1. The drivers are located on your PC software installation CD-ROM. Insert the CD- ROM into your computer. 2. Attach the Suunto sports Instrument PC interface cable to the computer USB port. The Found New Hardware Wizard is activated. 3. The Install Hardware Device Drivers window opens.
-
Page 72: Uninstalling Usb Drivers For Suunto Sport Instruments
1. Select Start - Settings - Control Panel - Add/Remove Programs. A window that shows the currently installed programs opens. 2. Select Suunto USB Drivers and then click Add/Remove (in Windows 98) or Change/Remove (in Windows 2000 and Windows XP/Vista). This will bring up the Suunto Uninstaller screen, which asks if it is OK to delete the drivers. -
Page 73: Suuntosports.com
Suunto users and learn from their activities. SuuntoSports.com membership is free and open for all sports participants. However, to be able to send your data to SuuntoSports.com, you need a Suunto sports instrument. You will also need the PC software delivered with the product to transfer the data from your PC to SuuntoSports.com. -
Page 74: Sections
If needed, you can update your personal and equipment profiles in the My Suunto section. You can also enter SuuntoSports.com directly from www.suuntosports.com. NOTE: SuuntoSports.com is continuously developed and its content is subject to change. -
Page 75: My Suunto
In My Suunto, you can also compare your logs and/or training programs with the ones that others have published. -
Page 76: Sport Forums
6.5. SPORT FORUMS Suunto users are active in many different sports. SuuntoSports.com has several Sports Forums that collect information to inform and inspire participants of these activities. All forums include sport-specific news, bulletin boards, event calendars, ranking lists and discussions. In the forums you can suggest links to sports-related Web sites, exchange training programs and read travel reports written by other members. -
Page 77: Technical Specifications
• Water-resistant to 100 m / 330 ft (ISO 2281) • User replaceable battery CR2032 • Compatible with certain wireless Suunto ANT devices • Memory capacity 128 kB, corresponds to 100,000 heart rate intervals + other recorded data (approximately 14 h at a heart rate of 120 bpm) •... - Page 78 Minimum and maximum values: • HR limits: min. 30 bpm, max. 240 bpm • History HR limits (set with Suunto Training Manager): min. 30 bpm max .240 bpm • Maximum HR for percentage display (set with Suunto Training Manager): max. 240...
- Page 79 Transmitter belt • Water resistance: 20 m / 66 ft • Weight: 61g • Frequency: 2.465 GHz Suunto ANT compatible • Transmission range: up to 10 meters • User-replaceable battery CR2032...
-
Page 80: Intellectual Property
8. INTELLECTUAL PROPERTY 8.1. COPYRIGHT This publication and its contents are proprietary to Suunto Oy and are intended solely for the use of its clients to obtain knowledge and key information regarding the opera- tion of Suunto t6 products. Its contents shall not be used or distributed for any other purpose and/or otherwise communicated, disclosed or reproduced without the prior written consent of Suunto Oy. -
Page 81: Disclaimers
9. DISCLAIMERS 9.1. USER’S RESPONSIBILITY This instrument is intended for recreational use only. Suunto t6 must not be substituted for obtaining measurements that require professional or industrial precision and must not be used to obtain measurements when skydiving, hang gliding, paragliding, gyrocopter riding or flying an aircraft. - Page 82 Repairs should be made by authorized Suunto service personnel. Unauthorized repairs will void warranty. Tested to comply with FCC standards. For home or office use. FCC WARNING: Changes or modifications not expressly approved by Suunto Oy could void your authority to operate this device under FCC regulations.
Need help?
Do you have a question about the T6 and is the answer not in the manual?
Questions and answers