Riden RD6006 Instruction
Constant voltage and constant current
Hide thumbs
Also See for RD6006:
- Instructions manual (67 pages) ,
- Manual (77 pages) ,
- Instruction manual (68 pages)
Table of Contents
Advertisement
Constant Voltage and Constant Current
DC Power Supply Instruction
Model: RD6006/RD6006-W
Date: 2019.10.22
Dear users, thank you for purchasing the constant voltage constant current DC power
supply produced by Hangzhou Ruideng Technology Co., Ltd. In order to let you know more
about the full function of this product, get a better experience and avoid misuse. Please read
this instruction carefully before using it. Keep it for future reference.
Note: This instruction is corresponding to firmware V1.24, the page and operation may be
different under different firmware versions, please pay attention when using it.
Advertisement
Table of Contents

Related Manuals for Riden RD6006


Summary of Contents for Riden RD6006
- Page 1 Constant Voltage and Constant Current DC Power Supply Instruction Model: RD6006/RD6006-W Date: 2019.10.22 Dear users, thank you for purchasing the constant voltage constant current DC power supply produced by Hangzhou Ruideng Technology Co., Ltd. In order to let you know more about the full function of this product, get a better experience and avoid misuse.
-
Page 2: Table Of Contents
CONTENT Production introduction........................1 1.1 Technical Parameter......................1 1.2 Core Function........................1 1.3 Panel Description........................2 1.3.1 Front panel......................... 2 1.3.2 Back panel........................2 1.4 Operation Introduction......................3 1.4.1 Main Page........................4 1.4.2 Operation Introduction....................4 1.4.2.1 Battery Charging Function Introduction............4 1.4.2.2 Main Page Output Voltage and Output Current Setting........ - Page 3 Appendix 1: Common Battery Voltage Comparison Table............... 21 Appendix 2: Common Electric Vehicle Voltage Comparison Table...........22...
-
Page 4: Production Introduction
Production introduction 1.1 Technical Parameter Model:RD6006 Display Screen:2.4 inch color LCD display Input voltage range: 6-70.00V Input voltage measurement resolution: 0.01V Output voltage range: 0-60.00V Output voltage measurement resolution: 0.01V Output current range: 0-6.000A Current setting measurement resolution: 0.001A Output power range: 0-360.0W Battery voltage measurement resolution: 0.01V... -
Page 5: Panel Description
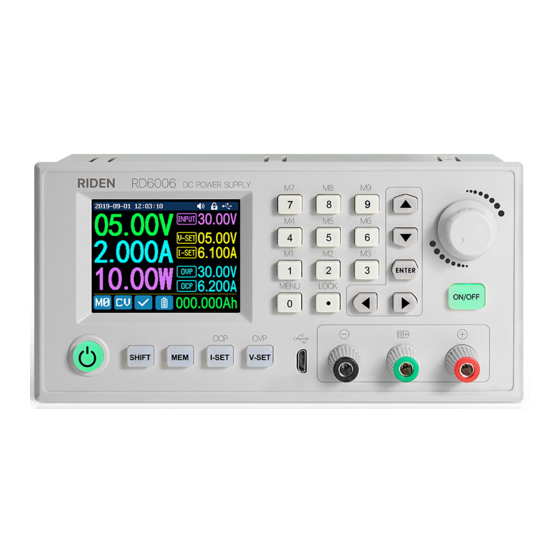
1.3 Panel Description 1.3.1 Front panel A: Power button B: Second function button C: Quick storage button D: Current/Over current protection value setting E: Voltage/Over voltage protection value setting F: Micro USB interface G: Power supply output negative electrode H: Battery charging positive electrode Battery charging negative electrode I: Power supply output positive electrode J: Output switch... -
Page 6: Operation Introduction
You can see the Wi-Fi module(RD6006-W contains) and RS-485 module in the picture below. If you need RS-485 for industrial wired control, please order it alone. -
Page 7: Main Page
1.4.1 Main Page W: Time AF: Protection status indication X: Button tune AG: Battery charging indication Y: Button lock status AH: Battery related information display area Z: Communication interface AM: Input voltage AA: Actual output voltage AL: Output voltage preset value AB: Actual output current AK: Output current preset value AC: Output power... -
Page 8: Main Page Output Voltage And Output Current Setting
The operation method is similar to output current setting. M0 is the default data group when RD6006 is powered on, manually modify the settings and automatically remember to M0 after confirmation. 1.4.2.3 Data Group Quick Storage and Call out Press “MEM”+keypad button 1-9, you can store the output voltage value, output current... -
Page 9: System Setting
Turn on the “Logo”, it will display Logo first and then enter the main page when boot RD6006. If you turn it off, you will enter the main page directly. The system language supports Simplified Chinese and English for the time being; the screen brightness can be set from level 0 to level 5;... -
Page 10: Main Page Style Setting
(connect mobile phone by Wi-Fi, but you need to choose Wi-Fi interface first, Wi-Fi module can not be installed or removed when RD6006 is powered on), TTL is not available for the time being; When the interface is changed, you need to reboot RD6006 to apply the modification. The baud rate can be set 9600/19200/38400/57600/115200 under USB mode;... -
Page 11: System Information
output voltage value, the operation method is similar to storage output current setting. Press “SHIFT”+ “I-SET” button or “SHIFT”+ “V-SET” button to set the storage over current protection/ storage over voltage protection value. The operation method is similar to storage output current value setting. -
Page 12: Android App Instruction
After downloading the mobile APP zip-file, please install the APP in file manager. Don’t install or remove Wi-Fi module when the power is on, or else it will be damaged. 2.1.1 APP download: You can download the RD6006 APP zip-file in this URL: https://drive.google.com/open?id=17V-JWHvqMF-NuWSznEiJ4RKrnn_Pkt5v 2.2 Installation Introduction After the installation, you can see the icon as shown below: 2.2.1 APP Start-up... - Page 13 Picture 1 Picture 2 AN: call out/ shut down sidebar AO: connection button AP: export data to mobile phone folder (Mobile phone memory or SD card root directory, repeated writing, can directly generate graphs in Excel), and can share files to other APP. AQ: voltage and current curve AR: actual output voltage AS: actual output current...
-
Page 14: App Connection And Operation
2.2.3 APP Connection and Operation 2.2.3.1 Network Distribution Picture 3 Picture Picture Picture... -
Page 15: Proper Wi-Fi Connection
2.2.3.2 Proper Wi-Fi Connection When power on RD6006, it will connect Wi-Fi first, and then detect if it can be connected to APP as shown in Picture 8(the APP must already be running ). If the IP address of the phone has changed, you need to press the “left direction”... -
Page 16: App Functions
2.2.3.3 APP Functions “AV” “BE” to adjust the value, the “BB”, Click to set the output voltage, and use the wheel “BD” to change the position of cursor, click “BC” to set the parameter. Click “AP” to exports the voltage-current curve to excel file, up to 24 hours document can be recorded. NOTE: 1. -
Page 17: Pc Software Installation And Operation Instruction
.NET Framework 4.7.2 is installed, if not, .NET Framework 4.7.2 will be installed automatically. 3.2 Software Operation 3.2.1 Installation Succeed Double click Riden Power Supply on the desktop to enter the PC software. 3.2.2 PC Software Operation Instruction Choose the right communication port, baud rate, slave address(default 001), click... -
Page 18: Functions Introduction
“CONNECT” to start communication. If the communication succeeds, the power supply button will be locked automatically, the buttons will automatically unlock after 3 seconds of accidental disconnection, and the “CONNECT” turns to “DISCONNECT”; Click “ON” to turn on the output of the power supply, and it will turn to “OFF”. -
Page 19: Basic Functions
3.3.2 Firmware Upgrade Press and hold “ENTER” and power on RD6006, enter the boot mode, then connect it to computer, there will be “boot mode” in the mode information text box, then click “FirmUp”, a... -
Page 20: Calibration Fine Tuning
can upgrade the firmware under the APP mode, if it can not be started up normally, you should press and hold the “ENTER” button and power on, upgrade it under boot mode.) During the firmware upgrade process, the interface is displayed as follows: 3.3.3 Calibration Fine Tuning The calibration fine-tuning function needs to be operated by a professional electronic person who has more than five and a half multimeters. -
Page 21: Logo Update
Set the output voltage at 1V and calibrate the actual output voltage zero point to make the actual output voltage displayed on RD6006 close to the value on multimeter. You can set 30V and calibrate the proportional value of actual output voltage. In the same way you can set 0.1A and 3A to calibrate the zero point and proportional value of the actual output current.(This section... -
Page 22: Version Update Detection
3.3.5 Version Update Detection Click “CheckUp”, the software will automatically detect if there is a new version, if so, a update prompt will pop up on the interface. 3.3.6 Language Setting Click “Language”, a language setting prompt will pop up on the interface, you can choose Simplified Chinese or English. -
Page 23: About
3.3.7 About Click “About”, you can check the version number, publish time and copyright Information. - Page 24 Appendix 1: Common Battery Voltage Comparison Table Nominal Battery Voltage Voltage Voltage Application Characteristics Type Digital High capacity, LiCoMnNiO2 Device rechargeable Electric bike Large discharge Lithium 3.65 current, Phosphate electric rechargeable Battery tool Lead Inexpensive Storage 1.75 rechargeable Battery electric bike Inexpensive Widely used widely used...
- Page 25 Appendix 2: Common Electric Vehicle Voltage Comparison Table Number of Discharge Charging Battery batteries Nominal Voltage termination limit Type connected voltage(V) voltage(V) in series LiCoMnNiO2 Lithium 87.6 Phosphate Battery Lead Storage 86.4 Battery Lithium 52.5 76.6 Phosphate Battery 71.4 LiCoMnNiO2 Lithium Phosphate Battery...
Need help?
Do you have a question about the RD6006 and is the answer not in the manual?
Questions and answers