
Related Manuals for Zimmer Biomet Arcos Modular Femoral Revision System


Summary of Contents for Zimmer Biomet Arcos Modular Femoral Revision System
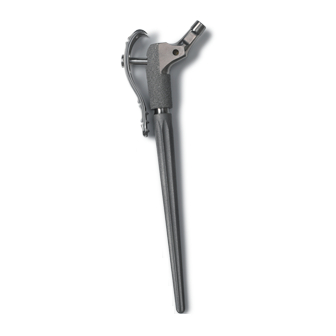
- Page 1 Arcos Modular Femoral ® Revision System Broach and Calcar Proximal Bodies Surgical Technique...
-
Page 3: Table Of Contents
Table of Contents Pre-operative Planning ..................2 Patient Positioning and Surgical Approach ............2 Removal of a Cemented Component ..............3 Removal of a Cementless Stem ................3 Calcar/Broach Proximal Bodies & PPS ® Distal Stems Sterile Field Technique ..4 Preparation of the Diaphysis ................4 Preparation of the Metaphysis ................ -
Page 4: Pre-Operative Planning
Arcos Broach/Calcar Proximal Body Surgical Technique Figure 1 Figure 2 Patient Positioning Pre-operative Planning and Surgical Approach When planning a hip revision utilizing the Arcos Patient position should be determined by the Modular Femoral Revision System, carefully review surgeon’s preferred approach. The goal of the surgical the indications and contraindications for use approach is to establish adequate visualization of the referenced within the package insert. -
Page 5: Removal Of A Cemented Component
Arcos Broach/Calcar Proximal Body Surgical Technique Figure 3 Figure 4 Figure 5 Removal of a Cemented Component Removal of a Cementless Stem Once the stem has been removed from the cement Removal of a cementless stem may be difficult due to mantle by utilizing universal extraction instruments or the biologic fixation that may exist between the implant manufacturer specific instruments, ensure all cement is... -
Page 6: Calcar/Broach Proximal Bodies & Pps Distal Stems Sterile Field Technique
Arcos Broach/Calcar Proximal Body Surgical Technique Calcar/Broach Proximal Bodies & PPS Distal Stems Sterile Field Technique Proximal Reamer Transition Reamer Figure 6 Figure 7 Figure 8 Preparation of the Diaphysis Preparation of the Metaphysis To prepare the femur for a PPS coated distal stem, To prepare the proximal femur for the tapered region select flexible or thin shaft reamers and sequentially of the PPS distal stem and proximal body, assemble... -
Page 7: Broaching The Metaphysis
Arcos Broach/Calcar Proximal Body Surgical Technique Figure 9 Figure 10 Figure 11 Broaching the Metaphysis Broach the proximal femur sequentially, until the final Once the desired size and 60 mm proximal body broach size matches the last proximal reamer used height has been achieved utilizing the modular (Figure 10). -
Page 8: Calcar Resection
Arcos Broach/Calcar Proximal Body Surgical Technique Calcar/Broach Proximal Bodies & PPS Distal Stems Sterile Field Technique Figure 12 Figure 13 Calcar Resection If utilizing the calcar proximal body implant, determine Note: The large platform should be utilized for a the level of deficiency in the proximal femur, align the +0 resection level and the small platform should be resection guide to the broach and mark the desired utilized for the +10 or +20 resection levels. -
Page 9: Trial Reduction
Arcos Broach/Calcar Proximal Body Surgical Technique Standard Offset High Offset Figure 14 Figure 15 Trial Reduction Once the desired offset, leg length and joint stability Utilizing the modular neck and head trials, perform a have been achieved, remove the modular neck trial reduction of the hip and determine if the selected and head trials. -
Page 10: Implant Assembly
Arcos Broach/Calcar Proximal Body Surgical Technique Calcar/Broach Proximal Bodies & PPS Distal Stems Sterile Field Technique Figure 16 Figure 17 Figure 18 Implant Assembly Implant Insertion With the trial still assembled in the sterile field, With the proximal inserter still assembled to the assemble the distal stem and proximal body implants implant, ensure the anti-rotation tabs are properly to match the orientation of the assembled trial... -
Page 11: Inserting The Locking Screw
Arcos Broach/Calcar Proximal Body Surgical Technique Torque Limiting Position Figure 19 Figure 20 Inserting the Locking Screw Final Reduction To lock the distal and proximal body implants, thread If desired, another trial reduction can be accomplished the locking screw into the top of the proximal body prior to selecting final head size and impacting the using the 3.5 mm hex driver and the T-handle in modular head onto the stem (Figure 20). -
Page 12: Calcar/Broach Proximal Bodies & Sts Distal Stems Sterile Field Techinque
Arcos Broach/Calcar Proximal Body Surgical Technique 10 | Calcar/Broach Proximal Bodies & STS Distal Stems Sterile Field Technique Locked Position Figure 21 Figure 22 Preparation of the Diaphysis Trialing the Distal Stem To prepare the femur for an STS distal stem, select When distal femoral reaming is complete, select the the STS reamers (silver reamers for 150 mm stem stem trial that is the same diameter as the final reamer... -
Page 13: Preparation Of The Metaphysis
Arcos Broach/Calcar Proximal Body Surgical Technique 11 | Proximal Reamer STS Reamer Figure 23 Figure 24 Preparation of the Metaphysis To prepare the proximal femur, assemble the final STS reamer into the proximal reamer and press down on the collar at the top of the proximal reamer to securely lock the two instruments together (Figure 23). -
Page 14: Broaching The Metaphysis
Arcos Broach/Calcar Proximal Body Surgical Technique 12 | Calcar/Broach Proximal Bodies & STS Distal Stems Sterile Field Technique Figure 25 Figure 26 Broaching the Metaphysis Broach the proximal femur sequentially, until the Once the desired size and 60 mm proximal body final broach size matches the last proximal reamer height has been achieved utilizing the STS/proximal used (Figure 26). -
Page 15: Calcar Resection
Arcos Broach/Calcar Proximal Body Surgical Technique 13 | Figure 27 Figure 28 Calcar Resection If utilizing the calcar proximal body implant, determine Note: The large platform should be utilized for a the level of deficiency in the proximal femur, align the +0 resection level and the small platform should be resection guide to the broach and mark the desired utilized for the +10 or +20 resection levels. -
Page 16: Trial Reduction
Arcos Broach/Calcar Proximal Body Surgical Technique 14 | Calcar/Broach Proximal Bodies & STS Distal Stems Sterile Field Technique Standard Offset High Offset Figure 29 Figure 30 Trial Reduction Once the desired offset, leg length and joint stability Utilizing the modular neck and head trials, perform a have been achieved, remove the modular neck trial reduction of the hip and determine if the selected and head trials. -
Page 17: Implant Assembly
Arcos Broach/Calcar Proximal Body Surgical Technique 15 | Figure 31 Figure 32 Implant Assembly When the desired orientation of the implants has been With the trial still assembled in the sterile field, achieved, thread the green proximal body inserter to assemble the distal stem and proximal body implants the assembled implant and impact the taper junction to match the orientation of the assembled trial... -
Page 18: Implant Insertion
Arcos Broach/Calcar Proximal Body Surgical Technique 16 | Calcar/Broach Proximal Bodies & STS Distal Stems Sterile Field Technique Torque Limiting Position Figure 33 Figure 34 Implant Insertion Inserting the Locking Screw With the proximal inserter still assembled to the To lock the distal and proximal body implants, thread implant, ensure the anti-rotation tabs are properly the locking screw into the top of the proximal body locked and insert the final implant into the femur until... -
Page 19: Final Reduction
Arcos Broach/Calcar Proximal Body Surgical Technique 17 | Figure 35 Final Reduction If desired, another trial reduction can be accomplished prior to selecting final head size and impacting the modular head onto the stem (Figure 35). Provisional heads in seven neck lengths allow an additional trial reduction using the actual implant to ensure proper leg length and stability. -
Page 20: Trochanteric Reattachment Technique
Arcos Broach/Calcar Proximal Body Surgical Technique 18 | Trochanteric Reattachment Technique Figure 36 Figure 37 Attaching the Trochanteric Bolt Guide Use the 5.0 mm hex driver to thread the trochanteric All proximal body designs accept a bolt and claw bolt guide into the insertion hole on the proximal except the 50A Cone and 50A Calcar bodies. -
Page 21: Preparing For Auxiliary Implant Attachment
Arcos Broach/Calcar Proximal Body Surgical Technique 19 | Engraved Line 25 mm Both have grooves to accept cable attachments 100 mm Guide Hex Driver Narrow Wide claw option claw option T-handle (16 mm) (17.5 mm) Figure 38 Figure 39 Preparing for Auxiliary Implant Attachment Note: Both the large and small claw are 100 mm Select the bolt length that corresponds with the depth... - Page 22 Arcos Broach/Calcar Proximal Body Surgical Technique 20 | Trochanteric Reattachment Technique Figure 40 Figure 41 Preparing for Auxiliary Implant Attachment (cont.) Advance the appropriate size drill bit through the Compress the arms of the trochanteric bolt guide plunger until the built-in stop bottoms out on the tightly to the auxiliary implant and remove the cylindrical surface of the outrigger (Figure 40).
-
Page 23: Final Attachment Of The Auxiliary Implant
Arcos Broach/Calcar Proximal Body Surgical Technique 21 | Figure 42 Figure 43 Figure 44 Final Attachment of the Auxiliary Implant Thread the bolt through the trochanteric bolt guide Once the bolt is secured to the implant, unthread the and into the proximal body until a “click” is felt and trochanteric bolt guide from the proximal body using heard (Figure 42). -
Page 24: In-Femur Assembly
Arcos Broach/Calcar Proximal Body Surgical Technique 22 | In-Femur Assembly Proximal/Distal Inserter Distal Fastener Proximal Fastener Figure 45 Figure 46 Figure 47 Implant Assembly The in-femur assembly tool can be utilized with any Thread the proximal fastener into the insertion hole on the proximal body implant (Figure 45). - Page 25 Arcos Broach/Calcar Proximal Body Surgical Technique 23 | 2–3 cm Figure 48 Figure 49 Insert the 5.0 mm hex driver to the top of the proximal/ Attach the proximal/distal inserter handle strike plate, distal inserter handle, hold the taper junction apart tightening until a “click”...
- Page 26 Arcos Broach/Calcar Proximal Body Surgical Technique 24 | In-Femur Assembly Torque Wrench Proximal/Distal Inserter Handle Anti-rotation Handle Figure 50 Figure 51 Implant Assembly (cont.) To fully engage the taper junction, attach the torque Disassemble the torque wrench and anti-rotation wrench to the end of the proximal/distal inserter handle.
-
Page 27: Inserter Disassembly
Arcos Broach/Calcar Proximal Body Surgical Technique 25 | Torque Wrench Proximal/Distal Inserter Handle Anti-rotation Handle Figure 52 Figure 53 Figure 54 Inserter Disassembly To loosen the strike plate, use the anti-rotation handle Unthread the distal fastener from the distal stem to hold the neck of the implant. -
Page 28: Inserting The Locking Screw
Arcos Broach/Calcar Proximal Body Surgical Technique 26 | In-Femur Assembly Torque Limiting Position Figure 55 Figure 56 Figure 57 Inserter Disassembly (cont.) Inserting the Locking Screw To remove the proximal fastener, utilize the taper To lock the distal and proximal body implants, thread assembly driver and unthread the proximal fastener the locking screw into the top of the proximal body from the proximal body implant (Figure 55). -
Page 29: Final Reduction
Arcos Broach/Calcar Proximal Body Surgical Technique 27 | Figure 58 Final Reduction If desired, another trial reduction can be accomplished prior to selecting final head size and impacting the modular head onto the stem (Figure 58). Provisional heads in seven neck lengths allow an additional trial reduction using the actual implant to ensure proper leg length and stability. -
Page 30: Taper Compression Assembly
Arcos Broach/Calcar Proximal Body Surgical Technique 28 | Taper Compression Assembly Proximal/ Distal Inserter Distal Fastener Proximal Fastener Figure 59 Figure 60 Figure 61 Proximal Body Insertion Attaching the Proximal Body to the Distal Stem Implant Once the desired offset has been chosen, ensure Place the distal fastener that matches the selected that the taper junction on the distal stem implant is proximal body height into the proximal/distal inserter... - Page 31 Arcos Broach/Calcar Proximal Body Surgical Technique 29 | Torque Wrench Anti-rotation Handle Figure 62 Figure 63 Figure 64 Insert the 5.0 mm hex driver into the top of the To fully engage the implant taper junction, attach proximal/distal inserter handle and tightly thread the torque wrench to the end of the proximal/distal the distal fastener into the distal stem (Figure 62).
-
Page 32: Inserter Disassembly
Arcos Broach/Calcar Proximal Body Surgical Technique 30 | Taper Compression Assembly Torque Wrench Proximal/Distal Inserter Handle Anti-rotation Handle Figure 65 Figure 66 Inserter Disassembly To remove the inserter from the fully seated implant, turn the torque wrench counter-clockwise while leveraging the anti-rotation handle. Depress the button at the top of the proximal/distal inserter handle and unthread the strike plate (Figure 65). -
Page 33: Inserting The Locking Screw
Arcos Broach/Calcar Proximal Body Surgical Technique 31 | Torque Limiting Position Figure 67 Figure 68 Figure 69 Figure 70 Inserting the Locking Screw To lock the distal and proximal body implants, thread Disengage the proximal/distal inserter by pulling back on the inserter collar (Figure 67). To remove the the locking screw into the top of the proximal body proximal fastener, utilize the taper assembly driver using the 3.5 mm hex driver and T-handle in torque... -
Page 34: Disengaging The Taper Junction
Arcos Broach/Calcar Proximal Body Surgical Technique 32 | Disengaging the Taper Junction Figure 71 Figure 72 Disengaging the Proximal Body from the Distal Stem Implant Note: When disengaging the taper junction within To disengage the proximal body implant from the the femur the proximal body may feel tight within distal stem, remove the locking screw with the the bone although the taper junction is disengaged. - Page 36 All content herein is protected by copyright, trademarks and other intellectual property rights, as applicable, owned by or licensed to Zimmer Biomet or its affiliates unless otherwise indicated, and must not be redistributed, duplicated or disclosed, in whole or in part, without the express written consent of Zimmer Biomet.
Need help?
Do you have a question about the Arcos Modular Femoral Revision System and is the answer not in the manual?
Questions and answers