
Related Manuals for Honic HN-4KZ


Summary of Contents for Honic HN-4KZ
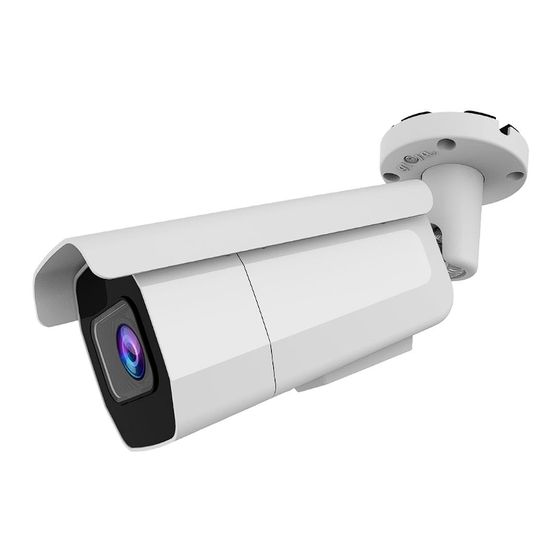
- Page 1 HN-4KZ Quick Start Guide Ultra HD 4K 8MP Outdoor POE IP Camera 3.6-11mm Optical Zoom Lens...
-
Page 2: Quick Reference
Many of the setup and installation sections below have corresponding videos on YouTube To access the setup videos, please go to YouTube and search “Honic Technology”. To contact Honic support, please do one of the following: •... - Page 3 rtsp://username:password@ipaddress:rtsp port/0 (or 1,2) Default Passwords: Username: admin Password: admin Device ID: Please check the label on the camera (package) Or (Configuration-Network-Advanced Setup-p2p) DHCP Enabled in default,: To disable DHCP, please check “Quick Configuration Tool” chapter bellow. PoE Standards: IEEE 802.3af ...
- Page 4 VMS Compatible List: Original VMS Lite (Windows, Mac), Milestone、 Exacq、 Avigilon、 MARCH、Axxon、Nuuo Browser Supported: IE 8-11 (Windows), Safari (Mac) Google Chrome (lower than Ver44), Firefox (lower than Ver53) Higher version of Chrome and Firefox no longer support NPAPI. Dimensions and Appearance (mm) Description Audio In (RCA)
- Page 5 Insert MicroSD Card & Recording Setting This camera has microSD card slot to record video data if with microSD card inserted. When inserting / replacing the SD card, make sure that power is off and that recording has been deactivated (Deactivated in default) in the browser (Configuration > System > SD Card >...
-
Page 6: To Install The Camera
Enable Recording: Select to enable SD card recording and deselect to disable it. Record Mode: This dropdown box allows the user to select “Overwrite” or “Does not cover”. StreamType: This dropdown box allows the user to select “Main Stream”, “Sub- ... -
Page 7: Installation Diagram
if there’s a bright point source in the camera’s view (a streetlight, car headlights or similar) then it might not engage night vision mode. The camera’s casing is resistant to water, different weather conditions and tampering. It would take an overwhelming event of this kind to damage the housing of the camera (severe weather such as hurricanes or someone intentionally damaging the lens would be enough). -
Page 8: Connecting The Camera
Connecting the Camera 1. Connect the Ethernet cable to the camera. A 12V DC power adapter (NOT included) is only required if connecting the camera’s Ethernet cable to a router or switch that does not support PoE. 2. Connect the end of the Ethernet cable to the NVR’s PoE ports. The camera may take up to 1 minute to power up after being connected to the NVR. -
Page 9: Quick Configuration Tool
Cable Extension Options Extend the Ethernet cable run for your camera up to 300ft. See table below. It is recommended to use UL CMR approved cables. Cable Type Max Cable Run Distance Max # of Extensions Cat5e or higher Ethernet cable 300ft / 92m You can use a RJ45 Coupler (not included) or switch (not included) to connect male ends of Ethernet cable together. - Page 10 4. Change parameters and Disable DHCP (optional) 5. Input password (Both are admin in default) 6. Modify For the best security, Honic recommends you use a static IP setting and standard port forwarding. Assign an IP address to the IP Camera by using the first 3 sets of numbers of your default ...
- Page 11 ccess the Camera by Browser Windows: IE 8-11 Mac: Safari 1. Start your browser, input the IP address of your camera (IP address showed in Search Tool) in the address bar and then press Enter to start the login page. 2.
- Page 12 4. If there is problem to install Active X plugin in IE browser, Please check the following: IE browser—Tool—Internet Option—Security—Customized Level—ActiveX controls and plug-ins, Enable all the options bellow—OK For additional assistance, please contact us: support@honitech.com or WhatsApp: +86 18028341866...
-
Page 13: Mobile Connection
Mobile Connection 1. Install Android/iOS App Search “Bitvision” in App store or Google Play. b. Or scan the following QR code to download. Android App iOS App 2. Add Device Start Bitvision app (For security purpose, please register an account if you are a new user). - Page 14 Click on the top left, choose “Device” to go to Device interface. Click and then “Add device” at the bottom on Device interface. Select “SN Add”...
- Page 15 Scan the QR code printed on the device sticker and posted on the web (Browser— Configuration—Network—Advanced Setup—P2P). You could also input serial number (Device ID) manually, Device ID was printed on the camera sticker. Input the device name, username, password, captcha (Captcha number was printed on the device sticker) and select group, then submit.
- Page 16 Default definition is “Fluent”, you could choose BD or HD. BD is recommended. 3. Playback Click Playback in default interface. b. Click “+” and choose the device, Click “Done” at the top right.
- Page 17 Click calendar icon at the top right, choose date, click “ok”, then go back to Playback, drag the timeline to check the playback video. Click “Open audio” at the bottom if all audio settings enabled and pickup device connected. 4. Camera Configuration in Bitvision Go to “Device Manage”, find the camera.
- Page 18 b. Click the camera (iOS); Click the three dots at the end of the camera (Android). Set up parameters.
- Page 19 Motion detection: Enable or disable motion detection, for detailed motion detection settings, please go to browser. Coding format: Main stream; Sub stream, Tri steam. Coding type: H.265; H.264; MJPEG. H.265+: H.265+ must be enabled for cloud recording. If your NVR support H.265+, ...
- Page 20 Enable H265+ in Coding parameters. Go to Service privileges in Could service, then enable cloud service (H.264+ or H.265+ could also be enabled in Web settings, Browser—Configuration—Video)
- Page 21 6. Motion Alert in App Enable motion detection in browser or APP configuration (please check “Mobile connection-4-c-set up parameters). Enable Push alarms (please check “Mobile connection-4-c-set up parameters).
- Page 22 Go to Setting and Enable message notification. 7. Optical zoom in/out in App Start Bitvision and go to Real Time interface for preview, Click the PTZ icon at the bottom of the interface, zoom in and zoom out by clicking + and -.
-
Page 23: Nvr Connection
For detailed user manual of Bitvision, please download it from www.herospeed.net-- Manual--Bitvision App User Manual. For additional assistance, please contact us: support@honitech.com WhatsApp: +86 18028341866 NVR Connection 1. If IP camera connect to router or POE switch directly, please choose ONVIF protocol on NVR, search the IP camera, default username and password are both “admin”. -
Page 24: Web Operation And Interface
Web Operation and Interface This section of the manual details the camera’s interface, as well as all of the operations the camera can perform. Windows: Internet Explorer 8-11 Mac: Safari Preview Section 1: Width/height ratio for the live feed is 4:3 Width/height ratio for the live feed is 16:9 The live feed is original image size with full resolution Self-adaptive Width/height ratio... - Page 25 Section 2: Zoom- Zoom+ Focus- Focus+ One key focus Initialize camera lens Section 3 & 4: Stop and start preview Recording to computer, The video is saved at the path specified in configuration-local configuration-record file settings-save record file to- Snapshot to computer, The snapshot is saved at the path specified in configuration-local configuration-picture and clip settings- save captured files in live view to- Digital zoom, Click this button to activate the zone selection function.
- Page 26 Start and stop playback Click left icon for 1x speed and click right icon for 2x speed Digital zoom, Click this button to activate the zone selection function. This allows the user to use the mouse to select a zone to zoom in on.
- Page 27 Audio Configuration Audio Input: Active pickup device needed to connect to audio in cable with RCA connector. Audio Output: Active speaker needed to connect to audio output cable with RCA connector. Audio Preview Supported: Browser “Live view” interface, enable “sound”. b.
- Page 28 Bitvision “Real time” interface (need wait to upgrade version about June, 2019). Day/Night Setting Fill Light mode: This dropdown box allows the user to select Auto, Day, Night and scheduled switch. Auto: Switch day/night by AGC level automatically. b. Day: color image both day and night. Night: Black &...
- Page 29 Select Time and Text, input text content and save, then you could see the date and text on image. Mirror: This dropdown box allows the user to select vertical, horizontal, and both. Corridor Pattern: This dropdown box allows the user to select 90 degrees or 270 degrees. Motion Detection Please start browser configuration-event-motion detection.
- Page 30 Left click and drag to select areas, max support 3 areas. Video Tampering Please start browser configuration-event-video tampering. 1. Select “Enable”, left click and drag to select area or select all, set sensitivity and save. 2. Click “Arming schedule”-select all-then click blue color bar to adjust time period and save.
- Page 31 Please start browser configuration-event-alarm Input. 1. Click “Arming schedule”-select all-then click blue color bar to adjust time period and save. 2. Click “Linkage Method”, select the method that user need, support upload to SMPT, FTP, Alarm output (IO output). 10. Video Stream Type: This dropdown box allows the user to select “tri stream”...
- Page 32 Bit Rate: This box allows the user to change the bit rate. Rate Control: This dropdown box allows the user to select a bit rate type. The system supports two bit rate types: CBR and VBR. In VBR mode, video quality can be set. I-Frame Interval: This field allows the user to set the P frame amount between two I frames.
- Page 33 12. Maintenance Reboot System: Click to reboot the camera. Default: Click it to full restore device to factory setting. Upgrade: Download proper firmware from www.herospeed.net--Hisilicon IP Camera— 8MP—PTZ-- 3516AV200_OS08A10 Online Upgrade: Check and upgrade if there is newer firmware available. For detailed user manual of web configuration, please download it from www.herospeed.net--Manual--IP Camera User Manual.
- Page 34 Add Honic Camera to Blue Iris Launch Blue Iris and click + button at top/right of the software window or right click and select Add new camera to add the camera to Blue Iris. Input the name of the camera and choose Network IP as the connection type.
- Page 35 Input new User and Password if you have change the default username and password. Add Honic Camera to iSpy 1. Launch iSpy, and click “Add”>> “IP Camera”. Choose FFMPEG (H264), input URL: rtsp://username:password@ipaddress:rtsp port/0 (or 1,2)
- Page 36 E.G.: rtsp://admin:admin@192.168.1.168:554/1 Add Honic Camera to ZoneMinder 1. Add a new monitor 2. Set the camera Name, Source Type set to FFMPEG 3. Source Path: rtsp://username:password@ipaddress:rtsp port/0 Please change Remote Method to: RTP/RTSP...
-
Page 37: Support And Warranty
Save 4. Refresh Support & Warranty 1. If there is any problem, please contact us Service@honictech.com Support@honictech.com WhatsApp: +86 18028341866 You will get reply within 8 hours. 2. Warranty: 30 days money back and 1 year warranty.
Need help?
Do you have a question about the HN-4KZ and is the answer not in the manual?
Questions and answers