
Related Manuals for Honic HN-BP6025XES


Summary of Contents for Honic HN-BP6025XES
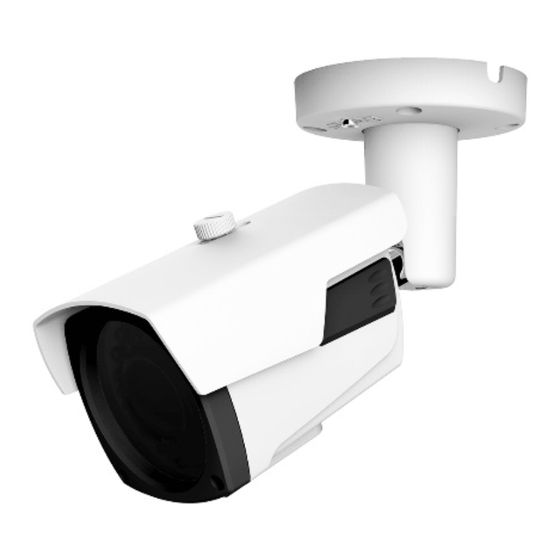
- Page 1 USER MANUAL HN-BP6025XES 1080P AHD/CVI/TVI/1200TVL 2.7-13.5mm 5x Optical Motorized Zoom Auto Focus Camera...
-
Page 2: Important Notes
Important Notes Each camera has been tested at least 3 times before shipping, if there is ANY PROBLEM of the camera, please make sure contact us before returning or reviewing: Service@honictech.com 1. Power supply, coaxial video cable and DVR are NOT INCLUDED but REQUIRED. - Page 3 You could buy DC 12V 3A or 5A power supply at Honic Store. 6. Peel off the protective film on the lens and glass panel before installation. 7. CVBS (1200TVL, Analog) model do not support UTC, which means you need zoom the lens via OSD joystick only, but not via UTC menu in DVR.
-
Page 4: Notice Before Using
c. Video cable should be good quality, or there will be distorted image or lines, it is not the problem of camera, but video cable. Please read this user manual carefully to ensure proper use of the product. Notice Before Using Default Mode: 1080P TVI Video Output. - Page 5 Installation and Operation: Unpacking and Handling Each unit is shipped assembled and factory tested. Ensure that all accessories are removed from the container before discarding packing material. Package includes 1x bullet camera 4x mounting screws 4x screw anchors 1x install guide 1x user manual 1x drill template 1x Allen wrench...
- Page 6 (iv) Do not install the camera near a magnetic field or a high-power motor. (v) Only use a dry cloth to clean the camera. If there is dirt that is difficult to remove, wipe gently with a mild detergent. Never use strong or abrasive detergents. (vi) A 12V DC 2A-5A power supply must be used.
- Page 7 Note: Before connecting the power supply, please check its output voltage, 12V (2A-5A) required. How to Zoom and Focus (auto focus)
- Page 8 This camera has 5x optical zoom ability from 2.7mm- 13.5mm by motorized varifocal lens and it could be auto focused at any zoom position. CVBS (1200TVL, Analog) mode: Because this camera do not support UTC (Up the Coax), so when you power on the camera and switch the camera to CVBS mode, please up push or down push the OSD joystick to zoom in or zoom out, it will be auto focused after the zoom position has been set.
- Page 9 2.7mm 91.6° 80.5° 2.8mm 89.9° 79.8° 3.6mm 75.7° 66° 69.9° 60.7° 50.0° 42.6° 38.5° 32.6° 12mm 26.2° 22.1° 13.5mm 22.8° 19.0° Detailed Lens Chart Detailed Lens Chart 5 feet 10 feet 25 feet 2.7mm 6.2 * 8.3 12.5 * 16.6 31.3 * 42.0 2.8mm 6.4 * 8.6...
- Page 10 Setup OSD Menu Press the OSD joystick to start the OSD menu in any video output mode, Move the joystick up or down to navigate through the menu options. Move the joystick left or right to change a menu setting. When a menu option or setting is followed by , press the joystick to access to the next screen.
- Page 11 OSD Functions and Options *ALL “RUTURN”: (RETURN TO MAIN MENU, EXIT&SAVE, EXIT&CANCEL) *ALL “TV FORMAT”-AHD/TVI/CVI/CVBS (Do not move OSD joystick left or right here!!! If change the format accidentally, there will be no signal, please power off and power on camera again, then switch to the video format you need by OSD joystick.
- Page 12 BACKLIG MODE: IGHT ONLY/ALL DAY Level 0- 20 Color- BLK/Customize/WHT/ YEL/CYN/GRN/MAG/RE D/BLU RETURN H-Pos 0-20 V-Pos 0-20 H-Size 0-20 V-Size 0-20 Return MODE: NORMAL/ROI ROI: WIND0W ZONE: 0-3 WINDOW USE: ON/OFF H-Pos 0-1920 V-Pos 0-1080 H-Size 0-1920 V-Size 0-1080 RETURN Weight –...
- Page 13 Extern S/W: LOW/HIGH D->N Level 1 ~ 20 N->D Level 1 ~ 20 Delay: Low / Middle / High Return AUTO SMART IR: OFF/ON Anti-Sat. 1 ~ 20 (Not used when smart IR off) AGC Threshold 1 ~ 20 AGC Margin 1 ~ 20 Delay –...
- Page 14 This setting is same as Main MENU-SYSTEM- Return TV SYSTEM-TV FORMAT (DO NOT CHANGE!!!) OFF/LOW/MIDDLE/HIG IMAGE SHARPNE TV FORMAT (This setting is same as Main MENU-SYSTEM-TV SYSTEM-TV FORMAT) (DO NOT CHANGE!!!) 1 ~ 10 GAMMA RETURN MIRROR 0.55 / 0.65 /0.75 / 0.45 FLIP Off / On Off / On...
- Page 15 RETURN Y-Level (1 ~ 20) / CR Level (1 ~ 20) CB Level (1 ~ 20) / Return MOTION OFF/ON Det Window Window Zone 0 ~ 3 Window Use On/Off Det H-Pos / Det V-Pos / Det H-Size Det / V- Size Return Det Tone 0 - 4...
-
Page 16: Osd Menu Description
FRAME Burst Gain 0–128 (not RATE used CVBS) FREQUEN B&W BURST OFF/ON (used TVI ) IMAGE UCC Select 8 Byte RANGE CHANGE!!!) 720 EX Off/ On (used TVI) RETURN COLOR 1080P 30FPS (DO NOT SPACE CHANGE!!!) COLOR 60HZ (DO NOT CHANGE!!!) LANGUA FULL / COMP / USER... - Page 17 recommendations are made to hopefully enhance the results. However every installation will be different and there will occasions when alternative solutions may be more suitable. MOTOR AF MODE Auto/Manual ZOOM SCANNIN Half/Full On ONEPUSH On/Off On SYNC INITIAL RETURN AF Mode •...
- Page 18 INITIAL Press and hold the OSD joystick button to full range lens initialization. EXPOSUR BRIGHTN 0 - 20 Auto-Normal /Deblur SHUTTER Manual-1/30-1/30000 Flicker Off/x2/x4/x8/x16/x32 SENS-UP 0 -10 RETURN Brightness Adjust the camera’s brightness from 0~20. The higher the number, the brighter the image will appear. SHUTTER Select either AUTO, MANUAL or FLICKER.
- Page 19 AGC (Auto Gain Control) The higher the gain level, the brighter the screen, but the higher the noise. NOTES: • SENS-UP may be disabled depending on manual SHUTTER settings. • The higher the SENS-UP level, the brighter the screen, but the more likely it is that an after-image will appear.
- Page 20 H-Pos 0-1920 V-Pos 0-1080 H-Size 0-1920 V-Size 0-1080 RETURN Weight – Low / Middle / High Return HLC (High Light Compensation) If the scene contains extremely bright light areas such as car headlights, the light can mask out much of the on-screen detail.
- Page 21 the image to properly expose the object in the foreground. • H-POS: Adjust LEFT or RIGHT to move the Horizontal Position. • V-POS: Adjust LEFT or RIGHT to move the Vertical Position. • H-SIZE: Adjust LEFT or RIGHT to increase or decrease the Horizontal Size.
- Page 22 • The camera’s frame rate drops from 30fps to 15fps when WDR is ON. DAY&NI EXTERNA SMART IR: OFF/ON Anti-Sat. 1 ~ 20 (Not used when smart IR off) Extern S/W: LOW/HIGH D->N Level 1 ~ 20 N->D Level 1 ~ 20 Delay: Low / Middle / High Return...
- Page 23 EXTERN ↵ (External) The mode is switched to ‘COLOR’ in a normal environment, but switches to ’B&W’ mode when ambient illumination is low. *Default setting for cameras with IR LEDs. • ANTI-SAT: Cameras equipped with IR LEDs may have an over-saturated night time image. Adjust the level of ANTI-SAT to compensate for over-saturation.
- Page 24 • DELAY: Sets a delay time before the switch is made from day to night/night to day. Useful if the camera is placed in an area that is subject to shadows or intermittent light level changes. COLOR The image is always displayed in color. Automatic switching does not occur.
-
Page 25: Color Gain
AUTOext is used in larger color map than AUTO mode. PRESET Automatically readjust only by a simple press and hold until the desired auto white level is reached. MANUAL ↵ Select this to fine-tune white balance manually. Color Temp (°Kelvin) and Red / Blue gain values are adjustable. - Page 26 Off / Low / Middle / High NOTES: When adjusting the noise reduction level, remember that the higher the level is set, the greater the reduction in noise level, as well as the brightness of the image but trailing may occur with moving objects. IMAGE SHARPNE TV FORMAT (This...
- Page 27 Zone Disp Off /On H-Pos / V-Pos / H-Size / V-Size / RETURN Y-Level (1 ~ 20) / CR Level (1 ~ 20) CB Level (1 ~ 20) / Return This function includes features that allow you to make adjustments to fine-tune the quality of the image displayed on the monitor.
- Page 28 DEFOG: Images in extraordinary environments such as fog, smoke, rain or smog have a dynamic range lower than ordinary images. This function is a contrast enhancement, which is used to overcome such shortcomings. PRIVACY ↵ Apply a mask to an area you want to hide. Useful in areas where a camera can see into areas that are not relevant to security needs.
-
Page 29: Motion Osd
Window Use On/Off Det H-Pos / Det V-Pos / Det H-Size Det / V- Size Return Det Tone 0 - 4 MDRECT FILL On/Off Sensitivity 0 - 10 Motion OSD On/Off Text Alarm On/Off Signal Out Off/On Return Monitor activity more efficient with this feature by means of highlighting moving objects with a red outlined box around the moving object. -
Page 30: Text Alarm
TEXT ALARM When motion is detected text will be displayed on screen to alert you the motion. SIGNAL OUT Not supported. SYSTEM TV FORMAT SYSTEM Y GAIN 0 – 32 (not used CVBS) CB Gain 0 – 255 (not used CVBS) CR Gain 0 –... -
Page 31: Frame Rate
COLOR USER: OFFSET 0 – 32 LANGUA RETURN HD-CbCr / YUV / SD- CbCr TITLE OFF/ON RESET ENG / CHN / CHN(S) / RETURN JPN / KOR Off / Right Up / Left Down ON TV FORMAT Please do not change the TV format! It will lose signal if change it to others mode that your DVR do not support. - Page 32 Image Range allows you to set the proper Black and White levels according to the external display you use. FULL: Display all BLACK level and WHITE level without compression. COMP: Display BLACK level and WHITE level with compression. USER: Reset the BLACK level by changing the OFFSET value.
-
Page 33: Specifications
Press and hold the SET button to reset the camera OSD settings to the factory defaults. Release the SET button when “PUSHING” is displayed. Specifications Model No. HN-BP6025XES Video Output Mode TVI/AHD/CVI/ CVBS (TVI in default) Camera Image Sensor 1/2.9" Sony 2.1MP Exmor CMOS Sensor... -
Page 34: Troubleshooting
White Balance AUTO / MANUAL Gain Control AUTO Noise Reduction 3DNR Picture Adjustment YES(FHD Mode Only) OSD Support (FHD Mode Only) General Housing Metal, IP66 Bracket IR Cut Filter Operation Temperature 14F ~ 122F RH95% Max Storage Temperature -4F ~ 140F RH95% Max Power Source DC12V±10%, 2000mA Dimension... - Page 35 (iii) Ensure switch the camera video output mode to correspond your DVR video type. (iv) Ensure your AHD DVR is 1080P or 1080N, CVI and TVI DVR is 1080P. (v) Ensure power supply is working well and the current is 2A-5A. b.
- Page 36 IRs, leave set to EXTERN. h. SENS-UP function is not working. Check if Shutter settings are set to AUTO or FLICKER. We are here to help: If you need further help email HONIC Technical Support: support@honictech.com Camera Dimensions (mm)
-
Page 37: Frequently Asked Questions
Frequently Asked Questions Q: Does this camera work with 720P DVR system? A: No, the video signal is 2MP 1080P, it could not work with 720P DVR. Q: How should I switch the video mode? A: Please check notice before using above. Q: Will the OSD switch stay in same mode if camera is powered off, or do you have to reset mode each time you power it back up? - Page 38 24-Month Warranty for Quality-Related Issues Honic warrants this product against defects in workmanship and material for a period of 2 years from its original purchase date. The warranty does not cover any incidental, accidental or consequential damages arising from the use of or the inability to use this product.
Need help?
Do you have a question about the HN-BP6025XES and is the answer not in the manual?
Questions and answers