Grundfos ALPHA2 Installation And Operating Instructions Manual
Hide thumbs
Also See for ALPHA2:
- Installation manual ,
- Installation and operating instructions manual (37 pages) ,
- Instructions manual (31 pages)
Table of Contents
Advertisement
Advertisement
Table of Contents

Related Manuals for Grundfos ALPHA2


Summary of Contents for Grundfos ALPHA2
- Page 1 GRUNDFOS INSTRUCTIONS GRUNDFOS ALPHA2 Installation and operating instructions...
- Page 2 Declaration of Conformity We, Grundfos, declare under our sole responsibility that the product GRUNDFOS ALPHA2, to which this declaration relates, is in conformity with these Council directives on the approximation of the laws of the EC member states: — Low Voltage Directive (2006/95/EC).
-
Page 3: Table Of Contents
Original installation and operating instructions. CONTENTS Page Symbols used in this document ........General description . -
Page 4: Symbols Used In This Document
Original installation and operating instructions. Warning Prior to installation, read these installation and operating instructions. Installation and operation must comply with local regulations and accepted codes of good practice. Warning The use of this product requires experience with and knowledge of the product. -
Page 5: General Description
2.2 Advantages of installing a GRUNDFOS ALPHA2. 2.1 The GRUNDFOS ALPHA2 circulator pump The GRUNDFOS ALPHA2 circulator pump is designed for the circulation of water in heating systems and domestic hot-water systems. GRUNDFOS ALPHA2 is the best choice for •... -
Page 6: Applications
VDI 2035. In domestic hot-water systems, it is advisable to use GRUNDFOS ALPHA2 pumps only for water with a degree of hardness lower than approx. 14 °dH. For water with a higher degree of hardness, a direct- coupled TPE pump is recommended. - Page 7 3.3 System pressure Maximum 1.0 MPa (10 bar). See fig. 2. 3.4 Relative air humidity (RH) Maximum 95 %. See fig. 2. 3.5 Enclosure class IP 42. See fig. 2. 3.6 Inlet pressure Minimum inlet pressure in relation to liquid temperature. See fig. 2. Minimum inlet pressure Liquid temperature [MPa]...
-
Page 8: Installation
Mounting the GRUNDFOS ALPHA2 Fig. 3 Arrows on the pump housing indicate the liquid flow direction through the pump. 13.2 Installation dimensions – GRUNDFOS ALPHA2 XX-40, XX-50, XX-60 13.3 Installation dimensions – GRUNDFOS ALPHA2 25-40 A, 25-60 1. Fit the two gaskets supplied when the pump is mounted in the pipe. - Page 9 4.2 Control box positions Control box positions Fig. 4 Warning The pumped liquid may be scalding hot and under high pressure! Drain the system or close the isolating valves on either side of the pump before the screws are removed. When the position of the control box has been changed, fill the Caution system with the liquid to be pumped or open the isolating valves.
- Page 10 The heat loss from the pump and pipework can be reduced by insulating the pump housing and the pipe. See fig. 5. As an alternative, polystyrene insulation shells can be ordered from Grundfos. See Accessories. Do not insulate the control box or cover the control panel.
-
Page 11: Electrical Connection
5. Electrical connection § + 6% 1 x 230V , 50 Hz -10% Min. ø5 mm Max. ø10 mm Max. 1.5 mm 7 mm 7 mm 12 mm 17 mm Click Electrical connection Fig. 6 The electrical connections and protection must be carried out in accordance with local regulations. -
Page 12: Control Panel
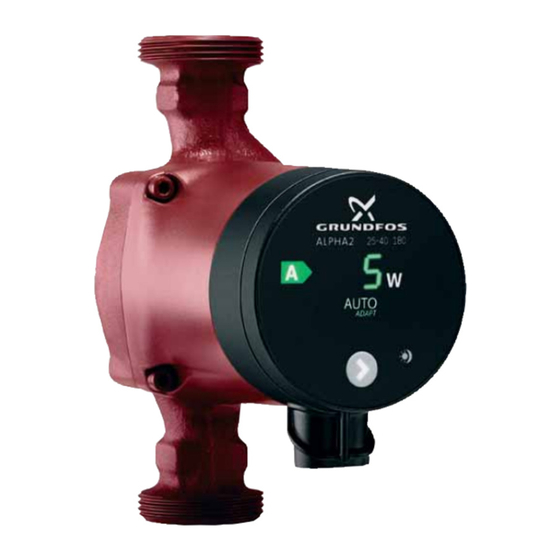
ALPHA2 25-40 180 AUTO ADAPT GRUNDFOS ALPHA2 control panel Fig. 7 The control panel on the GRUNDFOS ALPHA2 comprises: Pos. Description Display showing the actual pump power consumption in Watt Eight light fields indicating the pump setting Light field indicating the status of Automatic Night SetBack... - Page 13 6.3 Light fields indicating the pump setting GRUNDFOS ALPHA2 has eight optional settings which can be selected with the push-button. See fig. 7, pos. 5. The pump setting is indicated by eight different light fields. See fig. 8. AUTO ADAPT...
-
Page 14: Setting The Pump
7. Setting the pump Contents: 7.1 Pump setting for system type 7.2 Pump control. 7.1 Pump setting for system type Selection of pump setting for system type Fig. 9 Factory setting = AUTO ADAPT Recommended and alternative pump settings according to fig. 9: Pump setting Pos. - Page 15 Changing from recommended to alternative pump setting Heating systems are "slow" systems that cannot be set to the optimum operation within minutes or hours. If the recommended pump setting does not give the desired distribution of heat in the rooms of the house, change the pump setting to the shown alternative.
-
Page 16: Automatic Night Setback
8. Automatic Night SetBack Contents: 8.1 Basis for Automatic Night SetBack 8.2 Function of Automatic Night SetBack. 8.1 Basis for Automatic Night SetBack Fig. 10 Automatic Night SetBack Warning Pumps built into gas boilers with a small water content must never be set to Automatic Night SetBack. - Page 17 To ensure the optimum function of Automatic Night SetBack, the following conditions must be fulfilled: • The pump must be installed in the flow pipe. The Automatic Night SetBack function does not work if the pump is installed in the return pipe. •...
- Page 18 8.2 Function of Automatic Night SetBack Once Automatic Night SetBack has been activated, the pump changes automatically between normal duty and night setback. See 11. Pump settings and pump performance. Changeover between normal duty and night setback is dependent on the flow-pipe temperature.
-
Page 19: Systems With Bypass Valve Between Flow And Return Pipes
9. Systems with bypass valve between flow and return pipes Contents: 9.1 Purpose of bypass valve 9.2 Manually operated bypass valve 9.3 Automatic bypass valve (thermostatically controlled). 9.1 Purpose of bypass valve Fig. 11 Systems with bypass valve Bypass valve The purpose of the bypass valve is to ensure that the heat from the boiler can be distributed when all valves in the underfloor-heating circuits and/or thermostatic radiator valves are closed. - Page 20 9.3 Automatic bypass valve (thermostatically controlled) Follow this procedure: 1. Adjust the bypass valve with the pump in setting I (speed I). The minimum flow (Q ) for the system must always be observed. min. Consult the manufacturer's instructions. 2. When the bypass valve has been adjusted, set the pump to the lowest or highest constant-pressure curve.
-
Page 21: Start-Up
10. Start-up Contents: 10.1 Before start-up 10.2 Venting the pump 10.3 Venting of heating systems. 10.1 Before start-up Do not start the pump until the system has been filled with liquid and vented. The required minimum inlet pressure must be available at the pump inlet. - Page 22 (2). In heating systems that often contain much air, Grundfos recommends the installation of pumps with pump housing with air separator, i.e. ALPHA2 pumps, type ALPHA2 XX-XX A. When the heating system has been filled with liquid, follow this procedure: 1.
-
Page 23: Pump Settings And Pump Performance
AUTO ADAPT Fig. 14 Pump setting in relation to pump performance Setting Pump curve Function The AUTO function enables ALPHA2 to control the pump ADAPT performance automatically within a defined performance range, Highest to see fig. 14: AUTO ADAPT lowest •... - Page 24 Setting Pump curve Function ALPHA2 runs at a constant speed and consequently on a constant curve. In speed III, the pump is set to run on the max. curve under all Speed III operating conditions. See fig. 14. Quick venting of the pump can be obtained by setting the pump to speed III for a short period.
-
Page 25: Fault Finding Chart
12. Fault finding chart Warning Before starting any work on the pump, make sure that the electricity supply has been switched off and that it cannot be accidentally switched on. Control Fault Cause Remedy panel 1. The pump Light off. a) One fuse in the Replace the fuse. -
Page 26: Technical Data And Installation Dimensions
13. Technical data and installation dimensions Contents: 13.1 Technical data 13.2 Installation dimensions – GRUNDFOS ALPHA2 XX-40, XX-50, XX- 13.3 Installation dimensions – GRUNDFOS ALPHA2 25-40 A, 25-60 13.1 Technical data Supply voltage 1 x 230 V – 10 %/+ 6 %, 50 Hz, PE Motor protection The pump requires no external motor protection. - Page 27 ALPHA2 25-60 (N) 180 ALPHA2 32-60 180 *) For the UK market only. **) For UK 1 1/2. 13.3 Installation dimensions – GRUNDFOS ALPHA2 25-40 A, 25-60 A Dimensional sketches and table of dimensions. Fig. 16 Dimensional sketches, ALPHA2 25-40 A, 25-60 A...
-
Page 28: Performance Curves
14. Performance curves Contents: 14.1 Guide to performance curves 14.2 Curve conditions 14.3 Performance curves, ALPHA2 XX-40 14.4 Performance curves, ALPHA2 XX-50 14.5 Performance curves, ALPHA2 XX-60. - Page 29 14.1 Guide to performance curves Each pump setting has its own performance curve (Q/H curve). However, AUTO covers a performance range. ADAPT A power curve (P1 curve) belongs to each Q/H curve. The power curve shows the pump power consumption (P1) in Watt at a given Q/H curve. The P1 value corresponds to the value that can be read from the pump display, see fig.
- Page 30 14.2 Curve conditions The guidelines below apply to the curves on the next pages: • Test liquid: Airless water. The curves apply to a density of ρ = 983.2 kg/m • and a liquid temperature of +60 °C. • All curves show average values and should not be used as guarantee curves.
- Page 31 14.3 Performance curves, ALPHA2 XX-40 [kP a] [kP a] Q [m³/h] Q [m³/h] Q [l/s] Q [l/s] [W ] [W ] Q [m³/h] Q [m³/h] Fig. 18 Performance curves, ALPHA2 XX-40...
- Page 32 14.4 Performance curves, ALPHA2 XX-50 [kP a] Q [m³/h] Q [l/s] [W ] Q [m³/h] Fig. 19 Performance curves, ALPHA2 XX-50...
- Page 33 14.5 Performance curves, ALPHA2 XX-60 [kP a] Q [m³/h] Q [l/s] [W ] Q [m³/h] Fig. 20 Performance curves, ALPHA2 XX-60...
-
Page 34: Features
Min. 0.05 PC 0740 TF110 Max. 0.19 230V ~ 50Hz IP 42 MADE IN DENMARK Fig. 21 Nameplate, GRUNDFOS ALPHA2 Pos. Description Pos. Description Rated current [A]: Pump type • Min.: Minimum current [A] • Max.: Maximum current [A] Input power P... - Page 35 15.2 Type key Example ALPHA2 Pump type Nominal diameter (DN) of suction and discharge ports [mm] Maximum head [dm] –: Cast-iron pump housing A: Pump housing with air separator N: Stainless-steel pump housing Port-to-port length [mm]...
-
Page 36: Accessories
16. Accessories Fig. 22 Accessories Accessories for GRUNDFOS ALPHA2. See fig. 22. Accessories include • fittings (unions and valves) • insulation kits (insulation shells) • plug. -
Page 37: Disposal
This product or parts of it must be disposed of in an environmentally sound way: 1. Use the public or private waste collection service. 2. If this is not possible, contact the nearest Grundfos company or service workshop. Subject to alterations. - Page 40 Telefax: +60-3-5569 2866 Telefax: +46(0)31-331 94 60 Télécopie: +32-3-870 7301 Germany México Switzerland Belorussia GRUNDFOS GMBH Bombas GRUNDFOS de México S.A. de GRUNDFOS Pumpen AG Представительство ГРУНДФОС в Schlüterstr. 33 C.V. Bruggacherstrasse 10 Минске 40699 Erkrath Boulevard TLC No. 15 CH-8117 Fällanden/ZH...
- Page 41 Thinking ahead makes it possible Innovation is the essence 95047457 1209 The name Grundfos, the Grundfos logo, and the payoff Be–Think–Innovate are registrated trademarks owned by Grundfos Management A/S or Grundfos A/S, Denmark. All rights reserved worldwide. Repl. 95047457 1107 www.grundfos.com...
Need help?
Do you have a question about the ALPHA2 and is the answer not in the manual?
Questions and answers