Table of Contents
Advertisement
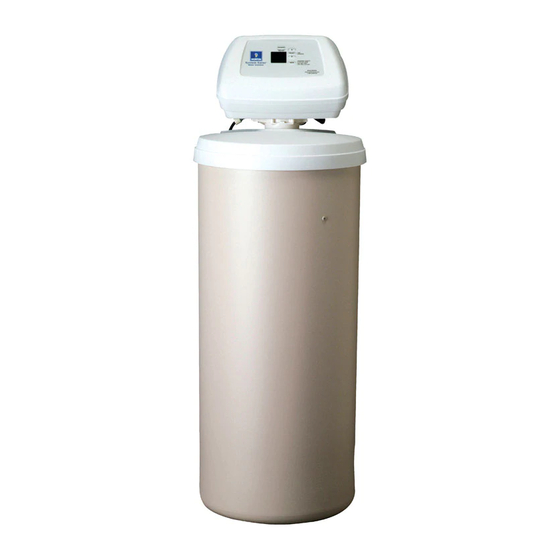
Water Softener
Model MSD45E
How to install, operate and
maintain your Demand
Controlled Water Softener
Do not return water softener to store
If you have questions or concerns when
installing, operating or maintaining your
water softener, call our toll free number:
1--888--64 WATER
(1--888--649--2837
or visit www.mortonwatersofteners.com
When you call, please be prepared to
provide the model and serial number
of your product, located on the rating
decal on back of the top cover.
System tested and certified by NSF
International against NSF/ANSI Standard 44
for hardness reduction and efficiency,
and certified to NSF/ANSI Standard 372
For best results use Mortonr Clean and Protect™ or
Clean and Protect™ Plus Rust Defense™ Pellets in your softener.
)
.
7334159 (Rev. N 6/12/17)
Advertisement
Table of Contents

Related Manuals for Morton MSD45E


Summary of Contents for Morton MSD45E
- Page 1 Water Softener Model MSD45E How to install, operate and maintain your Demand Controlled Water Softener Do not return water softener to store If you have questions or concerns when installing, operating or maintaining your water softener, call our toll free number:...
- Page 2 Protect your new water softener with Mortonr Clean and Protect™ or Clean and Protect™ Plus Rust Defense™ Pellets Mortonr Water Softener Salt Pellets are made with a time--release formula that works with your softener to help prevent mineral buildup and keep your home’s pipes and appliances working their best.
-
Page 3: Table Of Contents
9 -- 11 PROGRAMMING THE MORTON WATER SOFTENER ........ -
Page 4: Warranty
BEFORE YOU START FOLLOW THE INSTALLATION INSTRUCTIONS CAREFULLY. FAILURE TO INSTALL THE SOFTENER PROPERLY VOIDS THE WARRANTY. BEFORE YOU BEGIN INSTALLATION, READ THIS ENTIRE MANUAL. THEN, OBTAIN ALL THE MATERIALS AND TOOLS YOU WILL NEED TO MAKE THE INSTALLATION. CHECK LOCAL PLUMBING AND ELECTRICAL CODES. THE INSTALLATION MUST CONFORM TO THEM. CODES IN THE STATE OF MASSACHUSETTS REQUIRE INSTALLATION BY A LICENSED PLUMBER. -
Page 5: Unpacking / Inspection
UNPACKING / INSPECTION The parts required to assemble and install the unit Remove and discard (or recycle) all packing mater- are included in a bag. Thoroughly check the water ials. To avoid loss of the small parts, we suggest you softener for possible shipping damage and parts keep them in the parts bag until you are ready to use loss. -
Page 6: Specifications & Performance Claims / Dimensions
It is typically less than the rated efficiency, due to individual application factors including water hardness, water usage, and other contaminants that reduce a softener’s capacity. MODEL MSD45E RATED CAPACITY (grains @ lbs salt dose) 13,233 @ 2.6 35,700 @ 9.9... -
Page 7: Before Starting Installation
BEFORE STARTING INSTALLATION " WHERE TO INSTALL THE SOFTENER ..........Place the softener as close as possible to the Put the softener in a place water damage is least pressure tank (well system) or water meter (city... - Page 8 TYPICAL SOLDERED COPPER or CPVC INSTALLATIONS soft water CROSS - - OVER Use if water supply flows from the left. Include single or 3 - - valve bypass. HARD hard water SOFT WATER WATER FROM TO SOFTENER SOFTENER INLET hard water to OUTLET outside faucets 120V AC...
-
Page 9: Installation Steps
INSTALLATION STEPS FIGURE 1 INSTALL BYPASS VALVE and/or PLASTIC INSTALLATION ADAPTORS: clip (2) NOTE: Before installing the bypass valve or plastic instal- lation adaptors, be sure the turbine and support are firmly plastic installation adaptors in place, in the valve outlet. Blow into the valve port and (install in softener valve or bypass valve) observe the turbine for free rotation. - Page 10 INSTALLATION STEPS, continued " If making a soldered copper installation, do all CONNECT AND RUN THE VALVE DRAIN sweat soldering before connecting pipes to the HOSE: softener fittings. Torch heat will damage plastic " Measure, cut to length and connect the 3/8” flex- parts.
- Page 11 ‘‘service’’, pausing several mistake. times to allow the softener to pressurize slowly. PROGRAM THE MORTON WATER SOFTER 2. 3--VALVE BYPASS: Fully close the bypass valve and open the outlet valve. SLOWLY, open ELECTRONIC CONTROL, page 12.
-
Page 12: Programming The Morton Water Softener
PROGRAMMING THE MORTON WATER SOFTENER RECHARGE button display up button down button DATA button ELECTRONIC CONTROL SETTINGS REQUIRED upon installation, and after an extended power out- " age (see Program Memory, page 18). NOTES: D WHEN THE POWER SUPPLY IS PLUGGED INTO THE ELECTRICAL OUTLET (STEP 10, PAGE 11), 12:00PM (flashing), and PRESENT TIME show in the upper display area. -
Page 13: Sanitizing Procedures
PROGRAMMING THE MORTON WATER SOFTENER, continued SET WATER HARDNESS NUMBER ........... -
Page 14: Water Conditioning Information
WATER AND WATER CONDITIONING WATER CONDITIONING INFORMATION ..........IRON in water can cause stains on clothing and immediately when drawn from a faucet because it plumbing fixtures. -
Page 15: General Water Softener Maintenance
GENERAL WATER SOFTENER MAINTENANCE CHECKING THE SALT STORAGE LEVEL, AND ADDING SALT (also see page 11) ..Brine (salt dissolved in water) is needed for each you add more. Without salt, you will soon have hard and every regeneration. - Page 16 GENERAL WATER SOFTENER MAINTENANCE, continued CLEANING THE NOZZLE AND VENTURI ASSEMBLY ........A clean nozzle and venturi is needed for the soft- ener to work right.
-
Page 17: Morton Water Softener Features & Settings
MORTON WATER SOFTENER FEATURES AND SETTINGS NOTE: SEE PAGES 12 and 13 TO SET THE CORRECT TIME OF DAY AND WATER HARDNESS NUMBER. NORMAL OPERATION, ELECTRONIC CONTROL DISPLAY ....... - Page 18 VACATION NOTE ................The Morton Demand water softener regenerates only while water is used and softening capacity must be re- stored.
- Page 19 MORTON WATER SOFTENER FEATURES AND SETTINGS, continued REGENERATION (START) TIME: At the 2:00AM 1. Beginning from the present regeneration start time, the softener begins regen- time display, press and hold in erations at that time. This is a good time in most...
- Page 20 3. Press SELECT to select and move to next screen. the right model code set to operate the softener cor- 4. 12 hr flashes along with rectly. The correct model code for model MSD45E TIME. To change the display to is A 45.
-
Page 21: Morton Water Softener Service
MORTON WATER SOFTENER SERVICE feature / service: AUTOMATIC ELECTRONIC DIAGNOSTICS ...... - Page 22 MORTON WATER SOFTENER SERVICE, continued service: TIMER / SOFTENER, SERVICE CHECKOUT PROCEDURE ......If you are not getting soft water, and an error code...
- Page 23 MORTON WATER SOFTENER SERVICE, continued 2. Press the DATA button again. (B) This display segment ( ), in the following This diagnostic display, shows table, indicates an open POSITION switch. The oth- the total number of recharges er indicates a closed switch. Use the RECHARGE...
-
Page 24: Repair Parts
REPAIR PARTS Valve Assembly (see pages 26 and 27) Mortonr Water Softener Installation & Operation Manual... - Page 25 REPAIR PARTS PART PART DESCRIPTION DESCRIPTION 7351054 Power Supply, 24V DC Tank Neck Clamp Kit 7331177 (includes 2 ea. of Key Nos. 1 & 2) 7192785 Salt Cover Clamp Section (2 req.) 7178626 Retainer Clip (2 req.) 7155115 Cover, Brinewell Distributor O- -ring Kit 7109871...
- Page 26 REPAIR PARTS wear- -strip seal cross- -section view Mortonr Water Softener Installation & Operation Manual...
- Page 27 REPAIR PARTS PART PART DESCRIPTION DESCRIPTION 7224087 Screw, #8-32 x 1 in. (2 req.) Turbine & Support Assembly, 7290931 including 2 O- -Rings (See Key No. 7286039 Motor (incl. 2 ea. of Key No. 50) 73) & 1 ea. of Key Nos. 74 & 75 7231393 Motor Plate Turbine Support &...
Need help?
Do you have a question about the MSD45E and is the answer not in the manual?
Questions and answers