Table of Contents
Advertisement
Advertisement
Table of Contents

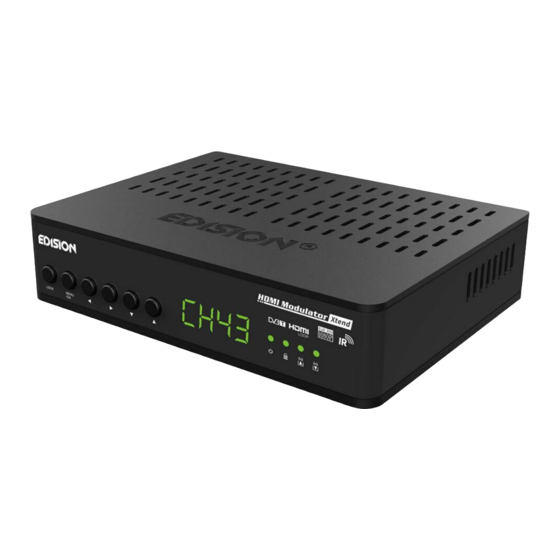
Summary of Contents for Edision HDMI Modulator Xtend
- Page 1 HDMI Modulator to DVB-T/MPEG4 HDMI LOOP & IR Control User’s Guide...
-
Page 2: Table Of Contents
►IR CONTROL SYSTEM EDI-RX SPECIFICATIONS ... 5 ►TROUBLESHOOTING ......13 - 14 ►CONNECTIΟΝ & OPERATION ....6 -7 ►INSTALLATION EXAMPLE ......15 ►PACKAGE INCLUDES ........8 The CE certificate of the product is available on our webpage, by visiting this link: https://www.edision.gr/en/support... -
Page 3: Introduction
►INTRODUCTION Digital FULL HIGH DEFINITION single channel modulator, with EMBEDDED IR REMOTE CONTROL system over coaxial, plus HDMI LOOP for HDMI signal connection to a TV set. HDMI signal input from any HDMI source (Terrestrial & Satellite TV receivers, Cameras, DVD’s, DVR’s, etc) can be converted up to FULL HIGH DEFINITION 1080p, Digital Terrestrial DVB-T signal output, in VHF/UHF band, plus the HDMI source can be also connected to a TV set, using the HDMI LOOP OUT of the modulator. -
Page 4: Features
►FEATURES • INPUT signal: HD IN • Adjustable RF Output Level / Default 90dbμV • OUTPUT signal: Digital Terrestrial DVB-T MPEG4 • Fast Pre-Config Function / 50 ID’s Selectable • IR control over coaxial, through the embedded • Backup Config File by USB EDI-Rx system. -
Page 5: Rf Specifications
►RF SPECIFICATIONS Frequency Range VHF (CH. 5-12) & UHF (CH. 21-69) Impendance 50Ω RF IN RF signal mix through 1/2, 2/3, 3/4, 5/6, 7/8 Guard Interval 1/4, 1/8, 1/16, 1/32 Constellation QPSK, 16QAM, 64QAM RF Output level ~90dBuV Adjustable from 0 to -14dB 0 to +6d Bandwidth 7MHZ, 8MHZ 2K, 8K... -
Page 6: Connectiον & Operation
IR EDI-Rx and then from the RF OUT (D) of the EDI-Rx, to the ANT IN of the TV. 6. From the IR OUT(3) of the HDMI Modulator Xtend, connect the Jack to IR Tx cable and place it in front of the HDMI source to be controlled via IR. - Page 7 10. Connect the power supply DC5V input of the IR Control System EDI-Rx (C) to a USB port of a TV/STB, using the cable USB-to-DC. 11. Proceed to channel scan on your TV or STB. DC 5V/2A IR OUT HD IN HD OUT RF OUT Jack to IR Rx...
-
Page 8: Package Includes
Connect the HDMI cable to the HD OUT and when the green light turns on, the signal is active ►PACKAGE INCLUDES First TV equipment: Second TV equipment: 1. HDMI Modulator Xtend 4. IR Control System EDI-Rx 2. Jack to IR Tx cable 5. Jack to IR Rx cable 3. -
Page 9: Main Menu
►MAIN MENU To enter the main menu options, press once the Menu/OK key and use the Left or Right keys to navigate within the main menu. CH: Shows the current RF FACT: Factory defaults. Press channel output. Use the keys key UP to restore factory Up &... -
Page 10: Configuration Extraction (Cfg)
For an advanced configuration of the HDMI modulator Xtend, you must extract the configuration file to a USB drive, modify it and import it again in the HDMI modulator Xtend. To extract the configuration file named jedi_config.txt*, you must connect a USB drive** to the USB slot, enter the Main Menu, select CFG and press key UP to extract the file to the USB drive. -
Page 11: Configuration Import (Cfg)
USB drive, insert the drive to the USB slot and power cycle your HDMI modulator Xtend. When you see this message CFG, press the MENU/OK button to confirm the import process. When the process is completed, the unit will reboot with the new configuration! *IMPORTANT: Use only FAT32 partitions. -
Page 12: Id's Selectable
2106 2107 audiopid 2201 2202 2203 2204 2205 2206 2207 pmtpID 2301 2302 2303 2304 2305 2306 2307 serviceID 2401 2402 2403 2404 2405 2406 2407 *IMPORTANT: 7 sample ID configurations, out of 50 installed in the HDMI modulator Xtend. -
Page 13: Troubleshooting
• Make sure that the selected RF output channel number, is not the same as a received TV channel or the same as from other modulator output • In case the HDMI Modulator Xtend is connected in line with the aerial antenna, disconnect the aerial antenna, connect only the modulator and try again “Signal Loss!”... - Page 14 • Make sure that the same LCN has not been selected in more than one devices The video (image) of the HDMI Modulator Xtend appears to be from another HDMI Modulator Xtend • Make sure the Fast Pre-Config ID does not conflict with the Fast Pre-Config ID of another unit The sound is not synchronized with the video •...
- Page 16 . e d i s i o n . g r EDISION HELLAS LTD • FARMAKEIKA - 57001 N. RYSIO • THESSALONIKI - GREECE DC 5V/2A IR OUT HD IN HD OUT RF OUT R F O U T...


Need help?
Do you have a question about the HDMI Modulator Xtend and is the answer not in the manual?
Questions and answers