
Related Manuals for Hunter Douglas PowerView Pebble


Summary of Contents for Hunter Douglas PowerView Pebble
- Page 1 PRODUCT INFORMATION MANUAL SECTION: 7E POWERVIEW GUIDE POWERVIEW GUIDE PEBBLE REMOTE APP SETUP & OPERATION...
-
Page 2: Table Of Contents
Troubleshooting . . . . . . . . . . . . . . . . . . . . . . . . . . . . . 62 PowerView Help © Copyright 2016 Hunter Douglas Limited [ABN 98 009 675 709] ® Luxaflex, PowerView and Pebble are registered Trade Marks of Hunter Douglas • 03/2016... -
Page 3: Getting Started
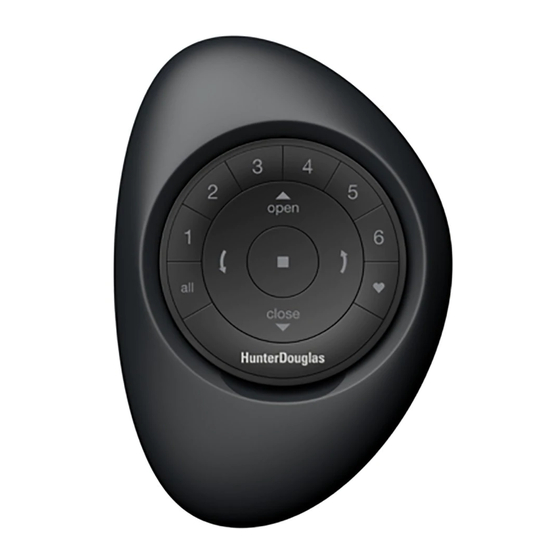
GeTTinG sTarTed with the PowerView™ Pebble Remote ® Remote Module Key to Operation Groups (1-6) Select or de-select Group numbers for programming or operation. Stop Open Stops shade in any position. Also used to enter and exit Move shade to fully programming mode. -
Page 4: Pairing Multiple Remotes To A Single Network Id
PairinG MulTiPle reMoTes to a Single Network ID Each PowerView Remote comes with its own unique Radio Frequency (Network) ID. If multiple remotes (ie. PowerView Pebble and/ ® Target Target Source or PowerView Surface remotes) will be used in the home, it is necessary to establish a single... - Page 5 With the source remote in Programming Target mode, PRESS and continue to HOLD Target (Stop) on the target remote. Complete steps 8 and 9 at the same time. PRESS RELEASE (Stop) on the source remote. Source RELEASE (Stop) on the target remote.
-
Page 6: Programming Mode Overview
ProGraMMinG Mode overview In programming mode, you can set a variety of functions, from joining a shade to a Group to removing a shade from a Group, to setting Favourite shade positions. You must activate programming mode on the PowerView™ Pebble ®... -
Page 7: Selecting & De-Selecting Groups
seleCTinG & de-seleCTinG GrouPs Before operating a single window covering you must first select its corresponding Group number (1-6) or the ALL button. Multiple Groups numbers can be selected for simultaneous operation in any combination. Group numbers can be selected or deselected. Like any Group number, the All button can also be selected or deselected;... -
Page 8: Joining A Shade To A Group
JoininG a shade To a GrouP Shades must be joined to a Group to operate. A single shade can be joined to multiple Groups, if desired. PRESS and HOLD (Stop) until indicator lights blink on the PowerView™ Pebble Remote. ®... -
Page 9: Removing A Shade From A Group
reMovinG a shade froM a GrouP Shades can be removed from a group, if desired. PRESS and HOLD (Stop) until indicator lights blink on the PowerView™ Pebble ® Remote. RELEASE (Stop). PRESS and RELEASE the desired Group number (1-6) on the remote. The selected group number will blink. -
Page 10: Setting A Favourite
seTTinG a favouriTe All shades come from the factory with a default Favourite position set at 50% open. If you prefer a different shade position, you can create a custom Favourite. Use the PowerView™ Pebble Remote ® to move all shades to a desired Favourite position. -
Page 11: Groups 1-6
ProduCT oPeraTion: Groups 1-6 Shades must be joined to a Group to operate. ò Multiple Groups can be simultaneously operated, if desired. PRESS and RELEASE desired Group number(s) (1-6) on the PowerView™ Pebble Remote. ® With desired Group number(s) selected, PRESS and RELEASE either: (Open) on the remote to open the shade. -
Page 12: All Button
ProduCT oPeraTion: all button The ALL button allows all Grouped shades to be ò operated simultaneously. PRESS and RELEASE the ALL button. PRESS and RELEASE either: (Open) on the remote to open the shade. (Close) on the remote to close the shade. -
Page 13: Product Operation
ProduCT oPeraTion: favourite button (Favourite) button moves selected Grouped shades to their individually set Favourite position. PRESS and RELEASE desired Group number(s) (1-6) or ALL on the PowerView™ Pebble Remote. ® PRESS and RELEASE (Favourite) on the remote. VIDEO INSTRUCTION –... -
Page 14: Product Operation
ProduCT oPeraTion: silhouette and Pirouette shadings ® ® PRESS RELEASE desired Group ò number(s) (1-6) on the PowerView Pebble Remote. ® PRESS either: (Left Arrow) on the remote to close the vanes to the desired position. NOTE: If the shade is in the fully raised, open position, the shade will lower to the down, closed position. -
Page 15: Product Operation: Luminette
ProduCT oPeraTion: luminette Privacy sheers ® PRESS RELEASE desired Group ò number(s) (1-6) on the PowerView Pebble Remote. ® PRESS either: (Left Arrow) on the remote to rotate the vanes to the left. NOTE: If the shade is in the fully open position, the shade will traverse to the fully closed position. -
Page 16: Performing A Programming Reset
Network ID and any Group assignments. It will not clear the window covering’s limits. Completing a programming reset will prevent a PowerView Pebble Remote ® or a mobile device from operating a window covering until it is reprogrammed. -
Page 17: Setting Limits
seTTinG liMiTs Limits identify the position that shades stop when fully open or fully closed. Limits are set at the factory for the correct stop positions according to the ordered height. To reset the limits: PRESS and HOLD the manual control button on the headrail for approximately 6 seconds. -
Page 18: Duplicating A Remote
duPliCaTinG a reMoTe Duplicating a remote copies a remotes unique group programming information and transfers it to another remote so that they are essentially Source Target identical. Window coverings programmed to operate with one remote will also respond to commands from a duplicated remote. Duplicating a remote is not the same as pairing multiple remotes to a PowerView™... - Page 19 PRESS and HOLD (Stop) on the source remote, until the indicator lights begin Target Source to blink. NOTE: This puts the source remote in Programming Mode. Indicator lights on the source remote will continue to blink for 20 seconds following each set of commands.
-
Page 20: Pairing A Repeater To A Network: Using A Remote
PRESS and HOLD (Stop) on the PowerView Pebble Remote until indicator lights on the interior of the remote blink. NOTE: This puts the remote in Programming Mode. Hold the remote in close proximity to the Repeater to complete Step 4. -
Page 21: Battery Replacement
ROTATE the back cover COuNTER-CLOCKwISE to close the back cover in place. Gently RE-INSERT the PowerView Remote Module into the PowerView Pebble until it is snug. NOTE: Indicator lights on the PowerView Pebble Remote will illuminate, indicating there is power. -
Page 22: Mounting The Powerview Surface
PLACE the Surface mounting plate on the ò ò mounting surface, lining up the screw holes on the mark. The Hunter Douglas logo on the mounting plate should appear right side up and be horizontal. ATTACH the Surface mounting plate to the mounting surface using the screws provided. -
Page 23: Inserting The Remote Module Into The Pebble
The reMoTe Module inTo The Pebble ® Replacing batteries in the PowerView Pebble Remote will not cause the loss of any shade programming, including Groups and Favourites. The PowerView Pebble Remote uses two CR 2032 batteries. LINE uP the raised notches of the PowerView remote module with the indentations in the Pebble. - Page 24 – 24 –...
- Page 25 PowerView App Setup and Operation – 25 –...
-
Page 26: Getting Started With The Hub
GeTTinG sTarTed wiTh The hub PowerView Hub and Repeater Components PowerView Hub Power Supply Repeater PowerView Hub Ehternet Cable uSB Power Supply Cable Repeater Power Supply Hub Back Reset RS232 Pressing the reset button Plug allows connection reboots the system. to Home Automation. -
Page 27: Pairing A Hub To A Remote Network
PowerView Pebble. PRESS and HOLD (Stop) on the remote until indicator lights begin to blink. TAP “I’m ready” when you are ready to pair the PowerView Pebble Remote and the Hub. PRESS and RELEASE (Stop) on the remote. ... -
Page 28: Creating A Network Using The Powerview App
CreaTinG a neTwork usinG The Powerview™ aPP If a PowerView Shade Network has not been previously established using the PowerView Pebble or Surface Remotes, a network will ® need to be created during the initial Hub set up process. TAP the PowerView icon to open the PowerView App. -
Page 29: Pairing A Remote To A Hub Network
PairinG a reMoTe To a hub neTwork A Hub previously paired to an existing remote network or that had created its own network during setup, can have additional Pebble ® Surface remotes paired to it, even if the remotes are introduced after the initial Hub setup. This is especially beneficial when a PowerView™... -
Page 30: Pairing A Repeater To A Network: Using The Hub
PairinG a rePeaTer To a neTwork: using the hub Repeaters extend the range of the radio frequency (RF) signal emitted by the PowerView Pebble Remote, the PowerView Surface, or the ® PowerView Hub when used with the PowerView App, for larger rooms or multiple room applications. -
Page 31: Discover Shades
disCover shades From the Shades screen, TAP “Discover Shades”. A progress indicator will appear reporting the total number of shades as they are discovered. Once complete, a “Success!” popup will appear, showing the total number of shades discovered. NOTE: Discovery time may vary. If, during the Discover Shades process, there are concerns, you may tap “Done”... -
Page 32: Edit Shade Information
ediT shade inforMaTion Shades will appear under each product type in the order they were discovered and will not appear in the order they were installed. You can identify and modify the shades using the following steps. From the Shades screen, TAP the image of the shade you wish to edit. -
Page 33: Assign Shade To A New Room
assiGn shade To a new rooM Once the shade has been properly identified and renamed, you can add the shade to a Room. From the Shades screen, TAP the shade image. The Shade edit screen will appear. TAP + (Select a Room). TAP + (Create Room). -
Page 34: Assign Shade To An Existing Room
assiGn shade To an exisTinG rooM If a Room has already been created, you can easily assign shades to it. From the Shades screen, TAP the shade image. The Shade edit screen will appear TAP + (Select a Room). TAP the appropriate Room icon. The Room will now appear in the Shade edit screen. -
Page 35: Create A Room
CreaTe a rooM when not Part of the shade edit Process) TAP the Rooms tab. TAP “Edit”. TAP + (Create Room). TYPE a custom Room name. NOTE: If the keyboard does not automatically appear, you will need to TAP in the “Name Your Room”... -
Page 36: Shade Operation In A Room
shade oPeraTion in a rooM Shades can be operated individually or by shade type within a room. TAP the Rooms tab TAP your desired Room. SELECT the shade you wish to operate or “Select All” to move all shades of the same shade type to the same position. -
Page 37: Delete A Room
deleTe a rooM TAP the Rooms tab. TAP “Edit”. TAP the “X” for the Room you wish to delete. TAP “Delete” to confirm. TAP “Done” to return to main Rooms screen. VIDEO INSTRUCTION – 37 –... -
Page 38: Create A Room Scene
CreaTe a rooM sCene TAP the Scenes tab. TAP “Edit”. TAP + (Create Scene) button under the preferred Room. TYPE a custom Scene name. TAP “Color Theme” and/or “Icon” to select your preferred color theme and icon. TAP “Save”. – 38 –... - Page 39 SELECT the shade type. NOTE: If you have multiple shades types, you will need to set them up separately. From the list of shades within the Room SELECT which shades to include or “Select All” if all shades will be included in the scene.
-
Page 40: Create A Multiple Room Scene
CreaTe a MulTiPle rooM sCene TAP the Scenes tab. TAP “Edit”. TAP + (Create) under Multiple Scenes. NOTE: In order to create multiple room scenes, first create scenes in at least two different rooms. TYPE a custom Scene name. NOTE: If the keyboard does not automatically appear, you will need to TAP in the Name Your Scene field. -
Page 41: Shade Operation In A Scene
shade oPeraTion in a sCene From the Scenes tab, TAP the Scene you wish to operate. The shades will move to the desired pre-set position. VIDEO INSTRUCTION – 41 –... -
Page 42: Setting Up And Using Schedules
seTTinG uP and usinG sChedules For automated operation of Scenes, they must be scheduled. Schedules tab. “Options”. TAP “Add a Schedule”. desired Scene. A default scheduling screen will appear for that Scene. NOTE: The “Enabled” indicator will appear green to indicate that the Scheduling input has been set up. -
Page 43: Scheduling Scenes - Sunrise/Sunset
sChedulinG sCenes – sunrise/sunseT Location Services must be turned on in the PowerView App Settings. Also, the PowerView App must be allowed access to the device’s location. Schedules tab. TAP “Options”. TAP “Add a Schedule”. desired Scene. A default scheduling screen will appear for that Scene. -
Page 44: Enabling Remoteconnect
enablinG reMoTeConneCT RemoteConnect allows a mobile device to activate Scenes by remotely connecting to the Hub via an Internet connection. The mobile device must be in the home with the Hub during the initial RemoteConnect setup. The mobile device must also have established connectivity to the same wireless router used to connect to the Hub. - Page 45 RE-ENTER the newly created PIN to verify. NOTE: On the press of the fourth number, the PIN is automatically verified for authenticity. Once the PIN is matched, the PIN pop-up simply closes. TAP “Done”. TAP anywhere outside of the Menu to close the Menu.
-
Page 46: Using Remoteconnect
usinG reMoTeConneCT For RemoteConnect to be used, the mobile device must be connected to the Internet either through a Wi-Fi or data connection. RemoteConnect can only be used to activate Scenes. TAP the PowerView App icon to open. TAP “RemoteConnect”. TAP the Hub location you wish to operate. -
Page 47: Using Repeaters With The App
usinG rePeaTers wiTh The aPP Repeaters extend the range of the radio frequency (RF) signal emitted by the PowerView Pebble Remote, the PowerView Surface, or the ® PowerView Hub when used with the PowerView App, for larger rooms or multiple room applications. -
Page 48: Battery Life Indicator
baTTery life indiCaTor As battery life diminishes, the PowerView App will give visual indicators of battery status. Battery status can be checked at any time. TAP “Shades”. TAP any shade’s image to check its battery status. NOTE: A low battery icon will be shown on any shade’s image if that shade’s batteries are low. -
Page 49: Backing Up The Hub
baCkinG uP The hub Backing up the Hub saves all Shades, Rooms, Scenes, Schedules, and Hub information (including current Scene Controller settings) as a local file within the PowerView App on your device. TAP the menu. TAP “Hub Info”. TAP “Hub Backups”. TAP “Add”. -
Page 50: Emailing A Hub Backup
eMailinG a hub baCkuP TAP the menu. TAP “Hub Info”. TAP “Hub Backups”. TAP the desired Backup from the list of backups. TAP “Email Backup”. Note: Once the Email screen loads, the backup file to be sent will load as an attachment to the email. -
Page 51: Restoring A Hub Backup
resTorinG a hub baCkuP TAP the menu. TAP “Hub Info”. TAP “Hub Backups”. TAP the desired Backup from the list of backups. TAP “Restore Backup”. TAP Restore Backup. Note: Once a backup is restored, a “Success” message will appear. TAP “Finish”. VIDEO INSTRUCTION –... - Page 52 PowerView Scene Controller – 52 –...
-
Page 53: Adding A New Scene Controller
addinG a new sCene ConTroller From the Scenes screen, TAP the menu. TAP “Scene Controllers” . TAP “Add a New Controller”. FOLLOw the series of on-screen instructions for pairing a Scene Controller to your PowerView Shade Network. Once a “Success!” message appears on the Scene Controller and then the App, TAP “Continue”... -
Page 54: Configuring Scenes In A Scene Controller
ConfiGurinG sCenes in a sCene ConTroller A Scene Controller does not create Scenes. Scenes previously configured in the PowerView App can be added to or removed from a Scene Controller, as desired. From the Scenes screen, TAP the menu. TAP “Scene Controllers”. TAP the desired Scene Controller. - Page 55 TAP “update your Scene Controller to save changes”. FOLLOw the series of on-screen instructions to update the Scene Controller to include new scene changes. TAP “OK”. TAP the (<) Back button. TAP “Done”. VIDEO INSTRUCTION – 55 –...
-
Page 56: Operating Scenes With The Scene Controller
oPeraTinG sCenes wiTh The sCene ConTroller PRESS “Select” on the Scene Controller to activate the Scene Controller. PRESS the < (Left) and > (Right) arrows to scroll through the available Scenes. PRESS “Select” to operate the desired Scene. NOTE: Once a Scene has been selected for operation, its name will blink on the OLED menu screen to indicate that the signal has been sent to the Hub. -
Page 57: Frequently Asked Questions
Troubleshooting and Frequently Asked Questions – 57 –... - Page 58 RS-232 serial input or IP (Internet protocol). Q: What are the available colors for the PowerView Pebble? A: The PowerView Pebble is available in a variety of on-trend colors and finishes. Black Matte, Citron, Clear Frost, Cobalt, Pewter Frost, Poppy and White.
- Page 59 Pairing, on the other hand, does not copy a remote’s Groups or Favourite information to another remote. Instead, pairing places multiple remotes on a unified PowerView Shade Network for the home. PowerView Pebble Remote and PowerView Surface Remote Q: Can I use my PowerView Pebble Remote or PowerView Surface Remote to operate my PowerRise shades? ®...
- Page 60 ® A: A Favourite position can be created and set for each of the six group buttons on the PowerView Pebble Remote or PowerView Surface Remote. The Favourite button is a quick and easy way to send shades to a specific, pre-set position. There is one Favourite position per shade that comes pre-set at 50%.
- Page 61 Q: Are there any service fees associated with App features? A: Hunter Douglas does not charge any additional fees for App updates. For features that use your mobile wireless network, check with your carrier for data rate charges that may apply.
-
Page 62: Troubleshooting
TroubleshooTinG ISSUE Some PowerView™ window treatments do not respond to commands from my PowerView remote (ie., Pebble Remote, Surface Remote or a combination). ® Cause Solution The window covering in 1. CHECK all wires and cables for loose connections. VErify that correct question does not have power supply is being used and is plugged in. - Page 63 TroubleshooTinG ISSUE My PowerView™ App can only Discover window covering in one room, but not in any others. I have remotes for all the rooms, and they operate the window covering in those rooms correctly. Cause Solution The window covering in 1.
- Page 64 TroubleshooTinG ISSUE I have a remote and a PowerView™ Hub. I was able to Discover my PowerView window covering using the App, but now I cannot operate any window treatments from the App. Cause Solution The mobile device running 1. CLOSE OUT of the PowerView App. the PowerView App is 2.
- Page 65 TroubleshooTinG ISSUE continued... I have a remote and a PowerView™ Hub. I was able to Discover my PowerView window treatments using the App, but now I cannot operate any window covering from the App. Cause Solution A 12-second reset has been 1.
- Page 66 ISSUE The batteries in my showroom Pebble Remote(s) don’t last long. ® Cause Solution The remote is not 1. Preserve battery life by keeping the remote in a location where it will not frequently used but it be moved inadvertently. This will prevent the auto-wake feature from is placed or located turning the backlights on and draining the batteries.
- Page 67 Hunter Douglas Australia 338 Victoria Rd Rydalmere, NSW, 2116, Australia PowerView has been certified as complying with ACMA’S regulatory requirements.
Need help?
Do you have a question about the PowerView Pebble and is the answer not in the manual?
Questions and answers