Chapters
Table of Contents

Related Manuals for Samsung R9600 Series


Summary of Contents for Samsung R9600 Series
- Page 1 Range Hood Hotte de la cuisine Campana de cocina Installation Instructions Guide Guide d’instructions d’installation Guía de Instrucciones para Instalación NK36R9600CS/AA NK36R9600CM/AA LIB0148500...
-
Page 2: Table Of Contents
Table of Contents Important Safety Instructions Installation Requirements Electrical Requirements Venting Requirements Venting Methods Tools and Parts Dimensions and Clearances Installation Installation Instructions Wall Installation Mounting the hood Install Range Hood Internal Blower Motor Electrical Connection Complete Installation Range Hood Use Range Hood Description Range Hood Controls Range Hood Care... -
Page 3: Important Safety Instructions
Important Safety Instructions APPROVED FOR RESIDENTIAL APPLIANCES FOR RESIDENTIAL USE ONLY READ AND SAVE THESE INSTRUCTIONS PLEASE READ ENTIRE INSTALLATION GUIDE BEFORE PROCEEDING. INSTALLATION MUST COMPLY WITH ALL LOCAL CODES. IMPORTANT: Save these Instructions for the Local Electrical Inspector’s use. INSTALLER: Please leave these Instructions with this unit for the owner. - Page 4 Important Safety Instructions WARNING WARNING TO REDUCE THE RISK OF FIRE, ELECTRIC SHOCK, OR INJURY TO TO REDUCE THE RISK OF A RANGE TOP GREASE FIRE: PERSONS, OBSERVE THE FOLLOWING PRECAUTIONS: ■ Never leave surface units unattended at high settings. Boilovers cause smoking and greasy spillovers that may ignite.
-
Page 5: Installation Requirements
Installation Requirements Electrical Requirements Venting Methods IMPORTANT To use the hood’s top outlet to vent your hood, a 10” (25.4 cm) round Observe all governing codes and ordinances. vent system is required.This vent systems are not included and must be purchased separately. -
Page 6: Tools And Parts
Installation Requirements Tools and Parts Dimensions and Clearances Removing the packaging CAUTION Remove the carton carefully. Wear gloves to protect against sharp edges. WARNING Remove the protective film covering the product before putting into operation. Parts supplied • Hood assembly with blower and LED lamps already installed. •... -
Page 7: Installation
Installation Installation Instructions Rear Installation Diagram We recommend that a qualified technician install the range hood. It is the Use the diagram or the hood as a template and mark the locations on the installer’s responsibility to ensure the range hood complies with the instal- wall for electrical wiring and keyhole screws slots. -
Page 8: Wall Installation
Installation Wall Installation 7. Line the top of the wood support up with the wood support location line on the wall, and then center it on the center line. WARNING 8. Locate the marks for the studs, and then draw two vertical lines USE TWO OR MORE PEOPLE TO MOVE AND INSTALL THE RANGE on the wood support marking where the studs intersect with the HOOD. -
Page 9: Mounting The Hood
Installation 3. Drill a 1 ⁄ ” (3.2 cm) hole at this location. 4. Pull enough power supply cable through the wall to allow for easy connection to the terminal box. 5. Remove the terminal box cover and set aside. 6. -
Page 10: Electrical Connection
Installation Electrical Connection 3. Push the right end of the motor mounting plate up, and then snap it into the spring tab. NOTE: The spring tab should be outside the slot in the mounting WARNING plate. ELECTRICAL SHOCK HAZARD. DISCONNECT POWER BEFORE SERVICING. REPLACE ALL PARTS AND PANELS BEFORE OPERATING. -
Page 11: Range Hood Use
Press again and the hood fan will return to sleep mode. The Auto Heat-Sensing feature does not require the hood to be con- B. LOW nected via Bluetooth with a compatible Samsung cooktop. • Press the LOW button and the hood will be turn on at Low speed. - Page 12 COOKTOP AND RANGE HOOD CONNECTIVITY 1. Press the Auto Connectivity button to activate the function. This appliance has a feature which allows you to pair compatible Samsung 2. The hood will turn on/off automatically when you turn cooktop cooktops and your hood via Bluetooth.
-
Page 13: Range Hood Care
Range Hood Care Cleaning 3. Remove the drip tray from the drip tray bracket. Exterior surfaces: To avoid damage to the exterior surface, do not use steel wool or soap- filled scouring pads. Do not use chlorine based cleaners. Rub in the direction of the grain line to avoid scratching the surface. -
Page 14: Warranty (Usa)
SAMSUNG’s authorized service center. REVENUE OR PROFITS, FAILURE TO REALIZE SAVINGS OR SAMSUNG will repair or replace this product, at our option and OTHER BENEFITS, OR ANY OTHER SPECIAL, INCIDENTAL OR at no charge as stipulated herein, with new or reconditioned... -
Page 15: Warranty (Canada)
WITH RESPECT TO THIS PRODUCT SHALL BE BINDING ON SAMSUNG will repair or replace this product, at our option and SAMSUNG. SAMSUNG SHALL NOT BE LIABLE FOR LOSS OF at no charge as stipulated herein, with new or reconditioned... - Page 16 Sommaire Importantes Consignes de Sécurité Exigences d’Installation Spécifications Électriques Exigences Concernant l’évacuation Méthodes d’évacuation Outils et Pièces Dimensions et Espaces Installation de la Hotte Instructions d´installation Installation sur le mur Montage de la hotte Installation du moteur interne de la hotte Utilisation de la hotte Conexion Électrique Achever l`ínstallation...
-
Page 17: Importantes Consignes De Sécurité
Importantes Consignes de Sécurité APPROUVÉ POUR LES APPAREILS DE TYPE RÉSIDENTIEL POUR UNE UTILISATION RÉSIDENTIELLE SEULEMENT LISEZ CES INSTRUCTIONS ET CONSERVEZ-LES VEUILLEZ LIRE CES INSTRUCTIONS AU COMPLET AVANT DE COMMENCER. L’INSTALLATION DE L’APPAREIL DOIT RESPECTER TOUS LES CODES EN VIGUEUR. IMPORTANT: Conservez ces instructions afin de pouvoir les remettre à... - Page 18 Importantes Consignes de Sécurité AVERTISSEMENT AVERTISSEMENT POUR RÉDUIRE LE RISQUE D’INCENDIE, CHOC ÉLECTRIQUE POUR MINIMISER LE RISQUE D’UN FEU DE GRAISSE SUR LA CUI- OU DOMMAGES CORPORELS, RESPECTER LES INSTRUCTIONS SINIÈRE: ■ SUIVANTES: Ne jamais laisser un élément de surface fonctionner à puissance de ■...
-
Page 19: Exigences D'installation
Exigences d’Installation Spécifications Électriques Pour un fonctionnement efficace et silencieux: • Ne pas utiliser plus de trois coudes à 90°. IMPORTANT Observer les dispositions de tous les codes et règlements en vigueur. • Veiller à ce qu’il y ait une section droite de conduit de 24” (61 cm) ou plus entre les coudes, si on doit utiliser plus d’un raccord coudé. -
Page 20: Outils Et Pièces
Exigences d’Installation Outils et Pièces Dimensions et Espaces Enlever l’emballage ATTENTION Enlever délicatement le carton. Porter des gants pour se protéger des bords coupants. AVERTISSEMENT Enlever le film de protection recouvrant le produit avant de commencer l’opération. Outils et pièces •... -
Page 21: Installation De La Hotte
Installation Instructions d’installation Schéma d’installation par l’arrière de la hotte Nous recommandons qu’un technicien qualifié installe la hotte. Il est de Utilisez le schéma ou la hotte comme modèle et marquez les emplace- ments sur le mur pour le câblage électrique et les fentes pour vis en trou la responsabilité... -
Page 22: Installation Sur Le Mur
Installation 8. Retirez le support en bois à l’arrière de la hotte en desserrant les 2 Installation sur le mur vis de l’intérieur. ADVERTISSEMENT 9. Alignez le haut du support en bois avec la ligne d’emplacement du support en bois sur le mur, puis centrez-le sur la ligne centrale. UTILISER DEUX OU PLUS DE PERSONNES POUR DÉPLACER 10. -
Page 23: Montage De La Hotte
Installation 3. Percez un trou de 1 ⁄ po (3,2 cm) à cet endroit. 5. Installez les 4 vis (B) de 4,2,2 x 19 mm (0,17 x 0,75 po) à travers le dos du hotte dans le support en bois, puis serrez. 4. -
Page 24: Utilisation De La Hotte
Utilisation de la Hotte Connexion Électrique 4. Aligner les trous de montage, puis visser les vis de 6x16 mm et rondelles de blocage de 6,4 mm. ADVERTISSEMENT RISQUE DE CHOC ÉLECTRIQUE. DÉCONNECTER LA SOURCE DE COURANT ÉLECTRIQUE AVANT L’ENTRETIEN. REPLACER PIÈCES ET PANNEAUX AVANT DE FAIRE LA REMISE EN MARCHE. -
Page 25: Description De La Hotte
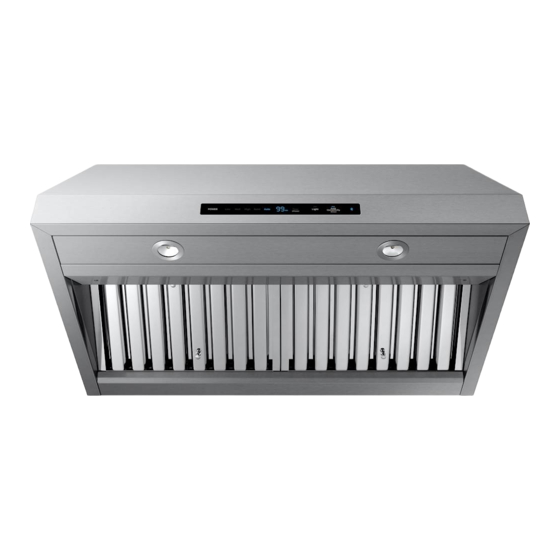
Utilisation de la Hotte Description de la hotte 1. Lampes DEL 2. Poignée du filtre à graisse 3. Filtre à graisse 4. Control Commandes de la Hotte A. Mise en marche Affichage du minuteur B. Vitesse Basse H. Minuteur C. Moyenne (MED) I. - Page 26 J. La Connection automatique La fonction de connexion automatique vous permet de connecter rapide- ment la hotte via Bluetooth avec une table de cuisson Samsung compat- ible une fois que la hotte et la table de cuisson aient été synchronisées.
-
Page 27: Entretien De La Hotte
Entretien de la Hotte Nettoyage 4. Placez le support du plateau d’égouttement à l’aide des vis fournies. Surfaces externes: Afin d’éviter d’endommager la surface externe, ne pas utiliser de tampons en laine d’acier ou de tampons à récurer savonneux. Ne pas utiliser de nettoyants à... -
Page 28: Garantie (Usa)
OU DE PROFITS DEFAUT DE REALISER DES ECONOMIES OU Garantie limitée à l’acheteur d’origine AUTRES AVANTAGES OU TOUT AUTRE DOMMAGES SPE- Ce produit de la marque SAMSUNG, qui est fourni et distribué CIAUX, DIRECTS OU INDIRECTS CAUSES PAR L’UTILISATION, par la société Samsung Electronics America, Inc. (SAMSUNG) MAUVAISE UTILISATION OU L’INCAPACITE D’UTILISER CE... -
Page 29: Garantie (Canada)
PERSONNE ENTREPRISE OU SOCIETE EN MATIERE DE CE Garantie limitée à l’acheteur d’origine PRODUIT EST OBLIGATOIRE SUR SAMSUNG. SAMSUNG NE Ce produit de la marque SAMSUNG, qui est fourni et distribué SERA PAS RESPONSABLE POUR LA PERTE DE REVENUS par la société Samsung Electronics Canada, Inc. (SAMSUNG) OU DE PROFITS DEFAUT DE REALISER DES ECONOMIES OU et livré... - Page 30 Índice Instrucciones Importantes de Seguridad Requisitos de Instalación Requisitos Eléctricos Requisitos de Ventilación Métodos de Ventilación Herramientas y Piezas Dimensiones del producto Instalación de la campana Instructions de instalación Instalación en la pared Montaje de la campana Instale el motor interno de la campana Uso de la campana Conexión eléctrica Complete la instalación...
-
Page 31: Instrucciones Importantes De Seguridad
Instrucciones Importantes de Seguridad APROBADO PARA APARATOS DE USO DOMÉSTICO SÓLO PARA USO DOMÉSTICO LEA Y GUARDE ESTAS INSTRUCCIONES ANTES DE CONTINUAR, LEA LAS INSTRUCCIONES POR COMPLETO. LA INSTALACIÓN DEBE CUMPLIR CON TODA LA NORMATIVA LOCAL. IMPORTANTE: Guarde estas instrucciones para su uso por parte del inspector de electricidad local. - Page 32 Instrucciones Importantes de Seguridad ADVERTENCIA ADVERTENCIA PARA REDUCIR EL RIESGO DE INCENDIOS, CHOQUE ELÉCTRICO O PARA REDUCIR EL RIESGO DE INCENDIO PROVOCADO POR GRASA LESIONES A PERSONAS, OBSERVE LO SIGUIENTE: EN LA SUPERFICIE DE LA ESTUFA: ■ ■ Use esta unidad sólo de la manera para la que fue diseñada por el Nunca deje las unidades de superficie sin vigilancia cuando estén en fabricante.
-
Page 33: Requisitos De Instalación
Requisitos de Instalación Requisitos Eléctricos Para obtener el funcionamiento más eficaz y silencioso: IMPORTANTE • No use más de 3 codos de 90°. Observe todos los códigos y reglamentos aplicables. Asegúrese de que haya un mínimo de 30” (76.2 cm) de ducto de •... -
Page 34: Herramientas Y Piezas
Requisitos de Instalación Herramientas y Piezas Dimensiones del producto Retirar las piezas del empaque PRECAUCIÓN Quite la caja cuidadosamente. Use guantes para protegerse de los bordes afilados. ADVERTENCIA Quite la película de protección que cubre el producto antes de ponerlo en funcionamiento. -
Page 35: Instalación De La Campana
Instalación Instrucciones de Instalación Salida posterior Usar el diagrama o la campana como plantilla y marcar los puntos en el muro para el trabajo del conducto, la instalación eléctrica y las ranuras de • Se recomienda que el sistema de ventilación sea instalado antes de los tornillos de instalación. -
Page 36: Instalación En La Pared
Instalación 8. Retire el soporte de madera de la parte posterior de la campana Instalación en la pared aflojando los 2 tornillos del interior. ADVERTENCIA 9. Alinee la parte superior del soporte de madera con la línea de ubicación del soporte de madera en la pared, y luego céntrela en la USE DOS O MÁS PERSONAS PARA MOVER E INSTALAR LA línea central. -
Page 37: Montaje De La Campana
Instalación 2. Determine la ubicación donde el cable de alimentación se ejecutará a través de la pared. 3. Perfore un orificio de 1 ⁄ ”(3,2 cm) en esta ubicación. 4. Tire del cable de alimentación suficiente a través de la pared para permitir una fácil conexión a la caja de terminales. -
Page 38: Conexión Eléctrica
Instalación Conexión eléctrica 3. Empuje hacia arriba la parte frontal del ensamble de motor y atórelo en el clip de montaje. NOTA: El clip de montaje debe estar por fuera de la ranura del ADVERTENCIA ensamble motor. PELIGRO DESCARGA ELÉCTRICA. DESCONECTE EL SUMINISTRO DE ENERGÍA ANTES DE DARLE MANTENIMIENTO. -
Page 39: Uso De La Campana
Uso de la Campana Complete la instalación Descripción de la campana Vuelva a colocar los filtros. Verifique el funcionamiento de la campana. Si la campana extractora no funciona: • Compruebe si el disyuntor está desconectado o se han fundido los fusibles. - Page 40 NOTA • Configurar el temporizador de apagado. Sólo las parrillas disponibles de la marca Samsung pueden utilizar esta Para más información acerca de cómo bajar la aplicación Smart Things función. a su dispositivo móvil y usarlo para controlar su campana, visite www.samsung.com.
-
Page 41: Mantenimiento
Mantenimiento Limpieza 5. Lave los filtros metálicos y las graseras en lavaplatos o con solución jabonosa caliente. Superficies exteriores Vuelva a colocar las graseras. Para evitar el daño en las superficies externas, no use 7. Reinstale los filtros. estropajos de acero ni jabonosos. No use limpiadores de base de cloro. -
Page 42: Garantía (Usa)
GARANTÍA EXPRESADA O GARANTÍA DADA POR ALGUNA izado por SAMSUNG . El recibo de compra original con fecha PERSONA, FIRMA O CORPORACIÓN CON RESPECTO A ESTE deberá ser presentado como prueba de compra a SAMSUNG o PRODUCTO SERÁ... -
Page 43: Garantía (Canada)
LIMITADA NO SERA EXTENDIDA A NINGÚN OTRO MÁS QUE AL por SAMSUNG . El recibo de compra original con fecha deberá COMPRADOR ORIGINAL DE ESTE PRODUCTO NO ES TRANS- ser presentado como prueba de compra a SAMSUNG o al cen- FERIBLE Y DECLARA SU RECURSO EXCLUSIVO. - Page 44 LIB0148500 Printed in Mexico 02/19...