
Related Manuals for Luxair LA-60-1100 STD


Summary of Contents for Luxair LA-60-1100 STD
- Page 1 Operating and installation instructions All models: Directions For Use To avoid the risk of accidents or damage to this appliance It is essential to read these Instructions before it is installed ©® copyright luxair UK Ltd 2007 and used for the first time.
-
Page 2: Table Of Contents
Installation for OC hoods_____________________________27 Installation all Island hoods_________________________ 28 31 Changing the bulbs all models_______________________32 -33 Problem solving all models_________________________34 –38 Remote control operated hoods_________________________39 Luxair help line_____________________________________ 40 Cleaning and care________________________________41 – 42 Hood heights maximum and minimum___________________ 43 Warranty Form ________________________________44... -
Page 3: Caring For The Environment
Caring for the environment Disposal of your old appliance Disposal of the packing material Electrical and electronic appliances The transport and protective packing often contain materials that, if has been selected from materials, which handled or disposed of incorrectly, are environmentally friendly for could be potentially hazardous to disposal, and can normally be recycled. -
Page 4: Technical Safety
(e.g. electric shock). This appliance is intended for domestic use only. Installation, maintenance and Luxair cannot be held liable for repair work may only be carried out damage caused by improper or by a suitably qualified and competent incorrect use of the appliance. -
Page 5: Warning And Safety Instructions
Warning and Safety instructions The appliance is only completely taking a pan off the hob, even for isolated from the electricity supply brief periods. when: – It is switched off at the wall socket Regulate the flames so that they do and the plug withdrawn, not extend beyond the base of the pan. - Page 6 These can be obtained from the the lamps at all times. For Luxair web site or from local builders' instructions on changing bulbs, merchants. please refer to maintenance sector in this booklet.
- Page 7 Warning and Safety instructions Using at the same time as other In order to ensure safe operation, and heating appliances that depend on to prevent gases given off by the the air from the room heating appliances from being drawn back into the room when the extractor and the heater are in operation simultaneously, an under pressure in the...
- Page 8 Warning: be less efficient. Luxair will not exchange or repair damaged hoods caused by incorrect Never reduce the diameter of the ducting being fitted, the minimum ducting, e.g. where narrower ducting ducting must not be smaller than has already been installed.
- Page 9 60cm please set the minimum height to 750mm. Warning: Luxair will not cover the warranty if you have installed the cooker hood on either, 100mm ducting, or an old or existing ducting used by a previous appliance.
-
Page 10: Cutting Down Chimney Sections
Cutting Down Chimney Sections Luxair recommend that the Warning: following procedure be carried out Luxair cannot be held liable for damage by a qualified and competent caused by carelessness when modifying person, cutting the extended the chimney sections; any modification... - Page 11 Ducting kits are used to vent you’re kitchen odors to the outside of the house, and we recommend that only Luxair ducting kits are used with our products, this will also assure you that the product’s warranty is not affected.
- Page 12 Cooker hoods that are not to be vented to outside walls Please note that if the hood is not to be vented to an outside wall, the top section of the hood with the vents must be used, this allows the filtered air back into the room.
- Page 13 5) You must use either a ducting kit or charcoal filters with all Luxair hoods. 6) All filters and ducting kits can be purchased from our web...
- Page 14 Standard Wall Mounted Hoods, STD, RND, OC...
- Page 15 STD/RND Parts to the appliance Wall Bracket Top Chimney Section with Vents Bottom Chimney Section Reducer Main Body fixing screws Press the button 1 to start the fan running on low, then increase to level 2 or 3 depending on cooking levels. When the fan runs at power level 1.
- Page 16 Make sure that the fixings are adequate for the type of surface you are fixing to. Luxair provide some screws but they may need changing depending on the type of wall you have, if you are in any doubt then seek professional advice.
- Page 17 Fitting Instructions Applies To All Chimney Wall Hoods Mark the height and position of your ducting hole; this should be a minimum distance from top o the hood to the center of your hole 400mm, (see page 11). Remove the hood of the wall before drilling the ducting position;...
- Page 18 Fitting Instructions Apply To All Wall Mounted Hoods Once all electrical and ducting has being connected and tested proceed to assemble the chimney sections, place the bottom part of the chimney into the body of the hood, no fixings are required as the grooves secure this part, slide the top section into the bottom section of the chimney, taking care not to...
- Page 19 See page 10. Metal grease filters are designed to last the life of your hood and can be purchase direct from Luxair should they become damaged. These filters can be cleaned in your dishwasher in the upright position or by hand washing in soapy hot water only.
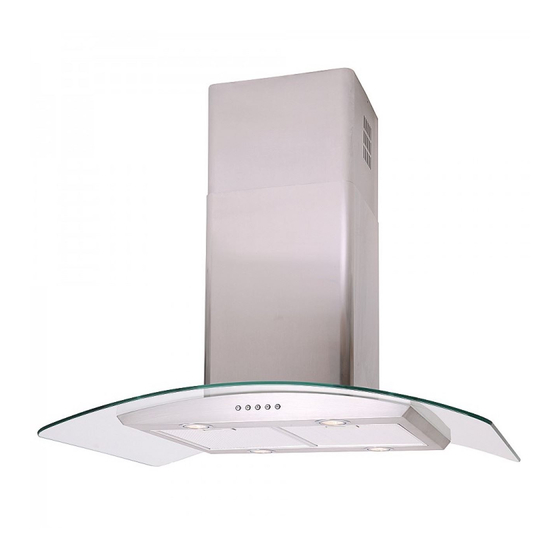
- Page 20 CVD-ST MODELS Curved Glass and Straight Glass Wall Mounted Units...
- Page 21 CVD-ST Wall Mounted Models 1. Wall Bracket 2. Top Chimney Section 3. Bottom Chimney Section 4. Reducer Collar 5. Body Section 6. 8mm Safety Glass 7. Fixing Screws Fitting the charcoal filter: Remove the metal grease filter to reveal the inner flue section. Make sure all wires are pushed to one side preventing snagging.
- Page 22 Glass Wall Mounted Units. Follow Fitting Instructions 1- 9 on Pages 18-20 After following instructions 1-9 on pages 18-20 continue with this section for the rest of the fitting of this hood. Once the hood is assembled and checked, place your glass directly on top of the main body section, line up with the screw holes and secure with screws and washers.
-
Page 23: Operating Your Hood
Operating your hood: Electronic switches 1: select speed one to activate your fan, then speed 2 and so on. 2: to turn on the lights press the light switch. 3: The T button is a timer switch, when presses the T button will start to flash! This means you have activated the timer unit, your hood will turn its self of after 20mins, to cancel this simply press the T button again. - Page 24 Octagonal Wall Units Follow Fitting Instructions 1- 9 On Pages 18-20...
- Page 25 Fitting the square filters Remove the metal grease filter to reveal the inner flu section. Make sure all wires are pushed to one side preventing snagging. Offer the filter to the bottom and back the flu section and insert into back L-shaped bracket.
- Page 26 Installation All Island Hoods Octagonal, Curved Glass, Please note: All Luxair Islands are Straight Glass, Oval And Black installed in exactly the same manner and it is only the shape and design that differ, please use the following steps for all Island unit models.
- Page 27 Installation All Island Hoods Ceiling Position the inner top section of the upper arm directly on the ceiling and above your hob and mark the center hole, also mark fixing positions. Make sure you are center to your hob. Make sure that your fixings will hold at least 75kg in weight;...
- Page 28 Installation All Island Hoods Before you go any further assemble the glass (applicable to glass units only) over the main body of your hood and secure with screws and washers (provided). Do not over tighten these screws as you may cause the glass to shatter.
- Page 29 Installation All Island Hoods When you have selected the correct height above your hob secure the inner bottom section of the flue, to the inner top section of the flue in the fixing positions as opposite. Your cooker hood should now be secure.
-
Page 30: Changing The Bulbs
Changing The Bulbs Ball Lights We at Luxair are constantly modifying and upgrading our products it is therefore recommended you check your appliance to identify the type of light fittings installed. Warning: Please make sure that the Removing the bulb, see fig 2:... - Page 31 Changing The Bulbs Screw Bulbs Surface lights Remove the metal grease filters from your hood to expose the light fitting located at the back of your hood,(this only applies to standard hoods) Never try to remove the light fitting from your hood, to remove the bulb twist the metal ring anticlockwise, the metal ring and the glass will fall loose take care that you do not break...
- Page 32 If the ducting is connected to the inside of the collar this is incorrect and must be replaced with 125mm duct. Remove the chimney section to Luxair are not liable for incorrect your ducting or installation problems.
- Page 33 If yes, then you need to contact the person who installed your hood. Luxair are not Please note that extra noise levels can be a problem when responsible for ducting problems.
- Page 34 Before You Call Us (Non Ducted) If your cooker hood is not ducted to Purify the air; they also help to an outside wall and you are prevent grease build up on the motor experiencing vibration, then please fan blades. check the following.
- Page 35 Before You Call Us (poor Extraction) Poor extraction is caused by a Pleas note: number of reasons, below are some Luxair install motors as stadered 650 tips and hints to help eliminate such cbm ph motors, in most domestic problems.
- Page 36 Never install Luxair hoods with ducting smaller than 125mm, if you are replacing an existing extractor, never use the old ducting system...
- Page 37 Luxair cannot unit is new. be held liable for units that are affected by this. If in doubt seek advice.
-
Page 38: Luxair Help Line
Luxair Help Line UK We at Luxair are here to help, if you NOTES:……………………………… need any assistance or advise on ………………………………………… installing your new hood, please call ………………………………………… our UK help line. ………………………………………… ………………………………………… ………………………………………… ………………………………………… ………………………………………… ………………………………………… ………………………………………… …………………………………………... -
Page 39: Cleaning And Care
– the screw-out fuse is removed (in controls). countries where this is applicable). Stainless steel surfaces can be cleaned using the Luxair E-Cloth, or with a General notes proprietary non-abrasive cleaning agent designed specifically for use on The surfaces and controls are stainless steel. - Page 40 Cleaning the grease filter by hand Please observe the General notes on cleaning. • Clean the filter with a soft nylon brush in a mild solution of hot water and a little washing-up liquid. Do not use stainless steel cleaning Do not use "neat"...
- Page 41 10 for further instructions on this procedure. Luxair cannot be held liable for damage caused by cutting or altering the above standard heights, cutting or altering the above hoods STD HOOD is done so at your own risk.
- Page 42 Electrical Connections When switched off there must be an All electrical work should be all-pole contact gap of 3 mm in the undertaken by a suitably qualified switch (including switch, fuses and and competent person in strict relays according to EN 60335). accordance with current national and local safety regulations If the switch is not accessible after...
- Page 43 Technical data Fan performance wall mounted Total connected load* ..240 W hoods − Fan motor*....200 W Extraction power according to −...
-
Page 44: Warranty Form
--------------------------------------------------------------------------------------------------------------- Serial Number: Model Number: Please note: this box must have the correct serial number and model number in order To activate your warranty, this form must also be returned to Luxair within 31days After installation. Purchase Details: -------------------------------------------------------------------------------------------- Purchased From: Date Purchased: See back page for address details. - Page 45 Luxair will not accept returned goods for credit if purchased by you in error, we will refund in full or replace damaged or faulty goods only if installation has not taken place, goods that have been installed...
- Page 46 Lux Air UK, Lux Air House, Unit 2 & 5, Keld Close Barker Business Park, Melmerby, Ripon North Yorkshire HG4 5NB OO44 (0) 1765 641888 Telephone: 0044 (0)1765 641889 0044 (0) 1765 641888 Help Line Email: info@luxairhoods.com Web: www.luxairhoods.com Alteration rights reserved / 1306 M.-Nr.
Need help?
Do you have a question about the LA-60-1100 STD and is the answer not in the manual?
Questions and answers
The 4 Lights stopped working at the same time. Is there an internal fuse