Advertisement
Table of Contents
- 1 Table of Contents
- 2 Precautions for Safe Use
- 3 Terms of Parts
- 4 How to Disassemble : Chamber
- 5 How to Prepare Ingredients / Use by Strainer Types
- 6 How to Assemble
- 7 Cautions During Operation
- 8 How to Use
- 9 How to Use Control Lever (by Mode/By Ingredients)
- 10 When Squeezing Screw Stops During Operation
- 11 Caution When Using Operation Button
- 12 How to Clean
- 13 Before Requesting Repair
- 14 Product Specifications / Warranty
- Download this manual
CONTENTS
02
04
06
07
08
13
14
15
17
18
20
24
(Household use only / Warranty Included)
1 Read 'Precautions for safe use' (Page 2) and use the appliance properly.
2 After finish reading the manual, keep it in a convenient location for future reference.
3 Do not use it abroad which has different power supply and voltage.
4 Any quality improvements are subject to change without notice.
TM
H-AA Series
Advertisement
Table of Contents

Subscribe to Our Youtube Channel
Summary of Contents for HUROM H-AA Series
-
Page 1: Table Of Contents
H-AA Series CONTENTS Precautions for Safe Use Terms of Parts How to Disassemble : Chamber How to Prepare Ingredients / Use by Strainer Types How to Assemble Cautions during Operation How to Use How to Use Control Lever (by mode/by ingredients) -
Page 2: Precautions For Safe Use
PrecAutIonS for SAfe uSe 1. You should read <Precautions for safe use>. Caution When violating the labeling requirement, it may cause serious injury or damage to the appliance. 2. You should follow <Precautions for safe use>. 3. Precautions are classified as following. Do not operate without locking the hopper properly. -
Page 3: Terms Of Parts
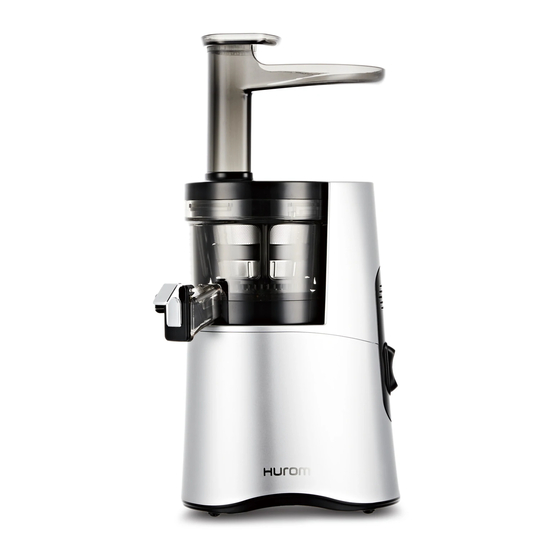
* These components may vary depending on the model. termS for PArtS * Some parts(Coarse Strainer, Ice Cream Strainer) can be optional for each model. Safety Sensor ( ) Pusher Body Pusher hook Operating switch Body bump Shaft Hopper Hopper Chute Safety Sensor ( ) Pulp container Squeezing Screw... -
Page 4: How To Disassemble : Chamber
How to disassemble the chamber How to trim the ingredients * This is a reference about how to trim the ingredients, so if you have allergy please choose your own proper ingredients. Please clean all the parts before first use. * Please refer to the recipe book for the product usage of each ingredient. -
Page 5: How To Assemble
How to assemble the chamber for juicing Place the assembled parts from Assemble the hopper like Press the squeezing screw into [SteP 1] into the chamber by the picture. After putting the Assemble the strainer and spinning the assembled parts from turning the strainer from side hopper on the chamber, turn brush as shown in the picture. - Page 6 How to assemble the chamber for making ice cream note Assemble the chamber and ice cream Assemble the hopper like the Press the squeezing screw into strainer. picture. After putting the hopper on the assembled parts from [SteP 1] The spinning brush isn't needed Place the ice cream outlet align with the chamber, turn it clockwise until until the screw fits perfectly.
-
Page 7: Cautions During Operation
How to assemble the chamber set and body cautions during operation *The assembling method is same regardless of strainer type. Ingredients which needs caution. It may cause damage or failure. - Fruits with hard seeds such as persimmon, Japanese apricot, lemon, plum, peach etc. that are hard to chew with our teeth should be taken out before extraction. -
Page 8: How To Use
How to use : How to use control lever by mode for juicing / Ice cream Place the control lever into cLoSe The control lever is between the juice cap and pulp outlet. The control lever has various functions and can help to extract juice by characteristic of ingredients except extract function. ) position before operating. -
Page 9: When Squeezing Screw Stops During Operation
How to use control lever by ingredients (Juicing) When squeezing screw stops during operation Use the control lever by the properties of each ingredients, you can make a more delicious juice. Press [reV] button on the operating switch Ingredients for about 3~5 seconds and stop it. repeat this 2~3 times. -
Page 10: How To Clean
How to clean clean the parts Juice cap Packing Unplug the power cord with dry hands after Open the juice cap, hold the chamber and juice the unit has been completely stopped. cap with one hand, and remove the juice cap packing with your other hand to disassemble. -
Page 11: Before Requesting Repair
Before requesting for repair If you need additional information, please contact your local Customer Service Center or visit www.hurom.com. When applying for after-sales service, please have the manufacturer’s serial number or bar code available. 1. the main body itself will not work. - Page 12 Memo Memo...
-
Page 13: Product Specifications / Warranty
Hurom provides warranty for ten (10) years for the motor and two (2) years for other parts from the date of purchase by the original purchaser. Coverage is valid only with proof of purchase from an Authorized Local Distributor.


Need help?
Do you have a question about the H-AA Series and is the answer not in the manual?
Questions and answers