
Related Manuals for Fitness Reality 1000 Super Max

Summary of Contents for Fitness Reality 1000 Super Max
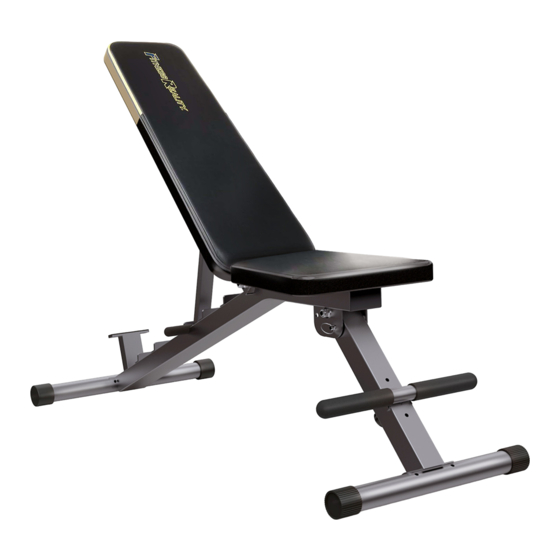
- Page 1 Bench IMPORTANT: Read all instructions carefully before using this product. Retain this owner’s manual for future reference. The specifications of this product may vary from this photo, subject to change without notice. 2804.6-021717...
- Page 2 PLEASE DO NOT RETURN THIS PRODUCT TO THE STORE. STOP and contact customer service if you have any questions regarding assembly or proper operation of the machine. Email us at: Service@paradigmhw.com Or call us at: 1-844-641-7920 Hours: 8:00 am to 5:00 pm (PST) Daily...
-
Page 3: Table Of Contents
TABLE OF CONTENT SERVICE ------------------------------------------------------------------------ 2 LABEL PLACEMENT --------------------------------------------------------- 3 IMPORTANT SAFETY GUIDELINES ------------------------------------ 4 OVERVIEW DRAWING ------------------------------------------------------ 5 PART LIST ---------------------------------------------------------------------- 6 HARDWARE & TOOLS PACK --------------------------------------------- 7 ASSEMBLY --------------------------------------------------------------------- 8 ADJUSTMENTS --------------------------------------------------------------- 11 TRANSPORTATION ---------------------------------------------------------- 14 WARRANTY -------------------------------------------------------------------- 15 PARTS REQUEST FORM--------------------------------------------------- 16... -
Page 4: Service
SERVICE IMPORTANT: FOR NORTH AMERICA ONLY For damaged or defective product, questions, replacement parts or any other service support, please contact our customer service department by the below methods: For The Best Service, please Email: service@paradigmhw.com Response Time: 1-2 Business Days Emailing us with the information above will be the best method to receive a response during peak business hours Website:... -
Page 5: Label Placement
LABEL PLACEMENT... -
Page 6: Important Safety Guidelines
IMPORTANT SAFETY GUIDELINES Read all instructions carefully before assembling and operating this product. This unit is designed with optimum safety in mind. Retain this owner’s manual, do not remove any safety labels from the machine, and keep the original purchase receipt for future reference. 1. -
Page 7: Overview Drawing
OVERVIEW DRAWING... -
Page 8: Part List
PARTS LIST Part # Description Q'ty Main Frame Front Support Tube Front Stabilizer Rear Stabilizer Rear Support Tube Backrest Support Tube Leg Holder Seat Backrest Hex Bolt M8x20mm Hex Bolt M8x50mm Carriage Bolt M8x60mm Hex Bolt M12xL90 Flat Washer Ø12xØ24x2 Spring Washer Ø8 Flat Washer Ø8xØ16x1.5 Curved Washer... -
Page 9: Hardware & Tools Pack
HARDWARE & TOOLS PACK... -
Page 10: Assembly
ASSEMBLY STEP 1 A. Rest the Bench on its side and completely pull out the Pin (105) from the bracket on the Main Frame (A). B. Pull the Front Support Tube (B) outwards and completely reinsert the Pin (105) into the first hole on the bracket of Main Frame (A). - Page 11 ASSEMBLY Tools: 19mm Wrench 2pcs STEP 2 A. Installing the Front Stabilizer: Lift up the Front Support Tube (B), and then align the Front Stabilizer (C) holes with the holes on the front curve of the Front Support Tube (B). The square holes of the Front Stabilizer (C) should point towards the floor.
- Page 12 ASSEMBLY STEP 3 A. Installing the Leg Holder: There are four holes down the Front Support Tube (B). They are for height levels. Pick one of the holes and insert the threaded end of the Round Knob (106) along with one Spring Washer (61) and one Flat Washer (64) through the back side. Align the Leg Holder (G) to the protruding threaded shaft of Round Knob (106).
-
Page 13: Adjustments
ADJUSTMENTS Adjusting the Front Support Tube Pull the Pin (105) out from the Main Frame (A) and swing the Front Support Tube (B) into one of the following positions: Position P1 gives a flat and level seat for working out. Position P2 gives an inclined seat for working out. - Page 14 ADJUSTMENTS Adjusting the Backrest Push the Backrest (J) upwards to lift the Rear Support Tube (E) off of the tabs that run along the rear shaft of the Main Frame (A). Then gently lower the Backrest (J) while guiding the Rear Support Tube (E) back into the new tab height so that your backrest angle is adjusted.
- Page 15 ADJUSTMENTS Tools: 19mm Wrench 2pcs 13,19mm Wrench 13, 19mm Wrench Loose Backrest If the Backrest (J) feels loose, shifting side to side use the two included 19mm Wrenches to tighten the Nylon Nuts (76).
-
Page 16: Transportation
TRANSPORTATION Transporting when the bench is set up: Lift up the Front Stabilizer (C) until the wheels on the Wheel End Caps (133) make contact with the ground, then move the bench to your desired location. Transporting In Storage Mode: Lift up the bench by holding the Seat (H) until the wheels on the Wheel End Caps (133) make contact with the ground, then move the bench to your desired location. -
Page 17: Warranty
WARRANTY MANUFACTURER’S LIMITED WARRANTY Paradigm Health & Wellness warrants to the original purchaser that this product is free from defects in material and workmanship when used for the purpose intended, under the conditions that it has been installed and operated in accordance with Paradigm’s Owner’s Manual. -
Page 18: Parts Request Form
PARTS REQUEST Paradigm Health & Wellness, Inc. EMAIL THIS FORM WITH YOUR RECEIPT OF PURCHASE TO Service@paradigmhw.com NAME:_____________________________________________________________ ________________________ ADDRESS:__________________________________________________________________________________ CITY:________________________ STATE:_____________ ZIP:_______________________________________ TELEPHONE: (Day)__________________________________________________________________________ (Night)________________________________________________________________________ SERIAL#:___________________________________________________________________________________ MODEL#:___________________________________________________________________________________ PURCHASE DATE:___________________________________________________________________________ PLACE OF PURCHASE:_______________________________________________________________________ PART # DESCRIPTION “YOUR ORDER WILL BE PROCESSED WITHIN 3 BUSINESS DAYS” * This form can also be faxed in Fax #: 626-810-2166...
Need help?
Do you have a question about the 1000 Super Max and is the answer not in the manual?
Questions and answers