Table of Contents
Advertisement
Advertisement
Table of Contents

Related Manuals for Rad Power Bikes RadRover

Summary of Contents for Rad Power Bikes RadRover
- Page 2 We take pride in bringing you a quality product that will offer years of enjoyment. Please read and understand this manual fully before assembling and riding your bike. If you have questions after reading this manual, please reference the Rad Power Bikes Help Center, contact us by email, and/or give us a call on the phone.
-
Page 3: Using This Manual
This manual contains details of the product, its equipment, and information on operation, maintenance, and other helpful tips for owners. Read it carefully and familiarize yourself with the RadRover before using it to ensure safe use and prevent accidents. Be sure to retain this manual as your convenient RadRover information source. -
Page 4: Table Of Contents
Table of Contents Using this Manual ..................................1 General Info .................................... 3 Assembly Instructions ................................7 Battery Charging ..................................15 Operation ....................................19 Maintenance ..................................33 Troubleshooting ..................................38 Warnings and Safety ................................40 Warranty ....................................44 Links to Assembly Video and Online Resources ........................46... -
Page 5: General Info
NOTICE: A critical aspect of assembling your bike by Rad Power Bikes is securing the front wheel and checking the tightness of the rear wheel axle nuts. All bikes by Rad Power Bikes use a quick release front wheel mounting mechanism and the rear wheel is bolted on. - Page 6 The electrical system on your RadRover offers various levels of power assistance and lighting for different operating conditions and user preferences. It is critical that you familiarize yourself with all aspects of your RadRover’s electrical system and check to see that it is working correctly before every ride. The front and rear brake levers contain safety power cutoff switches, which disable the hub motor’s assistance when applied, and both levers should be checked for correct operation.
- Page 7 Suspension, Handlebar, Grips, and Seat Adjustments The suspension fork on your RadRover will affect the handling of the bike so you MUST understand how it works before use. The suspension fork should be properly adjusted for your weight and terrain. Check to ensure the handlebar, handlebar stem, and seat post are properly fastened, aligned, and fitted to the user.
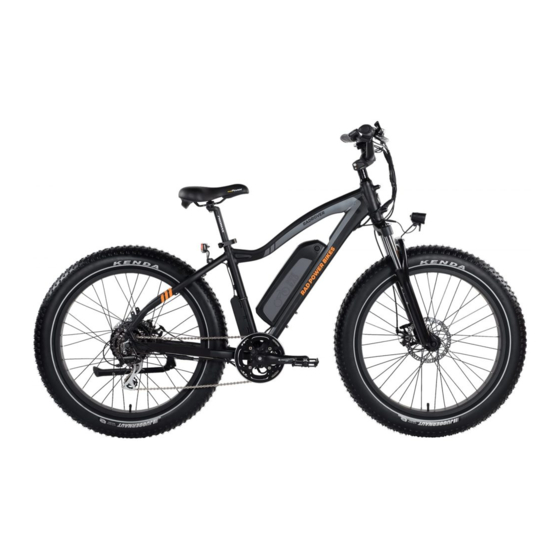
- Page 8 Fully Assembled RadRover...
-
Page 9: Assembly Instructions
Assembly Instructions NOTICE: The following assembly steps are only a general guide to assist in the assembly of your bike from Rad Power Bikes and is not a complete or comprehensive manual of all aspects of assembly, maintenance, and repair. We recommend you consult a certified, reputable bike mechanic to assist in the assembly, repair, and maintenance of your bike. - Page 10 Step 4: Inflate tires to desired PSI. Recommended pressure is 20 PSI (1.38 Bar) for the front and rear tires of the RadRover. Recommended tire pressure is indicated on the tire sidewall. Do not overinflate or underinflate tires. Step 5: Install the pedals.
- Page 11 STEP 7: Install Headlight as shown in assembly video from www.radpowerbikes.com/help. Carefully align and connect the waterproof connector joining the headlight to the wiring harness. The headlight should be adjusted to illuminate the road ahead and not blind oncoming traffic. The headlight is equipped with a light sensor which will automatically dim the headlight when riding during day to save power.
- Page 12 (ready for removal from the frame). NOTICE: If you have any questions regarding the assembly of your bike, contact Rad Power Bikes. If you are not able to ensure all the assembly steps in the assembly video are performed properly, or you are unable to view the assembly video, please consult a certified, reputable local bike mechanic for assistance in addition to contacting Rad Power Bikes for help.
- Page 13 Recommended Torque Values Hardware Location Hardware Torque Required (Nm) Handlebar Area Handlebar Stem Clamp Bolts Handlebar Area Stem Faceplate Bolts Handlebar Area Brake Lever Clamp Bolt Handlebar Area Shifter Clamp Screw Brakes Caliper Adapter to Frame Brakes Caliper to Adapter Brakes Brake Cable to Caliper Clamp Brakes...
- Page 14 Adjusting the Seat Height For most users, the seat height should be set by placing the ball of their foot on the pedal when the crank is at its lowest point. In this orientation their leg should almost be fully extended, with a slight bend at the knee. 1) Open the quick release lever by swinging the lever open and outwards about 180 degrees (depicted below, left).
- Page 15 Adjusting the Seat Position and Angle To change the angle and horizontal position of the seat: 1) Use a 6 mm Allen wrench to loosen the seat adjustment bolt (pictured at right) underneath the seat on the clamp positioned immediately underneath the seat, above the rear wheel.
- Page 16 Adjusting the Suspension Fork The RadRover comes equipped with an adjustable front suspension fork. This suspension fork can move up and down up to 80 mm to cushion bumps in the riding surface, which can make riding on a rough road or trail smoother and more comfortable.
-
Page 17: Battery Charging
Battery Charging Charging Procedure Follow these steps for charging your bike from Rad Power Bikes: 1. Turn the battery off by using the key. Insert the key into the key port (1, below) on the left side of the battery and rotate to align the key with the “OFF” icon located on the lock cylinder faceplate, the small circle with an “X”... - Page 18 If the battery is physically damaged, non-functional, preforming abnormally, or was dropped or involved in a crash, with or without obvious signs of damage, please discontinue use and charging and contact Rad Power Bikes immediately.
-
Page 19: Operation
Use caution to avoid damage to battery connector terminals, which are exposed when the battery is unlocked and removed from the frame of the bike. In the case of damage to the terminals or battery mounts, please discontinue use and contact Rad Power Bikes Technical Support immediately. When Installing the Battery onto the Bike o Ensure the battery is turned off before sliding the battery into the frame mount receptacle. - Page 20 Rad Power Bikes, designed for use with your specific bike serial number, as approved by Rad Power Bikes. o Do not charge the battery with any chargers other than the one originally supplied from Rad Power Bikes or a charger purchased directly from Rad Power Bikes, designed for use with your specific bike, as approved by Rad Power Bikes.
- Page 21 Long-Term Battery Storage If storing your bike from Rad Power Bikes for longer than two weeks at a time, follow the instructions below to maintain the health and longevity of your battery. o Charge (or discharge) the battery to approximately 75% charged.
- Page 22 Start-Up Procedure After the bike has been properly assembled following the assembly video, all components are secured correctly, and you have read this entire manual, you may turn the bike on and select a power level following the steps outlined below: 1.
- Page 23 Not taking care to familiarize yourself and practice the operation of the power system on your bike from Rad Power Bikes can...
- Page 24 Handlebar Features Location on Handlebar Component UP Arrow on LCD Display Remote MODE Button on LCD Display Remote DOWN Arrow on LCD Display Remote LCD Display Shifter Throttle Power Switch Throttle...
- Page 25 LCD Display Information The table and image below show the various features and information displayed on the LCD Display. Location Information on Display Battery Charge Indicator Distance (Odometer, Trip Odometer) Distance Unit (kilometers (km), miles (mi)) Speed Unit (kilometers per hour (Km/h), miles per hour (MPH)) Operation Mode Watt Meter, Error Code Indicator...
- Page 26 LCD Display Operations Operation Directions Turn ON bike Press and hold MODE (2) until power engages Turn ON Headlight, Taillight, and Press and hold MODE (2) and UP (1) until light illuminates LCD Display Backlight Activate Brake Light When bike is ON, squeeze Brake Lever Activate Flash Mode on Taillight When Bike and Taillight are ON, Press Rubber Button on Bottom Left of Taillight Housing...
- Page 27 Brake Light Features and Operations Starting in 2019, all bikes from Rad Power Bikes come equipped with a taillight/brake light that is integrated into the electrical system. Anytime the bike is powered on, depressing one or both brake levers on the handlebar should cause the brake light to illuminate.
- Page 28 Battery Capacity Display The LCD Display on the handlebars of your bike from Rad Power Bikes features a battery capacity gauge (like a fuel gauge on a car). This gauge calculates battery life based on the battery power output (instantaneous voltage reading) and can fluctuate while riding if power demand and/or output changes.
- Page 29 Driving Range The range of your bike from Rad Power Bikes is the distance the bike will travel on a single full charge of the onboard battery. The range values in this manual are estimates based on expected usage characteristics of bikes by Rad Power Bikes. Some of the factors which effect range include changes in elevation, speed, payload, acceleration, number of starts and stops, and ambient air temperatures.
- Page 30 MAXIMUM PAYLOAD CAPACITY FOR RADROVER The total maximum weight limit, or payload capacity, of the RadRover (275 lb or 125 kg) includes the weight of the rider as well as clothing, riding gear, cargo, etc. The RadRover is compatible with optional Rear Rack and Front Rack accessories that are not included in the base price of the bike and are available for purchase from www.radpowerbikes.com.
- Page 31 Carrying Loads section, do not overload the RadRover. The RadRover should never be operated by persons under the age of 18 years old. Children should not ride as passengers on the back of the RadRover unless they are seated in a properly fitted and approved Child Safety Seat.
- Page 32 Notice: The following bulleted list provides important additional tips for the safe operation of the RadRover when used for carrying children. o Increased weight from passengers will increase the time it takes to slow the bike when braking, please plan your stops accordingly.
- Page 33 Become proficient at controlling the RadRover with the cargo load in a flat and open area before riding on roads or hills. Do not use the front brake by itself. Use both brakes for all braking operations. Braking with only the front brake can cause excessive stress on components, damage to the bike and parts, and/or loss of control.
- Page 34 It is recommended to park indoors. If you must park outdoors in rain or wet conditions, you should only leave your bike from Rad Power Bikes outside for a few hours and proceed to park the bike in a dry location afterwards to allow all the systems to dry out.
- Page 35 Basic Bike Care To ensure safe riding conditions you must properly maintain your bike from Rad Power Bikes. Follow these basic guidelines and see a certified, reputable bike mechanic at regular intervals to ensure your bike is safe for use and fun to ride. See the Pre-Ride Safety Checklist and Recommended Service Intervals sections in this manual for more detailed information.
- Page 36 Pre-Ride Safety Checklist Notice: Before every ride, and after every 25-45 miles, we advise following the pre-ride safety checklist in the table below. Safety Check Basic Steps 1. Brakes Ensure front and rear brakes work properly. Check brake pads for wear and ensure they are not over-worn. Ensure brake pads are correctly positioned in relation to the rims.
- Page 37 Your cables, spokes, and chain will stretch after an initial break-in period of 50-100 mi (80-160 km), and bolted connections can loosen. Always have a certified, reputable bike mechanic perform a tune-up on your RadRover after your initial break-in period of 50-100 mi (80-160 km) (depending on riding conditions such as total weight, riding characteristics, and terrain).
- Page 38 Recommended Service Intervals Regular inspection and maintenance are key to ensure Rad Power Bikes function as intended, and to reduce wear and tear on their systems. Recommended service intervals are meant to be used as guidelines. Real world wear and tear, and the need for service, will vary with conditions of use.
- Page 39 Tire Inflation and Replacement The RadRover employs 26’’ x 4’’ rubber tires with inner tubes. The tires are designed for durability and safety for regular cycling activities and the tires need to be checked before each use for proper inflation and condition. Proper inflation, care, and timely replacement will help to ensure that your bike’s operational characteristics will be maintained, and unsafe conditions avoided.
-
Page 40: Troubleshooting
Troubleshooting Basic Troubleshooting Symptoms Possible Causes Most Common Solutions It doesn’t work 1. Insufficient battery power Charge the battery 2. Faulty connections Clean and repair connectors 3. Battery not fully seated in tray Install battery correctly 4. Improper turn on sequence Turn on bike with proper sequence 5. - Page 41 Error Detection Your bike from Rad Power Bikes is equipped with an error detection system integrated into the display and controller. In the case of an electronic control system fault an error code should display. The following error codes are the most common and can aid in troubleshooting.
-
Page 42: Warnings And Safety
Be careful at intersections and when preparing to pass other vehicles or other cyclists. o Familiarize yourself with all the features and operations of the bike by Rad Power Bikes. Practice and become proficient at shifting gears, applying the brakes, using the power assist system, and using the throttle in a controlled setting before riding in riskier conditions. - Page 43 A Note for Parents and Guardians As a parent or guardian, you are responsible for the activities and safety of your child. The RadRover is not designed for use by children. If you are carrying a passenger in a child safety seat, they must also be wearing a properly fitted and approved helmet.
-
Page 44: Warranty
Failure to review these notes can lead to serious injury or death. All users must read and understand this manual before their first use of the bike from Rad Power Bikes. Additional manuals for components used on the bike may also be provided and should be read before use in addition to this manual. -
Page 45: Wet Weather
Any aftermarket changes to your bike from Rad Power Bikes not expressly approved by Rad Power Bikes could void the warranty and create an unsafe riding experience. -
Page 46: Limited Warranty
Limited Warranty Warranty Info Every bike by Rad Power Bikes is covered under a manufacturer's one-year all-inclusive warranty for the original owner against all manufacturing defects. Rad Power Bikes warrants this product, including all individual components against defects in material or... - Page 47 Components of the RadRover are subject to higher wear when compared to bikes without power assistance. This is because the RadRover can travel at higher average speeds than regular cycles and has a greater weight. Higher wear is not a defect in the product and is not subject to warranty.
-
Page 48: Links To Assembly Video And Online Resources
Please visit the “Help Center” section of the Rad Power Bikes website (www.radpowerbikes.com/help) to view the official RadRover Assembly Video. Online Resources For more information on best practices, please visit the Rad Power Bikes website (www.radpowerbikes.com), Help Center (www.radpowerbikes.com/help), or contact our Rad Power Bikes Technical Support team with any questions.
Need help?
Do you have a question about the RadRover and is the answer not in the manual?
Questions and answers