Table of Contents
Advertisement
Advertisement
Table of Contents

Related Manuals for Billy Goat Hurricane Z3000


Summary of Contents for Billy Goat Hurricane Z3000
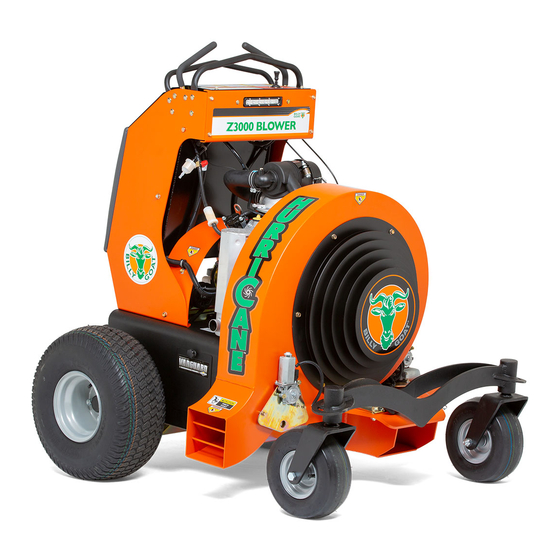
- Page 1 COMMERCIAL RIDE ON DEBRIS BLOWER Owner’s Manual Z3000 HURRICANE RIDE ON DEBRIS BLOWER Owner's Manual 5901807 Original Instructions IMPORTANT- READ CAREFULLY BEFORE USE AND KEEP FOR FUTURE REFERENCE 5107445 Copyright © Briggs & Stratton Corporation, Rev A Milwaukee, WI, USA. All rights reserved.
- Page 2 billygoat.com...
-
Page 3: Table Of Contents
Table of Contents TABLE OF CONTENTS IDENTIFICATION ................1 Product Identifi cation Tag ............1 INTRODUCTION ................2 Using Your Operator’s Manual ..........2 Safety Alert Symbol and Signal Words ........2 California Proposition 65 Statement ........2 SPECIFICATIONS ................3 SAFETY ..................... - Page 4 Table of Contents SERVICE ..................21 Service Intervals ..............21 Service Engine ................. 21 Checking Engine Oil Level ............22 Changing Engine Oil and Filter ..........23 Cleaning Engine Oil Cooler and Checking Air Filter ..... 23 Cleaning the Engine Oil Cooler ..........23 Checking Air Filter Elements ..........
-
Page 5: Identification
Identification Record your model number, serial number, and an- IDENTIFICATION gine model and serial number in the space provided for easy access. Product Identifi cation Tag The product identifi cation tag can be found on the left side of the engine deck. BRIGGS &... -
Page 6: Introduction
CAUTION indicates a hazard which, if not avoided, could result in minor or moderate injury. BILLY GOAT is a trademark of Billy Goat Industries, NOTICE indicates a situation that could result in Inc. damage to the product. -
Page 7: Specifications
Specifications SPECIFICATIONS Specifi cations are correct at time of printing and are subject to change without notice. ENGINE For complete engine specifi cations see the engine manufacturer’s operator’s manual included with your unit. Fits models: 5901807 Briggs & Stratton Briggs & Stratton Make 613477-0057-J1 Model... -
Page 8: Safety
Operator Safety SAFETY Check that the operator’s presence controls, • safety switches and shields are attached and Operator Training Required functioning properly. DO NOT operate unless they are functioning properly. Read the Operator’s Manual and other training • material. If the operator or mechanic cannot read Operating Safely English, it is the owner’s responsibility to explain this material to them. -
Page 9: Using A Spark Arrestor
Operator Safety Using a Spark Arrestor Slow down and use caution when making turns • and crossing roads and sidewalks. Close defl ec- The engine in this machine is equipped with a spark tors if not blowing. Watch for traffi c when operat- arrestor muffl... -
Page 10: Rotating Impeller Is Dangerous
Operator Safety Rotating Impeller is Dangerous Keep children indoors, out of the work area, and • in the watchful eye of a responsible adult, other than the operator, when a machine is being oper- WARNING ated. Stay alert to the presence of children. Never as- •... -
Page 11: Keep Riders Off
Operator Safety Keep Riders Off Wear Appropriate Clothing Only allow the operator on the machine. Keep Always wear safety goggles, or safety glasses • • riders off. with side shields, and a hard hat when operating the machine. Riders on the machine or attachment may be •... -
Page 12: Prevent Fires
Operator Safety Disconnect battery or remove spark plugs (for Always maintain the correct tire pressure. DO • • gas engines) before making any repairs. Discon- NOT infl ate the tires above the recommended nect the negative terminal fi rst and the positive pressure. -
Page 13: Handling Waste Product And Chemicals
Operator Safety Handling Waste Product and Chemicals Never fi ll containers inside a vehicle or on a truck • or trailer bed with a plastic liner. Always place Waste products, such as, used oil, fuel, coolant, • containers on the ground away from your vehicle brake fl... -
Page 14: Safety And Operational Decals
Safety and Operational Decals DECALS WARNING Before operating your unit, read the safety decals. The cautions and warnings are for your safety. To If any safety decals become worn or avoid a personal injury or damage to the unit, damaged, and cannot be read, order understand and follow all safety decals. -
Page 15: Operating
Operation OPERATING Operator Station Controls Please take a moment to become familiar with the • controls on the dash. A clear understanding of the operation and function of each control is essential to the safe and productive use of this machine. Parking Brake Parking Brake Disengaged This photo shows the parking brake in the DIS-... -
Page 16: Operator Station Controls
Operation Operator Station Controls Left Wheel Right Wheel Hydrostat Control Hydrostat Control Handle Bar Reverse Handle Bar Tach/Hour Oil Alert Meter Fuel Fill & Fuel Cap Ignition Key Switch Choke Throttle Control Control Defl ector Control billygoat.com... -
Page 17: Misc. Controls And Checks
Operation Misc. Controls and Checks Hydro Pump Bypass Valve (one on each pump) Emergency Brake Release Lever Oil Filter Hydro Pump Bypass Valve (one on each pump) Air Cleaner Fuel Shut Off Oil Dipstick Oil Drain Valve Belt Guard Fuel Filter Main Fuse... - Page 18 Operation Hydraulic Oil Filters One on each pump. Break-In Period: First service at 75 hours After that every 400 hours Hydraulic Pumps Change hydraulic oil every 400 hours. Remove Filter Guard bolts to access fi lter for service. billygoat.com...
-
Page 19: Testing The Safety Systems
Operation Result: The engine will turn over, this means all brake Testing the Safety Systems safety switches are working properly. The safety systems installed on your machine should be tested before each machine use. Be sure you Testing the Parking Brake have read this manual and are completely familiar with the operation of the machine before performing these safety system checks. -
Page 20: Using The Throttle And Choke
Operation Using the Throttle and Choke Filling Fuel Tank CAUTION Avoid injury! Fuel vapors are explosive and fl ammable. Shut engine OFF before fi lling fuel tank. • Do not smoke while handling fuel. • Keep fuel away from fl ames or sparks. •... -
Page 21: Transaxle Bypass Valve
Operation Park machine safely. Allow engine to cool. Transaxle Bypass Valve Engaged Remove any debris from around fuel tank cap. After moving the machine, pull cable sideways Remove fuel tank cap slowly to allow any pres- allowing cable to retract and disengage transaxle sure built up in tank to escape. -
Page 22: Using The Hydrostatic Motion Controls
Operation Using the Hydrostatic Motion Controls CAUTION This is the FORWARD travel position. The travel Avoid injury! Learn the proper use of the speed is dependant on how far forward the controls motion control levers and practice at low are pushed. throttle until becoming profi... -
Page 23: Using The Blower And The Defl Ector Controls
Operation Using the Blower and the Defl ector Controls CAUTION Avoid injury and property damage! DO NOT position discharge where it will blow de- bris towards people, vehicles, buildings or other objects in vicinity. Flying debris may damage, harm, or cause injury to people or objects in air fl... - Page 24 Operation NOTE: The defl ectors can be set in any position be- tween OPEN and CLOSED. Gear Rack Defl ector Motor Halfway Front Defl ector Right Discharge Chute Defl ector Open With a little time and experience, an operator can be- come profi...
-
Page 25: Service
Maintenance Procedures SERVICE Service Intervals Use the following schedule to perform routine maintenance on your machine. Break-In Every First Every Every Service Item (After First Annually 40 Hours 75 Hours 100 Hours 400 Hours 10 Hours) Change engine oil and fi lter Check hydraulic fl... -
Page 26: Checking Engine Oil Level
Maintenance Procedures Park machine safely. Checking Engine Oil Level IMPORTANT: Avoid Engine Damage! Failure to check Check when engine is cool before use or allow the oil level daily could lead to serious engine prob- engine to cool. lems if oil level is low. Clean area around dipstick to prevent debris from Check oil level before operating. -
Page 27: Changing Engine Oil And Filter
Maintenance Procedures IMPORTANT: Make sure engine and exhaust system Changing Engine Oil and Filter is cool before proceeding. The oil fi lter is located on IMPORTANT: Avoid Damage! Change the oil more the left side of the engine. often if the machine is used in extreme conditions: 10. -
Page 28: Checking Air Filter Elements
Maintenance Procedures Checking Air Filter Elements IMPORTANT: Avoid damage! Dirt and debris can en- ter the engine through a damaged fi lter element: Fuel Shut Off Do not wash paper element. • Do not attempt to clean paper element by tapping •... -
Page 29: Checking Engine Cooling Intake And Fan
Maintenance Procedures Checking Engine Cooling Intake and Fan Checking Carburetor Adjustment IMPORTANT: Avoid damage! An obstructed air in- The carburetor is designed to deliver the correct fuel- take screen can cause engine damage due to over- to-air mixture to the engine under all operating condi- heating. -
Page 30: Changing Hydraulic Oil And Filters
Maintenance Procedures Search for leaks with a piece of cardboard. Protect Remove toe kick to access the hydraulic fi lters, hands and body from high pressure fl uids. set aside. Hydraulic Oil Filter IMPORTANT: Check oil level in reservoir tank when oil is cold. -
Page 31: Purging Procedure
Maintenance Procedures 16. Remove the cap from the expansion tank, fi ll with 21. Engage neutral bypass valves. Mobil 1 15W50 or equivalent motor oil until oil just appears at the bottom of each transaxle’s purge 22. Start engine and idle up to 1800 rpm. Disengage port (approximately 2.5 qts. -
Page 32: Impeller Removal And Inspection
Maintenance Procedures Impeller Removal and Inspection Changing Drive Belt Use this procedure to inspect or replace a broken im- Park machine on a level surface. Remove key. peller. Allow machine to cool. Never perform work on a Park machine on a level surface. Remove key. hot machine. -
Page 33: Service Parking Brake
Maintenance Procedures Thread the new belt over the pulleys in the correct Service Parking Brake routing (Refer to Drive Belt Routing diagram). Use 3/4 wrench to replace the tensions on the There is no serviceable brake adjustment, the brakes belt. are automatic on this machine. -
Page 34: Service Motion Controls
Maintenance Procedures Service Motion Controls Adjusting Motion Controls - Checking Neutral Center Choose a hard, level surface to perform this test. Adjusting the Motion Controls Park machine safely. Stop engine. Mount the machine. Start engine. Release the parking brake by tipping the handles down. Chock wheels. - Page 35 Maintenance Procedures If left drive wheel rotates forward, rotate the neu- tral plate clockwise. If left drive wheel rotates backward, rotate the neutral plate counterclockwise. If right drive wheel rotates forward, rotate the neu- tral plate counterclockwise. If right drive wheel rotates backward, rotate the neutral plate clockwise.
-
Page 36: Service Tires
Maintenance Procedures Service Tires Checking Tire Pressure Removing and Installing Rear Drive Wheels CAUTION Removing: Avoid injury! Explosive separation of tire Park machine safely. and rim is possible when serviced incor- rectly: Do not attempt to mount a tire with- Lift machine with a safe lifting device centered out the proper equipment and experience under operator foot pad, placing blocking under... -
Page 37: Service Electrical
Maintenance Procedures Service Electrical Removing and Installing Battery Replacing Fuse CAUTION IMPORTANT Avoid injury! Battery electrolyte contains sulfuric acid. It is poisonous and can cause serious burns. Avoid Damage! Help prevent machine elec- trical damage. Make sure replacement fuse is the correct rating. Wear eye protection and gloves. -
Page 38: Cleaning Battery And Terminals
Maintenance Procedures Using Booster Battery or Jump Starting Thumb Screw CAUTION Avoid injury! The battery produces a fl am- mable and explosive gas. The battery may explode. Do not smoke or have open fl ame near battery. • Wear eye protection and gloves. •... -
Page 39: Troubleshooting
Troubleshooting TROUBLESHOOTING Using the Troubleshooting Chart If you are experiencing a problem that is not listed in this chart, refer to the engine manufacturer’s own- er’s manual provided with your machine for trouble- shooting or contact your authorized service center. When you have checked all the possible causes listed and you are still experiencing the problem, contact your authorized service center. - Page 40 Troubleshooting Engine overheats Clean cooling fi ns. • Clean engine cooling air intake screen. • Low oil level. • Do not operate at slow idle. Operate at faster idle. • • Plugged engine air intake fi lter. Engine lacks power Reduce load.
- Page 41 Troubleshooting Machine will not move with engine running Parking brake ENGAGED. • Transmission oil level low. • Transmission oil cold. Allow machine to warm up. • Pump drive belt slipping or broken. • • Pump free-wheel valves open. • Transmission problems. Contact your authorized service center.
-
Page 42: Storage
Storage STORAGE Preparing Fuel and Engine For Storage Fuel: Storing Machine Safety If you have been using “Stabilized Fuel,” add stabi- CAUTION lized fuel to tank until the tank is full. Turn OFF fuel shutoff. Avoid injury! Fuel vapors are explosive and fl... -
Page 43: Removing Machine From Storage
Storage Engine storage: Removing Machine From Storage Change engine oil and fi lter while engine is warm. Check tire pressure. Service air fi lter if necessary. Check engine oil level. Clean debris from engine air intake screen. Check battery. Charge battery if necessary. Remove spark plugs. -
Page 44: Warranty Statement
ABOUT YOUR WARRANTY Warranty service is available only through Billy Goat Authorized Service Dealers. This warranty covers only defects in materials or workmanship. It does not cover damage caused by improper use or abuse, improper maintenance or repair, normal wear and tear, or stale or unapproved fuel. - Page 45 Notes...
- Page 46 Notes...
- Page 47 Notes...
Need help?
Do you have a question about the Hurricane Z3000 and is the answer not in the manual?
Questions and answers