Table of Contents
Advertisement
THIS PRODUCT IS FOR OUTDOOR USE ONLY
Assembly, CARE & USE MANUAL
WARNING & SAFETY INFORMATION
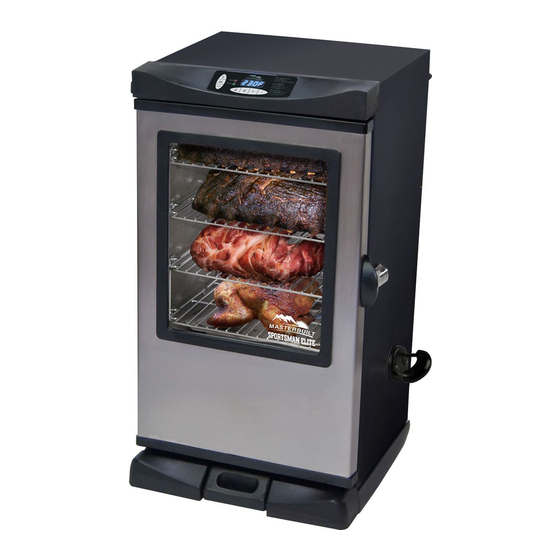
30" DIGITAL ELECTRIC SMOKER MODEL 20078215
(Model 20078215
220-240 V, 50 Hz, 800 W, class I )
Tools needed for assembly: Adjustable Wrench and Phillips Head Screwdriver
Approximate assembly time: 25 minutes
*Actual product may differ from picture shown
CARBON MONOXIDE
WARNING
HAZARD
This manual contains important
information necessary for the proper
Burning wood chips gives off carbon
assembly and safe use of the appliance.
monoxide, which has no odor and
can cause death.
Read and follow all warnings and
instructions before assembling and using
DO NOT burn wood chips inside homes,
the appliance.
vehicles, tents, garages or any enclosed areas.
Follow all warnings and instructions when
Use only outdoors where it is
using the appliance.
well ventilated.
Keep this manual for future reference.
Failure to follow these warnings and instructions properly could result in fire or explosion,
which could cause property damage, personal injury, or death.
Advertisement
Table of Contents

Related Manuals for Masterbuilt SPORTSMAN ELITE


Summary of Contents for Masterbuilt SPORTSMAN ELITE
- Page 1 THIS PRODUCT IS FOR OUTDOOR USE ONLY ASSEMBLY, CARE & USE MANUAL WARNING & SAFETY INFORMATION 30” DIGITAL ELECTRIC SMOKER MODEL 20078215 (Model 20078215 220-240 V, 50 Hz, 800 W, class I ) Tools needed for assembly: Adjustable Wrench and Phillips Head Screwdriver Approximate assembly time: 25 minutes *Actual product may differ from picture shown CARBON MONOXIDE...
- Page 2 ARNING GENERAL ARNINGS ATION READ ALL INSTRUCTIONS Unit is for OUTDOOR USE ONLY. CONTINUED ON AGE 2...
- Page 3 To protect against electrical shock do not immerse cord, plug or control panel in water or other liquid. Do not operate any appliance with a damaged cord or plug, or after appliance malfunctions or has been damaged in any manner. Contact Masterbuilt Customer Service for assistance at 1-800-489-1581.
- Page 4 LET’S GET STARTED! OUTDOOR USE ONLY ENJOY! HOW TO CLEAN SMOKER ALWAYS MAKE SURE UNIT IS COOL TO THE TOUCH BEFORE CLEANING AND STORING.
- Page 5 DO NOT RETURN TO RETAILER For Assembly Assistance, Missing or Damaged Parts Call: Misty Gully Customer Service at 0408028263 . STOP! Please have Model Number and Serial Number available when calling. These numbers are located on silver label on back of unit. PARTS LIST PART NO QUANTITY DESCRIPTION...
- Page 6 HARDWARE LIST M6x25 ST4x10 M6 X 9 Screw Screw Qty-8 Qty: 16 Qty: 12 REPLACEMENT PARTS LIST REPLACEMENT PART ITEM NO , t i Digital Smoker Control 9007140013 Drip Deflector Pan 9907120040 Door Latch Kit, Black 9907120004 Adjustable Screw Leg 910050006 Wood Chip Loader 9007130028...
- Page 7 ASSEMBLY STEP 1 Remove all components on inside of smoker before beginning assembly. Carefully position smoker on side as shown. Alternatively, the smoker can be positioned upside down for assembly. However, make sure styrofoam packaging remains on top to prevent damage to control panel.
- Page 8 ASSEMBLY STEP 3 Remove adjustable screw leg (11). Set aside to be used in Step 5. Attach right side panel (23) to smoker body (1) using screws (B) as shown. Repeat step on opposite side for remaining left side panel (28).
- Page 9 ASSEMBLY STEP 5 Insert adjustable screw leg (11) through bottom of side panel (23) as shown, and into smoker body. Repeat step on opposite side for remaining adjustable screw leg. TENSION NUT Note: When unit is upright, set adjustable screw leg height by turning clockwise/ counterclockwise, so that smoker is level.
- Page 10 ASSEMBLY STEP 7 Slide grease tray (13) onto grease tray brackets (21). STEP 8 Align keyholes on rack supports (6) with studs on the inside of smoker body as shown. Press rack support down to secure in place. Repeat step for remaining rack supports on both sides.
- Page 11 ASSEMBLY STEP 9 Place racks (4) inside smoker as shown. Note: Smoker comes with four racks. Six racks shown for illustration purposes only. STEP 10 Align keyholes on drip deflector (5) with studs on the inside of smoker body. Press drip deflector down to secure in place.
- Page 12 ASSEMBLY STEP 11 Place water bowl (8), wood chip tray (9), and drip pan (10) inside smoker as shown. Insert wood chip loader (12) into side of smoker. Assembly is complete.
- Page 13 PRE-SEASON INSTRUCTIONS PRE-SEASON SMOKER PRIOR TO FIRST USE. Some smoke may appear during this time, this is normal. 1. Make sure water pan is in place with NO WATER. 2. Set temperature to 275°F (135°C) and run unit for 3 hours. 3.
- Page 14 HOW TO USE CONTROL PANEL & REMOTE CONTROL Note: Direct sunlight may interfere with ability to read LED display, block light if needed. To set temperature: T TEM button once-LED display will blink. T TEM button again to lock in temperature. To set timer: T TIME button once-LED display for hours will blink.
- Page 15 HOW TO USE CONTROL PANEL & REMOTE CONTROL To replace batteries: To test frequency range: IMPORTANT TROUBLESHOOTING Possible solutions all buttons must be pressed within 5 seconds of each other CAUTION ...
- Page 16 IMPORTANT FACTS ABOUT USING SMOKER Maximum temperature setting is 275°F (135°C). Do NOT move unit across uneven surfaces. Rear handle is NOT for lifting. Wood chip loader and wood chip tray MUST be in place when using smoker. This minimizes the chance of wood flare ups.
- Page 17 MASTERBUILT SMOKIN’ RECIPES Pork or Baby Back Ribs MAPLE GLAZED HAM 5-7 lbs Ham Shank or Butt (fully cooked, bone in) 2-4 lbs Pork or Baby Back Ribs 1 1/2 cup Maple Syrup 1/2 tbsp Salt 1 tsp Ginger 1/4 cup Brown Sugar...
- Page 18 This expressed warranty is the sole warranty given by Masterbuilt and is in lieu of all other warran- ties, expressed or implied including implied warranty, merchantability, or fitness for a particular purpose.
- Page 20 Manufactured by: Masterbuilt USA, Georgia. Misty Gully Enterprises P/L P.O Box 96 Mansfield, Victoria 3724 Australia www.mistygully.com.au Phone: 0414 984 956 Email: info@mistygully.com.au...
Need help?
Do you have a question about the SPORTSMAN ELITE and is the answer not in the manual?
Questions and answers