Table of Contents
Advertisement
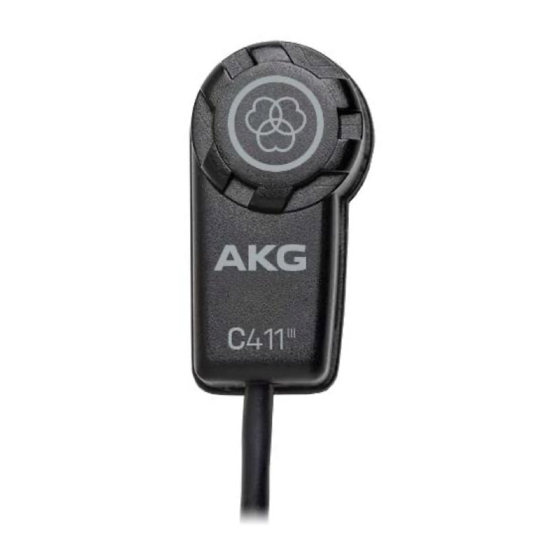
C411
HIGH-PERFORMANCE MINIATURE
CONDENSER VIBRATION PICKUP
2
BEDIENUNGSANLEITUNG
Vor Inbetriebnahme des Gerätes lesen!
18
USER INSTRUCTIONS
Read the manual before using the equipment!
34
MODE D'EMPLOI
Lire cette notice avant d'utiliser le système!
50
MODO DE EMPLEO
¡Consulte el manual antes de utilizar el equipo!
(L, PP)
III
Advertisement
Table of Contents

Summary of Contents for AKG C411 Series
- Page 1 C411 (L, PP) HIGH-PERFORMANCE MINIATURE CONDENSER VIBRATION PICKUP BEDIENUNGSANLEITUNG Vor Inbetriebnahme des Gerätes lesen! USER INSTRUCTIONS Read the manual before using the equipment! MODE D’EMPLOI Lire cette notice avant d’utiliser le système! MODO DE EMPLEO ¡Consulte el manual antes de utilizar el equipo!
-
Page 2: Table Of Contents
cONTENTS SAFETY AND ENVIRONMENT Environment DESCRIPTION Introduction Package content Optional Accessories Features Brief Description Versions INTERFACING C411 3.1.1 Connecting to Balanced Inputs 3.1.2 Connecting to Unbalanced Inputs C411 3.2.1 Connecting to Balanced Inputs 3.2.2 Connecting to Unbalanced Inputs 3.2.3 Using the MPA V L 3.2.4 Connecting to a Bodypack Transmitter Introduction... - Page 3 AKG Acoustics GmbH. Forwarding to third parties is not permitted. This manual should be returned to us on request. Updates Dieses Manual kann ohne Vorankündigung geändert werden und...
-
Page 4: Safety And Environment
SAFETy ANd ENvIRONMENT Safety and environment Risk of damage Please make sure that the piece of equipment your microphone will be connected to fulfills the safety regulations in force in your country and is fitted with a ground lead. Environment •... -
Page 5: Description
Introduction Introduction Thank you for your decision to buy an AKG product. Please read the user instructions carefully, before using the unit and keep them in a safe place so that you can refer to them in the future at any time. -
Page 6: Features
3-pin XLR connector. C411 • For use with the B23 L battery power supply, MPA V L phan- tom power adapter, or AKG Wireless bodypack transmitters. 5-ft. (1.5-m) permanently attached connecting cable with 3-pin mini XLR connector... -
Page 7: Interfacing
Interfacing The C411 pickup is a condenser transducer and therefore needs a power supply. Using any power supply other than those recommended by AKG may damage your pickup and will void the warranty. C411 3.1.1 Connecting to Balanced Inputs C411... -
Page 8: Connecting To Unbalanced Inputs
INTERFAcINg 3.1.2 Connecting to Unbalanced Inputs C411 Connecting to You may connect any AKG phantom power supply (2) to an unbal- unbalanced inputs anced input, too. Use a cable (3) with a female XLR connector and TS jack plug: INPUT 1... -
Page 9: Connecting To Balanced Inputs
INTERFAcINg 3.2.1 Connecting to Balanced Inputs C411 Connecting to balanced inputs INPUT 1 INPUT 2 INPUT 3 INPUT 4 B23 L Figure 3: Using the B23 L to power the microphone Connecting the cable: Push the mini XLR connector (1) on the pickup cable into one of the two mini XLR sockets on the B23 L (2) to the stop. -
Page 10: Using The Mpa V L
If your mixer provides no phantom power: Connect the MPA V L (3) to an optional AKG phantom power supply (4) and use an XLR cable (5) to connect the phantom power supply (4) to the desired balanced input. -
Page 11: Use
Introduction Introduction Since a soundboard vibrates differently in different places, you can get different sounds by carefully selecting the spot where you mount the pickup. Section 4.3 describes proven techniques that you may want to use as starting points for your own experiments. Attaching the Pickup to the Instrument If you are going to attach the pickup to a lacquered surface, check the condition of the lacquer coat first. - Page 12 Figure 5: Pressing the adhesive compound on the underside of the pickup Remove the backing from the supplied adhesive compound. Press some of the adhesive compound (just enough to cover the "footprint" of the pickup) on the underside of the pickup. Press the pickup onto the bridge of your instrument or onto the soundboard, near the bridge.
-
Page 13: Hints On Microphone Placement
Hints on Microphone Placement Hints on Microphone Placement Guitar Violin Banjo Zither C411 MANUAL... -
Page 14: Troubleshooting
TROUBLESHOOTINg Troubleshooting Problem Possible cause Remedy No sound Power to mixer and/or amplifier Switch power to mixer or amplifier is off. Channel or master fader on Set channel or master fader mixer or volume control on on mixer or volume control on amplifier is at zero. -
Page 15: Cleaning
cLEANINg Cleaning Use a soft cloth moistened with water to clean the surface of the microphone body. C411 MANUAL... -
Page 16: Technical Data
PP: 9 to 52 V universal phantom power C411 L: B 29 L battery power supply, MPA V L phantom adapter, AKG WMS bodypack transmitters Current consumption: approx. 2.2 mA Cable length/Connector: C411 PP: 3 m (10 ft.) / 3-pin male XLR C411 L: 1.5 m (5 ft.) / 3-pin mini XLR... - Page 17 TEcHNIcAL dATA Frequency responce C411 Polar Diagram C411 C411 MANUAL...


Need help?
Do you have a question about the C411 Series and is the answer not in the manual?
Questions and answers