Table of Contents

Related Manuals for CEA TREOSTAR 2000 PULSE


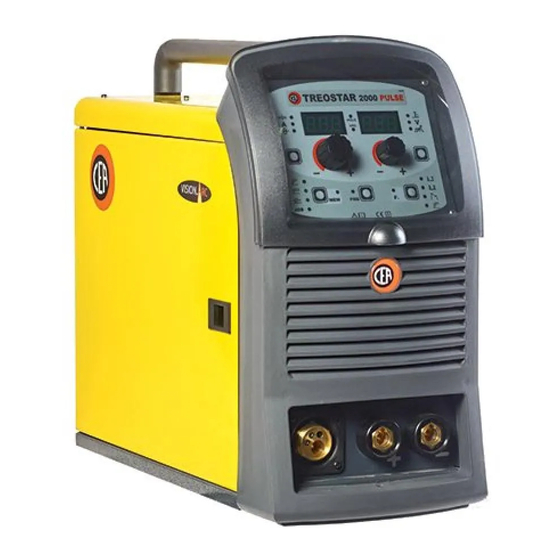
Summary of Contents for CEA TREOSTAR 2000 PULSE
- Page 1 Operator’s manual READ CAREFULLY CEA COSTRUZIONI ELETTROMECCANICHE ANNETTONI S.p.A. C.so E. Filiberto, 27 - 23900 Lecco - Italy Tel. ++39.0341.22322 - Fax ++39.0341.422646 Cas. Post. (P.O.BOX) 205 E-mail: cea@ceaweld.com - web: www.ceaweld.com...
-
Page 2: Table Of Contents
ENGLISH Introduction Electrode (MMA) 1 - WELDING PROCESS SELECTION Control panel 2 - SELECTION OF WELDING PROGRAM KEY AND KNOB COMMANDS 3 - SPECIAL FUNCTIONS “Fx” SELECTION DISPLAY AND LED INDICATIONS 4 - PRE-SETTING 5 - WELDING Switching on the welding machine and initial screen 6 - HOLD 7 - ACTIVATING THE VRD DEVICE Viewing the software version installed... -
Page 3: Introduction
WARNING: No LED switches on when this key is activated! Introduction ■ WELDING MODE SELECTION key Il presente manuale contiene tutte le informazioni necessarie per This is used to select the following welding modes (only for MIG This manual contains all the information necessary to make the welding processes) and each time the key is pushed the welding best use of this control panel. -
Page 4: Display And Led Indications
■ VRD LED DISPLAY AND LED INDICATIONS The Voltage Reduction Device (VRD) is a safety device that re- duces voltage. It prevents voltages forming on the output termi- nals that may pose a danger to people. ▪ HOLD FUNCTION LED ▪... -
Page 5: Loading Of The Wire
3) Ending viewing of the software version on the control panel WARNING: Changes to values are immediately activated (no fur- can come about in 2 different ways: ther confirmation is required and they will be displayed immedi- • Automatically: by waiting for the display time to elapse. ately) or, at least they will become active the next time welding is •... -
Page 6: Setup Menu
3) To exit the SPECIAL FUNCTIONS “Fx” menu, push and re- SETUP Menu lease the SPECIAL FUNCTIONS “Fx” (T3) key once. Hold the PRG key down for at least 3 seconds to open the SET- UP menu, which provides access to various functions, which are suitable for expert operators. -
Page 7: Menu Special Functions
To carry out the reset of the settings / parameters, proceed in the SAFETY CALIBRATION CODE (SCC) following manner: 1) Rotate the ENCODER - A (E1) knob until both the displays ATTENTION: This operation, if carryed on, optimizes the effi- read FAC no (see figure). -
Page 8: Mig-Mag Synergic / Mig Pulse / Double Pulsed Mig
tion of the ENCODER knob - V (E2) appearing on the PA- MIG-MAG synergic / MIG pulse RAMETER DISPLAY screen - V (D2) is the desired value. / double pulsed MIG Start the welder by pressing the switch, located on the back pan- el, at the position I. -
Page 9: Selection Of Welding Programme
2 - SELECTION OF WELDING PROGRAMME 3 - WELDING MODE SELECTION Select the MODE of welding, pressing and releasing, even various times if necessary, the WELDING MODE SELECTION key (T3) PROGRAM TABLE until the corresponding LED lights up. MIG-MAG-PULSE PROCESS 1 2 3 4 5 6 MATERIAL DISPLAYS PROGRAM... -
Page 10: Pre-Setting
■ PROGRAM DEFAULT (dEF) ARC LENGTH ADJUSTMENT WARNING: If carried out, this operation resets the program WELDING VOLTAGE (*) in use to the factory default settings. ELECTRONIC INDUCTANCE To carry out the reset of the settings / parameters, proceed in the following manner: •... -
Page 11: Hold
7 - HOLD MIG-MAG manual This function automatically starts itself at the conclusion of every welding operation and it is indicated to the operator by means of a Start the welder by pressing the switch, located on the back pan- flashing light of the HOLD FUNCTION LED for a specific amount el, at the position I. -
Page 12: Special Functions "Fx" Selection
3 - SPECIAL FUNCTIONS “Fx” SELECTION ■ PROGRAM DEFAULT (dEF) The SPECIAL FUNCTIONS “Fx” that are only available in the MIG- MAG manual welding process are shown below. For all the other WARNING: If carried out, this operation resets the program explanations regarding this menu make reference to the relative in use to the factory default settings. -
Page 13: Welding
6 - HOLD This function automatically starts itself at the conclusion of every welding operation and it is indicated to the operator by means of a flashing light of the HOLD FUNCTION LED for a specific amount WELDING VOLTAGE of time. Once the welding has been terminated, for about 15 seconds, both ELECTRONIC INDUCTANCE the DISPLAYS should show the same values of the parameters... -
Page 14: Electrode (Mma)
3 - SPECIAL FUNCTIONS “Fx” SELECTION Electrode (MMA) Start the welder by pressing the switch, located on the back pan- ADJUSTABLE FUNCTIONS “Fx” Fx > 3s el, at the position I. SETTINGS RANGE 1 - WELDING PROCESS SELECTION FUNCTION DISPLAY FACTORY RANGE Select the ELECTRODE PROCESS of welding (for welding with... -
Page 15: Pre-Setting
• Hold the SAVE “MEM” key (T2) down for at least 2 consecu- • PARAMETER DISPLAY screen - V (D2) tive seconds. HOT START T ≥ 2 s WELDING VOLTAGE ARC FORCE • The program in use has now been completed successfully. To confirmation the above, the control panel of the welder performs a short operation of MACHINE CHECK (all of the LED stay lit simultaneously so as to verify their actual operation), the gen-... -
Page 16: Activating The Vrd Device
7 - ACTIVATING THE VRD DEVICE The Voltage Reduction Device (VRD) is a safety device that reduc- es voltage. It prevents voltages forming on the output terminals that may pose a danger to people. The factory settings do NOT set out an active welding device during electrode welding. -
Page 17: Pre-Setting
• The program in use has now been completed successfully. To 5 - HOLD confirmation the above, the control panel of the welder performs This function automatically starts itself at the conclusion of eve- a short operation of MACHINE CHECK (all of the LED stay lit ry welding operation welding and it is indicated to the operator by simultaneously so as to verify their actual operation), the gen- means of a flashing light of the HOLD FUNCTION LED for a spe-... -
Page 18: Job
2) Hold down the SAVE “MEM” (T2) Key down for at least 2 con- secutive seconds to save JOB and automatically load the set- tings / parameters (including special functions) for the JOB just 1 - CREATING AND SAVING A JOB saved. -
Page 19: Hold
5 - HOLD Error condition This function automatically starts itself at the conclusion of every welding operation and it is indicated to the operator by means of a This paragraph describes the error conditions that may arise on flashing light of the HOLD FUNCTION LED for a specific amount the welding machine, the codes and messages shown on both op- of time. - Page 20 Error Error Error description and possible Error Error Error description and possible condition code diagnosis condition code diagnosis FILE SYSTEM ERROR POWER LIMITATION NON automatic reset error. This alarm appears if the power limit E2.0 Immediately contact technical is exceeded. The alarm alternates assistance dept.
- Page 21 CEA COSTRUZIONI ELETTROMECCANICHE ANNETTONI S.p.A. C.so E. Filiberto, 27 - 23900 LECCO - ITALY Cas. Post. (P.O. BOX) 205 Tel. +39 0341 22322 - Fax +39 0341 422646 cea@ceaweld.com www.ceaweld.com...
Need help?
Do you have a question about the TREOSTAR 2000 PULSE and is the answer not in the manual?
Questions and answers