
Related Manuals for Sailrite Ultrafeed LS-1


Summary of Contents for Sailrite Ultrafeed LS-1
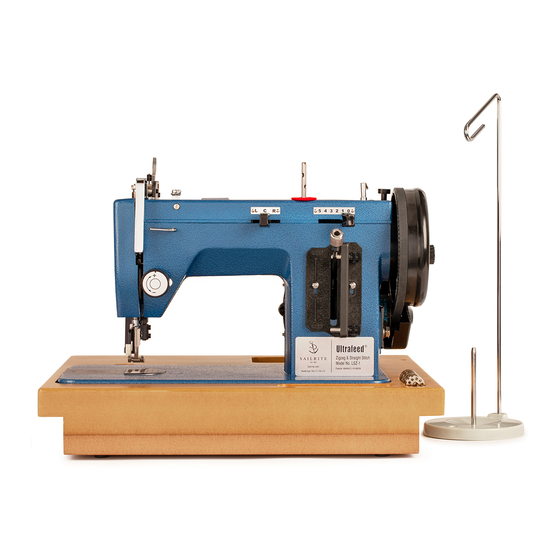
- Page 1 ULTRAFEED LS-1 & LSZ-1 ® GUIDEBOOK SET-UP • USE • MAINTENANCE • TROUBLESHOOTING • SCHEMATICS...
-
Page 2: Table Of Contents
Table of Contents Welcome to Your Ultrafeed Safety Ultrafeed Maintenance ® ® Lubrication Ultrafeed Set-Up ® Ultrafeed Sewing Machine! ® Marine Use & Potential for Rust Thread LS-1 Lubrication Points Needles LSZ-1 Lubrication Points You are now the proud owner of one of the toughest, most Winding Bobbins Troubleshooting the Ultrafeed versatile portable sewing machines around. -
Page 3: Ultrafeed ® Safety
Safety Ultrafeed Set-Up ® ® Please observe the following when using your Sailrite sewing machine: Thread Do not operate if you or the machine are Do not drop the machine. Ultrafeed sewing machines can handle any polyester, nylon, cotton, Profilen ®... -
Page 4: Needles
Needles Ultrafeed sewing machines require 135x17 needles sizes #12 to 22 or ® 135x16 leather needles, all available at Sailrite. A size #20 needle is used for most medium to heavy sewing. Needle Types Round point needles are used for most Needle Installation standard sewing. -
Page 5: Winding Bobbins
Simply place the second cone beside the primary cone and lead the thread up through the same guides. Follow normal bobbin winding instructions but do not disengage the clutch. > Posi-Pin clutch > Posi-Pin clutch ENGAGED DISENGAGED www.sailrite.com... -
Page 6: Threading The Machine
Pass through take-up arm (right to left) (G) and then under end cover. Pass through the needle bar thread guide hole (H) and then down through the needle eye from left to right (I). www.sailrite.com... -
Page 7: Removing & Installing Bobbin Case
Tension Plate case is pushed all the way on. The finger of Spring-loaded Lever the bobbin case will drop into the notch in the Finger hook’s retaining ring (G). Retaining Ring www.sailrite.com... -
Page 8: Using The Ultrafeed
Completed set-up should look similar to DO NOT operate the machine when threaded without material under the presser foot (and foot (12). Now you’re ready to sew! lowered). The machine will most likely “lock up” and be inoperable until the thread jam is cleared. www.sailrite.com... -
Page 9: Regulating Stitch Length
Lever (C), which is spring loaded to always rest with the presser foot down may bend the the needle is in the fabric or the needle may rest against the upper stop. needle. bend. Applies to LSZ-1 Model Only www.sailrite.com ... -
Page 10: Thread Tension Adjustment
In general, bobbin tension requires just about a two ounce drag on the thread (similar to what you feel when pulling dental floss off a spool). Knots visible on bottom: Increase upper tension Decrease bobbin case tension www.sailrite.com... -
Page 11: Adjusting Pressure Foot Tension
3 complete rotations for the 13). If it comes out, just screw it back in manner to ensure the post it rides on is lightest spring setting (20). a few turns. See "Adjusting Presser Foot tightened, not loosened. Tension" (p. 17). www.sailrite.com... -
Page 12: Welting & Cording Application
(26). Make Your Own Welting, Cording and Piping For how-to instructions, tips and advice on making and sewing with welting, www.sailrite.com cording and piping visit > LS-1 welting tunnel in > LSZ-1 welting tunnel in... -
Page 13: Ultrafeed ® Maintenance
Use even on the painted surfaces, metal parts, Right end lubrication points > needle plates, and presser feet. T-9 leaves a thin protective layer of wax. Use sparingly as a lubricant as wax buildup can create gumming friction over time. www.sailrite.com... - Page 14 Ultrafeed Guidebook: Ultrafeed® Maintenance ® Left end and back side lubrication points Underside lubrication points www.sailrite.com...
-
Page 15: Lsz-1 Lubrication Points
Ultrafeed Guidebook: Ultrafeed® Maintenance ® Top side lubrication points LSZ-1 Lubrication Points Left end and back side lubrication points Right end lubrication points > www.sailrite.com... -
Page 16: Troubleshooting The Ultrafeed
Put the presser foot down to check that With the presser foot up, push the upper the tension disks properly tighten. The tension assembly in until you feel the first thread should not easily pull through. signs of resistance. Replace the cover. www.sailrite.com... -
Page 17: Inconsistent Stitch Tension
Push the spring in all the way. the post and add the cover knob (A). clean the parts or blow out the debris. Replace hook (C) opposite driver (D). The hook just rests in place. Be sure the axle is facing out. www.sailrite.com... -
Page 18: Skipped Stitches
Increase the downward pressure on the presser foot by tightening the pressure regulating To reset the timing on your Ultrafeed , follow the steps outlined on p. 40 "Ultrafeed Timing". thumb screw (p. 12, 13). ® ® www.sailrite.com... -
Page 19: Thread Issues
If the machine is out of timing it may cause the gib hook point to cut or shred the thread. Eliminate this formation by trapping the thread tails from the needle and the bobbin as you start To reset the timing on your Ultrafeed , follow the steps outlined on p. 40 "Ultrafeed Timing". ® ® to sew. www.sailrite.com... - Page 20 4. Lower the needle by 1/16". Lowering the needle has a tendency to increase the size of the thread loop. Adjust the needle only if a smaller needle does not help. www.sailrite.com...
-
Page 21: Needle Issues
Use a 2.5 mm Allen wrench to tighten the two set screws (34) that fasten the bushing to the machine’s upper shaft, then reinstall the balance wheel and check for proper operation. www.sailrite.com... -
Page 22: Belt Issues
This movement is geared by a simple yoke and cam arrangement on the top shaft of the machine. It is a relatively simple design but is both reliable and satisfactory for canvas work. www.sailrite.com... - Page 23 Tighten the drive correctly. If not, continue on to adjust collar set screw. the needle bar height. If your Ultrafeed is still not performing ® properly after adjusting the needle bar height, proceed to check the rotational 0–1/32" timing. www.sailrite.com...
- Page 24 D) just a little. screw. adjust the rotational positioning of the If spaced properly, the driver is set shuttle race guide shaft or the left-right correctly. If not, continue on to adjust positioning of the shuttle gib hook. the driver. www.sailrite.com...
- Page 25 If the needle is being deflected by the hook, then the hook must be moved to the right. Applies to LSZ-1 Model Only www.sailrite.com ...
-
Page 26: Hook/Driver Gap
(C). There should be practically no side- larger rotary hook machines. The typical gap to-side play in the shaft. between parts is 0.04" (48). Applies to LS-1 Model Only www.sailrite.com ... - Page 27 Needle Plate (5mm) W032Z Needle Plate Screw A052 Shuttle Race Slide A048-B W029 Three Hole Thread Guide Upper Tension Assembly (includes 28) 8511 components may be purchased Bobbin Winder W030Z separately Screw 100576 A036 Applies to LSZ-1 Model Only www.sailrite.com ...
- Page 28 Needle Plate Screw A052 Shuttle Race Slide 120346 14 30 Three Hole Thread Guide W029 Upper Tension Assembly components may (includes 24) 8511 be purchased Thread Guard Screw 103253 separately Top Plate Set Screw E072 Applies to LS-1 Model Only www.sailrite.com ...
- Page 29 28 7010 Needle #20 (135X17) Screw 103264 Presser Foot Screw A036 Needle Crank Arm 103269 W016 Inside Presser Foot W012 Connecting Rod Set Base 29 Applies to LSZ-1 Model Only Applies to LS-1 Model Only www.sailrite.com ...
- Page 30 Shuttle Race Guide Shaft B170 Lower Shaft B172 Shuttle Driver W172 9601 Shuttle Gib Hook 123100 Bobbin 1232 Bobbin Case Assembly Screw B139-2 Zigzag Shuttle Drive Assembly W002Z Applies to LSZ-1 Model Only Applies to LS-1 Model Only www.sailrite.com ...
- Page 31 Feed Dog Screw W011 Feed Dog Driving Crank Guide Nut W046-1 Driving Crank Guide Screw A061 Feed Lifting Rock Shaft A072 Feed Lifting Rock Shaft Crank A073 Applies to LSZ-1 Model Only Applies to LS-1 Model Only www.sailrite.com ...
- Page 32 Crank Rod Bearing Set Base W025 End Plate W041 Crank Rod Bearing Set Base End Plate Set Screw W041-1 Screw W025-1 Presser Foot Bracket Limiter W014 LS-1 LSZ-1 Applies to LSZ-1 Model Only Applies to LS-1 Model Only www.sailrite.com ...
- Page 33 LT-2M-3 Motor Bracket Bolt LT-2M-2 W050BL Belt Cover 14 12 100576 A036 Belt Cover Screw Motor Base W049Z Motor Base W049 Motor Base Screw W049-1 Applies to LSZ-1 Model Only Applies to LS-1 Model Only www.sailrite.com ...
-
Page 34: Specifications
N EED LE S I Z E R AN GE Home Sizes to V-92 T H R E AD R AN G E 35 lbs. H E A D W EIG H T Applies to LSZ-1 Model Only Applies to LS-1 Model Only www.sailrite.com ... - Page 35 Sailrite.com Equipping you to sew at home & on the water 103280*1 Copyright ©2016 Guidebook for Sailrite Ultrafeed LS-1 & LSZ-1 Qty: 1 Ultrafeed PATENTED TECHNOLOGY Patents #6499415 • #7438009 Version V3-1 ®...
Need help?
Do you have a question about the Ultrafeed LS-1 and is the answer not in the manual?
Questions and answers