Table of Contents
Advertisement
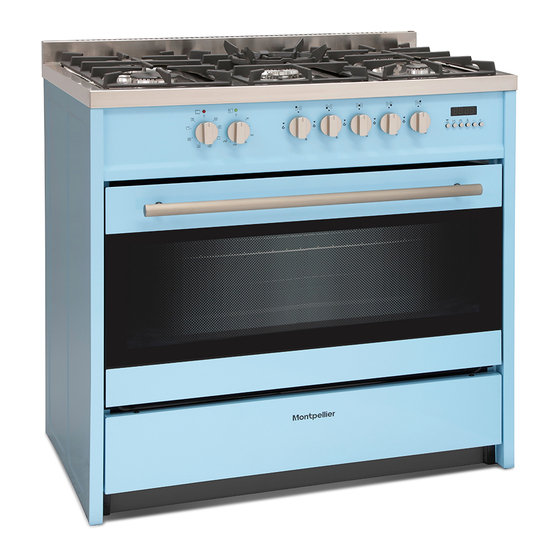
90cm Single Cavity Range Cooker
MR95DFPB/CR - Dual Fuel
Pastel Blue/Cream
Please read these instructions carefully before attempting to install or use this appliance.
We recommend that you keep these instructions in a safe place for future reference.
THE PERFECT BALANCE OF FUNCTION AND STYLE
LAUNDRY - DISHWASHING - COOKING - COOLING
Installation and Operating Instructions
Advertisement
Table of Contents

Related Manuals for montpellier MR95DFCR


Summary of Contents for montpellier MR95DFCR
- Page 1 THE PERFECT BALANCE OF FUNCTION AND STYLE LAUNDRY - DISHWASHING - COOKING - COOLING Installation and Operating Instructions 90cm Single Cavity Range Cooker MR95DFPB/CR - Dual Fuel Pastel Blue/Cream Please read these instructions carefully before attempting to install or use this appliance. We recommend that you keep these instructions in a safe place for future reference.
- Page 2 Welcome Thank you for choosing this Montpellier Range Cooker. Our Range Cookers have been designed to provide you with the best combination of style, reliability and performance to give you years of trouble-free use. You may be familiar with a similar product, but please take time to read these instructions carefully before installing or using your Cooker to ensure you get the most from your purchase.
-
Page 3: Table Of Contents
INSTRUCTIONS MANUAL INDEX INTRODUCTION GENERAL WARNINGS IINSTALLER'S GUIDE 2.1 COOKER INSTALATION 2.2 GAS CONNECTION 2.3 ELECTRIC CONNECTION 2.4 CONVERSION TO OTHER TYPE OF GAS 2.5 GAS TAPS / VALVES MAINTENANCE AND CLEANING USER'S GUIDE 3.1 PRELIMINARY ADVIC'ES 3.2 HOW TO USE BURNERS OF THE COOKING TOP 3.3 THE VITRO TABLE USE 3.4 HOW TO USE THE GAS OVEN AND THE GAS GRILL 3.5 HOW TO USE THE GAS OVEN AND THE ELECTRIC GRILL... -
Page 4: Introduction
INSTRUCTIONS MANUAL INTRODUCTION ATTENTION: Installation, regulation or maintenance, both gas and electric, should be executed only by qualified and authorised personnel who are aware of installation regulations in force. Please make sure to read this booklet carefully, containing general instructions for the Installation, Use and Maintenance of your cooker, before installing and using it. - Page 5 INSTRUCTIONS MANUAL the surface, which may result in shattering of the glass. WARNING - Ensure that the appliance is switched off before replacing the lamp to avoid the possibility of electric shock. The appliance is not intended to operated by means of an external timer or separate remote-control system. The appliance is not intended to be operated by means of an external timer or separate remote-control system.
-
Page 6: Iinstaller's Guide
INSTRUCTIONS MANUAL INSTALLER'S GUIDE 2.1 COOKER INSTALLATION declines any an all responsibilities for damages to things or injuries to persons or animals deriving from incorrect installation or use of equipment. This appliance is class 1: isolated kitchen appliance, free-standing installation, and is designed for non-professional use by private, adult and inside houses. - Page 7 INSTRUCTIONS MANUAL The furniture sided the cooker, if higher than the cooking plan, must be at a minimum distance of 150 mm from the side of the appliance - unless that surface is constructed of a suitable non-combustible material for the entire length of the cooking surface. Any horizontal surface situated within 200mm from the edge of any hob burner must be a minimum of 10mm below the cooking surface or else comply with the above.
- Page 8 INSTRUCTIONS MANUAL Install the cooker firmly and level it - some models with a small levelling feet Get leg accessories in polybag inside oven Ask one person to lift one side of the unit. Never invert unit. Screw leg at corner holes below unit one at a time Ask your assistant to lift the other side of the unit.Now, screw thw other two leg the same way before at different corners.
-
Page 9: Gas Connection
INSTRUCTIONS MANUAL 2.2 GAS CONNECTION The cooker is provided with a label placed on the rear panel near the gas inlet, showing the type of gas and pressure for which the appliance has been originally adjusted. Before connecting this appliance check if is prepared for the type of gas and pressure available in your home. If not, it is necessary to convert the appliance to another gas as indicated in section 2.4. -
Page 10: Electric Connection
INSTRUCTIONS MANUAL 2.3 ELECTRIC CONNECTION VERY IMPORTANT: The appliance must be always connected to the ground, according to actual regulations. The electric connection, should be executed only by qualified personnel who are aware of installation regulations in force. Before the connection, check if the electric network is prepared for the required power (see the data plate, or table of technical characteristics). -
Page 11: Conversion To Other Type Of Gas
INSTRUCTIONS MANUAL 2.4 CONVERSION TO OTHER TYPE OF GAS This operation must be executed always by qualified and authorised personnel. This appliance has been designed to function with Propane or Natural gas. This appliance is provided with a label on the rear panel, near the gas inlet, indicating the type of gas and pressure for which the cooker has been adjusted. - Page 12 INSTRUCTIONS MANUAL 4 - Grill 4.1 - Open the oven door and remove all internal accessories. 4.2 - Remove the burner / reflector unit by loosing the screw fixing the reflector and remove all elements from the injector support by turning downwards 4.3 - Unscrew and remove the injectors and replace them those corresponding to the available gas see table 1 4.4 - Screw the burner / reflector and put in place the internal accessories.
-
Page 13: Gas Taps / Valves Maintenance And Cleaning
INSTRUCTIONS MANUAL 2.5 GAS TAPS / VALVES MAINTENANCE AND CLEANING If the gas tap / valve is hard to turn, do not force it. It might need lubricating This operation must be executed always by qualified and authorised personnel To access the taps / valves, pull burner heads and remove the cooking top To lubricate the taps/ valves, follow these instructions - With a screw-drive, remove the cover - Pull the cone out of its housing... - Page 14 INSTRUCTIONS MANUAL Before removing the saucepans turn off the burners The user must not change the appliance electricity supply cable. For replacement contact only a qualified person. The use of a gas appliance requires a regular exchange of air. Make sure that the installation complies with the Installation section 2.1.
-
Page 15: How To Use Burners Of The Cooking Top
INSTRUCTIONS MANUAL 3.2 HOW TO USE BURNERS OF THE COOKING TOP If you use the burners properly, the consequence will be a maximum efficiency, thus saving energy. The power of the burners is shown on table 1. In order to obtain this, you must choose pans according to the size of the burner see the table 2. If the flame is wider than the pan you are wasting energy. -
Page 16: The Vitro Table Use
INSTRUCTIONS MANUAL 3.3 THE VITRO TABLE USE If the bottom of the pan you use is plane, It's possible user glass recipients or porcelain recipients The pans diameters should be accorded to the diameter of the work area. Don't use recipients with a inferior diameter to the work area. Cover the recipients during the cooking, for economise energy. -
Page 17: How To Use The Gas Oven And The Gas Grill
INSTRUCTIONS MANUAL 3.4 HOW TO USE THE GAS OVEN AND THE GAS GRILL ( GOX/K MODELS ) If the gas supply is deficient or if the flame is extinguished accidentally, the gas circuit will be automatically closed. To restart is necessary an user intervention. In this case and after verify that isn't a gas supply problem, wait at least one minute and repeat the lighting. -
Page 18: How To Use The Gas Oven And The Electric Grill
INSTRUCTIONS MANUAL 3.5 HOW TO USE THE GAS OVEN AND THE ELECTRIC GRILL (NOT APPLICABLE) For security reasons the design of the appliance do not permit the work of the gas oven and the electric grill at the same time (if fitted). For use the gas oven, procede like 3.3.1 To use the electric grill, turn the handle clockwise until the point until the Word grill or symbol on the grill... - Page 19 INSTRUCTIONS MANUAL 3.6 HOW TO USE THE MULTIFUNCTION OVEN (APPLICABLE MODELS ONLY) Various cooking options can be selected by the use of switching of different elements, and temperature that is controlled by a thermostat. Oven light In this position only the light is in operation. The light stays on the other seven use positions. Fan forced The circular heating element and fan come into operation and the heat is spread evenly to all shelf positions.
-
Page 20: How To Use The Multifunction Oven
INSTRUCTIONS MANUAL For use the gas oven, procede like 3.3.l To use the electric grill, turn the handle clockwise until the point until the Word grill or symbol on the grill panel HOW TO USE THE MULTIFUNCTION OVEN ( EV MOI D ELS ) Various cooking options can be selected by the use of switching of different elements, and temperature that is controlled by a thermostat. -
Page 21: How To Use The Turn Spit
INSTRUCTIONS MANUAL 3.7 HOW TO USE THE TURN-SPIT (APPLICABLE MODELS ONLY) In this model with turn spit put the aliments in the center of the spit Put the support grill in the two sides of the oven. Introduce the spit rod in to the motor shaft hole obtained in the back wall and check the rearend is well set. -
Page 22: Electronic Programmer
INSTRUCTIONS MANUAL 3.10 ELECTRONIC PROGRAMMER SETTING UP THE ACTUAL HOUR: Once the electrical connection is made to the oven, the display blinks and shows 0.00. Press keys (1) and (2) at the same time, then press keys (-) and (+) to set up the actual hour within 4 seconds;... - Page 23 INSTRUCTIONS MANUAL Semi-automatic Operation The oven can be programmed to switch off automatically. To do this proceed as follows: 1. Select the required function and temperature using the cooking function selector and the thermostat dial. 2. Press key (2) and set the cooking time by pressing keys (-) and (+) within the next 4 seconds. The actual time reappears and pilot lights (A) and (AUTO) remain ON.
-
Page 24: Digital Timer
INSTRUCTIONS MANUAL 3.11 DIGITAL TIMER Time of Day Adjustment Press the + and - buttons together. The point between the hours and minutes will start to flash. Using the + and - buttons, you can adjust the current time of day. Long presses of those buttons will enable fast adjustments. -
Page 25: Recommendation To Use The Oven And The Grill
INSTRUCTIONS MANUAL 3.12 RECOMMENDATION TO USE THE OVEN AND THE GRILL The accessible parts of the cooker could be hot, if the oven or the grill is in operation. Do not let children close to the appliance. Don't let children sit down or play with the oven door. Do not use the drop down door as a stool to reach above cabinets Warning: Never use the food - Warmer drawer set at the bottom of the range to store inflammable substances or waters... -
Page 26: Instruction For Maintenance And Cleaning
INSTRUCTIONS MANUAL INSTRUCTIONS FOR MAINTENANCE AND CLEANING Warning: Servicing should be carried out only by authorised personnel. Before maintenance or cleaning your cooker, switch off the circuit breaker, turn off the isolating gas valve or the gas mains and allow the cooker to cool down. GENERAL CLEANING Adequate maintenance and cleaning will prolong the life of the appliance, as well as ensure trouble-free service. - Page 27 INSTRUCTIONS MANUAL OVEN CLEANING The oven should be washed with warm water and a nylon pad soaked in ordinary detergent. The oven is " Easy to Clean " enamel, don't need abrasive detergent for cleaning. How to remove the interior glass on the oven's door for cleaning : - Press the (A), and remove the superior tops ( B ) - Release the interior glass ( C ), from the interior tops ( D ) - Remove the interior glass...
- Page 28 INSTRUCTIONS MANUAL Protection Filter of the Oven Fan During the cooking, to minimise fat/debris going on to the fan, install the filter cover. When cooking is complete, remove the filter and wash it. To install the filter, mount the filter leaning it against the rear wall at the same level of the fan, then push the "tang"...
-
Page 29: Control Of The Product
- Electric unit operation - Dielectric rigidity - Earthing continuity - Operation with one type of gas - Leak control - Operation of the safety valves - Aesthetic control Manufacturer address: Unit 1, Tewkesbury Retail Park, Northway Lane, Tewkesbury, Gloucestershire, GL20 8JH. www.montpellier-appliances.com... -
Page 30: Tables
INSTRUCTIONS MANUAL TABLES TABLE 1 - BURNERS BUTAN GAS PROPAN GAS NATURAL GAS Pressure nominal operation, mbar 28 - 30 Pressure nominal operation, mbar Pressure nominal operation, mbar Power W (P .C.S.) Rate Injector Rate Injector Rate Burners Normal Minimum Auxiliary 1 000 0,50... - Page 31 INSTRUCTIONS MANUAL TECHNICAL CHARACTERISTICS...
- Page 32 Your 2 year Manufacturer’s guarantee THIS DOES NOT AFFECT YOUR STATUTORY RIGHTS. Your new Montpellier appliance carries a free guarantee which protects you against the cost of repairs during the first 24 months from date of purchase provided that: Any claim is accompanied by evidence of the model reference, model serial number and proof of purchase, such as a Sales Receipt, showing that the appliance was purchased within the 24 months prior to the date of claim.
- Page 33 Montpellier Domestic Appliances Ltd. Unit 1, Tewkesbury Retail Park, Northway Lane, Tewkesbury, Gloucestershire GL20 8JU www.montpellier-appliances.com The symbol on the product or on its packaging indicates that this product may not be treated as household waste. Instead it shall be handed over to the applicable collection point for the recycling of electrical and electronic equipment. By ensuring this product is disposed of correctly, you will help prevent potential negative consequences for the environment and human health, which could otherwise be caused by inappropriate waste handling of this product.
Need help?
Do you have a question about the MR95DFCR and is the answer not in the manual?
Questions and answers