Advertisement
User Guide
©2017 Implus LLC • All rights reserved.
Perfect Fitness
, Perfect
, and Multi-Gym
are registered trademarks of Implus LLC.
®
®
®
U.S. and International Patents Pending.
www.PerfectOnline.com
No part of this booklet may be reproduced or utilized in any form or by any means
electronic, mechanical or otherwise without the expressed written consent of the
copyright holder.
1
Advertisement
Table of Contents

Related Manuals for Perfect Fitness MULTI-GYM pro


Summary of Contents for Perfect Fitness MULTI-GYM pro
- Page 1 User Guide ©2017 Implus LLC • All rights reserved. Perfect Fitness , Perfect , and Multi-Gym are registered trademarks of Implus LLC. ® ® ® U.S. and International Patents Pending. www.PerfectOnline.com No part of this booklet may be reproduced or utilized in any form or by any means electronic, mechanical or otherwise without the expressed written consent of the copyright holder.
-
Page 2: Important Safety Information
No matter your fitness level, you can progress at a rate IN THIS USER GUIDE AND ON THE WORKOUT CHART MAY RESULT IN that’s right for you using Perfect Fitness products. SERIOUS INJURY, DEATH OR PROPERTY DAMAGE. -
Page 3: Equipment Warning Label
Pro to a door frame, make sure the Safety Clip is securely ® wide and do not use this product if you attached to both the molding and Multi-Gym Pro. Remove the Multi-Gym 12) Handicapped, disabled, or injured weigh more than 300 lbs/136 kg. If the Pro from the door frame when not in use. -
Page 4: Assembly Instructions
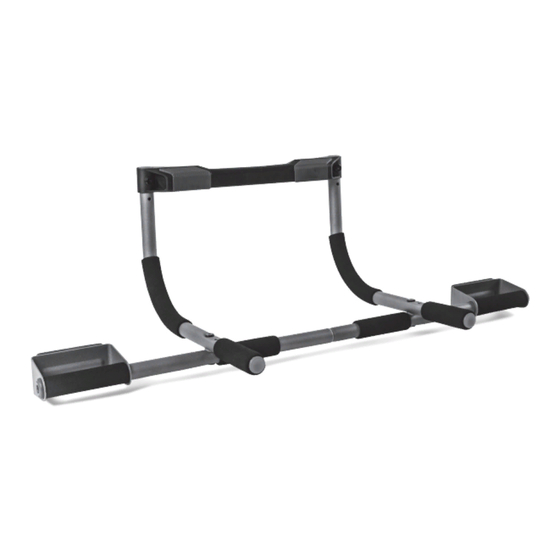
Assembly Instructions STEP 1 a) To begin assembly, place Left and Right bars on table with pads facing down. Read and follow all instructions provided before assembling or installing this product. b) Attach the Left and Right Bar Assembly together by first sliding the Right Bar Failure to properly assemble or install this product could result in damage to property and/ Assembly into the Left Bar Assembly. - Page 5 Multi-Gym Adjustments STEP 3 ® a) While the assembly is in front of you as shown, Attach the Connector Bar to the LEFT and RIGHT Curved Tube Assemblies. Make sure to line up the holes of the connector bar with the Door frames and trim (molding) vary in size.
-
Page 6: Parts List & Exploded View
Parts List & Exploded View STEP 2 - Installing the Safety Clip After the Multi-Gym ® has been Door frames and trim (molding) vary in size. The Perfect Multi-Gym has 2 adjustments to ® adjusted to fit the doorway, accommodate different molding heights (Figures A and B under Multi-Gym adjustments) ®... -
Page 7: Care And Storage
Warning Before each use, visually inspect the device. Never use the device if it is not working properly. Care & Storage Your Perfect product has been carefully designed to require minimum maintenance. ® To ensure this, we recommend that you do the following: Keep your unit clean.
Need help?
Do you have a question about the MULTI-GYM pro and is the answer not in the manual?
Questions and answers