Parker AC10 Easy Start Manual
To 22kw
Hide thumbs
Also See for AC10:
- Product manual (145 pages) ,
- Quick start manual (61 pages) ,
- Product manual (151 pages)
Table of Contents
Advertisement
Quick Links
- 1 Power and Motor Connections (Single Phase)
- 2 Power and Motor Connections (Three Phase)
- 3 Parameters - Overview
- 4 Parameters to Set before Use
- 5 How to Set a Parameter Value
- 6 How to Operate the Inverter from the Keypad
- 7 How to Connect and Configure a Potentiometer for Remote Speed Control
- 8 How to Connect and Configure a Run Forward or
- Download this manual
Parker AC10 Frequency Inverter (to 22kW)
Easy Start Guide
The Parker AC10 Frequency Inverter range is
available to order from inverterdrive.com
This guide is intended to complement the user manual provided by the manufacturer.
It is provided as a basic introduction to the product for Inverter Drive Supermarket customers.
It should not be used as a replacement for the manual issued by the manufacturer.
This product is not a safety device. All safety considerations including but not
limited to Emergency Stop provision should be assessed separately and are
outside the scope of this guide.
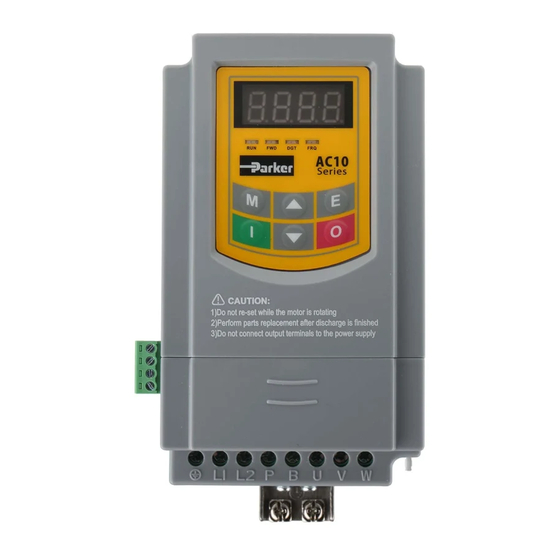
CAUTION:
1)Do not re-set while the motor is rotating
2)Perform parts replacement after discharge is finished
3)Do not connect output terminals to the power supply
L2
P
B
U
V
L2
P
B
U
V
W
W
Issue 3
20181109
Advertisement
Table of Contents

Related Manuals for Parker AC10


Summary of Contents for Parker AC10
- Page 1 2)Perform parts replacement after discharge is finished 3)Do not connect output terminals to the power supply The Parker AC10 Frequency Inverter range is available to order from inverterdrive.com This guide is intended to complement the user manual provided by the manufacturer.
-
Page 2: Table Of Contents
Easy Start Guide Parker AC10 Series Inverter (to 22kW) Contents Page 1 Contents Page 2 Power and Motor Connections (Single Phase) Page 3 Power and Motor Connections (Three Phase) Page 4 Motor Connections - Star and Delta Page 5 Parameters - Overview... -
Page 3: Power And Motor Connections (Single Phase)
Easy Start Guide Parker AC10 Series Inverter (to 22kW) 1. Power and Motor Connections (Single Phase) Before commencing, confirm that the Inverter and all cables are completely isolated from the power supply, have been isolated for at least 5 minutes and that the motor is not turning. -
Page 4: Power And Motor Connections (Three Phase)
Easy Start Guide Parker AC10 Series Inverter (to 22kW) 2. Power and Motor Connections (Three Phase) Before commencing, confirm that the Inverter and all cables are completely isolated from the power supply, have been isolated for at least 5 minutes and that the motor is not turning. -
Page 5: Motor Connections - Star And Delta
Easy Start Guide Parker AC10 Series Inverter (to 22kW) 3. Motor Connections - Star and Delta Dual voltage induction motors typically include The selection of Star or Delta is not optional terminal boxes with six points. The points can and must match the supply voltage. -
Page 6: Parameters - Overview
AC10 Inverter. 5. Parameters to set before use Set the following parameters to allow the AC10 If any of the parameters have been changed to control a motor with Run, Stop and Speed previously, follow the procedure in section 14 Control from the keypad. -
Page 7: How To Set A Parameter Value
Easy Start Guide Parker AC10 Series Inverter (to 22kW) 6. How to set a Parameter value 6.1 Press “M” key to access parameters. With the motor stopped, press the “M” key repeatedly until the parameter list is shown. The parameter list is prefixed with “F” as illustrated (left). -
Page 8: How To Operate The Inverter From The Keypad
Easy Start Guide Parker AC10 Series Inverter (to 22kW) 7. How to operate the Inverter from the keypad 7.1 Select the speed reference. Press the “M” key repeatedly until the speed reference is shown - the “Frq” lamp will illuminate. The default is 50.00 (Hz). All digits will flash except the currently-selected digit. -
Page 9: How To Enable Sensorless Vector Mode
Easy Start Guide Parker AC10 Series Inverter (to 22kW) 8. How to enable Sensorless Vector mode The standard motor control mode of the AC10 These calculations require a rotating Inverter is VxF. This simple mode controls “autotune” run with bare shaft during which the motor speed by varying Volts and Frequency in Inverter operates for approx. -
Page 10: How To Connect And Configure A Potentiometer For Remote Speed Control
The number of turns depends on the speed to be controlled from a more convenient application. A single turn Potentiometer is location such as a cabinet door (if the AC10 is available from The Inverter Drive Supermarket cabinet-mounted) or on the machine itself. -
Page 11: How To Connect And Configure A Run Forward Or
Easy Start Guide Parker AC10 Series Inverter (to 22kW) 10. How to connect and configure a Run Forward or Run Reverse switch The procedure described in section 7 enables This section explains how to enable 2-wire Run/Stop operation via the red and green control with Run Forward / Stop / Run Reverse buttons on the Inverter keypad. -
Page 12: How To Connect And Configure A Run/Stop Switch
Easy Start Guide Parker AC10 Series Inverter (to 22kW) 11. How to connect and configure a Run/Stop switch with Forward/Reverse selection The procedure described in section 7 enables This section explains how to enable 2-wire Run/Stop operation via the red and green control with Run/Stop and Forward/Reverse buttons on the Inverter keypad. -
Page 13: How To Configure "3-Wire" Control With Run/Stop
Easy Start Guide Parker AC10 Series Inverter (to 22kW) 12. How to configure “3-Wire” control with Run/Stop pushbuttons and Forward/Reverse selection The procedure described in section 7 enables This section explains how to enable 3-wire Run/Stop operation via the red and green control with Run and Stop via pushbuttons and buttons on the Inverter keypad. -
Page 14: Brake Resistor Connection
Easy Start Guide Parker AC10 Series Inverter (to 22kW) 13. Brake Resistor Connection Before commencing, confirm that the Inverter and all cables are completely isolated from the power supply, have been isolated for at least 5 minutes and that the motor is not turning. -
Page 15: How To Reset The Inverter To Factory Defaults
Easy Start Guide Parker AC10 Series Inverter (to 22kW) 14. How to reset the Inverter to Factory Defaults 14.1 Select parameter list. With the motor stopped, press the “M” key repeatedly until the parameter list is shown. The parameter list is prefixed with “F” as illustrated (left).
Need help?
Do you have a question about the AC10 and is the answer not in the manual?
Questions and answers