Table of Contents
Advertisement
Quick Links
Advertisement
Table of Contents

Related Manuals for POLYtij S3i


Summary of Contents for POLYtij S3i
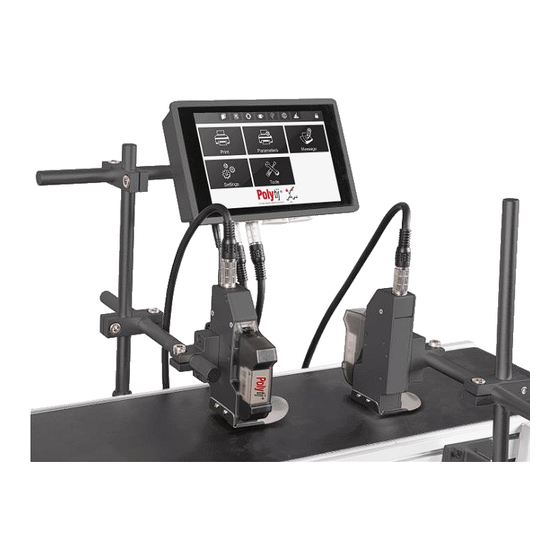
- Page 1 Edition: A03 September 6, 2018 High Resolution S3i Printer User Manual...
- Page 2 Edition: A03 September 6, 2018 IMPORTANT To ensure the best printing quality, we recommend utilising our specified cartridges and the corresponding accessories. Any malfunction or poor printing quality caused by improper use of inks or accessories which are not from Digital Ink Technologies Pty Ltd will not be guaranteed. Safety Precautions Please beware of the high voltage inside the machine once there is electrical connectivity.
- Page 3 September 6, 2018 Introduction Thank you for purchasing our POLYtij® S3i high resolution thermal inkjet printer. We hope to provide helpful information with this machine, please read the manual carefully to learn more about the inkjet printer and following the content below: •...
-
Page 4: Table Of Contents
Edition: A03 September 6, 2018 Contents 1 Important Precautions …………………………………………………………………………………………………………………… 6 2 Technical Specifications 2.1 Performance Values ................................7 2.2 Features .................................... 8 2.3 2.3 Ink Solutions ................................8 3 Function Use Introduction Message Management-Standard Mode 3.1.1 Message List ................................3.1.2 Toolbar.................................. - Page 5 Edition: A03 September 6, 2018 3.7.1 Cartridge status ................................ 48 3.7.2 System status................................49 3.7.3 Encoder information ..............................51 3.7.4 Photocell information ............................. 51 3.7.5 USB Status .................................. 52 3.7.6 Log out ................................... 52 3.7.7 Internet Status ................................52 Input Method Introduction ........................53 4 Maintenance ..........................
-
Page 6: Important Precautions
Edition: A03 September 6, 2018 1 Important Precautions S3i thermal inkjet printer. To protect the user’s personal safety Welcome to the high resolution POLYtij ® and user rights, please ensure correct installation and operation. Please read the following precautions carefully and ensure anyone who will be using the machine is trained thoroughly using this manual. -
Page 7: Technical Specifications
Edition: A03 September 6, 2018 2 Technical Specifications 2.1 Performance Values Items Specifications Note Technical source HP TIJ2.5 Thermal Ink Jet technology; Controller (H*W*D): 225*140*36mm Dimension Print head *2(H*W*D): 175*52*33mm Weight About 1kg Specified power 30V/3A,90W Power input adapter Print height 1-25.4mm Print speed and Standard 300DPI... -
Page 8: Features
Supports inks of various colours: black, red, green, yellow, blue, magenta, etc Supports porous, semi-porous and non-porous substrates Supports innovative ink technologies such as POLYtij® UV Invisible, FOODtij® and EDIBLEtij® for Anti-counterfeit, food grade and edible inks respectfully. -
Page 9: Function Use Introduction
Edition: A03 September 6, 2018 3 Function Use Introduction 3.1 Message Management-Standard Mode 3.1.1 Message List Click【Message】>【List】. List mode switch: Display message in default listing, click 【Icon】, and switch to simple display mode; Click Icon , to switch back to normal display mode; ... -
Page 10: Toolbar
Edition: A03 September 6, 2018 Import message: Insert a USB disk. The device will identify the disk, click 【Import】, and then message of USB disk: Inkjet/msg will be imported into the list automatically; When the imported message name is the same as on the device, it will popup reminder to rename import according to reminder. -
Page 11: New Text Message
Edition: A03 September 6, 2018 【Adaptive screen】: Display canvas size in 1:1 ratio. Click 【Tools】again for the toolbar to be hidden. 3.1.3 New Text Message Tips: At single print head P1/P2 mode, there is only one line on the message interface up to 12.7mm message can only use one print head to print. - Page 12 Edition: A03 September 6, 2018 Built source list Added from source list 【Input】 Shortcut: Switch to shortcut to input text content, User can input Chinese, English, numbers, symbols, and third-party language, 100 characters limited. (Note: If user has already added the source in 【Routine】...
- Page 13 Edition: A03 September 6, 2018 Y axis coordinates: Input range -5-12.7mm, user can select to adjust slightly. combine mode, there is two lines, input range -5-25.4mm) When half of the height is less than 5, the minimum value of Y axis is -1/2Hmm.) 【Zoom】...
- Page 14 Edition: A03 September 6, 2018 Align multiple lines to the left, align multiple lines to the centre, align multiple Text Alignment: lines to the right, align multiple lines left and right justification. 【 Name 】 It can be set to Chinese, English, numbers and symbols; cannot exceed 30 characters, empty and rename with added object are not allowed.
- Page 15 Edition: A03 September 6, 2018 GS1RSS14StackedOmni GS1 2D barcode GS1DM 【Specification】 Barcode type Settings Width: Totally 1-16 levels to choose. 1D Barcode Height: Single line canvas input 1-12.7mm. Double lines canvas can input 1-25.4mm. Hide/unhide text: click to choose hide/unhide barcode text. Font: Select barcode text font Font Size: Select barcode text font size 14-150.
- Page 16 Edition: A03 September 6, 2018 built image source 【Image setting】 Image Source List: Display the newly built image source. Click the image source to switch image and adjustable settings. Note: Please refer to 3.1.3 about “How to add/edit image source”. 【Position】...
- Page 17 Edition: A03 September 6, 2018 Limited length: When turning on this function and modifying the text source the characters length you have modified can’t be longer than its original content length. For example, when you create a new text source which includes 12 characters and turn on the limited length, at the start interface, the modified text source can only input ≤12 characters, inputting the 13 character will be prohibited.
- Page 18 Edition: A03 September 6, 2018 Icons description: Description Description Icon Icon Hour in 12 hour 4-digit Year system Last 3-digital Year Minute Last 2-digital Year Second the day of the Last 1-digital Year week Abbreviation of Month 01-12 the weekday abbreviated month AM/PM Month name...
- Page 19 Edition: A03 September 6, 2018 3) Counter source 【Edit】 Initial Value: begin value of the counter, range from -999999999999~+999999999999 Maximum Value: Maximum value, range from -999999999999~+999999999999 Repeat Value: The print times of each value, range 0~9999(0 mean not repeat print). Step Value: Set counter step number .(example: step value is 3, counter will be 1, 4, 7, 11…) Carry System: Default is DEC, user can select different carry systems, if need to add a new one, click【Edit】...
- Page 20 Edition: A03 September 6, 2018 Current Value: Set the current value of the counter, value should be within the begin value and maximum value. Repeat Index Value: Set the current repeat index value, only settable while repeat value is not 0, repeat index value range is 0-repeat value.
- Page 21 Edition: A03 September 6, 2018 starting time is set to 8:00, then the first shift A start time is 8:00, shift B start time is 12:00, shift C start time is 16:00, and so on.) Add:If you need to add another shift, user can input the 【Shift name】 and the 【Time】, click 【Add】, the new shift will be added to the list on the left side.
- Page 22 Edition: A03 September 6, 2018 Edit Others Shape :1-3000mm Straight line Length :0.1- Line Width :1-3000mm Rectangle, Width Chamfering:0-1/2h Height: single canvas Fill / Stroke:Click to switch to fill the image 1-12.7mm,double Line Width:0.1-2mm,only show graphic canvases 1-25.4mm borders. Set to Fill, when image stroke is set, fill setting is not available.
- Page 23 Edition: A03 September 6, 2018 Logopack: Add logopack plug-in first, then the logopack source will have images to select. [Edit] Choose your image on the left for which is to be added from the logo pack plug-in, the right is the images in the logopack. [Source name] Maximum of 30 characters.
- Page 24 Edition: A03 September 6, 2018 Search: Input key words and click “search”, the content will display in field list. Input page: it can jump to inputted field list, also can click up/down icon to search message. 【Advance】 Current value: Set current printed line, the range is between the begin value and end value. Repeat value: The print times for each value.
- Page 25 Edition: A03 September 6, 2018 Object Management: Click【Manage】user can select objects to edit shortcuts. Copy Copy objects to the Rename Rename objects clipboard Copy-paste or cut Delete Delete Objects Paste objects Select all Objects None Select none Align Object alignment Sort Keypad Description: Description Description...
-
Page 26: Edit Message
Edition: A03 September 6, 2018 Note: If you do not add the built to object, then it will be deleted automatically after saving the message. 3.1.4 Edit message Select the object which you need to edit in the list, select【Edit object】to enter the editing interface. -
Page 27: Message Management-Simple Mode
Edition: A03 September 6, 2018 3.2 Message Management-Simple Mode 3.2.1 Message List Click【Message】>【List】 List mode switch steps are the same as standard mode. Expand list width/ Search message / Message management (Export, Import, Rename, and Select All) are the same as standard mode. 3.2.2 Toolbar The same as standard mode. - Page 28 Edition: A03 September 6, 2018 2) Counter object 【Message】>【New】>【New object】>【Counter】 【Input】: Input contents represent the counter. 【Routine】: Initial Value: Beginning value of the counter, range from -999999999999~+999999999999 Maximum Value: Maximum value ranges from -999999999999~+999999999999 Repeat Value: Ranges between 0~9999 Step Value: For example: If step value is set to 3, counter will be 1, 4, 7,11…...
- Page 29 Edition: A03 September 6, 2018 Set the counter which the carry is based on (e.g. there is counter 1 and counter 2, set the carry source of counter 2 to be counter 1, then only after counter 1 reaches the maximum value, counter 2 will carry over.) Current Value: Set the current value of the counter, the value should be within the begin value and the maximum value.
- Page 30 Edition: A03 September 6, 2018 Last 2- Seconds digital Year Last 1- The day of the digital Year week Abbreviation Month 01-12 of the weekday abbreviated AM/PM month Month name Week of Year Name of weekday Hour in 24- Day of the hour time year system...
- Page 31 Edition: A03 September 6, 2018 Shift List: Display’s the default and newly built shifts. New: Building a new shift 【Interval】: According to the selected time interval, 24 hours a day is divided into the corresponding number of shifts. For example, the time interval is set to 4H, the system automatically generates 6 shifts (default A-F) and displays them in the left list.
-
Page 32: Edit Message
Edition: A03 September 6, 2018 【Modify Shift Content】: Select the shift from the list on the left to then edit its content on the right side, 【Add】will change to【Modify】,click【Modify】to save. 【Shift name】: Default is shift + number. User can input no more than 30 characters and can’t input ("... -
Page 33: Printing Management
Edition: A03 September 6, 2018 3.3 Printing Management 3.3.1 Start/Stop Printing Tips: When using an external photocell, it should be sensed (triggered) before printing. When using the internal photocell, the photocell should be sensed before printing. (In combined mode or separated mode, double print head only needs to sense from one photocell signal) ... -
Page 34: Printing Monitor
Edition: A03 September 6, 2018 Repeat Index Value: The next printing is the N time of the repeat value. The repeat value of the counter source must not be zero. Text source: User can modify the text content; the next printing content will be changed after saving the settings. -
Page 35: Offset Adjustment
Edition: A03 September 6, 2018 Select the records that the user wants to reprint in the list, click 【Add】 to add to 【added record】 list, click 【Reprint】then sense the photocell to enable printing of the selected records in order. User can add a maximum of 10 records. ... -
Page 36: Print Parameter
Edition: A03 September 6, 2018 Click 【Test】and sense the photocell to test the print location information. According to this method the user can adjust X, Y axis to combine the two heads for perfect alignment. Select ‘Yes’ to save the setting information. Note: Double print head combined mode must be set for the offset settings above to appear. -
Page 37: Printing Option
Edition: A03 September 6, 2018 Pre-purge: The user can choose to activate either double nozzles or the working nozzle. When the Pre-purge function is ON, the printer will fire ink droplets at the desired setting level during idle periods in the printing process. This will keep the nozzle plate warm and moist to eliminate the dried ink phenomenon. -
Page 38: Special Printing
Edition: A03 September 6, 2018 Line Speed :Line running speed (ie. conveyor). Input the range of the line speed according to DPI . 12Khz,fmin=15hz) 3.4.5 Special Printing Print mode:Continuous printing or reverse printing. Switch the mode for the corresponding settings to change between continuous/reverse printing. Continuous printing: Continuous printing numbers range from 0-9999. -
Page 39: Signal Management
Edition: A03 September 6, 2018 Language: 【English and others】. Click the icon to select language. Default language: English How to upgrade other language, please refer to section 3.6.2. After changing the language, the printer will restart automatically to make the changes. Device name: The maximum characters allowed is 30. - Page 40 Edition: A03 September 6, 2018 Create new user After opening the user management feature, click New to create a new user. Create user information User name: You can input English characters or numbers for the username, however there can be no more than 30 characters, and can't be left empty. ...
- Page 41 Edition: A03 September 6, 2018 Functions Features available Start/stop printing, Printing delay, Initial, Printing monitor, Re-print and offset Printing Parameters Print setting, Photocell setting, Direction, Mirror, Nozzle, DPI, Output, Pre-purge, Counter reset, Cache, Special print, Print record, Line speed, Object width, Pre-print ,Clean buff, refresh rate and frequency Message New message, edit message, Copy, Paste and Delete Settings...
-
Page 42: System Reset
Edition: A03 September 6, 2018 Open the user management, select user info and click Delete to remove the user info. Tip: You cannot delete the Administrator. Close user management Open user management to popup a page requiring you to input a password. Once the correct administrator password has been entered and you select “yes”, the icon will turn grey and you can close the user management. -
Page 43: About
Edition: A03 September 6, 2018 System parameter System time Default time Unit Device name INKJET Screensavers 3mins Screen brightness User control Closed Language Language management English Font Font management Default Input Input management English 3.5.5 About Displays the company name, website, company logo, software version, hardware version, device SN (serial number), and customer code. -
Page 44: Upgrade Management
Edition: A03 September 6, 2018 If image pixels are greater than 300*10000 (H*W), it will prompt an import failure. Supports a maximum of 100 images. Supported image formats: bmp/jpg/png/gif single bit picture. Export images: Insert a USB and click Export to export all images, the default path is ( Inkjet/Logo/ )... - Page 45 Edition: A03 September 6, 2018 Upgrade language Insert with language file (File stores under: Inkjet\Upgrade\Language) Click 【Language】 to select language, the list shows the upgraded language, the default is only English. Click 【Choose】 to select language from USB and after upgrade, the printer will restart.
-
Page 46: Backup And Recovery
Edition: A03 September 6, 2018 3.6.3 Backup and recovery Backup Insert U disk, click【Tools】>【Backup】 Click required backup option, multi-optional available (backup will be failure if not select any options,) Backup name is available for 30 characters limit, English, numbers, symbols ( Except “\/:*?"<>|”) and Chinese. -
Page 47: Permission
Edition: A03 September 6, 2018 replaces the original with duplicate file names will and the file name will be excluded be unchanged Parameter Restored parameters will replace original parameters Setting Restored parameters replace original parameters Click 【Recovery】to perform recovery operation. After recovery is successful, the device will reboot automatically, then the content of device will correspond with the recovery file. -
Page 48: Plugin Management
Edition: A03 September 6, 2018 3.6.5 Plugin Management Insert USB with plug-in file, click【Add】to select the file and add plugin, after adding the plugin successfully, it will display in the list. Click【All】, all plugins in the list are checked. Click【Delete】to delete all the selected plugins from the list. 3.7 Status bar 3.7.1 Cartridge status Click... - Page 49 Edition: A03 September 6, 2018 Green P1 is normal Single printhead Orange P1 warning P1 warning Green P2 is normal Orange P2 warning P2 warning Green P1、P2 are all normal Orange At least one of printheads in P1 and P2 is in a warning state At least one of the printheads in P1 and P2 is in an error state Display cartridge info: Ink status, Cartridge SN, Client Code, Ink type, Volume, Used...
-
Page 50: System Status
Edition: A03 September 6, 2018 3.7.2 System status Click to display system status Display P1 info Single printhead P1 Display P2 info Single printhead P2 Display P1 P2 info Combined printhead/Separated printhead System status colour Green: Normal Red: System time reset, FPGA error, etc. Display system info System status, MSG name, Direction, Print nozzle switch, DPI, Output, Pre-purge, Print cache, Times (Continuous printing/Reverse printing), Continuous/ Reverse Interval, Print record, Line... -
Page 51: Encoder Information
Edition: A03 September 6, 2018 3.7.3 Encoder information Encoder icon Displays green: The printer is connected with an encoder. Displays grey: No encoder connected. Encoder test Displays encoder connection status. Once the encoder is connected, click the encoder icon as seen in the image below for the encoder signal test interface to appear. -
Page 52: Usb Status
Edition: A03 September 6, 2018 3.7.5 USB Status USB Icon Once a USB is inserted, click the USB icon to display current USB status. USB info: Displays USB volume, USB space occupied and USB space remaining. 3.7.6 Log out Open the user management, click , to pop-up a login page. -
Page 53: Input Method Introduction
Edition: A03 September 6, 2018 Displays green:Connected to the internet. Displays grey: Not connected to the internet. Click the icon to open a pop-up for the internet settings interface. User can choose dynamic IP/static IP to access LAN. Dynamic IP: Insert the network line into the printer, it will obtain the relevant address information automatically. -
Page 54: Edition: A03 September
Edition: A03 September 6, 2018 Numbers: Selected by Symbols click shift to symbols; click to shift to Chinese symbols. Chinese: Click to shift from Chinese and English; Chinese typing only works while system language is set to Chinese. -
Page 55: Maintenance
Edition: A03 September 6, 2018 Spanish: Change the system language to Spanish, long-press a,e, i, o, u, n, system will then pop- up with the corresponding symbols. 【Cancel】Close keyboard, quit without saving 【Enter】Close keyboard and save 【Delete】Delete the last typed character, long-pressing will delete all the content in the input box. -
Page 56: Printer Maintenance
Edition: A03 September 6, 2018 4.1 Printer Maintenance Please ensure the power cable, power adapter cable and grounding cable are all in good condition. Make sure the connection of each cable is undamaged and reliable. Ensure the connection for grounding wire is secured and the grounding is reliable. Ensure the equipment is not displaced before turning on the machine. -
Page 57: Appendix 1: Terms And Definition
Edition: A03 September 6, 2018 The nozzle plate is delicate. Do not touch or clean nozzle with anything sharp or rough as not to scratch nozzle. Use the Non-woven cloth provided with the cartridge to wipe and clean the nozzle. Note: Wipe the nozzle with the printhead facing down. -
Page 58: Appendix 2: Common Troubles And Solutions
Edition: A03 September 6, 2018 6 Appendix 2: Common Troubles and Solutions Note 1: The table below lists the most commonly seen problems and solutions. If you experience any other problems, please contact your local distributor or Digital Ink Technologies for assistance. Note 2: The table below is for reference only, each problem may differ depending on the individual situation such as the installation environment and operation. -
Page 59: Troubleshooting And Solutions For Printer
Edition: A03 September 6, 2018 6.2 Troubleshooting and Solutions Problems Analysis Solutions Comment Make sure the AC power input on Check if the power adapter the adapter is correct, also check light is green and normal. that the DC output on the adapter Replace with a new adapter if is connected with the printer.
Need help?
Do you have a question about the S3i and is the answer not in the manual?
Questions and answers