Table of Contents
Advertisement
Quick Links
Advertisement
Table of Contents
Troubleshooting

Related Manuals for POLYtij S1i


Summary of Contents for POLYtij S1i
- Page 1 Edition: E1S20170601A POLY S1i High Resolution Inkjet Printer User Manual...
- Page 2 IMPORTANCE To ensure the best printing quality, we recommend to use our specified cartridges and the corresponding accessories. Any malfunction or poor printing quality caused by improper use of inks or accessories which are not from Sojet will not be guaranteed. Safety Precautions High voltage inside the machine after electricity connection, Maintenance or disassembly by unqualified or unprofessional person is strictly prohibited, in order to prevent any...
-
Page 3: Table Of Contents
Content Introduction................................5 ChapterOne:ImportantPrecautionsforUsage......................6 1.1 Installation Notes ..........................6 1.2 Operation Notes..........................6 ChapterTwo:InstallationandSetupInstructions......................7 2.1 Packing List for Spare Parts........................8 2.2 Device installation............................. 9 2.2.1Side printing installation........................9 2.2.2 Down printing installation......................9 2.2.3 Springback mechanism installation (optional)................10 Chapter Three: Device Introduction........................11 3.1 Controller Introduction..........................11 3.2 Printer head Introduction........................11 3.3 Technical Specifications........................... - Page 4 5.4.6 Screen Calibration........................32 5.5 Tools Management...........................33 5.5.1 Image Management........................33 5.5.2 System Upgrade..........................33 5.5.3 System Backup ..........................33 5.5.4 System Logs..........................33 5.5.5 About Equipment..........................33 5.5.6 System Reset..........................34 5.6 Input Methods Introduction........................35 5.7 Status Bar..............................36 Chapter Six: Maintenance ............................ 37 Printer Maintenance........................37 Ink Cartridge Maintenance......................37 Chapter Seven: Common Troubles and Solutions....................38...
-
Page 5: Introduction
Please read manual carefully before you use our inkjet printers. Introduction Thank you for purchasing our high resolution printer. We want you to get helpful information with this machine, please read the manual to learn more about our machine by the following content: Important precautions for use of the machine Introduction of printer: Parts and components of the machine Setup and Installation Instructions: Instructions for Equipment Setup and Cartridge Installation. -
Page 6: Chapterone:importantprecautionsforusage
Chapter One: Important Precautions for Usage Welcome to using Sojet Inkjet Printer. In order to protect your personal safety and user rights, ensure correct installation and operation, and full play of our printer, it is important that you read the precautions carefully. 1.1 Installation Notes 1.1.1 Use exclusive power supply for the machine. -
Page 7: Chaptertwo:installationandsetupinstructions
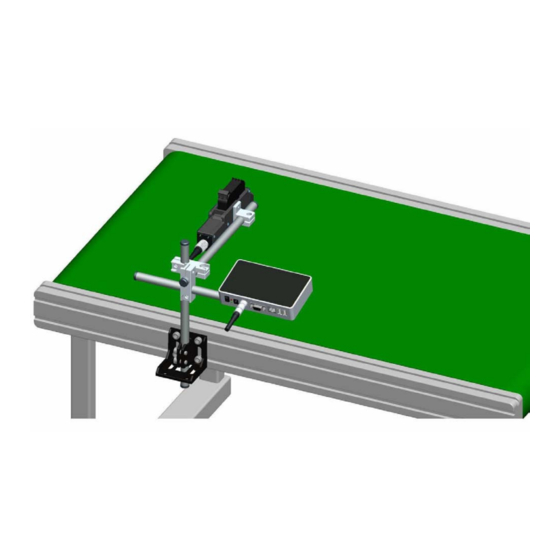
Chapter Two: Installation and Setup Instructions This chapter is about how to install the machine and cartridge. Firstly please check the packing list below Packing Picture... -
Page 8: Packing List For Spare Parts
2.1 Packing List for Spare Parts Please check everything with packing list to make sure all required parts in the package when you receive the products. 3、USB 1、Controller 2、Printer head 6、Printer head 5、Power supply adapter 4、Power line connection line 7、Ground line 8、Round bar fixer X 2 9、Round bar 10、Bi-direction bracket... -
Page 9: Device Installation
2.2 Device installation 2.2.1Side printing installation 2.2.2 Down printing installation... -
Page 10: Springback Mechanism Installation (Optional)
2.2.3 Springback mechanism installation (optional) Springback mechanism installation Anti-shock plate installation... -
Page 11: Chapter Three: Device Introduction
Chapter Three: Device Introduction 3.1 Controller Introduction Touch screen Power switch DB15 Port Indicator Ethernet light port Power port USB1 Aerial socket USB2 3.2 Printer head Introduction Dust cap Aerial socket Anti-shock plate... -
Page 12: Technical Specifications
3.3 Technical Specifications A. Performance Index Items Specifications Note Technical source HP TIJ 2.5 Thermal Ink Jet technology Controller(H*W*D): 151*93*32mm Dimension Printer head(H*W*D): 175*52*33mm 3pcs steel tubes with diameter at 16mm Clamp and bracket Bracket size 1pcs with length 350mm, 2pcs with length 280mm not included Power 30V/1A, 30W... -
Page 13: Chapter Four: How To Use The Printer And Check Before/After Use
Chapter Four: How to Use the Printer and check before/after Use In this Chapter, you will learn how to master and use printer quickly, including inspection work before and after use. 4.1 How to Use the Printer Steps Instructions Cartridge Insert cartridge into the printer by an angle of 15 degree, lock cartridge clip to Installation secure. -
Page 14: Chapter Five: Printer Operation Instructions
Chapter Five: Printer Operation Instructions This chapter is about how to operate printer interface, including Printing Management, Data Management, System Management, Tool Management, and Status Bar. 5.1 Main Interface Switch on power, printer starts Setting Manageme initialization After Status bar Printing initialization Manageme... -
Page 15: Printing Management
5.2 Printing Management Click on main interface Preview interface to enter printing management (see Image 2) Scroll bar Start Page up printing Page Printing Down delay File name Return (Image 2) Search Keywords enter bar 5.2.1 Find/Preview Data (see Image 2) Preview data Preview data by locating or selecting a file or data to display on preview interface;... -
Page 16: Print Initial Value
5.2.4 Print Initial Value Click to enter the initial value setting and repeated index value interface Hex switch: Click ,the current Hex switch counter value can be changed, but Counter the set value can’t be changed synchronized DEC-10 decimal (0-9) H36-36 hexadecimal (0-Z) The Hex is editable;... -
Page 17: New/Edit Data
5.3.1 New/Edit Data Image Logo Clip on data management interface to enter data edit Expiration date interface. Page up Production A. New data: text, counter, shifts, Add objects Text production date, expiration date, image Delete objects logo, barcode, dynamic text, dynamic logo, device information, string, CSV;... -
Page 18: Add Production Date
Note: Please refer to this Section ( 5.3.2) regarding how to add objects as “production date”, “expiration date”, ”image”, ”counter”, ”shift code”, “dynamic text” "dynamical logo", but the content of “production date”, “expiration date”, ”counter”, ”shift code”, “dynamic text” "dynamical logo" cannot be revised or adjusted directly when you add, and the font, height, content and font effect of “image”... -
Page 19: Add Image
5.3.5 Add Image Click to add image Select a image on file list by page up and down ( Image 13). Image file list (Image Note: When there is no image file found, a window jump out to remind you image importing (Image 14). -
Page 20: Add Shift
5.3.7 Add Shift Click to add “shifts code”. Click enter the setting interface: can set shifts interval, start time and shifts Interval numbers. Start time ShiftsInterval: 9 options: Shifts 0、0.5H、1H、2H、3H、4H、6H、8H、 12H,each option makes a day to the responding shifts number. Such as: interval value 8H, means 3 shifts per day. -
Page 21: Add Barcode
5.3.8 Add Barcode Code Click to add object“barcode”. type A. Click to enter barcode edit: Barcode type, horizontal scale level, barcode height, barcode text ( Image 18). Code width Code text Code height (Image 18) B. Click to enter barcode adjustment: coordinate location, text orientation( Image 19, ). - Page 22 D. Click Enter barcodes setting interface: User can create, edit and delete data sources inthe barcode content.The data sources including 10 objects: text,production date expiry date counter, shifts, dynamic text, device info, CSV, string and carriage return. After create a new object, its name will show up in the list, user can sort the objects by up and down arrows.
-
Page 23: Add Dynamic Text
5.3.9 Add dynamic text Clip to add dynamic text. A. Clip to enter the interface of dynamic text setting, and you can choose dynamic transmission path and communication protocol B. Scan printing Port is USB, selection modes are: S1P1: scan one while printing one S1PN:scan one while printing multiples until next scan data SNPN:scan multiples while printing... -
Page 24: Add Device Information
5.3.11 Add Device Information Click , add device information; Clip , enter device information setting interface, choose device name and device SN No available Device name can be defined by entering 5.4.5 user management to define and device SN can’t be changed. 5.3.12 Add String Click to add string. -
Page 25: Add Csv File
5.3.13 Add CSV File Click CSV to add the CSV file A. Put the CSV file under the U disk (Inkjet/CSV/) path Select CSV flies B. Inserts the U disk into the device. The device automatically identify the CSV file and switch options C. -
Page 26: System Management
Special 5.4 System Management Features User Click to enter system management Management interface ( Image 26). Printing options Editing options System setting Screen correction Image 5.4.1System Setting Click on system management System Language interface to enter system setting (Image 27). System time Screensaver time Unit... -
Page 27: Edit Options
5.4.2 Edit Options Click on system management interface to enter edit options setting interface. A. Click to enter production date Date format and expiry date format setting. New format Note: Seven common date formats default, Forty-three more formats addable for Edit format user. - Page 28 D: click ,enter the system setting interface. New system The system can be new-build, modified, and deleted, Modify system system default: DEC-10 decimal (0-9) H36-36 hexadecimal(0-Z) Deletsystem The default hex can't be modified or System setting deleted New-build and edit the system 1.
-
Page 29: Printing Options
5.4.3 Printing Options Click on system management interface to enter printing option setting. A. Click to enter nozzle Pre-purge maintenance setting. Pre-purge Mode Object Width One key Clean Note: 1) Pre-purge Mode: 2 modes : both right & left nozzles; the working nozzles only. - Page 30 D. Click to enter production line Setting. Line speed Line speed: system default 30m/min; Adjustable scope 1~150m/min; DPI: system default 300DPI; adjustable Scope 50~600DPI. Line speed setting Run speed test...
-
Page 31: User Management
Click on line speedsetting Speed interface to run speed test Image 35, 36). Test object length Line speed test: input test object length Run speed test 0~3000mm, click to enter speedtest Cancel startup interface, then start production line, Save put test object onto production line, the (Image photocell will be sensing the object, and the machine will calculate line speed... -
Page 32: Special Features
5.4.5 Special Features Click on system management interface to enter “Special “Features “ setting. ” A. Click to enter “Special printing” Special Setting . printing Continuou Continuous printing: s output times Output interval See Appendix 1: Terms and Definitions 9 for more information. 1) Continuous output times: system default 0 (OFF). -
Page 33: Screen Calibration
Click and enter Alarm settings. Three options as below: Red Light, Buzzer or Line Control ( Image 40 ). Red Light: When the device is in the following selected state, the tricolor light for warning Buzzer: The tricolor light will issue a buzzer alarm. -
Page 34: Tools Management
5.5 Tool Management Click on main interface to enter About printer Tool management interface System logs Backup management Upgrade management Image Logo System reset (Image 5.5.1 Image Management Click to enter imageLogo management interface Image 43). File list of Image Logo Image import: importing image from USB or Ethernet. -
Page 35: System Backup
5.5.3 System Backup Clip to enter backup management. Clip to enter backup operation interface; Export backup: including backup documents, Image and Parameter setting to enter the backup restore interface; can restore the message, image and Parameter which in U disk to the device;... -
Page 36: System Reset
5.5.6 System Reset Click from tools management interface to enter the system reset operation management interface ( Image 48). Click to execute system reset. You need administrator (Image password for permission to reset (Image 49). (Image Note: System reset is to restore all defaults. 1) Restore all to defaults, all data andimages are deleted. -
Page 37: Input Methods Introduction
5.6 Input Methods Introduction When click the input value in the input bar, the system interface automatically pops up the keyboard input method. You can enter uppercase English, lowercase English, Chinese, numbers, and common symbols (see Image 50, 51, 52, 53). A. -
Page 38: Status Bar
5.7 Status Bar Ink information including dynamic and static information. Static information including cartridge serial number, client code, cartridge type. Dynamic information: 1) Ink original volume , output volume for current printing data. 2) Ink used in percent, the remaining ink available for current data. Ink status icons include: information 1) Normal (... -
Page 39: Chapter Six: Maintenance
Chapter Six: Maintenance Inkjet printer is a kind of precision machine, if the daily maintenance is not timely and in place, it easily cause different kinds of faults and bring a lot of inconvenience! In order to prolong the service life and improve the utilization rate, it is necessary to arrange special personnel for the management and maintenance. -
Page 40: Chapter Seven: Common Troubles And Solutions
Chapter Seven: Common Troubles and Solutions Note 1: The table below listing the most commonly seen problems and the solutions, If there’s any other problems, contact your local dealer or our after-sale service for assistance. Note 2: The table below is for reference only because each problem may differ depending on individual situation such as installation environment and operation. -
Page 41: Troubleshooting And Solutions Forprinter
7.2 Troubleshooting and Solutions for Printer Problems Analysis Solutions Comment A. Make sure AC power input on adapter is correct, DC output on adapter is well connected 1.No power input; with printer. B. Check if power adapter light is normal. Replace a Printer new adapter if light is cannot be... -
Page 42: Appendix 1: Terms And Definitions
Appendix 1: Terms and Definitions Terms Definition Comment It is the distance from the point when E.g. Printing delay value is 30mm, photocell senses the printing object Printing delay printer starts printing at 30mm point after to the point when printing starts. the photocell senses the printing object.
Need help?
Do you have a question about the S1i and is the answer not in the manual?
Questions and answers
Hi I have a problem with a printer that does not print detail correctly on a potato bag clip, it's a POLYtij S1i printer
Common issues causing a POLYtij S1i printer to not print details correctly on a potato bag clip include:
1. Use of non-specified ink or accessories, which may lead to poor print quality.
2. Blocked nozzles in the print head; using the purge function can help clean them.
3. Ink exposed to direct sunlight or temperatures above 35°C, which affects ink quality.
4. Improper grounding during installation, causing the machine to malfunction.
5. Ink leakage inside the printer, potentially damaging internal components.
6. Damaged or missing nozzles in one channel; switching to another channel may improve print quality.
7. Incorrect channel selection or print settings for the application.
This answer is automatically generated