Table of Contents
Advertisement
Advertisement
Chapters
Table of Contents

Related Manuals for Aixam CITY

Summary of Contents for Aixam CITY
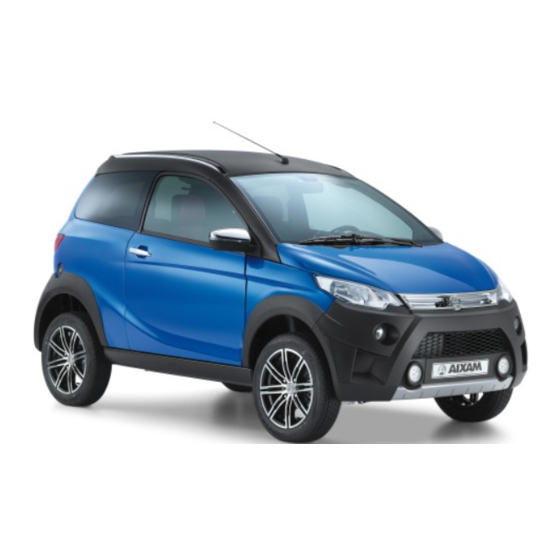
- Page 1 User Manual Edition 10/2018...
- Page 3 Dear Customer, You are now the proud owner of an AIXAM vehicle and we would like to thank you for your trust in us. AIXAM vehicles are designed to bring you the greatest satisfaction on board and our approved distributor network is at your disposal to guarantee you the best possible service.
-
Page 4: Introduction
This instruction and maintenance manual, also referred to as the user manual or instruction book, will give you important information, advice and warnings on transporting, starting, driving and maintaining your AIXAM. Your vehicle offers the best in terms of economics, reliability and comfort. It is up to you to retain its qualities as long as possible to take full advantage of its performance. -
Page 5: Vehicle Identification
VEHICLE IDENTIFICATION I the undersigned, _____________________ , hereby declare I have accepted the vehicle, the serial number of which appears opposite, in perfect condition. Serial No.: ________________________ Customer signature: ____________________ Engine No.: _______________________ Inverter unit No.: ___________________ Registration No.: ___________________ Date of 1 registration: Stamp of establishment selling the... - Page 6 0000001 = order No. 2: The manufacturer's plate is fitted with two studs next to the serial number. Never remove the ID plate, the warnings or instructions fitted on an AIXAM vehicle. Replace them quickly if they are damaged or lost.
- Page 7 RISK IDENTIFICATION LABELS DANGER WARNING, SAFETY INSTRUCTIONS READ THE INSTRUCTIONS DANGER! LIVE ELECTRICAL PARTS NEVER TRY TO ACCESS ANY PART OF THE VEHICLE WHICH REQUIRES THE USE OF A TOOL COMPULSORY WEARING OF SEAT BELT...
-
Page 8: Table Of Contents
CONTENTS GENERAL INFORMATION Windscreen wiper control .......... 44 Interior lighting 44 Welcome ............... 2 Hazard warning lights ..........44 Introduction ..............3 Reversing ..............45 Vehicle identification ..........4 to 6 Parking brake ............ -
Page 9: Safety
Prior to delivery, your vehicle was inspected to guarantee that your vehicle and fittings comply with your order. Our approved AIXAM distributor is required to carry out checks before delivery and to deliver your vehicle on time. Please check that your vehicle is in perfect condition and fitted with the equipment ordered. - Page 10 The safety alert symbol is used in this manual and on the stickers affixed to the vehicle in order to avoid the possibility of injury. Read these instructions carefully. It is essential that you read these instructions and safety rules before attempting to repair or use this vehicle.
- Page 11 You can only access public roads if your model is approved for road use, is registered with a number plate and the driver holds the required driving permits. It is your responsibility to check that you are authorised to put your car on the road. HERE IS THE LIST OF ROADS WHICH ARE BANNED TO ALL AIXAM VEHICLES: No vehicles.
- Page 12 SAFETY RULES Do not transport passengers in the part reserved for loading. Do not leave a child alone in the vehicle: risk of suffocation Do not leave objects on the parcel shelf. In the event of sharp braking or an accident, they may become projectile. Do not leave the keys in the ignition if the driver is not present.
-
Page 13: Technical Characteristics
TECHNICAL CHARACTERISTICS GENERAL CITY COUPE CROSSLINE CROSSOVER CROSSLINE GT Type L6e-BP light quadricycle L7e-CP heavy quadricycle Type and version UV53AF0A UV51AF0A | UV52AF0A | UV52CF0B UT62AF0B Guide wheels Front Drive wheels DIMENSIONS (mm) CITY COUPE CROSSLINE CROSSOVER CROSSLINE GT Front track width 1345 (except versions with 16"... - Page 14 TECHNICAL CHARACTERISTICS ENGINE Brand KUBOTA KUBOTA Type Z482 Z602 Cycle DIESEL DIESEL Number of strokes 2 IN-LINE 2 IN-LINE Number and position of cylinders Bore (mm) Stroke (mm) 73.6 Engine size (cm³) 23: 1 24: 1 Compression ratio 11.2 Maximum power (kW CEE): 3,200 3600 Engine speed at max.
- Page 15 TECHNICAL CHARACTERISTICS • Service brake MOVEMENT TRANSMISSION CHARACTERISTICS FRONT REAR • Type Discs Drums Gear type: continuous variable transmission • Diameter 220 mm 160 mm Clutch type: centrifugal • Control mode: automatic The front and rear linings are driven by hydraulic pistons •...
- Page 16 TECHNICAL CHARACTERISTICS BODYWORK PRE-DELIVERY CHECKS After all the care taken to make your AIXAM vehicle, your • Bodywork: quadrimobile approved distributor carries out a list of inspections, so that • Materials used for the bodywork: Thermoformed ABS PMMA you can get the most out of your new vehicle: •...
- Page 17 TRAINING When handing over the keys and so that you can fully enjoy your vehicle in optimal conditions, your AIXAM distributor must give you the user manual, the warranty conditions, and explain to you (and to all potential users) how the vehicle works and the servicing and safety rules to follow.
- Page 18 Aixam recommendations for servicing your vehicle...
- Page 19 Maintenance at 1,000 km or 1 year Maintenance at 5,000 km or 1 year Maintenance at 10,000 km or 1 year Date: Date: Date: month year month year month year Miles/kilometres indicated: Miles/kilometres indicated: Miles/kilometres indicated: FREE LABOUR Approved distributor's stamp Approved distributor's...
- Page 20 Maintenance at 30,000 km or 1 year Maintenance at 35,000 km or 1 year Maintenance at 40,000 km or 1 year Date: Date: Date: month year month year month year Miles/kilometres indicated: Miles/kilometres indicated: Miles/kilometres indicated: Approved distributor's stamp Approved distributor's stamp Approved distributor's stamp and signature...
- Page 21 Maintenance at 60,000 km or 1 year Maintenance at 65,000 km or 1 year Maintenance at 60,000 km or 1 year Date: Date: Date: month year month year month year Miles/kilometres indicated: Miles/kilometres indicated: Miles/kilometres indicated: Approved distributor's stamp Approved distributor's stamp Approved distributor's stamp and signature...
- Page 22 Recommends the use of AIXAM MEGA Yacco KUBOTA Z482 (10W30) 1.2 litre* ENGINE KUBOTA Z602 (10W30) 2.3 litre* 1.1 litre* INVERTER UNIT (Oil 80W90) 2.0 litre* COOLANT (SAE J1034) 0.3 litre* BRAKE FLUID (DOT4) *always check and top up if necessary...
-
Page 23: Locking And Unlocking Doors
LOCKING AND UNLOCKING LOCKING AND UNLOCKING FROM OUTSIDE THE VEHICLE - OPENING OPENING 1. Insert key The handles must rotate about an A. Lock axis of rotation when you pull B. Unlock towards you to open the doors Two keys are supplied: one with built-in remote control (see arrows) and one standard. - Page 24 OPENING THE TAILGATE MANUAL OPENING: EMERGENCY handle 1. Using the remote control: If the boot's electric opening system fails, please go to Press and hold down on the tailgate opening your nearest Distributor. button: The boot lock unlocks automatically. Emergency opening procedure: Open the hatch where spare bulbs for the rear left light are kept.
- Page 25 CLOSING THE TAILGATE Lower the tailgate to the stop with both hands. Be In the event of transporting heavy objects, careful to apply the same strength on each side the vehicle's road qualities are altered and and to ensure it is correctly locked. the braking distance increases.
- Page 26 OPENING THE BONNET CLOSING THE BONNET Pull the unlock lever under the dashboard on the left side. Lift the bonnet at the same time as you press the safety lock. Release the prop rod and attach it on its hook on the inside of the hood, then lower the hood around fifty centimetres and then release so that it closes under its own weight.
-
Page 27: Window Control
CONTROLS FOR OPENING THE DOOR WINDOWS ELECTRIC WINDOWS The two electric window control switches are on the bottom of the central panel of the dashboard. The deluxe version has one-touch driver control for the windows. Pressing the control button (last position on the switch) automatically opens or closes the window fully. - Page 28 REAR SEAT* If you want to fold down the rear seat of your car, you need to fasten the seat belts. Ensure that they cannot be trapped or damaged. To lift up the seat part of the rear seat, insert your hand towards the seat belt buckles, lift the seat and tip it towards the front of the vehicle.
-
Page 29: Seats
SEAT BELTS • Regardless of how long or how far your journey is, you must fasten your seat belt. • Always comply with local legislation of the country in which you are travelling. • The seat belt was designed for use by a single person. •... -
Page 30: Child Safety
CHILD SAFETY • Never leave a child or an animal alone in a car exposed to the sun with the windows closed. • Never leave the keys within reach of children inside the vehicle. • The use of devices to restrain infants and children is regulated. •... -
Page 31: Instrument Panel
INSTRUMENT PANEL* Depending on the vehicle version and the options chosen, there are several instrument panels, with central TFT or LCD screen (instrument panel shown is of the sport model). Only the white markers should be used to indicate speed Left turn signal light Pre-heating light Position lights indicator... - Page 32 VERSION WITH CENTRAL TFT SCREEN Four sub-screens can be displayed successively by pressing the left-hand scroll button or the button on the end of the right stalk control (except the configuration screen, which is only accessible 1- DOORS OPEN with the left-hand button on the panel) 1-2 Symbol for right door, left door or both doors open.
- Page 33 6-TRIP A 11-TEMPERATURE FAULT Trip information symbol, needs to be reset Symbol showing engine water temperature manually fault. Stop the engine at once and contact your a: distance travelled dealer b: average speed c: journey time 7-TRIP B 12-BRAKING FAULT Journey information, resets automatically 15 Symbol showing braking fault (low brake fluid minutes after the ignition is switched off, a:...
- Page 34 PROGRAMMABLE FUNCTION Step 5 Press the left button on the panel for Accessing settings four seconds The clock symbol is highlighted Step 1 Ignition ON Digital speed screen Vehicle must not be moving Step 6 ...
- Page 35 Setting the time Step 5-5 Step 5-1 Press the right button on the panel the tenths of minutes increase in 10-minute Press the left button on the panel for four steps seconds The clock symbol is highlighted Step 5-6 Step 5-2 ...
- Page 36 Panel backlighting setting Activation/deactivation of automatic locking Step 6-1 Step 7-1 Position lights working to set the panel The automatic locking function is triggered Press the left button on the panel for four when you reach a speed of 10 kph. Automatic seconds unlocking occurs when sharply decelerating.
- Page 37 Activation / deactivation of gradual control Stalk controls and ceiling light time delay Display of Trips A and B Step 8-1 Press the left button on the panel Step 1 The interior light symbol is highlighted Ignition ON ...
- Page 38 Press the button on the end of the stalk Reset Trips A and B Step 5 control once Digital speed screen Step 1 Trip B is automatically reset 15 minutes Ignition ON after the ignition is switched off. ...
- Page 39 Step 4 LCD SCREEN* Press several symbols at the same time Display of gear lever position* Press the button on the end of the stalk Display of general odometer control as many times as there are pop-ups Day trip display to acknowledge Service display Step 5...
- Page 40 Trip display Reset Trip Step 1 Step 1 Ignition ON Display of general odometer Ignition ON Display of general odometer Step 2 Step 2 Press the left button on the panel once Trip display ...
- Page 41 Activation / Deactivation of hazard warning Setting the brightness lights following emergency braking Step 1 Step 1 Position lights working to set the panel Ignition ON Ignition key ON General Display of general odometer odometer Step 2 Step 2 ...
- Page 42 Check your oil level and top up if necessary. If it remains on despite the oil level being correct, stop your engine and contact the AIXAM network as soon as possible.
-
Page 43: Abs Braking
ABS LED: this lights up when the ignition is switched on and switches off a few seconds later to inform you that the system is operational. If this LED comes on while driving, call in at your nearest AIXAM distributor; the ABS function is not working and there is a risk of the wheels locking up. However, the EBD is working. -
Page 44: Light Controls
LIGHTING CONTROL DIRECTION CHANGE CONTROL All lights off Turn the control forwards Parking lights Turn the control forwards Dipped beam / full beam headlights To inverse full beam/dipped beam, pull the control as far as possible Push the front lever down before turning left. towards you. -
Page 45: Interior Lighting
INTERIOR LIGHTING* CONTROL TO DEMIST REAR WINDOW* To trigger this, activate the control. It Middle Position. No lighting. will work for 12 minutes. Forward position (towards the front of the vehicle): Lights up if door is open (time delay as an option) Back position (towards the rear of the vehicle): WINDSCREEN WIPER, FRONT WINDSCREEN... -
Page 46: Parking Brake
REVERSING PARKING BRAKE To apply the brake, pull the lever The reverse lever is fitted with a ring with which to as far as it will go without pushing the change the gear. button on the end of the lever. To take the brake off, slightly pull To select a gear: the lever, at the same time pressing... -
Page 47: Heating & Ventilation
HEATING VENTILATION The heating only works if the engine is running. Efficiency of the heating device depends directly on the temperature of the coolant. It is therefore preferable to only use the heating when the engine has reached its normal running temperature. In cold weather, it is not worth starting the engine and leaving it to idle for several minutes before leaving because the heating does not work when the engine is idling. -
Page 48: Air Conditioning
Air conditioning: Switch on the fan (a). Press the air-conditioning button (b). Adjust the air recirculation to optimise the efficiency of the air conditioning (c). Recirculation can also be used to improve heating efficiency or to prevent outside pollution from getting inside. ... - Page 49 RECOMMENDATIONS FOR USE: Park in the shade to reduce the need for air conditioning. Open the windows before starting the air conditioning system to get rid of as much warmth as possible and then close them as soon as you put the air conditioning on. Do not direct the air vents directly to your head to avoid getting a sore throat.
- Page 50 12V socket A 12V socket can be used to connect external devices (charger, GPS, etc.) CIGARETTE LIGHTER. ASHTRAY (after-sales accessory only) ASHTRAY The ashtray can be taken out and moved. ATTENTION When you empty the ashtray, ensure that there are no smouldering ashes that could cause a fire.
-
Page 51: Multimedia Screen
USE OF A MULTIMEDIA SCREEN* USING THE NAVIGATION SYSTEM As an option, your vehicle may be fitted with a multimedia You may at times use a navigation system (GPS). screen. You must comply with the instructions described in the user manual provided by the supplier of this accessory, These systems are navigation aids and cannot in any given to you upon delivery of your vehicle fitted with this circumstances replace the highway code. - Page 52 ANTI-THEFT device* via perimeter alarm Disarming the alarm: The criteria for triggering the alarm are: Driver door open Passenger door open Ignition on Press the unlock button on the remote control (two quick flashes) (Attention: this alarm does not provide protection against The doors unlock the tailgate being opened) Emergency disarming (e.g.
- Page 53 Siren protection function 2. Deactivate siren function by turning the key to the position “. ” (red dot): The siren has its own battery protecting it from a power failure. If it is activated, and if the wires are cut, the audible warning will be triggered.
-
Page 54: Fuel
1. FUEL TO USE STARTER IGNITION CONTROL The type of diesel is written on the vehicle: a label next to the filler cap with the symbol. SAFETY LOCK To unlock the steering wheel, The engine is not certified for use slightly turn the steering wheel with organic diesel (FAME). - Page 55 Wash plastic items with soap and water. Never use chemical products. AIXAM-MEGA may not be held liable in the event of non- For seats and carpets, use commercially available compliance with these instructions resulting in any products designed for the purpose.
-
Page 56: Cleaning The Vehicle
CLEANING THE VEHICLE IN THE EVENT OF PUNCTURE The vehicle is equipped as standard with a repair kit (remember to replace the sealing product after each Wash the vehicle quickly if exposed to dirt capable of leading repair). Follow the instructions provided in the kit. to corrosion and in particular: If the vehicle is fitted with a temporary spare wheel, it is - Seawater, salt spray, chemicals used to de-ice roads in... - Page 57 The standardised dimensions for your Aixam are indicated on the tyre pressure label glued to the door frame. The It is essential to regularly check the condition of your load index must be greater than "60".
-
Page 58: Battery
Manufacturer; the Manufacturer's agreement is required. If you would like to charge your battery with a charger (which your AIXAM distributor can recommend), it must be removed from the car and charged in a ventilated room using an appropriate Only work on this equipment yourself if you are familiar with what to do and if you have the correct tools. - Page 59 Relay coupled to the fuse box: FUSE BOX KUBOTA Z482 and Z602 engine (except fuse F1 not used) Position Allocation Engine fan relay ATTENTION: When you replace a fuse, always use the FUSE ALLOCATION CHART: right amperage (risk of fire). Depending on the version, the number of relays may vary.
-
Page 60: Replacing Bulbs
Put the locking wire back in place and press on it while making REPLACING HEADLIGHT BULBS it slide to the left. Reposition the sealing cap on the bulb’s socket. Insert the cap on the rear part of the headlight. ATTENTION: take great care in performing the above two procedures to prevent water from entering the headlight and damaging it. - Page 61 REPLACING A FRONT FOG LIGHT BULB 2. On the casing (brake/rear/indicators): Remove the bulb fitting by Remove the casing inside the pivoting it to the left. The bulb vehicle. is an integral part of the support Reposition the bulb fitting, taking care that the attachment pins correspond to those at the rear of the headlight and pivot...
- Page 62 ENGINE OIL LEVEL Correctly close the fill plug All engines consume a certain amount of oil; it is thus important to check the oil level at regular intervals. Carry out this check with the engine still warm and not running. EVERY 5,000 km.
-
Page 63: Levels
INVERTER UNIT OIL LEVEL WINDSCREEN WASH LEVEL 1. Fill plug Fill with alcohol-free windscreen wash using the 2. Level screw filler pipe "4". 3. Drain plug Every 10,000km, It is forbidden to use alcohol-based products as perform an oil they may damage the plastic parts change for the inverter unit Procedure to be carried out after having used the vehicle. - Page 64 COOLANT LEVEL BRAKE FLUID LEVEL This level should fall between the This level should fall two marks. between the two Top up if necessary. marks. Top up if necessary. N.B.: the brake fluid should be changed every year If brake fluid spills over when filling, wipe clean. It must be opened when the engine is cold to avoid burns.
-
Page 65: Log Book
Precautions before driving LOG BOOK Contents Recommendations Precautions before driving Tiredness and alcohol behind the wheel Check your vehicle's condition ■ Tyre pressure. On the road ■ Correct operation of lights (brake lights, dipped beam, Getting comfortable behind the wheel indicators). -
Page 66: Tiredness And Alcohol Behind The Wheel
Tiredness and alcohol behind the wheel Getting comfortable behind the wheel 1 - Tiredness at the wheel 1- Adjust the position of the seat. ■ Signs of tiredness: stiff neck, heavy eyelids, yawning, 2- Adjust the rear-view mirror and the wing mirrors. inattention, etc. -
Page 67: Joining Traffic
Joining traffic Drive on the right Move slowly forwards to the edge of the road Look right and left 1- Drive on the right. Let any vehicles go by 2- Do not drive too close or too far from the edge of the road. -
Page 68: Keeping A Safe Distance
Keeping a safe distance Stopping in traffic Do not get too close to a stopped vehicle. You must be able to see the tyres of the vehicle in Do not drive too close to the vehicle in front of you. front. -
Page 69: Turning
Turning Joining a roundabout Look in your rear view and wing mirrors. Switch on the right or left indicator as soon as possible. Give way to vehicles already on the roundabout. Slow down. Enter the roundabout. Keep your foot above the brake as you enter the turn. Stay in the right land. -
Page 70: Joining A Lane
Joining a lane Overtaking a vehicle Check in the mirrors and directly that a vehicle is Check that the left lane is clear far ahead. not overtaking you. Check your mirrors. Accelerate. Check that another vehicle is not overtaking Switch on the left indicator and join the lane. you. -
Page 71: Sign Categories
Sign categories Priority signs Compulsory stop. Triangle = Danger Give way left and right. Prohibition or Obligation Give way left and right. prohibition End of prohibition Give way to the right. Obligation End of obligation Priority: you can go Be aware of dangers such as an indication emergency vehicle or a vehicle not complying with the signs... -
Page 72: Traffic Lights
Roads forbidden to light quadricycles and Traffic lights mopeds Traffic lights without signs No vehicles. No entry for vehicular traffic. No entry for mopeds or light quadricycles. No entry for motor vehicles. Cycle path or strip forbidden for quadricycles. Look right and Stop Stop Bus lane. - Page 73 You shall be informed of the agent the closest to your position. Aixam strives permanently to perfect its vehicles. Modifications are possible at any time concerning the form, equipment or technology. Indications concerning vehicle appearance, performance, dimensions, weights, standards and functions comply with information available at the time of writing.
- Page 74 HEAD OFFICE AND PLANT 56, route de Pugny – B.P. 70112 F – 73101 – AIX LES BAINS CEDEX Tel.: +33 (0)4 79 61 42 45 Fax +33 (0)4 79 35 06 11 0AZ105-EN...
Need help?
Do you have a question about the CITY and is the answer not in the manual?
Questions and answers