Table of Contents
Advertisement
Advertisement
Table of Contents

Related Manuals for Gtech CLM2.0


Summary of Contents for Gtech CLM2.0
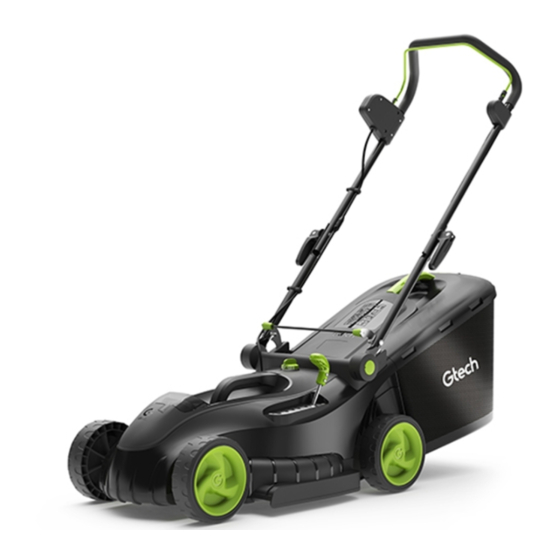
- Page 1 Cordless Lawn Mower CLM2.0 Model number: OPERATING MANUAL Original Instructions...
-
Page 2: Important Safeguards
IMPORTANT SAFEGUARDS: IMPORTANT: READ ALL INSTRUCTIONS BEFORE USE. RETAIN INSTRUCTIONS FOR FUTURE REFERENCE. Do not use in rain or leave outdoors whilst raining. WARNING: Basic safety precautions should always be observed when using an electrical appliance to reduce the risk of fire, electrical shock or serious injury. -
Page 3: Electrical Safety
• The operator is responsible for accidents • Never open the charger. In case of or hazards occurring to other people at defect, contact Gtech. their property. • This product contains Li-Ion batteries. • This appliance is not intended for use by... -
Page 4: Intended Use
• Do not attempt to repair any damaged parts on the mower unless you are qualified to do so. • Please contact Gtech on 01905 345891 if you have any queries about your product. Intended Use: • This product is intended for DOMESTIC... - Page 5 Warning Label Descriptions Remove safety key before servicing Warning/Caution. and cleaning. Beware of servering toes or hands. Do not put hands or feet near a rotat- Dangerous voltage. ing blade. Keep bystanders at a safe distance (at Read the instruction manual. least 5m).
-
Page 6: What's In The Box
Thank you for choosing a Gtech Cordless Lawn Mower. “I started Gtech to create sensible, easy to use products, which do a great job. Your opinion is important to us and we will use your feedback to improve our products and services and let other people know what it’s like to be part of the Gtech family.”... - Page 7 Handle set-up Pull the Lawn Mower lower handles back Once in position, they will click and lock into individually. place. Take the upper handle of the mower, ensuring Align the upper handles inside the lower the green start activation handle is positioned handles.
- Page 8 Line up the holes on the upper and lower Thread the supplied bolt through the holes in handles. the upper and lower handles. Do this on both sides of the mower. Thread the securing washer over the supplied Place the threaded inserts into the holes at the bolt, ensuring the flat side is on the outside.
- Page 9 Line up the bolt with the insert of the locking Twist the locking handle to tighten. handle, ensuring the handle is straight. Push the locking handle down towards the Ensure the handle is tight, not loose. mower to lock the handle in place. Do the same with the locking handle on the other side.
-
Page 10: Connecting The Power Cables
Connecting the power cables The power cables are located below the Line up the keyway on the end of the upper locking handle on the left side of the mower’s cable with the two holes in the lower power handle. cable. -
Page 11: Grass Box Assembly
Grass box assembly Lower the frame down towards the base. Hook the base of the box over the metal frame. Repeat these steps for the locking parts on Each edge of the metal frame should now be each edge of the bin. locked into place. -
Page 12: Fitting The Grass Box
Fitting the grass box To fit the grass box onto the mower, lift up the Insert the grass box into the back of the mower. protective flap. Ensure the hooks lock into place. The grass box is now fully assembled. 12 12... -
Page 13: Inserting The Battery
Inserting the battery Lift up the clear visor to reveal the battery Ensure the ‘G’ logo is facing upwards when housing. you slide the battery into the battery housing. It will click into place once fitted correctly. The visor will return to its original position. The state of charge indicator on the battery will be visible through the visor. - Page 14 The safety key The mower will not work without the safety Once correctly in place, the mower will be key. Rotate it 90º clockwise to operate. ready to use. Remove the key before you carry out any maintenance, clear any grass, carry the mower or put your hands near the blade.
- Page 15 Operating the Cordless Lawn Mower To operate the mower, press and hold the Pull the lever to the handle to start the mower. green saftey button and then pull the lever Releasing the lever will stop the mower. under the handle. Ensure the safety key has been activated before use.
-
Page 16: Adjusting The Cutting Height
Adjusting the cutting height For very level, 30mm fine- leaved 40mm lawns 50mm For a healthy, level, hard-wearing lawn 60mm 70mm For longer grass, uneven ground and damp grass 80mm The mower has 6 cutting height settings To adjust the height, hold the lever firmly and between 30mm and 80mm. - Page 17 Removing and emptying the grass box Lift the protective flap at the rear of the mower Whilst still lifting the protective flap, lift and pull and grasp the green handle attached to the the grass box towards you to remove from the grass box.
-
Page 18: Charging The Battery
Charging the battery Reveal the battery by lifting the cover visor. To unlock the battery, push the release latch located under the visor, then pull out the battery. State of charge indicator 100% - 60% - 30% -10% - 1% Figures are approximate. - Page 19 Charging the battery hour With the ‘G’ logo facing upwards on the The charger will display a solid red light to battery, line up the runners on the sides of the indicate it is plugged in. Once the charging battery with the runners on the battery charge process has started, a green light will flash.
- Page 20 Carrying the Cordless Lawn Mower Before carrying the mower, make sure the There is a hand-hold under the front of the safety key is removed to avoid starting it mower. accidentally. The easiest way to carry the mower is by holding the middle carry-handle and the front of the mower.
-
Page 21: Product Care
• Store it in a secure, dry place, out of reach of children. Do not expose to moisture. PLEASE NOTE: if the product needs to be repaired or replaced, only use replacement parts supplied by the manufacturer. Spare parts can be purchased from Grey Technology Ltd. Tel: 01905 345 891 Web: www.gtech.co.uk/support 21 21... -
Page 22: Troubleshooting
3. Check for a build-up of grass Charger flashing red (slow) Battery too hot - allow to cool Charger flashing red (rapid) Battery fault - call Gtech Product Support If these initial tips don’t solve your problem, we have various other ways to help. Visit: www.gtech.co.uk/support... - Page 23 GTECH CORDLESS LAWN MOWER TECHNICAL SPECIFICATION Voltage Battery capacity 2.0 Ah Li-Ion Blade speed 2800 rpm Grass box capacity Charge time 1 hour Cutting Width 420mm Cutting height adjustment 30mm – 80mm Protection type IPX 4 Measured sound power level 88.83 dB (A);...
- Page 24 XXXXX~ WWYY~ 00~0000000 If you purchased directly from Gtech your details are already registered and your 2 year warranty will start automatically. If you purchased from an authorised Gtech retailer, please register your warranty within 3 months and you will need to provide proof of purchase to support any claim against your warranty.
-
Page 25: Ec Declaration Of Conformity
In case of alteration of the machine, not agreed upon by us, this declaration will lose its validity Product’s name / function: Lawn mower / for cutting grass. Machine Type: A022009 Or CLM2.0 Rated voltage: 48VDC Measured sound power level: 88,83 dB(A) K= 2.29 dB (A) - Page 28 Grey Technology Limited Brindley Road, Warndon, Worcester WR4 9FB email: support@gtech.co.uk telephone: 01905 345891 www.gtech.co.uk/support...
Need help?
Do you have a question about the CLM2.0 and is the answer not in the manual?
Questions and answers