Table of Contents
Advertisement
____________________________________________________
®
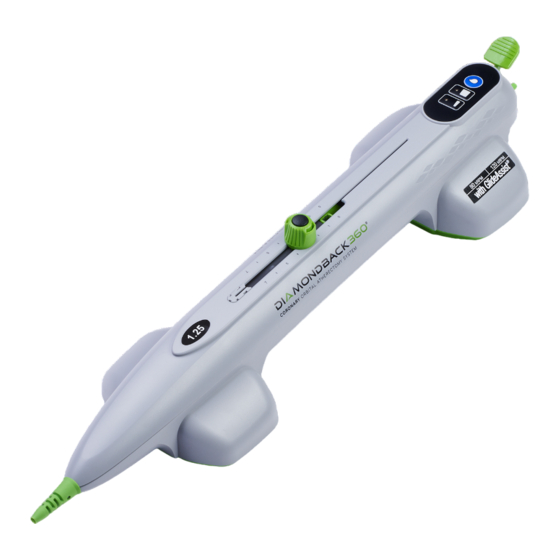
DIAMONDBACK 360
Peripheral Orbital Atherectomy
System Exchangeable Series
Including the Orbital Atherectomy Device, Handle, Orbital
®
Atherectomy Cartridge, Saline Pump, VIPERWIRE ADVANCE
Peripheral Atherectomy Guide Wire, and VIPERWIRE
®
ADVANCE
with FLEXTIP Peripheral Atherectomy Guide Wire
Instructions for use
____________________________________________________
Caution: Federal Law (USA) restricts this device to sale by or on the order of a
physician.
The following are trademarks of Cardiovascular Systems, Inc.:
®
®
®
®
CSI
, Cardiovascular Systems
, DIAMONDBACK 360
, VIPERWIRE
, VIPERWIRE
®
®
®
®
ADVANCE
, VIPERWIRE ADVANCE
with FLEXTIP, VIPERSLIDE
, GlideAssist
Advertisement
Table of Contents

Summary of Contents for Cardiovascular Systems, Inc. DIAMONDBACK 360 Peripheral Orbital Atherectomy System Exchangeable Series
- Page 1 ____________________________________________________ ® DIAMONDBACK 360 Peripheral Orbital Atherectomy System Exchangeable Series Including the Orbital Atherectomy Device, Handle, Orbital ® Atherectomy Cartridge, Saline Pump, VIPERWIRE ADVANCE Peripheral Atherectomy Guide Wire, and VIPERWIRE ® ADVANCE with FLEXTIP Peripheral Atherectomy Guide Wire Instructions for use ____________________________________________________ Caution: Federal Law (USA) restricts this device to sale by or on the order of a physician.
- Page 2 Explanation of Symbols on Package Labels Refer to the package labels to see which symbols apply to specific products. Lot number Model number Consult IFU www.csi360.com (USA) (Symbol appears in blue when placed on the device itself) Caution: Consult IFU www.csi360.com (USA) Do not reuse.
- Page 3 Explanation of Symbols on the Saline Pump Low saline red LED indicator Start button and pump ON green LED indicator Pump status yellow LED indicator Prime button Type CF Applied Part Slow Blow Type T Fuse...
- Page 4 Explanation of Symbols on the Handle Prime button Low speed button Medium speed button High speed button Rotate Symbol Eject Symbol Non-continuous use; spin cycles of 30 seconds on, 30 seconds off with maximum spin time of ≤ 8 minutes per cartridge using no more than three cartridges per handle...
-
Page 5: Table Of Contents
Table of Contents System Description....................1 System and Component Descriptions ..............1 Indications for Use ....................9 Contraindications ....................9 Restrictions ......................10 Warnings ......................10 Precautions ......................11 Storage and Handling ..................13 Adverse events ....................13 Clinical Trials Summary ..................14 Equipment, Setup, and Test ................ -
Page 6: System Description
1. System Description The Cardiovascular Systems, Inc. (CSI) DIAMONDBACK 360 Peripheral Orbital Atherectomy System (OAS) Exchangeable Series is a minimally invasive, catheter-based OAS designed for improving luminal diameter in patients with peripheral arterial disease (PAD). PAD is caused by the accumulation of plaque in the arteries of the leg or foot and reduces blood flow that may lead to pain, tissue loss, and eventual foot amputation, leg amputation or death. - Page 8 Table 1: Micro Crowns Model Number Type Size Shaft Nose Crown Length Length* DBP-EX-125MIC145 1.25 mm 145 cm 7 mm Cartridge DBP-CART-125MIC145 DBP-EX-125MIC75 1.25 mm 75 cm 7 mm Cartridge DBP-CART-125MIC75 *Nose length is the length of the drive shaft from the crown to the distal tip of the shaft. Table 2: Solid Crowns Model Number Crown Size...
- Page 9 Figure 1. OAD - includes the handle, cartridge, and saline line ______________________________________________________________________ Cartridge A. Nose length B. Crown C. Saline sheath D. Rotation grips E. Saline line port connector Handle F. Crown advancer knob G. On/Off button H. Cartridge eject button Speed buttons and indicators Brake light indicator K.
- Page 10 R. Saline bag spike OAD Features: • On/Off Button to control when the crown starts and stops • 3 speed control buttons with LED indicators to select the crown rotation speed • Saline prime button • 15 cm crown advancement with travel measurement indicators •...
- Page 11 2.2. Package Contents: OAD, Handle, Or Cartridge 2.2.1. OAD The OAD and accessories are supplied sterile and are for single-use only. Each package contains: • OAD (fully assembled – one handle and one cartridge) • Saline line (connects the OAD to the OAS pump) 2.2.2.
- Page 12 Figure 2. OAS Pump ______________________________________________________________________ A. IV pole screw clamp B. IV pole (not included) C. Low saline level sensor and connector cord D. Control panel E. OAS Pump door F. OAD connection ______________________________________________________________________ 2.4. OAS Pump Package Contents The OAS pump and accessories are supplied non-sterile. Each package contains: •...
- Page 13 Figure 3. Guide wire ______________________________________________________________________ A. Distal spring tip ______________________________________________________________________ Table 4 VIPERWIRE ADVANCE Peripheral 0.014” Guide Wires Model Number OAD Device Guide wire Guide Shaft Length Spring Tip wire Compatibility Diameter Length 0.014” 75 and 145 cm VPR-GW-14 335 cm 0.017”...
-
Page 14: Indications For Use
3. Indications for Use The DIAMONDBACK 360 Peripheral Orbital Atherectomy System Exchangeable Series is a percutaneous orbital atherectomy system indicated for use as therapy in patients with occlusive atherosclerotic disease in peripheral arteries and who are acceptable candidates for percutaneous transluminal atherectomy. -
Page 15: Restrictions
5. Restrictions The OAS should only be used by physicians who are experienced in peripheral angioplasty at their institutions and trained on the use of the OAS. Contact a CSI representative for information on training. 6. Warnings • Do not use the OAD in a vessel that is too small for the crown. The reference vessel diameter at the treatment area must be at least 2.00 mm in diameter for the 1.25mm micro crown. -
Page 16: Precautions
• Always advance the orbiting, abrasive crown by using the crown advancer knob. Never advance the orbiting crown by advancing the shaft or handle. Guide wire buckling may occur, and perforation or vascular trauma may result. • Always keep the crown advancing or retracting while it is at high rotational speeds. Do not allow the crown to remain in one location for more than 2–3 seconds. - Page 17 • Follow standard hospital atherectomy policies and procedures, including those related to anticoagulation and vasodilator therapy. • Radiographic equipment for fluoroscopy should be used to provide high-resolution images. Guide wires and catheters should only be manipulated under fluoroscopy. • Because of the torque responsiveness of CSI-approved guide wires, they are more difficult to handle than other commercially available guide wires used in peripheral angioplasty.
-
Page 18: Storage And Handling
8. Storage and Handling 8.1. Storage Store all system components at room temperature and in a clean environment away from magnets and sources of electromagnetic interference (EMI). Do not store ViperSlide Lubricant above 25°C (77°F). Do not freeze ViperSlide Lubricant. Refer to the ViperSlide Lubricant IFU prior to starting the atherectomy procedure. -
Page 19: Clinical Trials Summary
• Bleeding complications which may require transfusion • Cerebrovascular accident (CVA) • Death • Distal embolization • Entry site complications • Hemolysis • Hypotension/hypertension • Infection • Myocardial infarction • Pain • Pseudoaneurysm • Restenosis of treated segment that may require revascularization •... - Page 20 2. Hang the low saline level sensor and cord, by the closed loop, from the horizontal arm of the standard IV pole. 3. Plug the low saline level sensor connector into the back of the OAS pump (Figure ). Figure 4. Plug in the low saline level sensor_________________ ____________________________________________________ 4.
- Page 21 1. Figure 5).
- Page 22 Figure 5. OAS Pump control panel ______________________________________________________________________ A. Low saline red LED indicator B. Prime button C. Start button and green LED indicator D. Status yellow LED indicator ______________________________________________________________________ 2. Prepare a full 1000 mL bag of normal saline solution with lubricant. Refer to the VIPERSLIDE Lubricant Instructions for Use for lubricant preparation instructions.
- Page 23 If the handle and cartridge are not pre-connected, perform the following: 1. Insert the cartridge into the handle, see Figure 6. Figure 6. Cartridge Insertion 2. Rotate the cartridge to lock it to the handle. Two tactile, audible clicks indicate that the cartridge is locked, see Figure 7.
- Page 24 Figure 8. Assembled OAD. 11.5. Connecting the OAD to the OAS Pump Remove the sterile saline tubing from the OAD package and pass the saline bag spike end of the saline tubing out of the sterile field. Connect the other end of the saline tubing luer to the device luer.
- Page 25 Figure 9. Placing the saline tubing within the OAS Pump ______________________________________________________________________ A. Saline tubing positioners B. Saline tubing C. V-guides D. OAS Pump door ______________________________________________________________________ 4. While closing the door, verify that there is no pinching of the saline tubing and ensure that there is slack in the saline tubing between the OAS pump and saline bag with lubricant.
- Page 26 a. Verify that the saline tubing is connected to the OAD. b. Press the green Start button on the OAS pump control panel to start saline flowing through the saline tubing. Verify that the green LED illuminates. c. Press and hold the Prime button on the OAS pump control panel to purge air from the saline tubing.
- Page 27 Caution: Do not operate the OAD if there is a bend, kink, or tight loop in the guide wire. A bend, kink, or tight loop in the guide wire may cause damage to and malfunctioning of the OAD during use. 3.
-
Page 28: Oas Directions For Use
12. OAS Directions for Use 12.1. Performing the Atherectomy Procedure 1. Ensure that the OAD guide wire brake lever is open (in the up position). 2. Lock the crown advancer knob at 1 cm from the fully proximal position. 3. While keeping guide wire placement stationary, advance the OAD drive shaft over the guide wire and through the hemostasis valve. - Page 29 8. Unlock and move the crown advancer knob to the fully proximal position to relieve any compression in the driveshaft. 9. Press and release the On/Off button on top of the crown advancer knob to activate crown rotation. The OAD is preset to low speed, and the illuminated LED on the OAD will indicate that the device is operating at low speed.
- Page 30 1. Ensure the OAD brake is unlocked and the device is not spinning. 2. If the OAD is in the patient, keep the pump power on. 3. If there is a guidewire in the OAD, remove the guidewire from the proximal end of the OAD.
- Page 31 Figure 11. Cartridge Exchange b) Rotate the cartridge and then pull it partially out of the handle until it stops. The yellow button will now align with the eject symbol on the handle, see Figure 12. Figure 12. Cartridge Rotation c) Press and hold the yellow button while pulling on the cartridge until it is fully removed from the handle, see Figure 13.
- Page 32 Figure 13. Cartridge Removal 6. Obtain a new cartridge and follow the steps described in 11.4 to connect the new cartridge to the handle. Note: The cartridge is for single-use only and cannot be used with any other handles once it is used with the original handle. 7.
- Page 33 Caution: Do not use glass bottles for the saline solution with VIPERSLIDE Lubricant or hang multiple saline bags from the low saline level sensor as this will disable the Low Saline Level Sensor. 5. Remove the bag spike from the empty bag of saline and Lubricant and spike the new bag of saline and lubricant.
- Page 34 10. Load the new replacement OAD drive shaft over the existing guide wire. 11. Test the OAD crown advancement per the instructions in Section 11.6.1. 12.2. Completing the Atherectomy Procedure To complete the atherectomy procedure, perform the following: 1. While the crown is spinning, retract the crown and drive shaft proximal to the lesion. 2.
- Page 35 12.3. Disposal of the OAD The OAD is designed for single use and should not be reused or resterilized. Discard the OAD and saline tubing according to standard hospital protocol. Certain states may have additional requirements for disposal of certain batteries. Please verify your state’s requirements for disposal of CR lithium coin cells (CR2032 or equivalent) prior to disposal.
- Page 36 12.4.2. Disinfecting the OAS Pump Disinfect the OAS pump after each use by following the steps below: 1. Verify no debris is present after pump has been cleaned and rinsed with enzymatic detergent. Repeat the above cleaning procedure if any debris continues to be visible.
- Page 37 Figure 17. Thoroughly wipe these areas Figure 18. Wipe all surfaces of front face 12.5. Returning System Components Contact CSI Customer Service if system components need to be returned. See the back of this Instruction for Use for CSI contact information.
-
Page 38: Specifications
13. Specifications 13.1. OAD Specifications Parameter Value Electrical cable length: 3.4 m (11 ft.) OAD to OAS pump Type CF applied Part –DC barrel Electrical connector type (OAD power) (48 V DC) Fluid connector type Polycarbonate Luer fitting Saline line tubing length 3.2 m (10.5 ft.) minimum (from pump to OAD port) Visual alerts... - Page 39 OAS Pump Specifications Parameter Value Depth <30.6 cm (12.0 in) Height 20.3 cm (8.0 in) Width 25.4 cm (10.0 in) Weight <5.0 kg (11 lbs) Electrical cable length: 6.1 m (20 ft.) OAS pump to electrical outlet Master Fuse 250 V 4A SLOW BLOW (Type T) External housing ABS Plastic Electrical connector type...
-
Page 40: Oas Pump Declaration Of Conformity
13.2. VIPERWIRE ADVANCE Guide Wire Specifications VPR-GW-FT14 VPR-GW-FT18 VPR-GW-EL-14 VPR-GW-EL18 VPR-GW 14 VPR-GW-17 VPR-FLEX14 VPR-FLEX18 VPR-ELFLEX14 VPR-ELFLEX18 Guide Wire 335 cm 335 cm 335 cm 335 cm 475 cm 475 cm Length Guide Wire Silicone Silicone Silicone Silicone Silicone Silicone Coating Core wire .014”... - Page 41 Facility Environment. The OAS is Group 1 (Therapy ME Equipment and Systems) and therefore must meet CISPR 11 Class A. The Orbital Atherectomy System performance may be impaired by close proximity interference from RFID equipment and other common emitters like: diathermy, lithotripsy, and electrocautery.
- Page 42 Immunity Immunity Test Test Level Compliance Level Standard IEC 60601-1-2 Electrostatic ±8 kV contact ±8 kV contact Discharge (ESD), ±2, ±4, ±8, ±15 kV ±2, ±4, ±8, ±15 kV air IEC 61000-4-2 IEC 60601-1-2 Radiated RF, IEC 3 V/m 3 V/m 61000-4-3 80 MHz to 2.7 GHz 80 MHz to 2.7 GHz...
-
Page 43: Fcc
AIM 7351731 ISO/IEC 15693 (ISO 5 A/m, 13.56 MHz 5 A/m 18000-3 Mode 1) AIM 7351731 ISO 18000-3 Mode 12 A/m, 13.56 MHz 12 A/m AIM 7351731 ISO/IEC 18000-7 3 V/m, 433 MHz 3 V/m 54 V/m, 860 – 960 AIM 7351731 ISO/IEC 18000-63 54 V/m... - Page 44 SHALL NOT BE LIABLE FOR ANY DIRECT, INDIRECT, INCIDENTAL OR CONSEQUENTIAL LOSS, DAMAGE, OR EXPENSE ARISING FROM OR RELATED TO THE USE OF THIS DEVICE. No person has authority to bind CSI to any representation, warranty, or liability except as set forth in this Disclaimer of Warranty.
-
Page 45: Appendix A. System Troubleshooting
Appendix A. System Troubleshooting If issues with the OAS pump or OAD cannot be resolved in each of the situations below, replace the recommended part and continue with the procedure. Contact CSI Customer Service for returning OAS components. See the back of these instructions for use for CSI contact information. - Page 46 Issue Issue Solution number on the OAS pump. Verify that the OAS pump powers The OAS pump was 1. Verify the OAD power cord is connected to the OAS pump. running, but has 2. Press the Master Power switch, on the back of the stopped pumping OAS pump, to power off the OAS pump.
- Page 47 Issue Issue Solution number illuminates, press the Start button on the OAS pump and verify that the green LED illuminates. OAD speed LED 1. Verify the cartridge is installed correctly. indicators are 2. If the cartridge is installed correctly, replace the blinking sequentially cartridge.
- Page 48 Issue Issue Solution number Crown rotational 1. Immediately discontinue treatment, but leave the speeds are variable OAS pump running. and will not stabilize 2. Verify that saline is flowing. Verify VIPERSLIDE Lubricant is present in the saline bag. See the VIPERSLIDE Lubricant Instructions for Use for information.
- Page 49 Issue Issue Solution number 3. Check that the OAS pump green LED OAS pump on light is on and that the OAD green LED light is on. If the OAS pump green LED is flashing, press the pump start button twice. 4.
-
Page 50: Appendix B. Introducer, Guide Sheath, Or Guide Catheter Size
Appendix B. Introducer, Guide Sheath, or Guide Catheter Size Table B1. Micro Crown Crown Orbital Atherectomy Minimum Guide Catheter Model Number Diameter Device Maximum Introducer or Sizing Outer Diameter Guide Sheath Internal Diameter, mm (inches) French (inches) See guide catheter DBP-EX-125MIC145 manufacturer 1.25... - Page 51 See guide catheter DBP-EX-175SOLID180 manufacturer 1.75 1.75 (0.069) 5 (0.070) specifications for DBP-CART-175SOLID180 lumen diameter. * For manual contrast injection with use introducer sheath > 4 Fr. Table B3. Classic Crown Crown Model Number Orbital Atherectomy Minimum Guide Catheter Diameter Device Maximum Introducer or Sizing...
-
Page 52: Appendix C. Maximum Orbit And Resulting Lumen Diameter
Appendix C. Maximum Orbit and Resulting Lumen Diameter The following tables show the maximum orbit and resulting lumen diameter for all crown sizes, at incremental rotational speeds, for 20 passes (approximately 5 min of treatment time). Quantitative angiography is recommended to determine minimum vessel diameter. Note: A pass is defined as once out and back across the lesion. - Page 53 2.73 60,000 DBP-EX-175SOLID180 3.52 1.75 90,000 DBP-CART-175SOLID180 4.62 120,000 SD = standard deviation * These lumens are based on in vitro test results at approximately 5 minutes of treatment time (20 passes) at a rate of approximately 10 mm per second of travel speed. Actual clinical results may vary. Table C3.
-
Page 54: Appendix D. Orbit Performance
Appendix D. Orbit Performance The following charts demonstrate typical orbit diameter vs. duration of operation (as measured in simulated calcified lesions.) These charts are for reference only. Actual orbit performance may vary. 1.25mm Peripheral Micro Crown Orbit Chart Results Model DBP-EX-125MIC75 & DBP-CART-125MIC75 1.85 1.75 1.65... - Page 55 1.25mm Peripheral Micro Crown Orbit Chart Results Model DBP-EX-125MIC145 & DBP-CART-125MIC145 1.85 1.75 1.65 1.55 1.45 1.35 1.25 Number of Passes 60k RPM - Low Speed 90k RPM - Medium Speed 140k RPM - High Speed 1.25mm Peripheral Solid Crown Orbit Chart Results Model DBP-EX-125SOL75 &...
- Page 56 1.25mm Peripheral Solid Crown Orbit Chart Results Model DBP-EX-125SOL145 & DBP-CART-125SOL145 3.05 2.85 2.65 2.45 2.25 2.05 1.85 1.65 1.45 1.25 Number of Passes 60k RPM - Low Speed 90k RPM - Medium Speed 120k RPM - High Speed 1.50mm Peripheral Solid Crown Orbit Chart Results Model DBP-EX-150SOL145 &...
- Page 57 2.00mm Peripheral Solid Crown Orbit Chart Results Model DBP-EX-200SOL145 &DBP-CART-200SOL145 6.00 5.50 5.00 4.50 4.00 3.50 3.00 2.50 2.00 Number of Passes 60k RPM Low Speed 90k RPM Medium Speed 120k RPM High Speed 1.50mm Peripheral Classic Crown Orbit Chart Results Model DBP-EX-150CLA145 &...
- Page 58 2.00mm Peripheral Classic Crown Orbit Chart Results Model DBP-EX-200CLA145 & DBP-CART-200CLA145 3.00 2.90 2.80 2.70 2.60 2.50 2.40 2.30 2.20 2.10 2.00 Number of Passes LOW SPEED 60Krpm MED SPEED 90Krpm HIGH SPEED 140Krpm 1.25mm Extended Length Diamondback Peripheral Orbit Chart Results Model DBP-EX-125SOL200 &...
- Page 59 1.50mm Extended Length Diamondback Peripheral Orbit Chart Results Model DBP-EX-150SOL200 & DBP-CART-150SOL200 Number of Passes 60k RPM - Low Speed 90k RPM - Medium Speed 120k RPM - High Speed...
- Page 60 Manufacturer: Cardiovascular Systems, Inc. 1225 Old Highway 8 NW St. Paul, MN 55112 USA +01-651-259-1600 +1-877-274-0360 (USA) © Cardiovascular Systems, Inc. 2018 92-10015-01 Rev B...
Need help?
Do you have a question about the DIAMONDBACK 360 Peripheral Orbital Atherectomy System Exchangeable Series and is the answer not in the manual?
Questions and answers