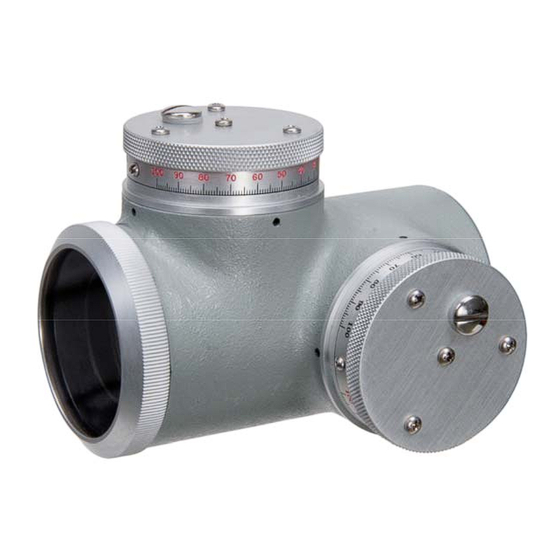
Summary of Contents for Brunson 190
- Page 1 Model 190 and 160 Family of Optical Micrometers Maintenance and Adjustment Manual Instrument Company...
- Page 2 Helping the World Measure Since 1927 www.brunson.us For Sales Assistance: 8000 E. 23rd Street sales@brunson.us Kansas City, MO 64129 Toll free: 877—MEASURE For Repair or Calibration Assistance: calibration@brunson.us (877.632.7873) Tel: 816.483.3187 Website: Fax: 816.241.1945 www.brunson.us Copyright 2011 Brunson Instrument Company...
-
Page 3: Table Of Contents
Adapter for 2.250” Barrels Exploded Parts Diagram Parts List Thank you for purchasing a Brunson Optical Micrometer. Remember that our customer support does not stop after shipment of a product—we are here to help you with any measurement challenges that you may have. - Page 4 Model 190 Single-Axis Micrometer Front Micrometer Rear Micrometer Model 160 Dual-Axis Micrometer...
-
Page 5: Introduction
In this manual, we refer to crometers. Essentially, the instrument on which you mount the 190 or 160 as the "Test In- the M160 consists of two strument". M190’s mounted perpen- dicular to each other. -
Page 6: Backlash
1. With the micrometer mounted, place a bifilar target about three feet away from the Test Instrument and at least nominally perpen- dicular to its line of sight. 2. Loosen the micrometer clamping screw just enough to be able to Model 190 and Model 160 Family of Optical Micrometers... -
Page 7: Range Accuracy
rotate the micrometer smoothly about the end of the Test Instru- ment barrel. If your Test Instrument barrel has an indexing pin, slide the micrometer forward slightly so you can move it easily past the pin. 3. Set the micrometer drum to zero, then use the tangent screws to register the measuring reticle line (the line that moves when you turn the micrometer drum) precisely on the target. - Page 8 Continue the cycle of checking and adjusting until range error is within one half of one minor graduation of being equal on both Model 190 and Model 160 Family of Optical Micrometers...
- Page 9 Figure 1 sides, and backlash and zero centering are within the tolerances stated in those sections above. When all these conditions are satis- factory, continue with the steps below. When the range is symmetrical, but too long or too short, the ra- dius of travel of the sector pin is incorrect.
- Page 10 The principles of calibration for the Model 190 single- M160 Dual-Axis Micrometer axis micrometer also apply to the Model 160 dual-axis micrometer. Essentially, the M160 consists of two Calibration M190’s mounted perpendicular to each other. There- fore it is a simple matter to perform all previously de- scribed calibration procedures on the front micrometer first, then repeat them for the rear micrometer.
- Page 11 2. Orient the Model 160 on a telescope so the front micrometer Brunson for repair or re- tracks parallel to the horizontal crosshair on a reference target. placement. 3. Re-set the front micrometer to zero, then use the tangent screws to register both crosshairs precisely on the target.
-
Page 12: Adapter For 2.250" Barrels
The M190 or M160 must be oriented to track the micrometers paral- lel to the instrument reticle. 1. Mount the adapter to the objective end of the telescope, then mount the micrometer on the adapter approximately parallel to the instrument reticle. Model 190 and Model 160 Family of Optical Micrometers... - Page 13 2. Focus the instrument on a finite reference target and precisely register the instrument reticle on the target. 3. Rotate the micrometer drum to track the instrument crosshair across a reference target. If the instrument reticle stays in regis- ter with the target, the adjustment is complete. If not, determine which way to clock the micrometer around the barrel to correct the tracking: 4.
-
Page 14: Exploded Parts Diagram
Exploded Parts Diagram (see parts list on next page) Note: The Model 190 is shown below. See parts listing on the next page for alternate parts specific to the Model 160. Model 190 and Model 160 Family of Optical Micrometers... -
Page 15: Parts List
Parts List Description Part No. Description Part No. 2557-1 Main Body Tube* 19 Adj. Screw Washer 2550 (2560) Window Pivot Screw** 2509-1 20 Adj. Screw Cap 5995 Window Screw Nut 2510 21 Pinion Screw 2513 Ball Bearing 1113-2 22 Pinion 2511 Window Mount* 2507-1...


Need help?
Do you have a question about the 190 and is the answer not in the manual?
Questions and answers