Table of Contents
Advertisement
Advertisement
Table of Contents

Related Manuals for V-ZUG Adora TL WP


Summary of Contents for V-ZUG Adora TL WP
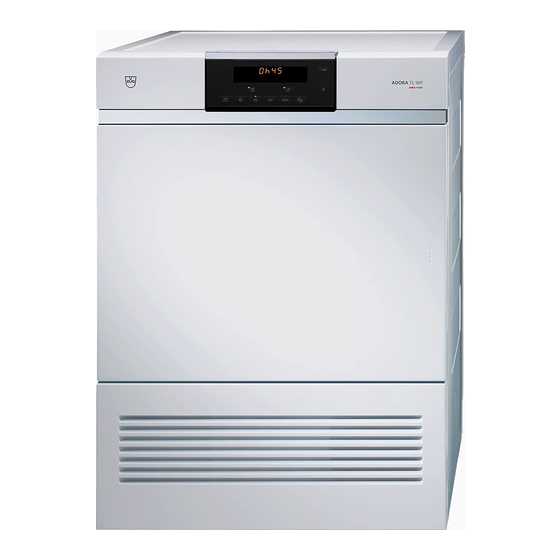
- Page 1 Operating instructions Adora TL WP Tumble dryer...
- Page 2 The product family (model number) corresponds to the first alphanumerics on the identification plate. These operating instructions apply to: Model Type Product range Adora TL WP WT-ATLWP 12001 Variations depending on the model are noted in the text. © V-ZUG Ltd, CH-6301 Zug, 2015...
-
Page 3: Table Of Contents
Contents 1 Safety precautions 5 Symbols used.................... 5 General safety precautions............... 6 Appliance-specific safety precautions ............ 7 Instructions for use.................. 8 2 Disposal 11 3 Using for the first time 12 Note ...................... 12 Function description ................ 12 Starting the function test ................. 13 Where is the identification plate? ............ 13 4 Appliance description 14 Appliance overview.................. 14... - Page 4 Error message A9, Clean filter and mats .......... 38 Build-up of fluff.................. 38 Cleaning the door filter................ 39 Basic cleaning of the door filter including mat........ 39 Cleaning the front mat................ 41 Moisture sensor.................. 42 9 Trouble-shooting 43 What to do if .................... 43 10 Drying tips 50 10.1 Fabric care symbols ................ 50...
-
Page 5: Safety Precautions
Safety precautions Symbols used Denotes important safety precautions. Failure to observe said precautions can result in injury or in damage to the appliance or fittings! Information and precautions that should be observed. Information on disposal Information about the operating instructions ►... -
Page 6: General Safety Precautions
1 Safety precautions General safety precautions • Read the operating instructions before using the appliance for the first time! • This appliance can be used by children aged 8 and above and by persons with reduced physical, sensory or mental cap- abilities, or lack of experience and/or knowledge, provided they are supervised or have been instructed on the safe use of the appliance and have understood the hazards involved. -
Page 7: Appliance-Specific Safety Precautions
1 Safety precautions Appliance-specific safety precautions • Children under 3 years of age must be kept away from the appliance unless they are constantly supervised. • The appliance has a maximum dry load capacity of 7 kg. • This appliance is only suitable for drying textiles which have been washed in water. -
Page 8: Instructions For Use
1 Safety precautions • Remove objects such as lighters and matches and the like. • Never stop a tumble dryer before the end of the drying cycle unless all items are quickly removed and spread out so that the heat is dissipated. •... - Page 9 1 Safety precautions • Any repairs, modifications or manipulations to the appliance, especially any electrically live parts, may only be carried out by the manufacturer, its Cus- tomer Services or a similarly qualified person. Repairs if carried out incor- rectly could cause serious injury or damage to the appliance and fittings as well as affect the functioning of the appliance.
- Page 10 1 Safety precautions How to avoid damaging the appliance • Transport the appliance in an upright position only! Transporting it in any other position will result in damage to the appliance! When carried carefully without being shaken, the appliance may be tilted a maximum of 90° to the left (viewed from the front).
-
Page 11: Disposal
Disposal Packaging • All packaging materials (cardboard, plastic film (PE) and polystyrene (EPS)) are marked and should, if possible, be collected for recycling and disposed of in an environmentally friendly way. Disconnection • Disconnect the appliance from the mains. With a fixed appliance, this is to be carried out by a qualified electrician! Safety •... -
Page 12: Using For The First Time
Using for the first time Note The appliance can only be operated after standing in the normal op- erating position for about 2 hours. The appliance must be installed and connected to the electricity supply in ac- cordance with the separate installation instructions. Have a qualified fitter/elec- trician carry out the necessary work. -
Page 13: Starting The Function Test
3 Using for the first time Starting the function test ► Connect the appliance to the mains and wait for to appear in the display. ► Use the button to start the function test. The function test can be interrupted in two ways: ►... -
Page 14: Appliance Description
Appliance description Appliance overview The appliance operates with a closed air circuit. Moisture is extracted from the air with the help of a heat pump and then the air is reheated. Recovering heat in this way sharply reduces energy consumption. Thanks to the heat pump, the appliance dries at lower temperatures. -
Page 15: Appliance Construction
4 Appliance description Appliance construction The appliance door can be set to open to the left or to the right. Our Customer Services can make the necessary adjustments to the appli- ance. Operating and display elements (pivoting operating panel) Appliance door Cover for door filter Door filter with mat Front grille... -
Page 16: Operating And Display Elements
4 Appliance description Operating and display elements * Depending on the serial number (FN) Display elements display (digital display) for: • Programme duration • Programme duration remaining • Delayed start • Hints and trouble-shooting Level of dryness display • Iron dry •... - Page 17 4 Appliance description Additional programme Timed drying Additional functions Easy care End of programme Delayed start Door opener Indicator lights The buttons for the automatic programmes, the additional programme and the additional functions are equipped with an indicator light. Indicator light flashes Programme or function can be selected.
-
Page 18: Programme Overview
Programme overview Programme sequence for the automatic programmes The drying programme has 3 phases: Drying The washing is tumble dried until it reaches the set level of dryness. The dry- ing programme is monitored by a moisture sensor. As soon as the required level of dryness is reached, the «Cooling down/Airing»... -
Page 19: Automatic Programmes
5 Programme overview Automatic programmes To select the right programme, follow the fabric care symbols on the labels of the wash items, e.g. 1–7 kg Extra dry For thick, multi-layered fabrics and mixed loads. Not suitable for knitted or woven articles such as T-shirts and under- wear as they could shrink. -
Page 20: Fabric Types
5 Programme overview Fabric types Use the button to select one of the following fabric types. 1–1.5 kg Airing For refreshing or airing little-worn garments. 1–7 items Shirts Fabrics are gently dried to «cupboard dry». 1–3 kg Outdoor garments Leisure- and sportswear (sympatex, goretex, ...) are dried gently. 1–4 kg Denim Denim fabrics are dried to «cupboard dry». - Page 21 5 Programme overview 1–2 kg Thin down filling For light-weight down textiles (e.g. thin duvets and jackets). Optimum wash load: 1 item 1–2 kg Thick down filling For bulky down textiles (e.g. pillows, jackets and thick duvets). If recommended, tennis balls can be used for fluffing up the down during drying.
-
Page 22: Additional Functions
5 Programme overview Additional functions Easy care Gentle drying for mixed fabrics (e.g. shirts, pullovers and T-shirts). The level of dryness is reduced. Optimum wash load: 1–2.5 kg Delayed start Take advantage of cheap-rate electricity (setting range of up to 24 hours). -
Page 23: User Settings
User settings Adjusting user settings Providing no programme is running and no error message is displayed, the user settings can be changed with the appliance door open or closed. The procedure is generally the same for all settings. Changing user settings ►... - Page 24 6 User settings Possible user settings The following diagram gives an overview of the possible user settings. Hold the button depressed for 5 seconds OFF * Childproof lock Very low drying Low drying Level of dryness Normal drying * Strong drying Very strong drying OFF * ReversePlus...
-
Page 25: Childproof Lock
6 User settings Childproof lock Childproof lock The childproof lock prevents a programme from being started accidentally. When the childproof lock is activated, a programme can only be started by pressing two buttons simultaneously. ► Hold the button depressed for 5 seconds. –... -
Page 26: Level Of Dryness
6 User settings Level of dryness The appliance is designed to provide the most energy-efficient drying. The moisture sensor continually monitors the level of dryness of the washing. If the washing is not being dried sufficiently – or being overdried – the level of dry- ness can be reset. -
Page 27: Reverseplus
6 User settings ReversePlus By reversing the main direction of spin of the drum, the washing dries more evenly and is less likely to get tangled. Particularly suitable for drying large items of washing, e.g. bedding. Switching ReversePlus on/off ► Hold the button depressed for 5 seconds. -
Page 28: Drying
Drying Preparing the appliance After the appliance is transported or re-sited, it must be left to stand in the normal operating position for around 2 hours. Failure to do this can result in damage to the appliance. ► Plug the appliance in at the mains or turn the wall switch Loading the appliance ►... -
Page 29: Selecting A Programme
7 Drying If no programme selection is made within 20 seconds, all the displays go out. However, it is still possible to make a programme selection. Selecting a programme «Press and go» An automatic programme can be selected with the press of a single button. All the necessary settings for the programme are provided automatically. - Page 30 7 Drying Selecting an automatic programme ► Close the appliance door. – The indicator lights for the programme buttons and the additional pro- gramme flash. * Depending on the serial number (FN) ► E.g.: Press the button until the required fabric type programme, such as , ...
- Page 31 7 Drying Selecting timed drying ► Close the appliance door. – The indicator lights for the programme buttons and the additional pro- gramme flash. * Depending on the serial number (FN) ► Press the button. ► Press repeatedly to select the desired duration, i.e. 10, 20, 30, 40, 50, 60, 90, 120 or 150 minutes.
-
Page 32: Changing Selection
7 Drying Selecting a delayed start * Depending on the serial number (FN) ► Immediately after programme selection, hold the button depressed or press repeatedly until the required delayed start duration (max. 24 hours) appears in the display. – The display goes dark. –... -
Page 33: Interrupting A Programme
7 Drying Interrupting a programme A running programme can be interrupted at any time to add or remove an item of washing before time. After the appliance door is closed, the heat pump waits 5 minutes be- fore starting again and the programme duration is correspondingly lengthened. -
Page 34: Programme Selection With Childproof Lock Activated
7 Drying Programme selection with childproof lock activated How to switch the childproof lock on/off is described in 'User settings'. ► Close the appliance door. – In the display appears: – The indicator lights for the programme buttons flash. * Depending on the serial number (FN) ►... - Page 35 7 Drying Aborting a programme through opening the appliance door ► Open the appliance door. – The programme running is interrupted. ► Hold the active programme button – the indicator light flashes – depressed and at the same time press the button.
-
Page 36: End Of Programme
7 Drying End of programme – In the display appears: – The indicator light for the programme that has finished illuminates and button flashes. «Crease guard» starts if the appliance is not unloaded straightaway. When it has finished, all displays go out. Unloading the washing ►... -
Page 37: Care And Maintenance
Care and maintenance Cleaning intervals Pos. Appliance Cleaning interval Clean part Door filter Each time after Remove any fluff. the drying pro- gramme Whenever there Using an abrasive liquid cleaning is a heavier agent and a sponge, rinse with water build-up of de- and allow to drip dry;... -
Page 38: Error Message A9, Clean Filter And Mats
8 Care and maintenance Error message A9, Clean filter and mats A thick coating of fluff results in a reduced process air flow, which can impair the drying process and trigger the «A9 Clean filter and mats» error message. Check and, if necessary, clean the following parts in the appliance: •... -
Page 39: Cleaning The Door Filter
8 Care and maintenance Cleaning the door filter each time after tumble drying ► Open the appliance door 1. ► Open the cover for door filter 2. ► Remove any fluff. ► Close the cover for door filter 2 again. The appliance will not start without the door filter in place. - Page 40 8 Care and maintenance ► Open the appliance door 1. ► Open the cover for the door filter 2. ► Take out the door filter 3, open and remove the filter mat 4. ► Hold the door filter 3 up to the light to detect deposits. Wash the door filter 3 to clean off heavier deposits.
-
Page 41: Cleaning The Front Mat
8 Care and maintenance Cleaning the front mat If the «A9 Clean filter and mats» error message still appears after the filter and the mats have been cleaned, clean the front filter mat in front of the heat pump very carefully using a vacuum cleaner. Clean the front mat if necessary ►... -
Page 42: Moisture Sensor
8 Care and maintenance Moisture sensor The moisture sensor 1 detects the level of moisture remaining in the washing. If the moisture sensor is dirty, it may produce false readings. The moisture sensor 1 must be cleaned if appears in the display. ►... -
Page 43: Trouble-Shooting
Trouble-shooting This section lists faults that can be solved simply by following the instructions given. If another fault is displayed or the fault cannot be remedied, please call Customer Services. Before calling Customer Services, please note down the error mes- sage in full. - Page 44 9 Trouble-shooting ... in the display appears Possible cause Solution • Moisture sensor is dirty or ► Clean the moisture sensor and then wipe wet. dry. ► Cancel the error message by pressing the button. ► Start the programme. ► If the error appears again, note down the er- ror message in full and the serial number (FN) and then turn off the power supply.
- Page 45 9 Trouble-shooting ... in the display appears: Possible cause Solution • Door filter is missing. ► Insert the door filter and ensure it is posi- tioned correctly, or close the appliance door. • The appliance door is open. ► Cancel the error message by pressing the button.
- Page 46 9 Trouble-shooting ... in the display appears Possible cause Solution • Pressing a programme ► Hold the button depressed and at the button several times while same time press the required programme the childproof lock is activ- button. The childproof lock has been overrid- ated.
- Page 47 9 Trouble-shooting ... the programme takes significantly longer than indicated in the display Possible cause Solution • The following parts in the ► Check and, if necessary, clean the parts. appliance could be blocked: – Door filter – Door mat –...
- Page 48 9 Trouble-shooting ... in the display flash alternately Possible cause Solution • Overvoltage ► Cancel the error message by pressing the button. ► Switch the power supply off for about 1 minute. ► Turn the power supply back on again and select a programme.
- Page 49 9 Trouble-shooting ... the duration remaining indicator remains frozen for a longer period Possible cause Solution • Not yet reached level of ► This is not a malfunction. No action is ne- dryness required. cessary. Once the level of dryness required is reached, the duration remaining indicator will run automatically again.
-
Page 50: Drying Tips
Drying tips 10.1 Fabric care symbols To select the right drying programme, follow the fabric care symbols on gar- ment labels. Tumble dry, medium heat Tumble dry, low heat Do not tumble dry 10.2 General tips • For the wash you are recommended not to use fabric conditioners or other fabric care solutions. -
Page 51: Energy-Saving Tips
10 Drying tips • For easy-care fabrics (e.g. shirts and cotton-mix fabrics), select the addi- tional easy care function and put only a few items in the drum. • Knitted and woven items (e.g. T-shirts) tend to shrink. Select the additional easy care function. -
Page 52: Spare Parts
Spare parts Please give model number and exact description when ordering parts. mesh door filter Door mat Front grille Front mat... -
Page 53: Technical Data
Technical data Dimensions Height: 85 cm Width: 59.5 cm Depth: 61 cm Weight: 65 kg Pumping height of pump: 1.2 m Dry load capacity: 7 kg Ambient conditions Permissible room temperature when appliance is in operation: 5 °C to 35 °C Electrical connection ►... -
Page 54: Product Fiche
12 Technical data 12.1 Product fiche In accordance with EU Regulation No. 392/2012 Brand V-ZUG Ltd The model identifier corresponds to the first 12001 alphanumerics on the identification plate. Rated capacity for cotton laundry at full load Type of appliance... -
Page 55: Consumption Values
12 Technical data Weighted condensation efficiency Sound power level 1) Energy consumption x kWh per year, based on 160 drying cycles of the standard cotton programme at full and partial load, and the consumption of the low-power modes. Actual energy consumption per cycle will depend on how the appliance is used. The standard cotton programme to which the information in the label and the fiche relates. - Page 56 12 Technical data Fabric types Programme Load capa- Residual mois- Programme dura- Energy city ture tion hrs./mins. Airing 1–1.5 – 0h10 0.02 Shirts 1–7 items 0 to 2 0h40 0.35 Outdoor gar- 1–3 0 to 2 0h55 0.60 ments Denim 1–4 –1 to 2 1h50 1.25...
-
Page 57: Note For Testing Institutes
12 Technical data 12.3 Note for testing institutes ► The declaration data can be determined correctly only after a run-in phase of 5 complete drying programmes with washing (automatic programme: normal dry ► Wash the door filter each time after completing a drying programme. ►... -
Page 58: Index
Index Cleaning.......... 39 Drying ..........18, 28 Additional functions........17 Duration remaining indicator ....29 Additional programme Timed drying ........ 17 Adjusting user settings ......23 Airing............18 Easy care ........... 22 Ambient conditions ........53 Selecting .......... 31 Appliance Electrical connection........ 53 Preparing .......... 28 End of the wash day ........ - Page 59 13 Index Symbols ............5 Note for testing institutes ......57 Note on heat pump ........11 Notes............60 Technical data........... 53 Testing institutes: Note ......57 Timed drying Selecting .......... 31 Operating elements ......15, 16 Tips.............. 50 Tumble dryer sheets ........ 50 Type ...............
-
Page 60: Notes
Notes... -
Page 63: Service & Support
Your repair order Call the free service number 0800 850 850 to contact your nearest V-ZUG service centre. You can arrange an onsite visit by us by phone if you wish. General queries, accessories and service agreement V-ZUG will be happy to help you with any general administrative or technical queries, to accept your orders for accessories and spare parts and to inform you about our progress- ive service agreements. - Page 64 At the end of the wash day: ► Clean the door filter ► Close the appliance door J12001013-R06 V-ZUG Ltd, Industriestrasse 66, CH-6301 Zug Tel. +41 58 767 67 67, Fax +41 58 767 61 61 info@vzug.com, www.vzug.com Service Centre: Tel. 0800 850 850...
Need help?
Do you have a question about the Adora TL WP and is the answer not in the manual?
Questions and answers