Table of Contents
Advertisement
Advertisement
Table of Contents

Related Manuals for SainSmart ENDER3


Summary of Contents for SainSmart ENDER3
- Page 1 ENDER3 3D PRINTER USER MANUAL...
-
Page 2: Table Of Contents
Contents I. PREFACE II. NOTICE III. PACKAGE LIST IV. QUICK START 1. Assembly Guide 2. Build Plate Leveling 3. Basic Printing V. SOFTWARE INSTALLATION VI. MENUS 1. Prepare 2. Control 3. No card/print from SD 4. Init.SD-Card/Change SD-Card 5. Tune VII. -
Page 3: Preface
The SainSmart Ender-3 3D Printer User Guide is designed for the Ender-3 users to start their printing journey. Even if you are familiar with 3D printing technology, we still recommend that you read through this guide, as there is lots of important information about the Ender-3 for you to get a better 3D printing experience. -
Page 4: Notice
PLEASE STRICTLY FOLLOW ALL THE SAFETY WARNINGS AND NOTICE BELOW ALL THE TIME. 1. Work Environment Safety Keep your work place tidy. Do not operate SainSmart Ender-3 3D Printer in the presence of flammable liquids, gases or dust. SainSmart Ender-3 should be placed out of children and untrained people’s reach. - Page 5 Do keep your hair, clothing and gloves away from moving parts. Do not touch the nozzle and build plate during printing. Do not touch the nozzle after finishing printing. Do not operate the device while you are tired or under the influence of drugs, alcohol or medication. 4.
-
Page 6: Package List
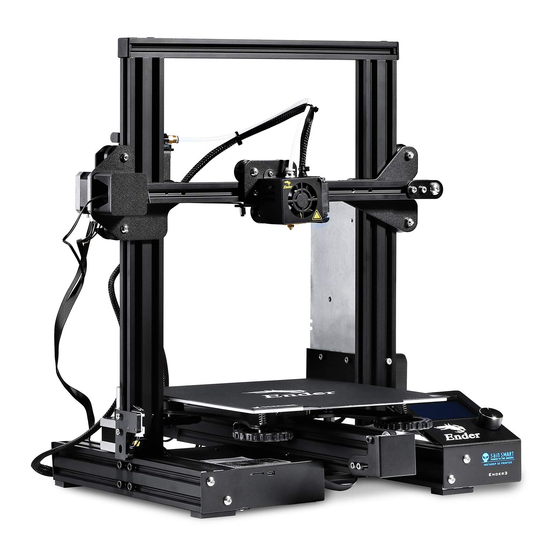
III. PACKAGE LIST Parts 3D Printer base 3.5inch Power supply (with extruder Roller bracket Nozzle parts LCD display 110/220V connected) Extruder parts Belt tensioner Z-axis motor Z-axis limit module Spool holder... - Page 7 Cover Power cable Belt Sections Right-rails Left-rails Lead-screw X-rails Top-rails...
- Page 8 Fasteners M5x8mm x 4pcs M5 T-Nut x 2PCS M4x20mm x 2pcs M5X25 x 4PCS M4X16 x 4PCS M4X18-P x 2PCS M5X45 x 4PCS Tools TF card with Reader PLA filament 50g Needle for nozzle x 1PCS x 1PCS x1PCS Screwdriver Cable tie Removal tool x 1PCS...
-
Page 9: Quick Start
IV. QUICK START 1. Assembly Guide Front Step 1 4pcs M5X45 Longer Shorter Shorter... - Page 10 Step 2 Select the correct input voltage to Front match your local mains (220V or 110V) 2pcs M5X8 2pcs M4X20...
- Page 11 Step 3 Front ≈32mm...
- Page 12 Step 4 Back 2pcs M4X18P...
- Page 13 Step 5 2pcs M4X16 Back...
- Page 14 Step 6 2pcs M4X16 Back...
- Page 15 Step 7 Back...
- Page 16 Step 8 Front...
- Page 17 Step 9 Front Don't tighten it too tight...
- Page 18 Step 10 2pcs 4pcs M5X25...
- Page 19 Step 11 2pcs M5X8 2pcs 2pcs M5 T-nut Front...
- Page 20 Step 12 Left Exp3...
-
Page 21: Build Plate Leveling
2. Build Plate Leveling Nozzle Build plate Knob The first and most important step towards ensuring the success of a 3D print is making certain that the build plate is parallel to the plane the extruder nozzle travels in, which is also known as “leveling” in 3D printing. And this is especially crucial and necessary for semi-assembled 3D Printer like Ender-3 without auto-leveling or assisted-leveling feature. - Page 22 If the paper slides through easily, the nozzle and build plate are too far apart. Rotate the knob clockwise to decrease the distance between them. If the paper cannot slide through, rotate the knob anticlockwise. 5. After leveling the first adjustment point,repeat step 4 for the other three points. 6.
-
Page 23: Basic Printing
3. Basic Printing • Pre-Heat 1. Press the control knob,TAP Prepare TAP Prepare PLA/Prepare ABS 2. Press the control knob,TAP Control TAP Temperature TAP Nozzle, rotate control knob to set the temperature as at least 180 C. Wait until the required temperature is met. •... -
Page 24: Software Installation
V. SOFTWARE INSTALLATION As you've seen, you can print a model directly from a gcode file on a microSD™ card and this is the preferred method, as it does not require a continuous connection to your computer. You can download gcode files to the microSD™ card and print them without building any model files by yourself. - Page 25 3. Ensure that all boxes are checked, then click Install to continue.
- Page 26 4. Once the files have been extracted and the Cura installation is complete, the driver installation wizard will launch.
- Page 27 5. Click Finish to complete the driver installation. 6. Click Next to continue.
- Page 28 7. Ensure that the box next to the start Cura 15.04.6 option is checked, then click Finish to complete the installation and launch the program. 8. Wait for Cura to finish launching. If this is the first time you have run Cura on this machine, Cura will automatically launch the First time run wizard.
- Page 29 9. Click the button next to the Other option, then click the 10. Select the Custom... option, then click Next to Next button to continue. continue.
- Page 30 11. Click the button to the left of the Other entry, then click Next to continue.
- Page 31 12. Change the settings to match those shown in the images below, then click Finish to continue.
-
Page 32: Menus
VI. MENUS Set nozzle temperature Current nozzle temperature Model Set hot bed temperature Current hot bed temperature Cooling fan speed Current location of the nozzle Print time Print progress Print speed Prompt message... -
Page 33: Prepare
Prepare Disable Steppers Disable stepper motors for the X/Y/Z axis so you can move the print head around manually without risking damaging the stepper motor driver electronics. Auto Home To make the X/Y/Z axis returns to the home position then your Ender-3 is ready for printing. Preheat PLA Heat up to the default setting temperature, which is 220 C for the nozzle and 60 C for the heated bed. -
Page 34: Control
Control Temperature 2.1.1 Nozzle Manually set up the temperature for nozzle. 2.1.2 Manually set up the temperature for heated bed. 2.1.3 Fan Speed Set up fan speed, which defines the speed at which the fans spin. A higher fan speed allows for better cooling and reduces oozing, but can also increases the shrinkage of the material. -
Page 35: No Card/Print From Sd
2.1.4 Restore Failsafe Restore factory setting. No card/print from SD When there is no inserted SD card, it will display No Card. When your card is inserted, choose the file that you need to print from your SD card. Init.SD-Card/Change SD-Card Please initialize you SD card every time you insert one. -
Page 36: Troubleshooting
VII. TROUBLESHOOTING 1.Erase the SD Card 2.Format the SD Card SD-Card Start 3.Replace the SD Card Rename the file with File Name Print from SD Card alphabet and number 1.Move the model and File is Any random Other files restart the slicing Slice identified code... -
Page 37: Supports & Service
VIII. SUPPORTS & SERVICE SainSmart support team is on standby and ready to help you with any problems you may have with your Ender-3 3D printer. If the issues or questions are not covered in this User Guide, you can seek for solutions on our official website or contact us via email. - Page 38 2711 Centerville Road, Wilmington, DE, 19808, United States...
Need help?
Do you have a question about the ENDER3 and is the answer not in the manual?
Questions and answers