Table of Contents
Advertisement
H
R
EAT
AVS HRV EKO 1.5, AVS C
N
OVOFIT
V
ENTILATOR
VB0122
VB0126
PLEASE READ AND SAVE THESE INSTRUCTIONS
Venmar Ventilation inc., 550 Lemire Blvd., Drummondville, QC, Canada J2C 7W9
User Guide
ECOVERY
1.0
AND
M
ODEL
www.venmar.ca
V
ENTILATORS
ONSTRUCTO
E
NERGY
AVS ERV EKO 1.5
VB0123
VB0136
These
ENERGY STAR
energy efficiency guidelines set by
Natural Resources Canada and the
US EPA. They meet ENERGY STAR
requirements only when used in
Canada.
M
ODELS
1.5V,
R
ECOVERY
products
earned
®
by meeting strict
08445 rev. C
the
Advertisement
Table of Contents

Summary of Contents for Venmar AVS HRV EKO 1.5
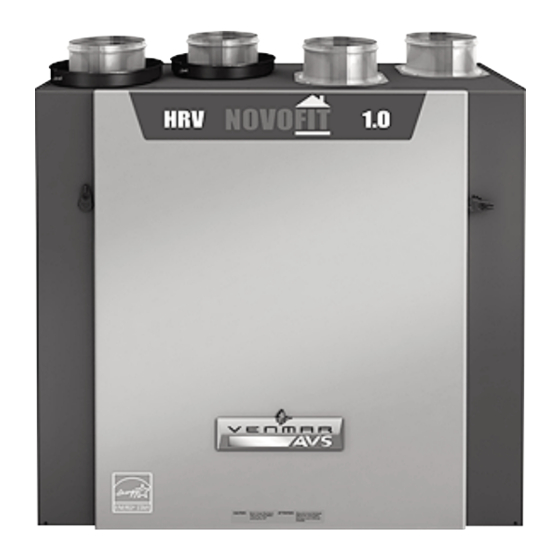
- Page 1 User Guide ECOVERY ENTILATORS ODELS AVS HRV EKO 1.5, AVS C 1.5V, ONSTRUCTO OVOFIT NERGY ECOVERY AVS ERV EKO 1.5 ENTILATOR ODEL VB0122 VB0123 VB0126 VB0136 PLEASE READ AND SAVE THESE INSTRUCTIONS Venmar Ventilation inc., 550 Lemire Blvd., Drummondville, QC, Canada J2C 7W9 www.venmar.ca...
- Page 2 Congratulations! You have made an excellent choice! The operating principle of your Heat Recovery Ventilator or your Energy Recovery Ventilator will give you personal comfort you have never known before. We have prepared this User Guide especially for you. Please read it carefully to ensure you obtain full benefit from your unit.
-
Page 3: Table Of Contents
Table of Contents 1. D ........4 EFROSTING 2. -
Page 4: Defrosting Mode
During the defrost cycle, the unit shifts to maximum speed and the dampers close. After defrosting, the unit returns to the operating mode selected by the user. 2. Controls 2.1 Booting Sequence (HRV EKO 1.5 ERV EKO 1.5 OOTING SEQUENCE ONLY The unit booting sequence is similar to a personal computer booting sequence. -
Page 5: Integrated Control
2. Controls (cont’d) 2.2 Integrated Control All units are equipped with an integrated control, located under the unit, on the recessed side of electrical compartment. Plug the unit. Use the push button (1) to control the unit. The LED (2) will then show on which mode the unit is in. OTTOM OF THE UNIT VD0207 Refer to table below to see how to operate the unit using its integrated control. -
Page 6: Altitude Main Control
2. Controls (cont’d) 2.3 Altitude Main Control (for AVS HRV EKO 1.5, AVS ERV EKO 1.5 and Novofit 1.0 units only) For more convenience, these units can also be controlled using a main control. Only one main control can be connected per unit. - Page 7 2. Controls (cont’d) 2.3 Altitude Main Control (for AVS HRV EKO 1.5, AVS ERV EKO 1.5 and Novofit 1.0 units only) (cont’d) ASING NDICATORS AND MODE SMART PREF VC0100 A SMART key: Enables and disables the SMART mode. B Set key: •...
- Page 8 2. Controls (cont’d) 2.3 Altitude Main Control (for AVS HRV EKO 1.5, AVS ERV EKO 1.5 and Novofit 1.0 units only) (cont’d) The Altitude main control is pre-programmed and ready to go. All you have to do is to set day and time. Then check the settings below and change if needed.
-
Page 9: A Ltitude M Ain C Ontrol
2. Controls (cont’d) 2.3 Altitude Main Control (for AVS HRV EKO 1.5, AVS ERV EKO 1.5 and Novofit 1.0 units only) (cont’d) Pressing on MODE/PREF. key (D) successively allows to go from Ventilation mode to Recirculation mode and then to Program mode (VENT... -
Page 10: Lite-Touch Constructo Main Control
2. Controls (cont’d) 2.4 Lite-Touch Constructo Main Control (for AVS Constructo 1.5V unit only) Activate the push button; the color of the indicator shows INTERMITTENT the unit operating mode. VC0075 OLOR UGGESTED REEN NTERMITTENT ELECT THIS MODE WHEN YOU ARE AWAY FROM THE HOUSE FOR A FEW DAYS WHEN YOU DEEM THE INSIDE AIR IS TOO DRY IN HEATING SEASON... -
Page 11: Constructo Main Control
2. Controls (cont’d) 2.5 Constructo Main Control (for AVS Constructo 1.5V unit only) AIR SUPPLY CONTROL DJUSTING Select speed “MIN” or “MAX” using slide switch (A). • When “MIN” (minimum speed) is 5°C selected, if the knob (B) is set 41°F OFF MIN MAX above the click, the unit will... -
Page 12: Optional Auxiliary Controls
Contrary to the main controls, up to 5 optional auxiliary controls can be connected to the same ventilation unit. 2.6.1 20/40/60-minute Push-Button Timer (for AVS HRV EKO 1.5, AVS ERV EKO 1.5 and Novofit 1.0 units only) Location: Located in the bathroom or in other locations where there is temporary humidity excess or pollutants. -
Page 13: Dehumidistat
2. Controls (cont’d) 2.6 Optional Auxiliary Controls (cont’d) 2.6.3 Dehumidistat (for AVS Constructo 1.5V unit only) Adjust knob to the desired maximum indoor humidity level. CAUTION Do not select a humidity level below 30%. This could lead to excessive dryness in the air causing discomfort for the occupants. -
Page 14: Maintenance
3. Maintenance WARNING Risk of electric shock. Before performing any maintenance or servicing, always disconnect the unit from its power source. When cleaning the unit, it is recommended to wear safety glasses and gloves. Refer to picture beside to identify the inner parts of your unit. -
Page 15: Annual Maintenance
3. Maintenance (cont’d) 3.1 Semi-Annual Maintenance (cont’d) 3. Slide out both filters from the unit (1 in the illustration beside). 4. Slide out the core from the unit (2 in the illustration beside). 5. Clean the inside walls of the unit with a clean damp cloth, then wipe with a clean dry one. -
Page 16: Troubleshooting
4. Troubleshooting PROBLEMS TRY THIS... On Altitude wall control, • At its very start-up or after a power failure, it takes there is no outside some minutes before the outside temperature temperature displayed value appears on screen. Set the wall control on on screen MIN or MAX in VENT Mode.

Need help?
Do you have a question about the HRV EKO 1.5 and is the answer not in the manual?
Questions and answers
Step by step to program so it runs 9pm to 9am on vent