Table of Contents
Advertisement
Advertisement
Table of Contents

Related Manuals for Bard Groshong NXT PICC


Summary of Contents for Bard Groshong NXT PICC
-
Page 2: Table Of Contents
Table of Contents Table of Contents Page Contents Product Description Product Description, Indications & Contraindications Contraindications, Warnings & Precautions Precautions Precautions & Possible Complications Insertion Instructions 1. Identify the Vein and Insertion Site 2. Patient Position/ Catheter Measurement 3. Preflush the Catheter 4. -
Page 3: Product Description
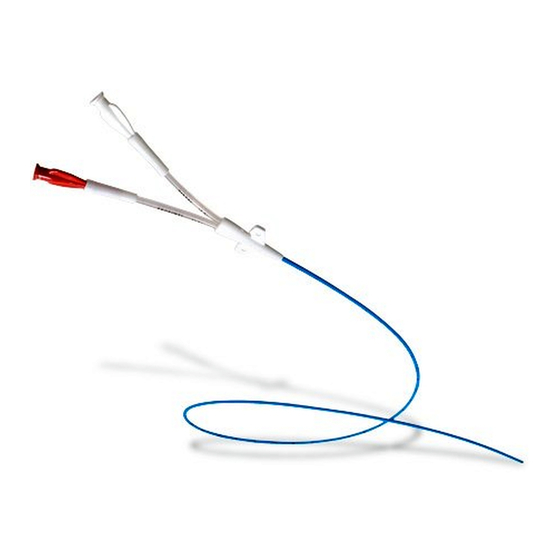
Product Description Product Description Groshong NXT peripherally inserted Central Catheters are made from specially formulated and processed medical grade materials, in a tray with accessories for reliable long (greater than 30 days) or short (less than 30 days) term vascular access. •... -
Page 4: Product Description, Indications & Contraindications
Product Description, Indications & Contraindications The benefits provided by the Groshong valve are: 1. Increased patient safety due to reduced risk of air embolism or bleedback. 2. Elimination of the need for heparin flushing to maintain catheter patency. 3. Reduced need for catheter clamping. 4. -
Page 5: Contraindications, Warnings & Precautions
Warnings: Groshong NXT PICC • Intended for Single Patient Use. DO NOT REUSE. Bard Access Systems, Inc. products are single use devices and should never be reimplanted. Reuse carries with it the attendant concern of cross-infection regardless of the cleaning or sterilization method. Resterilization of incompletely cleaned devices may not be effective. - Page 6 Precautions • Never use force to remove the stylet. Resistance can damage the catheter. If resistance or bunching of the catheter is observed, stop stylet withdrawal and allow the catheter to return to normal shape. Withdraw both the catheter and stylet together approximately 2 cm and reattempt stylet removal. Repeat this procedure until the stylet is easily removed.
-
Page 7: Precautions & Possible Complications
DO NOT USE A SYRINGE SMALLER THAN 10 ml! • For those unfamiliar with the procedure, published studies and a video are available from Bard Access Systems, Inc. depicting insertion and mainte- nance techniques. • For further information or questions, please call 800-443-3385 or 801-595-0700. -
Page 8: Insertion Instructions
Insertion Instructions Insertion Instructions 1. Identify the Vein and Insertion Site • Apply a tourniquet above the anticipated insertion site. • Select a vein based on patient assess- ment. Veins of the antecubital fossa are recommended (basilic, cephalic median cubital veins) with the basilic preferred. •... -
Page 9: Preflush The Catheter
Insertion Instructions 3. Preflush the Catheter Dual Single Lumen Lumen • Attach prefilled syringe to the • Attach prefilled syringe to luer Luer attachment on the exten- attachment on flushable stylet. sion set. • Preflush catheter with sterile • Preflush catheter with sterile nor- normal saline or heparinized mal saline or heparinized saline saline to wet stylet. -
Page 10: Apply Tourniquet And Drape
Insertion Instructions 5. Apply Tourniquet and Drape • Apply the tourniquet above the intended insertion site to distend the vessel. • Put on sterile non-powdered gloves. Powdered gloves should be washed before use. • Drape the patient by placing the fenestrated drape over the anticipated puncture site. -
Page 11: Withdraw The Introducer Needle
Insertion Instructions 7. Withdraw the Introducer Needle Splitable Non-Splitable • Support the introducer sheath to • Support the introducer sheath to avoid displacement. avoid displacement. • Apply slight pressure on the • Apply slight pressure on the vessel above the insertion site to vessel above the insertion site to minimize blood flow. -
Page 12: Complete Catheter Insertion
Insertion Instructions 9. Complete Catheter Insertion Non-Splitable Splitable • Continue to advance the • Continue to advance the catheter. For central placement, catheter. For central placement, when the tip has advanced to when the tip has advanced to the shoulder, have the patient the shoulder, have the patient turn head (chin on shoulder) turn head (chin on shoulder) -
Page 13: Attach Suture Wings (Dual Lumen Only)
Insertion Instructions 10b. Remove Splitable Introducer • Stabilize the catheter position by applying pressure to the vein distal to the introducer sheath. • Withdraw the introducer sheath from the vein and away from the site. • Split the introducer sheath and peel it away from the catheter. 11. -
Page 14: Remove The Stylet/Assembly
Insertion Instructions 12. Remove the Stylet/ Assembly • Stabilize the catheter position by applying light pressure to the vein distal to the insertion site. • Slowly remove the stylet. • Caution: Never use force to remove the stylet. Resistance can damage the catheter. - Page 15 Insertion Instructions 15. Attach Connector to Single Lumen Catheters • Retrieve the oversleeve portion of the connector and advance it over the end of the catheter. If you feel some resistance while advancing the oversleeve, gently twist back and forth or spin to ease its pas- sage over the catheter.
-
Page 16: Aspirate And Flush
Insertion Instructions 16. Aspirate and Flush • Attach primed extension set and/or saline-filled syringe. • Aspirate for adequate blood return and flush each lumen of the catheter with 10ml normal saline to ensure patency. • Note: When infusion volume is a concern in small or pediatric patients, flush with 3ml per lumen. - Page 17 Insertion Instructions 18. Securing the Groshong NXT PICC: Dual-Lumen Singe-Lumen insertion insertion to bifurcation Catheter inserted within 7cm of bifurcation...
-
Page 18: Suggested Catheter Maintenance And Catheter Removal
Suggested Catheter Maintenance & Catheter Removal Suggested Catheter Maintenance The catheter should be maintained in accordance with standard hospital protocols. Suggested catheter maintenance is as follows: • Dressing Changes Assess the dressing in the first 24 hours for accumulation of blood, fluid or moisture beneath the dressing. - Page 19 An issued or revision date for these instructions is included for the user’s information. In the event two years have elapsed between this date and product use, the user should contact Bard Access Systems, Inc. to see if additional product information is available.
Need help?
Do you have a question about the Groshong NXT PICC and is the answer not in the manual?
Questions and answers