Ojmar Nexo NLX1 Instruction Manual
Electronic locking system
Hide thumbs
Also See for Nexo NLX1:
- Installation and assembly manual (13 pages) ,
- Installation and assembly manual (43 pages) ,
- Assembly instructions (4 pages)
Table of Contents
Advertisement
Quick Links
Advertisement
Table of Contents

Related Manuals for Ojmar Nexo NLX1


Summary of Contents for Ojmar Nexo NLX1
- Page 1 NEXO NLX1 SYSTEM INSTRUCTIONS MANUAL VERSION 2.0...
- Page 3 NEXO NLX1 SYSTEM INSTRUCTIONS MANUAL VERSION 1.0...
- Page 4 This document is for information only and is not contractually binding. The information may have undergone changes that have not yet been incorporated in the present document and we therefore suggest that if in doubt you please contact Ojmar to obtain updated information. © Ojmar, S.A. CONTENTS...
-
Page 5: Table Of Contents
SERVICE ....................59 DELETED ....................59 5. MAINTENANCE MANUAL ................. 60 OPENING OF THE NEXO NLX1 LOCK USING EMERGENCY POWER SUPPLY ......................60 EMERGENCY MECHANICAL OPENING OF THE NEXO NLX1 LOCK .... 63 DISASSEMBLY OF THE NEXO NLX1 LOCK ..........65 REQUEST FOR DATA: EVENTS, CYCLES, SETUP ........ - Page 6 Configured by RFID cards for OTS family ..........83 6.6.2 Configured by NFC programmer for OTS family ........84 6.6.3 Set up via NFC for Nexo NLX1 family ............85 6.6.4 Configured via TCP/IP for Nexo NLX1 family ........... 86 7. API REFERENCE MANUAL ................87 INTRODUCTION ...................
- Page 7 PAGE LEFT BLANK INTENTIONALLY CONTENTSOJMAR 7...
-
Page 8: Introduction
The system operates with RFID proximity media (Wellness® wristbands, cards and key) with technologies based on international standards. The Nexo NLX1 system connects wirelessly to the central PC of the system and that way can: Configure the locks quickly and conveniently. -
Page 9: Operation
OPERATION To start up the Nexo NLX1 system, the steps detailed below must be followed: Configure the PC (see Section 3.1). Configure the router (see Section 2.2). Configure the parameters of the NFC programmer (IP, network, locks...) connecting it to the PC and using the software (see Section 3.3). -
Page 10: General Warnings
GENERAL WARNINGS To ensure the correct operation of our product in your facilities you must follow the following rules: Product installation and use must be carried out in accordance with the • technical operating conditions described in the corresponding manual. When not specifically indicated, the proper installation and use of the •... -
Page 11: Class B Device Notice
This transmitter must not be co-located or operating in conjunction with any other antenna or transmitter. TECHNICAL SUPPORT If you have any questions about our products, please contact the technical department of Ojmar: Telephone no.: +34 943 748 484 Fax:... -
Page 12: Installation Manual
2. INSTALLATION MANUAL SDK INSTALLATION OJMAR’s API allows you to install both the drivers of the NFC programmer and of the CNReader. The following documents are also copied in the installation process: OJM-PR-2015-085 API general overview.pdf • OJM-PR-2016-118 API reference manual.pdf •... - Page 13 Nb: If you did not select a destination folder, the files will be decompressed • in the same folder as the source file. Click on "Install". The decompression will begin. Close the window when the installation is complete. OJMAR 13 2_MANUAL DE INSTALACIÓN...
- Page 14 The following files will appear in the selected folder: • Ojmar API.exe • 2_MANUAL DE INSTALACIÓN...
- Page 15 Installation of the API: Run the file “Ojmar API.exe” to start the installation of • the API. Right click and select “Run as administrator”. Select language: The first step must be to select the language. The following • two languages are available:...
- Page 16 Read the information and agree to the terms and conditions: Press “Next” • after reading the available information. In the next step, you must accept the terms and conditions of the licence agreement to continue. 2_MANUAL DE INSTALACIÓN...
- Page 17 Select the installation folder: Select the installation folder for the API. • If the folder does not exist, a message will be displayed warning that the folder will be created. Press “Accept” to continue with the process. OJMAR 17 2_MANUAL DE INSTALACIÓN...
- Page 18 Select packages to install: The API module is required but the installation of • the drivers and documentation is optional. The packages available are as follows: Base: This is the API package. It is not optional. NFC: Drivers of the NFC programmer. If selected, they will be installed automatically.
- Page 19 Licence: You must select the licence file. • Search for the file in the folder that contains it and press “Next”. OJMAR 19 2_MANUAL DE INSTALACIÓN...
- Page 20 Confirm installation: When you press “Next” the installation route and the • packages that will be installed will be displayed. Press “Next” to begin the installation. Installation process: The installation progress will be displayed in a window. • Before finishing, the installation process of the drivers of the NFC programmer will be launched if it has been previously selected.
- Page 21 NFC Drivers: An installation wizard will help you install the drivers. • Complete the installation: When the progress of installation has finished, • press “Next” to install the shortcuts and complete the process. OJMAR 21 2_MANUAL DE INSTALACIÓN...
- Page 22 Drivers CNReader: The desktop reader drivers are not installed automatically. • These are copied to folder \cnreader\USBDriverV3.10 of the folder where the API has been installed. The supplied drivers are supported for the following operating systems: Windows XP (32 and 64 bits) Windows Vista (32 and 64 bits) Windows 7 (32 and 64 bits) Windows 8 (32 and 64 bits)
- Page 23 To do this, access the “Device Manager” of Windows. This option is found in the “Control Panel”. Locate the following error in the list: Right click on the device in conflict and select “Upgrade driver software”: Select “Browse my computer for driver software”. OJMAR 23 2_MANUAL DE INSTALACIÓN...
- Page 24 Press “Browse” and locate the “Drivers Cnreader” folder of the CD supplied by Ojmar. Confirm the driver installation clicking on the button “Install”. 10. If the installation was successful, the following screen will be displayed. 2_MANUAL DE INSTALACIÓN...
- Page 25 Docs: The manuals are copied in folder \docs of the folder where the API has • been installed. Shortcuts: In the last step, you can create shortcuts to the application. There • are two options available: Shortcuts on the desktop. Shortcuts in the start menu. OJMAR 25 2_MANUAL DE INSTALACIÓN...
- Page 26 From the start menu, you can start the application or uninstall it. The API can be started by double-clicking on the shortcut on the desktop. Run as administrator. • 2_MANUAL DE INSTALACIÓN...
- Page 27 If the following xml is displayed it means that the API is running properly. Windows Service: The API is installed as a Windows service. • Right click and select “Run as administrator”. OJMAR 27 2_MANUAL DE INSTALACIÓN...
-
Page 28: Physical Installation Of The Router
8.1. ASSEMBLY OF THE NEXO NLX1 LOCK The NEXO NLX1 lock can be installed on doors with thicknesses between 9 mm and 20 mm. The assembly of the lock on the locker door must be correctly carried out to ensure the correct operation of the lock. -
Page 29: Lock Direction
2.3.2 Assembly Considerations The NEXO NLX1 lock is fixed to the locker door with four screws. Recommended screws: • Conglomerate doors: Countersunk coach nut 4.5 x 35 DIN 7996 stainless steel (depending on the thickness of the door). - Page 30 2.3.2.1 Strike with reinforcement Figure 2-2. Measurements of the strike with reinforcement in mm (inches) (Figure 1 of 2). 2_MANUAL DE INSTALACIÓN...
- Page 31 Figure 2-2. Measurements of the strike with reinforcement in mm (inches) (Figure 2 of 2). OJMAR 31 2_MANUAL DE INSTALACIÓN...
- Page 32 2.3.2.2 Smooth strike (with channel in the body of the locker) Figure 2-3. Measurements of the smooth strike in mm (inches) (Figure 1 of 2). 2_MANUAL DE INSTALACIÓN...
- Page 33 Figure 2-3. Measurements of the smooth strike in mm (inches) (Figure 2 of 2). OJMAR 33 2_MANUAL DE INSTALACIÓN...
-
Page 34: Steps To Follow For Assembly
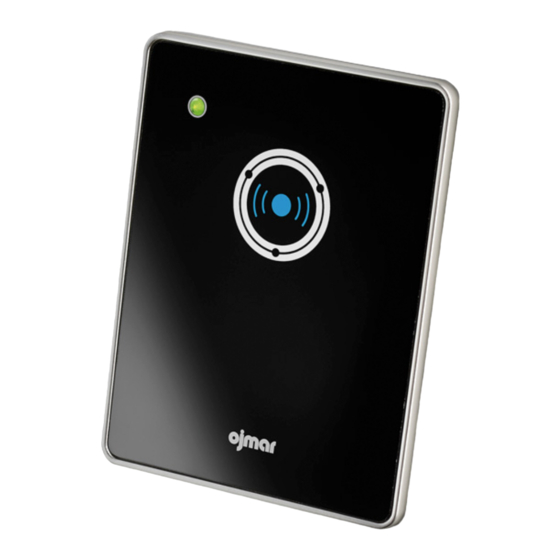
2.3.3 Steps to Follow for Assembly To assemble a NEXO NLX1 lock on a support or furnishing follow steps in this order: Mark the holes according to Figure 2-4. Drill the central hole of Ø23 (+0.1/0). If necessary, drill the holes to fasten the lock. - Page 35 Clean the surface of the door and make sure it is dry. Peel off the plastic film from the emblem. Insert front panel bulge in the hole connecting of the lock and make sure that the led viewer is aligned with the locker door. OJMAR 35 2_MANUAL DE INSTALACIÓN...
- Page 36 Press the front panel firmly that correctly stuck in the door. Remove the protective film from the front panel. Remove plastic strip from the bottom side of the lock 2_MANUAL DE INSTALACIÓN...
- Page 37 Once the locking device has been tightened, check that the lock can be opened and closed correctly with a user card. Once the locker door is closed, check that the mechanical lock error alarm is not triggered. OJMAR 37 2_MANUAL DE INSTALACIÓN...
- Page 38 POSITION RIGHT LOCK MOUNTING HOLES POSITION LEFT LOCK MOUNTING HOLES Figure 2-4. Measurements in mm (inches). 2_MANUAL DE INSTALACIÓN...
- Page 39 PAGE LEFT BLANK INTENTIONALLY OJMAR 39 2_MANUAL DE INSTALACIÓN...
-
Page 40: Start-Up
3. START-UP For more information, see Section 6.6. CENTRAL PC AND PCS (IPS, NETWORK, ETC.) The PCs connected to the system must have a unique IP address configured, and to do this we need to modify the parameters of the network: Access the network and sharing center in the computer’s control panel. - Page 41 Press “Change adapter settings”. Right click the network card and select “Properties”. OJMAR 41 3_PUESTA EN MARCHA...
- Page 42 Select “Internet Protocol version 4”, and press properties. You must then complete the following information and click OK: 3_PUESTA EN MARCHA...
-
Page 43: Reader/Portable Programmer
255 devices, change the subnet mask. Gateway: IP address of the router. READER/PORTABLE PROGRAMMER Portable programmers allow reading and writing the keys supplied by Ojmar. NFC OJMAR PROGRAMMER DESKTOP READER We have two programmers, each with different characteristics. Both models are connected to the PC via the USB port. -
Page 44: Ojmar Nfc Model Programmer
3.2.1 Ojmar NFC Model Programmer The Ojmar NFC programmer works using the installation's Management Software. When working using the Management Software, you can: Read information from the cards/wristbands • Record user cards/wristbands, cancellation and maintenance cards . • Initialize locks that have previously been configured from the Software. - Page 45 -10º to +50º (non-condensing) temperature range Approx. weight 380g APPROXIMATE Outer (length x 202 x 89 x 39 mm DIMENSIONS width x height) 3.2.1.1 Main Screen The main screen of the Ojmar NFC programmer displays the following information: OJMAR 45 3_PUESTA EN MARCHA...
- Page 46 Operations with cards/wristbands Operations with locks. Configuration. Date and time: Shows the date and the time of the programmer. This is the information that will be used for recording locks and cards/wristbands. Battery level: Displays programmer’s battery level. NB.: The level of the battery is shown for a few seconds after turning •...
- Page 47 Write card/wristband: Records on the card/wristband the configuration recorded in the programmer. By default, a key of “Free” type will be recorded for 1 lock and in Subgroup 0. Return: Return to the main menu. OJMAR 47 3_PUESTA EN MARCHA...
- Page 48 3.2.1.3 Operations with Locks This screen displays the following menus: Displays the following submenu for the locks of type NEXO NLX1: Initialize: This menu option allows initialising locks. Configure: This menu option allows configuring locks. To do so: Press “Initialize”.
- Page 49 Auto power off: When you turn this button on the programmer screen will turn off automatically after approximately 2 minutes of inactivity. Change data/: Allows changing the time and the date of the programmer. Return: Return to the main menu. OJMAR 49 3_PUESTA EN MARCHA...
-
Page 50: Desktop Reader
3.2.2 Desktop Reader The Desktop Reader allows reading and recording keys using the installation’s Management Software. NB.: The desktop reader cannot connect directly with the locks. It must be • connected to the computer via the USB port and use the Management Software of the installation for programming the keys. -
Page 51: Loading Initialisation Data To The Nfc Programmer
See section 7.3.1.1 - Initialisation & set up and point “Configure programmer NDM” of section 7.3.2.3.1. INITIALISE LOCKS WITH NFC PROGRAMMER The following steps must be carried out to be able to initialise the locks: Turn on the NFC programmer. Choose option 1 of the next screen. OJMAR 51 3_PUESTA EN MARCHA... - Page 52 Press button “OTS Online”. Press button “Initialize”. Pressing the top button, you can choose between initialising all locks, even or odd locks. 3_PUESTA EN MARCHA...
- Page 53 Press button “Continue”. Hold the programmer in front of the led viewer symbol as shown in the following picture. See the progress in the progress bar of the programmer. OJMAR 53 3_PUESTA EN MARCHA...
- Page 54 A long green led turns on and the lock emits 3 beeps and the green led flashes 2 times, informing that the initialisation data has been recorded correctly. The PC sends the configuration data using wireless communication to the lock. The lock beeps 3 times and the green led lights up 3 times, confirming that it has received the configuration data correctly.
-
Page 55: Description Of Led Flashes
3x short Initialisation, configuration, fw upgrade. 3x short 3x short Unsuccessful maintenance operation. Fault. Send to Ojmar: EEPROM 3x short 3x short deprogrammed, mechanical errorD Correct Operation. GREEN: Pay attention to the message and fix it as soon as possible. -
Page 56: Lists
3.5.1 Lists To manage their opening and closing, the locks of the system have user lists: White list: Users who are on this list will be able to operate with the lock in • question. Black list: Users who are on this list will not be able to operate with the lock in •... - Page 57 PAGE LEFT BLANK INTENTIONALLY OJMAR 57 3_PUESTA EN MARCHA...
-
Page 58: Card Recording
• another user. NB.: A single master key is supplied (in key fob format) for each • installation. If you want an additional master key contact Ojmar. NB.: For exclusive use of the facility's staff. • • 4_GRABADO DE TARJETAS... -
Page 59: Service
When closed, it will continue to be occupied by the key it previously had assigned. NB.: A single service key is supplied (in key fob format) for each • installation. If you want an additional service key contact Ojmar. NB.: For exclusive use of the facility's staff. • DELETED This key allows deleting all the information of the lock and returning it to its factory state. -
Page 60: Maintenance Manual
5. MAINTENANCE MANUAL OPENING OF THE NEXO NLX1 LOCK USING EMERGENCY POWER SUPPLY It is advisable to carry out maintenance of the doors of the lockers every 6 months to make sure they are in their correct position and thus, correct any misalignments produced by the hinges and that the closing of the locker is correct. - Page 61 Nb: The power supply tool can only be inserted into the hole in one • position. OJMAR 61 5_MANUAL DE MANTENIMIENTO...
- Page 62 User key, master or service 5_MANUAL DE MANTENIMIENTO...
-
Page 63: Emergency Mechanical Opening Of The Nexo Nlx1 Lock
Once removed, pick up the emergency mechanical opening tool, arrows facing up and position it in the door’s hole,resting it against the door of the locker as shown in the picture. Insert the diameter of the mechanical opening tool into the hole in the door. OJMAR 63 5_MANUAL DE MANTENIMIENTO... - Page 64 Make sure that the emergency opening tool is aligned with the door, not in an angle. With a drill and Ø10 mm bit, insert the bit into the hole of Ø10 mm and drill to make a hole in the lock. ALIGNMENT OK ALIGNMENT NOT Bit Ø10 mm...
-
Page 65: Disassembly Of The Nexo Nlx1 Lock
Insert the key supplied by Ojmar in front of the metal part of the lock and with the help of this, remove it by pushing it to the right if it is a right lock or to the left if it is a left lock. - Page 66 Remove the cover. To do this, Lower part with the flat side of the key supplied by Ojmar, push the clip of the cover upwards that is on the gap on the battery holder. This clip is located in the central part of the lock.
-
Page 67: Request For Data: Events, Cycles, Setup
Attach the battery holder with the two screws. Loosen the 4 screws of the lock. REQUEST FOR DATA: EVENTS, CYCLES, SETUP See Section 7.3.3.4.2. OJMAR 67 5_MANUAL DE MANTENIMIENTO... -
Page 68: Battery Replacement
The steps to be followed to replace the batteries are as follows: Loosen the two screws on the battery holder using the key provided by Ojmar. Remove the battery holder. 5_MANUAL DE MANTENIMIENTO... -
Page 69: Cleaning
Replace the batteries and put the battery holder on again. The NEXO NLX1 lock needs 4 AA batteries. Battery recommended • Ojmar: VARTA INDUSTRIAL ALKALINE 1,50 V. SIZE AA LR6. NB.: The batteries used must be deposited in containers destined •... - Page 70 5_MANUAL DE MANTENIMIENTO...
-
Page 71: Faq
If it is occupied, free it using the Management Software or closing and opening the occupied lock. If it is blank, writethe card/wristband on the Management Software. OJMAR 71 5_MANUAL DE MANTENIMIENTO... -
Page 72: Declaration Of Conformity
5.8 DECLARATION OF CONFORMITY I, the undersigned, on behalf of the company: Ojmar, S.A. Polígono Industrial de Lerun s/n. 20870 Elgoibar Spain Tax Reference A20003042 Hereby declare that the product: NEXO NLX Lock Model: 077 Complies with the directives listed below: Directive 2004/108/EEC Electromagnetic Compatibility (EMC) •... - Page 73 Short Range Devices (SRD); Close Range Inductive Data Communication equipment operating at 13,56 MHz; Part 2: Harmonized EN under article 3.2 of the R&TTE Directive". OJMAR 73 5_MANUAL DE MANTENIMIENTO...
- Page 74 PAGE LEFT BLANK INTENTIONALLY 5_MANUAL DE MANTENIMIENTO...
-
Page 75: Api Introduction
There will be also a 3rd party software that uses the API. This software is out of the scope of this document. There is also an Ojmar SW available except for the OTS NLX1 lock. -
Page 76: Nexo Nlx1 Particularities
Figure 6-1. Ojmar´s RFID system. Figure above depicts how the system interacts. The API is usually installed in at least one PC at premises and will interact via USB with the NFC programmer and with the desktop reader. This makes possible to transfer information to the lock by both means the NFC programmer and RFID cards previously recorded by the NFC programmer or the desktop programmer. - Page 77 The API will act as a mere intermediary in this case. 6.2.1.1 Nexo NLX1 limitations Following limitations are defined during the usage of the Nexo NLX1 system. Communication limitations: • Up to 252 bytes can be sent by TCP/IP communication.
-
Page 78: Api Structure Overview
REST Support. There are many languages that support this; the API documentation has examples for at least PHP, C# and Java. The 3rd party integrator will receive an API installer from Ojmar and will install it in the PC. This API includes documentation explaining how to implement communication with the API, and how to implement the functions to be able to make all the system work correctly. -
Page 79: Online Communications
NFC reader). This has been implemented in such a way, to avoid reader monopolization, letting to the 3rd party SW to use their own RFID reader writer or the option to use Ojmar's programmer for their own application. -
Page 80: Documentation Provided
• API License. • 6.5 SYSTEMS WORKFLOW Ojmar’s systems workflow is divided in three steps: Device configuration: System initialization, configuration and start-up. Users’ configuration: System daily operation with final customer and client. System maintenance: System maintenance operations. All these operations are performed using RFID cards recorded with the desktop reader or the NFC programmer, or by means of the NFC Programmer itself. -
Page 81: Customers´ Usage
6.5.1.3 Configuration via Socket for Nexo NLX1 Configuration Frame: In order to facilitate the Nexo NLX1 setup the locks may be initialized with basic configuration using the NFC programmer. The lock will connect using the network data and request to the 3rd party SW via API socket the rest of the information (RFID and user configuration). - Page 82 6.5.3.1 Maintenance via RFID cards Describe card: Translates a frame with information read from a card to Human • readable information. Frame for master card: Creates a frame for a card that can open every lock of • the facility and erases the lock occupancy if it closed, so that another user can close that lock afterwards.
-
Page 83: Lock Configuration Example
Once the card for the time set is written, the same procedure must be used in order to create a setup card. Firstly, the frame will be created using the url http://localhost:8086/serialization/setupCard with following body: {"lock_type":"OTS", "num_installation":6666, "first_num_lock":1, "last_num_lock":73, "mode":"free", OJMAR 83 6_API INTRODUCTION... -
Page 84: Configured By Nfc Programmer For Ots Family
"card_model_setup":"classic", "subgroup":2} And the answer shown is: {"result": "ok", "data": "666600000D800200000000000000000000000049000001C7000000000000 000000000000000000000000000000000000"} Once received the frame, the information is written to the card in the same way as the set time card. http://localhost:8086/card/write with following body: {"reader_type":"cnreader", "card_model":"desfire", "frame": "666600000D800200000000000000000000000049000001C7000000000000 000000000000000000000000000000000000"} And following response with be received, ending the setup card write: {"result": "ok",... -
Page 85: Set Up Via Nfc For Nexo Nlx1 Family
6.6.3 Set up via NFC for Nexo NLX1 family First of all, we need to provide the network information to the lock. We will generate an initialization frame to send it to the NFC programmer: http://localhost:8086/initialization/initData with following body: "num_installation":"B1B2", "num_subinstallation":"01",... -
Page 86: Configured Via Tcp/Ip For Nexo Nlx1 Family
6.6.4 Configured via TCP/IP for Nexo NLX1 family Once the programmer has the initialization frame, we can place the NFC programmer in a stock factory lock. After that, the lock will get connected to the wireless network and send a request packet to the API at the IP passed in the initialization. -
Page 87: Api Reference Manual
Nowadays, there are two Ojmar locks, one for each type working system. OJMAR 87... -
Page 88: Api References Index
The following table shows different type of locks for each type of working system: System value Offline Online online In this document, we suppose that the Ojmar API is serving in the following url: http://localhost:8086 API REFERENCES INDEX Function Description Type... -
Page 89: Api References Definitions
Recorder OTS family OTS FW Update OTS Updates the OTS Adv FW Recorder OTS family Adv. FW Update Nexo Updates the Nexo NLX1 FW Recorder Nexo NLX1 NLX1 FW Updates the NFC programmer Fw Recorder Nexo NLX1 Update NFC programmer... - Page 90 JSON POST file that includes all the necessary information in order to initialize the network of the lock. Only available for the Nexo NLX1 lock. Parameters POST http://localhost:8086/initialization/initData Parameter of the request JSON file: Parameter Mandatory Data type Possible values...
- Page 91 "num_installation":"B1B2", "num_subinstallation":"C2", "ssid":"OnlineSystem", "password":"A1A2A3A4", "encrypt_type":2, "server_ip":"192.168.1.97", "initial_ip":"192.168.1.100", "gateway_ip":"192.168.1.10", "range":"1-50", "mask":"255.255.255.0", "first_num_lock":1, "last_num_lock":50, "group":1, "target": "pp" JSON response: "result": "ok", "data": "00051111B1B2C2098D020A0401000001000032B1B2030A04010000010000 32111104090401000001000032C2050B0401000001000032FFFFFF145B040 10000010000324F6E6C696E6553797374656D000000000000000000000000 0000000000000000413141324133413400000000000000000000000000000 000000000000000000002C0A80161C0A80164C0A8010A0132FFFFFF000A03 010800FE02411D OJMAR 91 7_API REFERENCE MANUAL...
- Page 92 7.3.1.1.2 SETUP FRAME Definition JSON file is sent by POST with the necessary information for the configuration of the lock. Can be used for OTS family & Nexo NLX1 family Parameters POST http://localhost:8086/serialization/setupCard Parameter of the request JSON file: Parameter...
- Page 93 OTS family JSON request: "lock_type": "OTS", "num_installation": "6666", "first_num_lock": "50", "last_num_lock": "73", "mode": "free", "card_model_setup": "classic", "subgroup": 2 JSON response: "result": "ok", "data": "666600000D840200000000000000000000000049000032F0000000000000 000000000000000000000000000000000000" Nexo NLX1 family JSON request: "lock_type":"online", "num_installation":"6666", "num_subinstallation":1, "first_num_lock":"50", "last_num_lock":"73", "group":1 OJMAR 93 7_API REFERENCE MANUAL...
- Page 94 Definition JSON file is sent by POST with the necessary information time setting of the lock. Can be used for OTS family & Nexo NLX1 family. NOTE: The computer where the OjmarAPI is serving must be in time to •...
- Page 95 "result": "error", "code":"-1", "message":".." Example OTS family JSON request: "lock_type": "OTS", "num_installation": "6666" JSON response: "result": "ok", "data": "6666000030000000000000000000000000000000093619160815031E0000 000000000000000000000000000000000000" Nexo NLX1 family JSON request: "lock_type":"online", "num_installation":6666, "num_subinstallation":1, "group":1, "start_range":15, "end_range":26 JSON response: "result": "ok", "data": "00051111666601090E070C040100000F00001A5805F0B70A03010800FE02 A4C0" OJMAR 95...
- Page 96 7.3.1.1.4 FRAME FOR TIME EXCHANGES Definition JSON file is sent by POST with the necessary information for the next 5 time advances and 5 time delays. Can be used for the OTS family. Parameters POST http://localhost:8086/serialization/timeExchangesCard Parameter Mandatory Data type Possible values lock_type String...
- Page 97 Only available for the OTS family. Parameters POST http://localhost:8086/serialization/automaticOpeningCard Parameter Mandatory Data type Possible values lock_type String "OTS" num_installation String(4) hex Time String "HH:mm" Response OK: "result": "ok", "data": "XXXXX...XXXX" Response NOK: "result": "error", "code":"-1", "message":".." Example JSON request: OJMAR 97 7_API REFERENCE MANUAL...
- Page 98 User functionalities 7.3.1.2.1 FRAME FOR SIMPLE USER CARD Definition JSON file is sent by POST with the necessary information for the creation of a simple frame for user cards. Available for OTS family & Nexo NLX1. Parameters POST http://localhost:8086/serialization/userSimpleCard Parameter Mandatory...
- Page 99 JSON file is sent by POST with the information necessary for creating a customized user card. In the case of user cards parameters for OTS family and Nexo NLX1 family are not always the same. Below are two tables with the parameters required for each system.
- Page 100 Parameter of the request JSON file for the OTS family system: Parameter Mandatory Data type Possible values lock_type String "OTS" num_installation String(4) hex dedicated_locks No (maximum 1 Array<Integer> lock) free_locks Integer From 0 to 3 No (maximum 3 locks) subgroups Yes for free locks Array<Integer>...
- Page 101 Parameters for Nexo NLX1 Parameter Mandatory Data type Possible values lock_type String "online" num_installation String(4) hex num_subinstallatio String(2) hex dedicated_locks Array<Integer> (maximum 1 lock) free_locks Integer expiry_type String "no", "endDate" or "uses" expiry_time String "HH:mm" expiry_type = "endDate" expiry_date String "dd/mm/yyyy"...
- Page 102 Parameter Mandatory Data type Possible values start_date String "dd/mm/yyyy" start_time String "HH:mm" end_date String "dd/mm/yyyy" end_time String "HH:mm" weekdays Array<Integer> From 0 to 6 (Monday = 0, Sunday = 6) holidays Boolean calendar If holidays = Array<Boolean> (size 368) true group Integer From 0 to 255...
- Page 103 "expiry_date": "19/04/2014", "prohibition": 3, "time_zones":[{ "start_time":"09:30", "end_time":"17:30", "weekdays":[0,1,2,3,4] JSON response: "result": "ok", "data": "6666FDFC3600000000000000009A07440000000080FFFF6E80FFFF8080FF FF8026460700000000000000000000000067" JSON request for offline system with dedicated locks: "num_installation": "6666", "lock_type": "OTS", "dedicated_locks": [294] JSON response: "result": "ok", "data": "66660000050000000000000000FFFFFF000000008001265D000000000000 000000000000000000000000000000000000" OJMAR 103 7_API REFERENCE MANUAL...
- Page 104 "time_zones":[{ "start_time": "09:30", "end_time": "17:30", "weekdays": [0,1,2,3,4] JSON response: "result": "ok", "data": "6666FF3F3300000000000038009B87440000000080FFFF1380FFFF800000 000026460700000000000000000000000067" Example for Nexo NLX1 family JSON request for online system: "lock_type": "online", "num_installation": "6666", "num_subinstallation": "1", "dedicated_locks": [6, 11], "free_locks": 3, "expiry_type": "endDate", "expiry_time": "17:08", "expiry_date": "19/04/2014", "start_expiry_time": "17:08",...
- Page 105 "start_time": "09:30", "start_date": "01/01/2015", "end_time": "17:30", "end_date": "01/01/2016", "weekdays": [0,1,2,3,4] "group": 1, "start_range": 1, "end_range": 10 "time_zones":[{ "start_time": "09:30", "start_date": "01/01/2015", "end_time": "17:30", "end_date": "01/01/2016", "weekdays": [0,1,2,3,4] JSON response: "result": "ok", "data": "0005A1A26666010114840000068400000B04FFFFFF04FFFFFF04FFFFFF02 085533E0F05352AD700303510001040954A513985686B7985C09260112040 100000100000A05000240020201200C14040100000100000A0154A5139856 86B7985C0A030108000B021A52" OJMAR 105 7_API REFERENCE MANUAL...
- Page 106 Definition JSON file is sent by POST with the information necessary for creating a cancellation card that will send a card to the black list. Available for both OTS family & Nexo NLX1 family. Parameters POST http://localhost:8086/serialization/cancellationCard Parameter of the request JSON file:...
- Page 107 Examples Examples for OTS family JSON request: "lock_type": "OTS", "num_installation": "6666", "uid": "11223344" JSON response: "result": "ok", "data": "666600000A0000000000000000000000112233440000004E000000000000 000000000000000000000000000000000000" Examples for Nexo NLX1 JSON request: "lock_type":"online", "num_installation":"1234", "num_subinstallation":"33", "group":"1", "start_range":"1", "end_range":"2", "uid":"01020304" JSON response: "result": "ok", "data": "0005111112343309120E10040100000100000200000001020304000A0301 0800FE025F69"...
- Page 108 FRAME FOR MASTER CARD Definition JSON file is sent by POST with the information necessary for creating a master card that is able to open every lock from an installation. Available for OTS family and Nexo NLX1 family. Parameters POST http://localhost:8086/serialization/masterCard Parameter...
- Page 109 "result": "ok", "data": "666600000200000000000000000000000000000000000002000000000000 000000000000000000000000000000000000" Example for Nexo NLX1 family JSON request: "lock_type":"online", "num_installation":"6666", "num_subinstallation":1, "password":"******" JSON response: "result": "ok", "data": "0005111166660103037100000A03010800FE026029" 7.3.1.3.3 FRAME FOR SERVICE CARD Definition JSON file is sent by POST with the information necessary for creating a service card that is able to open and close every lock from an installation.
- Page 110 Example for OTS family JSON request: "password": "******", "lock_type": "OTS", "num_installation": "6666" JSON response: "result": "ok", "data": "666600000800000000000000000000000000000000000008000000000000 000000000000000000000000000000000000" Example for Nexo NLX1 family JSON request: "lock_type":"online", "num_installation":"6666", "num_subinstallation":1, "password":"******" JSON response: "result": "ok", "data": " 0005111166660103033100000A03010800FE021233" 7_API REFERENCE MANUAL...
- Page 111 7.3.1.3.4 FRAME FOR RESET CARD Definition JSON file is sent by POST with the information necessary for creating a reset card that restores the lock to factory mode. Available for OTS family and Nexo NLX1 family. Parameters POST http://localhost:8086/serialization/resetCard Parameter of the request JSON file:...
- Page 112 "num_installation": "6666" JSON response: "result": "ok", "data": "666600000100000000000000000000000000000000000001000000000000 000000000000000000000000000000000000" Example for Nexo NLX1 family JSON request: "lock_type":"online", "num_installation":"6666", "num_subinstallation":33, "bcb":"false", "bc":"false", "bzl":"false", "bl":"false", "blg":"false", "bca":"false", "bt":"true", "bp":"false", "bpt":"false", "group":1, "start_range":1, "end_range":100 7_API REFERENCE MANUAL...
- Page 113 Only available for OTS family. Parameters POST http://localhost:8086/serialization/testCard Parameter Mandatory Data type Possible values lock_type String "OTS" Response OK: "result": "ok", "data": "XXXXX...XXXX" Response NOK: "result": "error", "code":"-1", "message":".." Example JSON request: "lock_type": "OTS" OJMAR 113 7_API REFERENCE MANUAL...
- Page 114 JSON response: "result": "ok", "data": "000000000F0000000000000000000000000000000000000F000000000000 000000000000000000000000000000000000" 7.3.1.3.6 FRAME FOR EVENTS CARD Definition JSON file is sent by POST with the information necessary for creating an events card that can download 3 events from the lock. Available for OTS family. Parameters POST http://localhost:8086/serialization/eventsCard JSON file is sent by POST with the information necessary for creating an events...
- Page 115 Possible values lock_type String "OTS" num_installation String(4) hex subgroups Array From 0 to 15 Yes (maximum 16 subgroups) expiry_type String "no", "endDate" expiry_time If expiry_type = String "HH:mm" "endDate" expiry_date String "dd/mm/yyyy" If expiry_type = "endDate" OJMAR 115 7_API REFERENCE MANUAL...
- Page 116 Parameter Mandatory Data type Possible values prohibition No (used only with Integer 0 = no (default)1 = expiry date) closing forbidden2 = opening forbidden3 = both forbidden time_zones Array No (used only with free locks) start_time String "HH:mm" end_time String "dd/mm/yyyy"...
- Page 117 7.3.1.4.1 DECODE CARD FRAMES Definition JSON file is sent by POST with the frame to decode and return a JSON file with the object information described in the card. Available for OTS family and Nexo NLX1 family Parameters POST http://localhost:8086/serialization/describeCard...
- Page 118 "808000000D890700000000000000000000000049000032F8000000000000 000000000000000000000000000000000000" JSON response: "result": "ok", "card_type": "setup", "num_installation": "8080", "first_num_lock": 50, "last_num_lock": 73, "mode": "free", "subgroup": 7, "direct_sector": 9 Example for Nexo NLX1 family JSON request: "frame":"00051111666633098D020A04010000010000326666030A040100 000100003211110409040100000100003233050B0401000001000032FFFFF F145B04010000010000324F6E6C696E6553797374656D0000000000000000 0000000000000000000000004131413241334134000000000000000000000 00000000000000000000000000002C0A80161C0A80164C0A8010A0132FFFF FF000A03010800FE028B69" JSON response: "result": "ok", "card_type": "init", "num_installation": "6666", "num_subinstallation": "33",...
- Page 119 Only available for OTS family. Parameters POST http://localhost:8086/serialization/getEvents Parameter of the request JSON file: Parameter Mandatory Data type Possible values frame String Response OK: "result": "ok", "num_installation": XXXX, "events": [{ "num_lock": XX, "event_code": XX, "UID": "XXXXXXXXXXX", "date": "YYYY/MM/DD HH:mm:ss" OJMAR 119 7_API REFERENCE MANUAL...
- Page 120 Response NOK: "result": "error", "code":"-1", "message":".." Example JSON request: "frame": "66660003070800401004791AA1431C807A8732881204791AA1431C807A87 32881004791AA1 431C807A87328800000000" JSON response: "result": "ok", "card_type": "events_card", "num_installation": "6666", "num_lock": 3, "events": [ "num_lock": 3, "event_code": "10", "UID": "04791AA1431C80", "date": "2014/05/15 12:34:00" "num_lock": 3, "event_code": "12", "UID": "04791AA1431C80", "date": "2014/05/15 12:34:00"...
-
Page 121: Recorder´s Api
Define the port for NFC programmer communication Definition JSON file is sent by multipart form is sent by POST with the data to set nfc programmer port. Available for the NFC programmer for OTS family & Nexo NLX1 family. Parameters... - Page 122 GET request is sent indicating reader type (NFC, CNReader) and the web service will return the frame of the RFID card. Available for OTS & Nexo NLX1 family. NOTE: Use describe Card web service in order to translate the information •...
- Page 123 Definition JSON file is sent by POST with the frame and reader type (NFC, CNReader) and the web service will write the frame in the card. Available for OTS & Nexo NLX1 family. NOTE: Use Datamodel´s API web services in order to create the frame •...
- Page 124 Response OK: "result": "ok", "data_ots": "Card write ok" (Opt.) "data_online": "Card write ok" (Opt.) "uid": "XXXXXXXX" (4 or 7 bytes) Response NOK: "result": "error", "code":"-1", "message":".." Example JSON request: "reader_type":"cnreader", "card_model":"classic", "frame":"00051111666633098D020A04010000010000326666030A040100 000100003211110409040100000100003233050B040100000100003200000 1145B0401000001000032496E616B69546573740000000000000000000000 000000000000000000000000363636366F6A6D61720000000000000000000 00000000000000000000000000002C0A86461C0A86465C0A8640A0132FFFF FF000A03010800FE0276EB" JSON response: "result": "ok", "data_online": "Card write ok", "uid": "26F99832"...
- Page 125 String(4) hex Subgroup String Config String "dedicated", "free" Blacklist Array String Up to 1200 UIDs (4 or 7 bytes) Response OK: "result": "ok", "data": "Init data write ok", Response NOK: "result": "error", "code":"-1", "message":".." OJMAR 125 7_API REFERENCE MANUAL...
- Page 126 Configure programmer NDM Definition Multipart form is sent by POST with the data to update the configuration data of the locks to the programmer. Available for the Nexo NLX1 family NOTE: Use the Initialization frame web service or the setupCard web •...
- Page 127 Only available for the OTS family. Parameters GET http://localhost:8086/nfc/getEvents The events that have been downloaded to the NFC programmer will be read. Response OK: "lock_num": XXX, "eventCode": XXX, "UID": "XXXXXXXX", "date": "YYYY/MM/DD HH:mm" Response NOK: OJMAR 127 7_API REFERENCE MANUAL...
- Page 128 Update the FW of the OTS real time Definition Multipart form is sent by POST with the data that updates the Firmware of the real time OTS (From OTS family) lock. NOTE: Firmware version must be asked to Ojmar S.A. • Parameters MULTIPART FORM POST http://localhost:8086/nfc/reprogramOtsLockFw...
- Page 129 Update the FW of the OTS Advance Definition Multipart form is sent by POST with the data that updates the Firmware of the OTS Advance (From OTS family) lock NOTE: Firmware version must be asked to Ojmar S.A. • Parameters MULTIPART FORM POST http://localhost:8086/nfc/reprogramMultiStandardOtsLockFw Multipart form is sent by POST with the data to update the FW.
- Page 130 Update the FW of the NFC programmer Definition Multipart form is sent by POST with the data that updates the Firmware of the NFC programmer. Available for OTS family and Nexo NLX1 family. NOTE: Firmware version must be asked to Ojmar S.A. •...
-
Page 131: Socket Api
7.3.3 Socket API Nexo NLX1 locks have the ability to work online in a wireless network and establish direct communication with the API. This way the 3rd party SW can receive state information in real time from the locks and determine whether a card should be able to operate with a lock in each situation. - Page 132 GET request is sent indicating the port number that third-party software is using for asynchronous communication with the locks. API, by defect, connect to port number 7777. Parameters GET http://localhost:8086/online/setPort/{port_num} Request GET parameters: Parameter Mandatory Data type Possible values port_num Integer Response OK: "result": "ok",...
- Page 133 Array(Int) Which locks has the card access rights to lock_request Boolean If lock is making a request lock_response Boolean If lock is answering a petition lock_number Lock´s number Example JSON structure with: OJMAR 133 7_API REFERENCE MANUAL...
- Page 134 LOCK CONFIGURATION Definition When a Nexo NLX1 lock is initialized, it is connected to the network provided and will send a request to the API. The API will receive the request and forward it to the socket where the 3rd party SW will be listening. If the SW detects that it is the first time receiving information from that lock it will respond with a JSON with the config flag enabled.
- Page 135 Number of occasional locks that the user will have access rights profiles Array (Int) Example Lock request JSON: "profiles":[], "uid":"000000D4817BAA", "mem_uid":"00000000000000", "lock_status":["A","L"], "num_installation":"2222", "num_subinstallation":"33", "locks":[], "lock_request":true, "lock_response":false, "num_lock":1 OJMAR 135 7_API REFERENCE MANUAL...
- Page 136 3rd party SW answer JSON: "num_lock": 1, "config": true, "num_installation": "2222", "num_subinstallation": "33", "dedicated_locks": [2], "free_locks": 3, "profiles": [] The lock has been configured. 7.3.3.3.2 LOCK OPENING/CLOSING ALLOWEMENT Definition 3rd party SW will be able to answer if the lock is able to open or close with that card by answering the request with the following JSON.
- Page 137 "lock_response":false, "num_lock":1 3rd party SW answer JSON: "num_installation": "2222", "num_subinstallation": "33", "dedicated_locks": [1], "free_locks": 1 Example that will not open/close the lock Lock request JSON: "profiles":[], "uid":"000000D4817BAA", "mem_uid":"00000000000000", "lock_status":["A","L"], "num_installation":"2222", "num_subinstallation":"33", "locks":[], "lock_request":true, "lock_response":false, "num_lock":1 OJMAR 137 7_API REFERENCE MANUAL...
- Page 138 3rd party SW answer JSON: "num_installation": "2222", "num_subinstallation": "33", "dedicated_locks": [3] 3rd party SW will send a dedicated_lock that is not the actual lock number. If a different installation or subinstallation number is sent, lock will not perform the action too. NOTE: It is mandatory to answer with a no permission JSON in order to •...
- Page 139 Lock request JSON: "profiles":[], "uid":"000000D4817BAA", "mem_uid":"00000000000000", "lock_status":["A","L"], "num_installation":"2222", "num_subinstallation":"33", "locks":[], "lock_request":true, "lock_response":false, "num_lock":1 3rd party SW answer JSON: "num_installation": "2222", "num_subinstallation": "33", "dedicated_locks": [3] “occupy": true automatic_close", false reverse_working" false time_between_operations",100 working_type", "dedicated" white_list", true black_list", false OJMAR 139 7_API REFERENCE MANUAL...
- Page 140 7.3.3.3.4 LOCK OPENING/CLOSING ALLOWEMENT + CARD CONFIGURATION Apart from giving the access rights of opening and closing, 3rd party SW can propagate the information to the card so that this one will be configured with its last permission without any human intervention (in case the lock gets offline). 7.3.3.3.5 LOCK OPENING/CLOSING ALLOWEMENT + LOCK CONFIGURATION...
- Page 141 Lock request JSON: "profiles":[], "uid":"000000D4817BAA", "mem_uid":"000000D4817BAA ", "lock_status":["C","O"], "num_installation":"B1B2", "num_subinstallation":"C2", "locks":[], "lock_request":true, "lock_response":false, "num_lock":156 3rd party SW answer: "num_installation": "B1B2", "num_subinstallation": "C2", "dedicated_locks": [1,2], "free_locks": 1, "change_num_installation": { "num_installation": "CCDD", "group": 1, "range_from": 1, "range_to": 100 OJMAR 141 7_API REFERENCE MANUAL...
- Page 142 Opening/closing + change lock´s subinstallation number Definition 3rd party SW will be able to answer if the lock is able to open or close with that card by answering the request with the following JSON plus the option of changing lock´s sub-facility number if it is needed.
- Page 143 JSON plus the option of changing lock´s number if it is needed. Parameters Parameter Mandatory Data type Possible values num_installation String Lock installation number. num_subinstallation String Lock subinstallation number. dedicated_locks Array(Int) Dedicated locks that the user will OJMAR 143 7_API REFERENCE MANUAL...
- Page 144 Parameter Mandatory Data type Possible values have access rights free_locks Number of occasional locks that the user will have access rights profiles Array (Int) change_num_lock Array group Group of locks that will be affected (From 1 to 254). num_lock Lock´s new number.
- Page 145 (From 1 to 254). range_from Initial lock number that will be affected (From 1 to 65534). range_to Last lock number that will be affected (From 1 to 65534). Example Lock request JSON: OJMAR 145 7_API REFERENCE MANUAL...
- Page 146 "profiles":[], "uid":"11223344556677", "mem_uid":"00000000000000", "lock_status":["A","L"], "num_installation":"AABB", "num_subinstallation":"CC", "locks":[], "lock_request":true, "lock_response":false, "num_lock":1785 3rd party SW answer JSON: "num_installation": "AABB", "num_subinstallation": "CC", "dedicated_locks": [5,8], "free_locks": 6, "profiles": [], "set_time": { "group": 1, "range_from": 1, "range_to": 100 Opening/closing + white/black list management Definition 3rd party SW will be able to answer if the lock is able to open or close with that card by answering the request with the following JSON plus managing the white and black list if the lock goes offline.
- Page 147 Last lock number that will be affected (From 1 to 65534). items Array String 7 bytes. action String “add”,”delete”,”m odify”. list_type String “white”,”black”. Example Lock request JSON: "profiles":[], "uid":"000000AABBCCDD", "mem_uid":"00000000000000", "lock_status":["A","L"], "num_installation":"EEFF", "num_subinstallation":"AC", "locks":[], "lock_request":true, "lock_response":false, "num_lock":12 OJMAR 147 7_API REFERENCE MANUAL...
- Page 148 3rd party SW answer JSON: "num_installation": "B1B2", "num_subinstallation": "C2", "dedicated_locks": [1,2], "free_locks": 1, "profiles": [], "change_lists": { "items": [ {"uid": "000000AAAAAAAA", "action": "add", "list_type": "white"}, {"uid": "000000BBBBBBBB", "action": "delete", "list_type": "white"} {"uid": "CCCCCCCCDDDDDD", "action": "add", "list_type": "black"} "group": 1, "range_from": 1, "range_to": 100 Opening/closing + lock reset Definition...
- Page 149 Example Lock request JSON: "profiles":[], "uid":"000000AABBCCDD", "mem_uid":"00000000000000", "lock_status":["A","L"], "num_installation":"EEFF", "num_subinstallation":"AC", "locks":[], "lock_request":true, "lock_response":false, "num_lock":12 3rd party SW answer JSON: "num_installation": "B1B2", "num_subinstallation": "C2", "dedicated_locks": [1,2], "free_locks": 1, "expiry_type": "no", "uses": 0, "profiles": [], "delete_data": { OJMAR 149 7_API REFERENCE MANUAL...
- Page 150 "options": ["BT"], "group": 1, "range_from": 1, "range_to": 100 7_API REFERENCE MANUAL...
- Page 151 Group of locks that will be affected (From 1 to 254). range_from Initial lock number that will be affected (From 1 to 65534). range_to Last lock number that will be affected (From 1 to 65534). get_inst_subinst Boolean OJMAR 151 7_API REFERENCE MANUAL...
- Page 152 Example Lock request JSON: "profiles":[], "uid":"000000AABBCCDD", "mem_uid":"00000000000000", "lock_status":["A","L"], "num_installation":"EEFF", "num_subinstallation":"AC", "locks":[], "lock_request":true, "lock_response":false, "num_lock":12 3rd party SW answer JSON: "num_lock": 1, "num_installation": "2222", "num_subinstallation": "33", "dedicated_locks": [2], "free_locks": 3, "profiles": [], "request_data": { "media": "serial_port", "get_inst_subinst": true, "group": 1, "range_from": 1, "range_to": 100 Opening/closing + lock group and number Definition...
- Page 153 Group of locks that will be affected (From 1 to 254). range_from Initial lock number that will be affected (From 1 to 65534). range_to Last lock number that will be affected (From 1 to 65534). get_num_lock_group Boolean OJMAR 153 7_API REFERENCE MANUAL...
- Page 154 Example Lock request JSON: "profiles":[], "uid":"000000AABBCCDD", "mem_uid":"00000000000000", "lock_status":["A","L"], "num_installation":"2222", "num_subinstallation":"33", "locks":[], "lock_request":true, "lock_response":false, "num_lock":8 3rd party SW answer JSON: "num_lock": 8, "num_installation": "2222", "num_subinstallation": "33", "dedicated_locks": [2], "free_locks": 3, "profiles": [], "request_data": { "media": "serial_port", "get_num_lock_group": true, "group": 1, "range_from": 1, "range_to": 100 Opening/closing + lock installation &...
- Page 155 Initial lock number that will be affected (From 1 to 65534). range_to Last lock number that will be affected (From 1 to 65534). get_time Boolean Example Lock request JSON: "profiles":[], "uid":"123456781234", "mem_uid":"123456781234", "lock_status":["C","O"], "num_installation":"6666", "num_subinstallation":"33", "locks":[], "lock_request":true, OJMAR 155 7_API REFERENCE MANUAL...
- Page 156 "lock_response":false, "num_lock":11 3rd party SW answer JSON: "num_installation": "6666", "num_subinstallation": "33", "dedicated_locks": [2], "profiles": [], "request_data": { "media": "serial_port", "get_time": true, "group": 1, "range_from": 1, "range_to": 100 Opening/closing + get events Definition 3rd party SW will be able to answer if the lock is able to open or close with that card by answering the request with the following JSON receiving the last events that happened in the lock Parameters...
- Page 157 Array n_events 1-10. Example Lock request JSON: "profiles":[], "uid":"65849301223344", "mem_uid":"65849301223344", "lock_status":["O","B"], "num_installation":"2432", "num_subinstallation":"16", "locks":[], "lock_request":true, "lock_response":false, “num_lock":6157, 3rd party SW answer JSON: "num_lock": 1, "num_installation": "2432", "num_subinstallation": "16", "dedicated_locks": [2], "free_locks": 3, "profiles": [], OJMAR 157 7_API REFERENCE MANUAL...
- Page 158 "request_data": { "media": "serial_port", "get_log": { "n_events": 8 "group": 45 "range_from":6000, "range_to": 6200 Opening/closing + get number of cycles Definition 3rd party SW will be able to answer if the lock is able to open or close with that card by answering the request with the following JSON plus requesting the cycles that the lock has already performed.
- Page 159 Parameter Mandatory Data type Possible values that will be affected (From 1 to 65534). get_n_cycle Boolean Example Lock request JSON: "profiles":[], "uid":"000000BCDEFABC", "mem_uid":"00000000000000", "lock_status":["A","L"], "num_installation":"2222", "num_subinstallation":"33", "locks":[], "lock_request":true, "lock_response":false, "num_lock":3 OJMAR 159 7_API REFERENCE MANUAL...
- Page 160 3rd party SW answer JSON: "num_lock": 1, "num_installation": "2222", "num_subinstallation": "33", "dedicated_locks": [2], "free_locks": 3, "profiles": [], "request_data": { "media": "serial_port", "get_n_cycle": true, "group": 1, "range_from": 1, "range_to": 100 Opening/closing + get public configuration Definition 3rd party SW will be able to answer if the lock is able to open or close with that card by answering the request with the following JSON plus requesting the complete configuration of the lock Parameters...
- Page 161 Example Lock request JSON: "profiles":[], "uid":"000000BCDEFABC", "mem_uid":"00000000000000", "lock_status":["A","L"], "num_installation":"2222", "num_subinstallation":"33", "locks":[], "lock_request":true, "lock_response":false, "num_lock":3 3rd party SW answer JSON: "num_lock": 1, "num_installation": "2222", "num_subinstallation": "33", "dedicated_locks": [2], "free_locks": 3, "profiles": [], "request_data": { "media": "eth", OJMAR 161 7_API REFERENCE MANUAL...
- Page 162 "read_public_information": true, "group": 1, "range_from": 1, "range_to": 100 7.3.3.4 Lock response Every 3rd party SW answer will be replied by the lock sending a final response. This response can contain two different structures. First one will be for all the opening/closing operation + card configuration + lock configuration and the last one will be the answer to the information request.
- Page 163 String % of battery level. InformationRequest Array Information String LockNumGroupResponse. num_installation String Lock´s facility number. Num_subinstallation String Lock´s sub installation number. Example logItems=[LogItem [timestamp=1476886236, uid=00000667BE4404 , eventCode=EventType[USER_OPEN: 16], batteryStatus=73]]]],commands=[CommandCont ainer [commands=[InformationRequest [information=NumInstSubinstResponse[sub inst alation=51, instalation=26214]]]]] OJMAR 163 7_API REFERENCE MANUAL...
- Page 164 Lock number and group request Returns the information concerning the lock number and group, plus the last event. Definition Lock will always answer the last event that happened in the lock, that includes event type, uid that performed the action, time and date that happened and the lock´s installation and subinstallation information.
- Page 165 [commands=[InformationRequest [information=LogResponse[overwrite=0 , logSize=69, logItems=[LogItem [timestamp=1476888500, uid=00000000000000, event Code=EventType[ALARM_CAM_FORCED: 96], batteryStatus=100], LogItem [timestamp=147 6888501, uid=00000667BE4404, eventCode=EventType[USER_CLOSE: 18], batteryStatus= 73], LogItem [timestamp=1476888500, uid=00000667BE4404, eventCode=EventType[OPER ATION_REQUEST: 7], batteryStatus=73], LogItem [timestamp=1476887991, uid=0000066 7BE4404, eventCode=EventType[USER_OPEN: 16], batteryStatus=73], LogItem [timesta OJMAR 165 7_API REFERENCE MANUAL...
- Page 166 mp=1476887990, uid=00000667BE4404, eventCode=EventType[OPERATION_REQUEST: 7], ba tteryStatus=73], LogItem [timestamp=1476887561, uid=00000667BE4404, eventCode=Ev entType[USER_CLOSE: 18], batteryStatus=73], LogItem [timestamp=1476887560, uid=0 0000667BE4404, eventCode=EventType[OPERATION_REQUEST: 7], batteryStatus=73], Log Item [timestamp=1476886236, uid=00000667BE4404, eventCode=EventType[USER_OPEN: 1 batteryStatus=73]]]]]]],dataModelVersion=DataModelVersion[vIn teger=0, vDecim al=3, vSecDecimal=18],dataModelCheck=DataModelChk[checksum=50397],] {"log":{"overwrite":false,"size":69,"events":[{"date":1476888 500,"event_code":"6 0","uid":"00000000000000","battery_status":100},{"date":14768 88501,"event_code": "12","uid":"00000667BE4404","battery_status":73},{"date":1476 888500,"event_code" :"7","uid":"00000667BE4404","battery_status":73},{"date":1476 887991,"event_code" :"10","uid":"00000667BE4404","battery_status":73},{"date":147 6887990,"event_code ":"7","uid":"00000667BE4404","battery_status":73},{"date":147 6887561,"event_code...
- Page 167 A JSON structure will be received by TCP/IP with following parameters. Parameter Mandator Data type Possible values Log_items Array () log_item Array(string Timestamp String Unix format. eventCode String Event code + description (See Annex). battery_status String % of battery level. OJMAR 167 7_API REFERENCE MANUAL...
- Page 168 Parameter Mandator Data type Possible values InformationReques Array Information String ReadPublicConfigurationResponse inst String subinst String time Unix time. battery_status Hw_status String fromStartUp fromBatteryChange String UID that is occupying the lock. logItems=[LogItem [timestamp=1476889166, uid=00000667BE4404 , eventCode=EventType[USER_CLOSE: 18], batteryStatus=73]]]],commands=[CommandCon tainer [commands=[InformationRequest [information=ReadPublicConfigurationRespons e[integrator=0,inst=0,subinst=0,time=0,id8=0,id7=0,id6=0,id5= 0,id4=0,id3=0,id2=0 ,id1=0,dstH=0,dstha=0,dsthd=0,dstDa=0,dstDd=0,lowBatteryPos=0...
-
Page 169: Example Of How To Configure Lock From Factory Mode
This example will explain how to start working with a lock once it is received from Ojmar S.A, starting from the initialization & configuration, creating a user card and allowing it to close/open the lock and receiving 2 events as a maintenance operation. - Page 170 So, initialization data has been uploaded to the programmer. 7.4.1.2 Initialize the lock and configure it by the socket Choose the lock option on the NFC programmer, Nexo NLX1 and initialize option. Choose the lock number that wants to be initialized, and approach the programmer to the lock: Once done, following data will be sent from the lock to the server.
- Page 171 "list_type":"white" {"uid":"B4512B4A", "action":"add", "list_type":"white" "set_time":{ "group":"1", "range_from":"0", "range_to":1 "profiles":null, "num_installation":"B1B2", "num_subinstallation":"C2", "dedicated_locks":[0], "free_locks":0 Lock will send back the event in order to finish the communication and will beep 3 times. "logs":[ {"date":1460390756, "event_code":"64", "uid":"000094FC6B4A04", "battery_status":33 OJMAR 171 7_API REFERENCE MANUAL...
-
Page 172: User Card Request
7.4.2 User card request 7.4.2.1 Record a user card Once the lock is configured, a user card will be written. For that, two steps will be made POST http://localhost:8086/serialization/userSimpleCard JSON request: "lock_type":"online", "num_installation":"2222", "num_subinstallation":"89", "free_locks":8, "dedicated_locks":[1] JSON response: "result": "ok", "data": "00051111B1B2C201248400000104FFFFFF04FFFFFF04FFFFFF04FFFFFF04 FFFFFF04FFFFFF04FFFFFF04FFFFFF03065100006100000A03010800FE02A... - Page 173 "lock_response":false, "num_lock":1 The third party software reads the JSON and sends the following JSON, closing the lock and requesting logs. "num_lock":1, "config":false, "request_data":{ "group":"1", "range_from":"0", "range_to":1, "media":"serial_port", "get_log":{ "n_events":2 } "profiles":null, "num_installation":"B1B2", "num_subinstallation":"C2", "dedicated_locks":[1], "free_locks":6 OJMAR 173 7_API REFERENCE MANUAL...
-
Page 174: Code Examples
The lock detects that the third-party software ask for logs, so sends the following JSON. "logs":[ {"date":1460390756, "event_code":"12", "uid":"000094FC6B4A04", "battery_status":33 {"date":1460390754, "event_code":"10", "uid":"000094FC6B4A04", "battery_status":33 "num_installation":"2222", "num_subinstallation":"33", "locks":[ {"lock_type":"free", "num_lock":"1" "lock_request":false, "lock_response":false, "num_lock":0 CODE EXAMPLES 7.5.1 // Create a TCP Stream socket $sock = socket_create(AF_INET, SOCK_STREAM, 0);... -
Page 175: Java
Socket socket = new Socket("127.0.0.1", args[1]); // Pre-cook response List<String> whitelist = new ArrayList<String>(); whitelist.add("A1B2C3D4"); whitelist.add("A1B2C3D4"); whitelist.add("A1B2C3D4"); whitelist.add("A1B2C3D4"); // Receive data byte[] data = readBytes(); // Send response Gson gson = new Gson(); String rawResponse = gson.toJson(whitelist); sendBytes(rawResponse.getBytes()); OJMAR 175 7_API REFERENCE MANUAL... - Page 176 public void sendBytes(byte[] myByteArray) throws IOException { sendBytes(myByteArray, 0, myByteArray.length); public void sendBytes(byte[] myByteArray, int start, int len) throws IOException { if (len < 0) throw IllegalArgumentException("Negative length not allowed"); if (start < 0 || start >= myByteArray.length) throw IndexOutOfBoundsException("Out bounds: "...
- Page 177 IPEndPoint remoteEP = new IPEndPoint(ipAddress,7777); // Create a TCP/IP socket. Socket sender = new Socket(AddressFamily.InterNetwork, SocketType.Stream, ProtocolType.Tcp ); // Connect the socket to the remote endpoint. Catch any errors. try { sender.Connect(remoteEP); Console.WriteLine("Socket connected to {0}", sender.RemoteEndPoint.ToString()); OJMAR 177 7_API REFERENCE MANUAL...
- Page 178 // Receive the response from the remote device. int bytesRec = sender.Receive(bytes); Console.WriteLine("Received: {0}", Encoding.ASCII.GetString(bytes,0,bytesRec)); // Encode the data string into a byte array. byte[] whitelist = Encoding.ASCII.GetBytes("['A1B2C3D4E5','A1B2C3D4E5','A1B2C3D4 E5']"); // Send the data through the socket. int bytesSent = sender.Send(whitelist); // Release the socket.
-
Page 179: Anexo
$depth = 512 [, int $options = 0]]] ) Example: <?php $json = '{"a":1,"b":2,"c":3,"d":4,"e":5}'; var_dump(json_decode($json, true)); ?> The above example would be: array(5) { ["a"] => int(1) ["b"] => int(2) ["c"] => int(3) ["d"] => int(4) ["e"] => int(5) OJMAR 179 7_API REFERENCE MANUAL... -
Page 180: How To Make A Rest Call
7.6.1.2 Java In JAVA the are many JSON libraries to work with JSON strings. This document will show the usage of one of these libraries, Gson. Create JSON string from an object. DataObject obj = new DataObject(); Gson gson = new Gson(); // convert java object to JSON format, and returned as JSON formatted string String json = gson.toJson(obj);... - Page 181 We will use "java.net.URL" and "java.net.HttpURLConnection". 7.6.2.2.1 URL url = new URL("http://..."); HttpURLConnection conn (HttpURLConnection) url.openConnection(); conn.setRequestMethod("GET"); conn.setRequestProperty("Accept", "application/json"); if (conn.getResponseCode() != 200) { throw new RuntimeException("Failed : HTTP error code : " + conn.getResponseCode()); OJMAR 181 7_API REFERENCE MANUAL...
- Page 182 BufferedReader BufferedReader(new InputStreamReader(( conn.getInputStream() ))); String output; System.out.println("Output from Server ..\n"); while ((output = br.readLine()) != null) { System.out.println(output); conn.disconnect(); 7.6.2.2.2 POST URL url = new URL("http://.."); HttpURLConnection conn (HttpURLConnection) url.openConnection(); conn.setDoOutput(true); conn.setRequestMethod("POST"); conn.setRequestProperty("Content-Type", "application/json"); String input = "{\"qty\":100,\"name\":\"iPad 4\"}"; OutputStream os = conn.getOutputStream();...
- Page 183 You can also just assign the values in line if you want: var client = new RestClient(); client.EndPoint = @"http:\\myRestService.com\api\"; ; client.Method = HttpVerb.POST; client.PostData = "{postData: value}"; var json = client.MakeRequest(); The HttpWebRequest object is in the System.Net namespace OJMAR 183 7_API REFERENCE MANUAL...
- Page 184 PAGE LEFT BLANK INTENTIONALLY 7_API REFERENCE MANUAL...
-
Page 185: Annexes
The best position of the router is on the ceiling in front of the locks (this position depends on the layout of the lockers in the changing room). Below are the different lockout layouts with the best position of the router: Option a) • OJMAR 185 7_API REFERENCE MANUAL... - Page 186 Option b) • 7_API REFERENCE MANUAL...
- Page 187 Option c) • INSTALLING ONE ROUTER PER 50 LOCKS IS RECOMMENDED. • OJMAR 187 7_API REFERENCE MANUAL...
- Page 188 7_API REFERENCE MANUAL...
Need help?
Do you have a question about the Nexo NLX1 and is the answer not in the manual?
Questions and answers