Advertisement
We would like to hear from you with any comments or suggestions. In the continental U.S. or Canada,
you can call us toll-free at 1-888-301-0332 from 8:00 a.m. to 5:00 p.m., CST, Monday – Friday. You
can also send us an email using the feedback icon at SamsClub.com.
For assembly questions, please call 1-866-942-5362 from 8:30 a.m. to 4:30 p.m., PST, Monday –
Friday
THIS INSTRUCTION BOOKLET CONTAINS IMPORTANT SAFETY INFORMATION.
PLEASE READ AND KEEP FOR FUTURE REFERENCE.
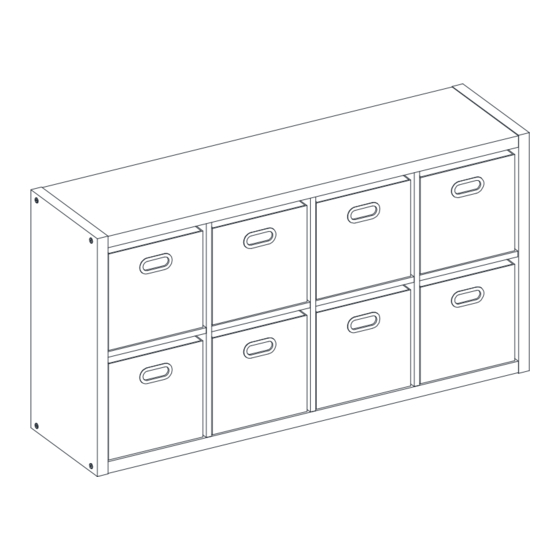
8 Cube Room Organizer
Stock # DYL8RO-R-E
Stock # HAN8RO-DO-E
Stock # NOA8RO-WG-E
ADULT ASSEMBLY REQUIRED
Date 2015-11-25 Rev. 1 Factory: KONRIC (16086)
LOT NUMBER:
DATE PURCHASED: /
Rustic
Dark Oak
Warm Gray
/
Advertisement
Table of Contents

Related Manuals for Member's Mark 8 Cube Room Organizer


Summary of Contents for Member's Mark 8 Cube Room Organizer
- Page 1 LOT NUMBER: DATE PURCHASED: / 8 Cube Room Organizer Stock # DYL8RO-R-E Rustic Stock # HAN8RO-DO-E Dark Oak Stock # NOA8RO-WG-E Warm Gray ADULT ASSEMBLY REQUIRED We would like to hear from you with any comments or suggestions. In the continental U.S. or Canada, you can call us toll-free at 1-888-301-0332 from 8:00 a.m.
- Page 2 M A X I M U M R E C O M M E N D E D W E I G H T L O A D S MANUFACTURER: Whalen Furniture Manufacturing CATALOG: 8 Cube Room Organizer MADE IN CHINA MAXIMUM LOAD 100 lb.
- Page 3 Parts and Hardware List Please read completely through the instructions and verify that all listed parts and hardware are present before beginning assembly. A- Top/Bottom Panel (Qty. 2) B- Side Panel (Qty. 2) C- Large Divider Panel (Qty. 2) D- Center Divider (Qty. 1) (With Cam lock holes) E- Small Divider Panel (Qty.
- Page 4 Assembly Instructions Cam Bolt (4 used in this step) ③ 1. Unpack the unit and confirm that you have all the hardware and required parts. 2. Lay the Side Panels (B) on a level and protected surface with the pre-drilled holes facing up. Screw two Cam Bolts (3) into the plastic bushings included on the center of each Side Panel (B).
- Page 5 Assembly Instructions ∅10 x 60 mm Wood Dowel (4 used in this step) ⑤ 3. Insert four Small Wood Dowels (5) half way into the pre-drilled holes on the Large Divider Panel (C) by tapping lightly with a rubber mallet, if necessary. Position two Small Divider Panels (E) onto the inserted Wood Dowels and press them together.
- Page 6 Assembly Instructions ∅10 x 60 mm Wood Dowel (8 used in this step) ⑤ 4. Attach the Center Divider (D) and one Small Divider Panel (E) to the assembled Small Divider Panel (E) using four Small Wood Dowels (5). 5. Repeat last step to install the remaining Large Divider Panel (C) and Small Divider Panel (E) to the previous assembly.
- Page 7 Assembly Instructions Cam Bolt ∅10 x 60 mm Wood Dowel Cam Lock Cover (4 used in this step) (4 used in this step) (20 used in this step) ② ⑥ ⑤ 6. Insert twenty Small Wood Dowels (5) into the end holes of Large Divider Panels (C) and Center Divider (D).
- Page 8 Assembly Instructions ∅5/16" x 2-1/2" Bolt (8 used in this step) ① ∅15 x 60 mm Wood Dowel ∅10 x 60 mm Wood Dowel (12 used in this step) (8 used in this step) ④ ⑤ 9. Insert eight Small Wood Dowels (5) into the end holes of both Small Divider Panels (E) and insert three Large Wood Dowels (4) into each end of the Side Panels (B).
- Page 9 Assembly Instructions 11. Ask for assistance to stand the unit upright. 12. Unfold the Storage Baskets (F) and then place the Basket Flooring (G) inside the open basket to ensure it remains square. Position the Storage Baskets onto the compartments as shown. 13.
- Page 10 Assembly Instructions 14. Position the assembled cabinet at the desired location against a wall. 15. Now, follow the instructions printed on the plastic bag containing the Tipping Restraint Hardware Kit to attach the tip-over restraints to the unit and the wall, as shown in the illustration. NOTE: Young children can be seriously injured by tipping furniture.
-
Page 11: Care And Maintenance
Care and Maintenance Use a soft, clean cloth that will not scratch the surface when dusting. Use of furniture polish is not necessary. Should you choose to use polish, test first in an inconspicuous area. Using solvents of any kind on your furniture may damage your furniture’s finish. Never use water to clean your furniture as it may cause damage to the finish.
Need help?
Do you have a question about the 8 Cube Room Organizer and is the answer not in the manual?
Questions and answers