Table of Contents
Advertisement
Advertisement
Table of Contents
Troubleshooting

Related Manuals for Beckman Coulter Allegra 6 Series


Summary of Contents for Beckman Coulter Allegra 6 Series
- Page 1 BE-IM-9 Allegra 6 Series ® and Spinchron R Centrifuges ™ Instruction Manual...
- Page 2 Symbol Simbolo Symbol Title Titel Titre Titulo Titolo Symbole Símbolo Dangerous voltage Gefährliche elektrische Spannung Courant haute tension Voltaje peligroso Pericolo: alta tensione Attention, consult accompanying documents Achtung! Begleitpapiere beachten! Attention, consulter les documents joints Atención, consulte los documentos adjuntos Attenzione: consultare le informazioni allegate On (power) Ein (Netzverbindung)
- Page 3 SAFETY NOTICE This safety notice summarizes information basic to the safe operation of the equipment described in this manual. The international symbol displayed above is a reminder that all safety instructions should be read and understood before installation, operation, mainte- nance, or repair of this centrifuge.
- Page 4 Laboratory Biosafety Manual) are handled; materials of a higher group require more than one level of protection. • Dispose of all waste solutions according to appropriate environmental health and safety guidelines. It is your responsibility to decontaminate the centrifuge and accessories before requesting service by Beckman Coulter Field Service.
- Page 5 BE-IM-9 February 2008 Allegra 6 Series ® and Spinchron R Centrifuges ™ Instruction Manual © 2008 Beckman Coulter, Inc.
-
Page 7: Table Of Contents
Contents Page INTRODUCTION Certification ..........Scope of Manual. - Page 8 Contents Page SECTION 4: TROUBLESHOOTING Shutdown/No-Start Diagnostics......4-1 Other Possible Problems ........4-2 Emergency Access .
-
Page 9: Introduction
SCOPE OF MANUAL This manual is designed to familiarize you with the Allegra 6 series and Spinchron R centrifuges, their functions, specifications, opera- tion, and routine operator care and maintenance. We recommend that... -
Page 10: Conventions
Introduction • Section 4 lists possible malfunctions, together with probable causes and suggested corrective actions. • Section 5 contains procedures for routine operator care and main- tenance, as well as a brief list of supplies and replacement parts. ➠ NOTE If the centrifuge is used in a manner other than specified in this manual, the safety and performance of this equipment could be... -
Page 11: Cfc-Free Centrifugation
CFC-FREE CENTRIFUGATION To ensure minimal environmental impact, no CFCs are used in the manufacture or operation of Allegra 6 series and Spinchron R centrifuges. RADIO INTERFERENCE This equipment has been tested and found to comply with the limits for a Class A digital device, pursuant to Part 15 of FCC Rules. -
Page 12: Canadian Regulations
For Beckman Coulter products bearing this label please contact your dealer or local Beckman Coulter office for details on the take back program that will facilitate the proper collection, treatment, recovery, recycling and safe disposal of the device. -
Page 13: Description
The Beckman Coulter Allegra 6 centrifuge generates centrifugal forces required for a wide variety of applications. Together with the Beckman Coulter rotors designed for use in this centrifuge, the centri- fuge applications include: • Routine processing such as sample preparations, pelleting, extrac- tions, purifications, concentrations, phase separations, receptor binding, and column centrifugations. -
Page 14: Figure 1-1. Allegra 6 Centrifuges
Description Allegra 6 Allegra 6R Spinchron R Allegra 6KR Figure 1-1. Allegra 6 Centrifuges... -
Page 15: Specifications
Description SPECIFICATIONS Only values with tolerances or limits are guaranteed data. Values without tolerances are informative data, without guarantee. Allegra 6R / Allegra 6 Spinchron R Allegra 6KR Speed Set* (in 200-rpm increments)..0 to 8000 rpm ....0 to 8000 rpm ....0 to 8000 rpm Display . -
Page 16: Available Rotors
Description AVAILABLE ROTORS Refer to the appropriate rotor manuals for complete rotor descriptions. Max RCF Rotor Manual Rotor Profile and Description Rotor Profile and Description (× g) Capacity Number GH-3.8A Horizontal (4 place) GS6-TB-017 4 × 750 mL Buckets (r = 204 mm) 3750 3210... -
Page 17: Safety Features
Description Max RCF Rotor Manual Rotor Profile and Description (× g) Capacity Number Rotor Profile and Description GA-6 Fixed Angle, 35° (6 place) GS-TB-023 6 × 250 mL = 137 mm 6100 5710 SAFETY FEATURES The centrifuge has been designed and tested to operate safely indoors at altitudes up to 2 000 m (6 562 ft). -
Page 18: Name Rating Plate
Always mention the serial number and the model number shown when corresponding with Beckman Coulter regarding your centrifuge (the serial number is also on the inside of the door). CHASSIS... -
Page 19: Drive
Description Neoprene Gasket Neoprene Gasket Drive Shaft Exhaust Holes Neoprene Boot Thermistor Drive Shaft Neoprene Boot Refrigerated Nonrefrigerated Figure 1-2. Interior View of the Centrifuge Nonrefrigerated models only—During centrifugation, the rotor move- ment draws air through the filtered air-intake ports in the door into the chamber bowl, where it circulates around the rotor. -
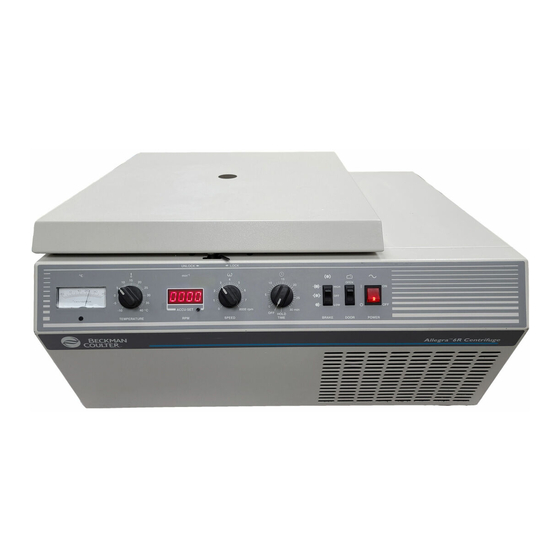
Page 20: Controls And Indicators
Description ➠ NOTE To avoid chamber icing, refrigeration is off when the door is open. The centrifuge door must be closed and locked for the refrigeration system to begin operating. CONTROLS AND INDICATORS CONTROL PANEL Mounted at an angle on the centrifuge front for easy visibility and access, the control panel (Figure 1-3, nonrefrigerated model;... -
Page 21: Figure 1-4. The Control Panel (Refrigerated Models)
Description Figure 1-4. The Control Panel (Refrigerated Models) BRAKE This switch is used to select the brake mode used during deceleration. Refer to the appropriate rotor manual for acceleration and decelera- tion times for available rotors under various conditions. The three positions of the switch provide: •... - Page 22 Description When centrifuge power is turned on, the display shows “0000.” During the run the display indicates actual rotor speed to the nearest 10-rpm increment. If the run is shut down prematurely due to one of four conditions (see Section 4, ), the TROUBLESHOOTING diagnostic message “8880”...
-
Page 23: Installation Requirements
Installation Requirements WARNING This centrifuge weighs 51.7 kg/114.0 lb (nonrefrigerated benchtop), 75.8 kg/167.0 lb (refrigerated benchtop), or 90.3 kg/199.0 lb (refrigerated kneewell). DO NOT attempt to lift or move it without assistance from another person. WARNING Do not place the centrifuge near areas containing flammable reagents or combustible fluids. -
Page 24: Electrical Requirements
Installation Requirements • Select a location away from heat-producing laboratory equipment, with sufficient ventilation to allow for heat dissipation. • Position the centrifuge on a level surface (a sturdy table or labora- tory bench for benchtop models) that can support the weight of the centrifuge (refer to in Section 1) and resist SPECIFICATIONS... -
Page 25: Figure 2-1. Centrifuge Dimensions
Installation Requirements 37.0 94.0 Allegra 6R 15.5 26.0 39.4 66.0 Spinchron R 23.0 58.4 21.5 54.6 Allegra 6 37.0 94.0 15.5 26.0 39.4 66.0 23.0 58.4 30.0 76.2 49.5 125.7 Allegra 6KR 26.0 66.0 26.5 67.3 23.0 58.4 21.5 54.6 Figure 2-1. -
Page 26: Test Run
Installation Requirements Make sure the voltage imprinted on the name rating plate affixed to the back of the centrifuge agrees with the line voltage of the outlet used. With the POWER switch in the OFF ( O ) position, plug in both ends of the centrifuge power cord. -
Page 27: Operation
Operation WARNING The centrifuge must not be used in the vicinity of flammable liquids or vapors, and such materials should not be run in the centrifuge. Never bring any flammable substances within the 30-cm (1-ft) area surrounding the centrifuge. During operation you should not come within the 7.6-cm (3-in.) clearance envelope except to adjust centrifuge controls, if necessary. -
Page 28: Preparation And Loading
Operation WARNING Handle body fluids with care because they can transmit disease. No known test offers complete assurance that they are free of micro-organism. Some of the most virulent — Hepatitis (B and C) and HIV (I–V) viruses, atypical mycobacteria, and certain systemic fungi —... - Page 29 Operation Action Result 3. Move the manual lock lever to the left (UNLOCK). UNLOCK LOCK 4. Press DOOR to OPEN posi- Door remains open. tion, then lift the door up. CAUTION Never drop the rotor onto the centrifuge drive shaft. The shaft can be damaged if the rotor is dropped onto it or forced sideways.
-
Page 30: Starting A Run
Operation Action Result 7. Firmly fasten the tie-down The rotor is secured to the shaft. nut on the shaft using the ➠ torquing bar (356036). NOTE Do not overtighten the nut. The tie-down nut is in the lid knob on the GA-6 fixed angle rotor. - Page 31 Operation Action Result 2. Select the brake position. 3. Set the TEMPERATURE knob to the required run temperature (refrigerated models only). 4. Turn the TIME control to the As the run begins, acceleration control protects delicate gradients; required run time. when the rotor reaches about 200 rpm, full acceleration to set speed occurs.
-
Page 32: Stopping A Run
Operation STOPPING A RUN A timed run ends automatically when the TIME control counts down to zero. To end a run in progress for any reason: Action Result 1. Turn the TIME control knob The door interlock system will keep the door latched until the rotor to OFF. -
Page 33: Troubleshooting
Perform the recommended corrective action in sequence, as listed. If the problem persists, call Beckman Coulter Field Service. To help diagnose and correct the problem, try to provide as much information as possible: •... -
Page 34: Other Possible Problems
3. Check for air inlet obstruction and dirty air-inlet filter. Clean as required (see Section 5, Care and Maintenance). 4. Check chamber temperature; if it is overtemperature, call Beckman Coulter Field Service. Tachometer signal loss Call Beckman Coulter Field Service. -
Page 35: Troubleshooting Chart
ON (I). Electrical failure Check connections; call Beckman Coulter Field Service. Motor bearings or commutator worn Motor needs replacing; call Beckman Coulter Field Service. Motor failure Call Beckman Coulter Field Service. Set temperature Ambient temperature too high Reduce ambient temperature. -
Page 36: Emergency Access
Troubleshooting EMERGENCY ACCESS If the facility power fails, the centrifuge will resume operation when power is restored and the rotor will return to set speed. In the event of an extended power failure, it may be necessary to trip the door- locking mechanism manually to remove the rotor and retrieve your sample. -
Page 37: Figure 4-1. Emergency Access
Troubleshooting Secondary (manual) Lock Lever Figure 4-1. Emergency Access Action Result 5. Turn the hex wrench to The latch releases and the door can be opened. the right (clockwise) until you hear a “click” or the If the rotor is still spinning, close the door and wait until it stops door opens. -
Page 39: Care And Maintenance
Coulter Field Service (1-800-742-2345 for Allegra 6 models or 1-800-854-3633 for Spinchron models; customers outside the United States should contact their local Beckman Coulter representative). Refer to the applicable rotor manual and Chemical Resistances (publication IN-175) for instructions on the care of rotors and rotor accessories. -
Page 40: General Maintenance
Care and Maintenance GENERAL MAINTENANCE Perform the following procedures regularly to ensure satisfactory performance and long service life of the centrifuge. • Regularly inspect the interior of the rotor chamber for accumula- tions of sample, dust, or glass particles from broken sample tubes. Clean as required (see , below), as these accumulations CLEANING... -
Page 41: Decontamination
Resistances for more information regarding chemical resistance of centrifuge and accessory materials. While Beckman Coulter has tested these methods and found that they do not damage the centrifuge, no guarantee of sterility or disinfection is expressed or implied. When sterilization or disinfection is a concern, consult your laboratory safety officer regarding proper methods to use. -
Page 42: Speed Calibration
• Examine the gasket to make sure that it is free of glass particles. Carefully remove any glass particles that may remain. If glass is under the gasket, call Beckman Coulter Field Service to replace the gasket. • Carefully wipe away any glass particles that remain in the bowl. -
Page 43: Speed Knob Adjustment
Care and Maintenance SPEED KNOB ADJUSTMENT If set and indicated speed are not in agreement, the SPEED knob may need adjustment. Action Result 1. Install a rotor. 2. Set the SPEED knob to 3000 rpm. 3. Check that the door is shut and securely latched. -
Page 44: Temperature Knob Adjustment
Care and Maintenance TEMPERATURE KNOB ADJUSTMENT (Refrigerated Models Only) If set and indicated temperature are not in agreement, the TEMPERA- TURE knob may need adjustment. Action Result 1. Turn the centrifuge power off. 2. Tap lightly on the °C meter until the needle is centered at 15°C. -
Page 45: Storage And Transport
Before returning a centrifuge or accessory for any reason, prior permission (a Returned Goods Authorization form) must be obtained from Beckman Coulter, Inc. Contact your local Beckman Coulter office to obtain the RGA form and for packaging and shipping instructions. -
Page 46: Supply List
Care and Maintenance SUPPLY LIST Contact Beckman Coulter Sales (1-800-742-2345 in the United States; worldwide offices are listed on the back cover of this manual) for information about ordering parts and supplies. See the Beckman Coulter Benchtop Rotors, Tubes & Accessories catalog (BR-9742, available at www.beckmancoulter.com) for detailed information on... - Page 47 IT IS EXPRESSLY AGREED THAT THE ABOVE WAR- able period of time, Beckman Coulter will repair or, at its RANTY SHALL BE IN LIEU OF ALL WARRANTIES OF election, replace such component or accessory. What consti-...
- Page 51 Beckman Coulter, Inc. • 250 S. Kraemer Blvd. • Brea, California 92821 Sales and Service: 1-800-742-2345 • Internet: www.beckmancoulter.com ©2009 Beckman Coulter, Inc. All rights reserved...
Need help?
Do you have a question about the Allegra 6 Series and is the answer not in the manual?
Questions and answers