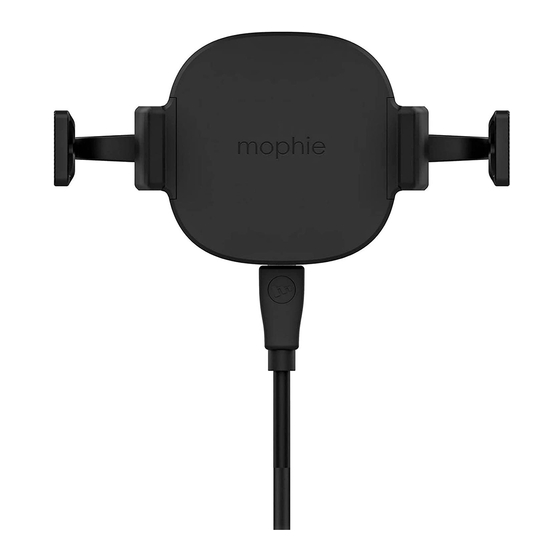
Summary of Contents for Mophie charge stream vent mount
- Page 1 charge stream vent mount Made for Apple, Samsung, and other Qi-enabled smartphones USER M ANUAL...
- Page 2 Thank you for purchasing the mophie charge stream ® ™ vent mount. The charge stream vent mount securely attaches to your vehicle’s vent and will wirelessly charge any Qi-enabled smartphone at up to 10W of power (depending on the device) or any mophie case with wireless charging.
- Page 3 10W of power (depending on the device). The charge stream vent mount can also deliver a charge though cases up to 3mm thick that contain no metal. Do not attempt to use the charge stream vent mount with smartphones that are not Qi-enabled.
- Page 4 Installation on a vent Note: If you decide to attach the dash-mount adapter, see Installing the Dash-mount Adapter, on page 10. Determine which vent-clip assembly (standard Standard Vent Clip or extended) is needed for proper placement Standard Vent Clip of the vent mount in your vehicle. Attach the vent-clip assembly to the back of the vent Standard Vent Clip Standard Vent Clip...
- Page 5 Connect the supplied micro-USB cable to the vent mount’s micro-USB port and to the supplied QC 2.0 car charger’s USB-A port. Insert the car charger into your vehicle’s 12-volt power outlet. Note: Do not plug the micro USB cable into a vehicle's USB-A port.
- Page 6 Slide the vent clip mounting fingers over one of your vehicle’s vent louvers. (You can rotate the vent clip mounting fingers before installation to accommodate different vent louver thicknesses.)
- Page 7 Insert your Qi-enabled smartphone or mophie case with wireless charging into the vent mount. Press the side of the device against the inside of the vent mount’s inner arm (A) and push the device against the charging surface (B). Using the vent mount’s outer arms for leverage will...
- Page 8 Using the charge stream vent mount Charging will automatically begin after you insert your Qi-enabled device in the vent mount with the center of the device aligned against the center of the mount. IMPORTANT: DO NOT DIRECT HEATED AIR FROM THE VENT ONTO THE VENT MOUNT WHILE IT IS ATTACHED TO THE VENT—this can damage the vent...
- Page 9 Changing to landscape orientation Remove the vent mount from the vent. Rotate the vent clip 90 degrees. Do not rotate the vent mount while it is installed on the vent—you may damage the vent louvre.
- Page 10 LED flashing: A metallic foreign object (keys, etc.) has been detected against the charging pad. Remove the foreign object. Installing the dash-mount adapter The supplied dash-mount adapter allows you to install the charge stream vent mount in a convenient location away from the vehicle’s vents.
- Page 11 Before you begin: • The dash-mount adapter’s adhesive can only be used once, so carefully select the mounting location before adhering the adapter to it. • dash-mount adapter’s adhesive semi-permanent. If you need to remove the adapter later on, click here for instructions on how to properly remove it.
- Page 12 Remove the protective cover from the dash-mount adapter’s adhesive and firmly press the adapter onto the cleaned mounting location. VERY IMPORTANT: Before continuing, wait 24 hours to allow the adhesive to fully cure.
- Page 13 After the adhesive has cured for 24 hours, insert the charge stream vent mount into the dash-mount adapter.
- Page 14 Taking care of your charge stream vent mount • Keep your charge stream vent mount dry and away from moisture and corrosive materials. • Do not clean your charge stream vent mount with harsh chemicals, soaps or detergents. Just wipe it with a soft, water-dampened cloth.
- Page 15 Warning Read all instructions and warnings prior to using this product. Improper use of this product may result in product damage, excess heat, toxic fumes, fire, or explosion, for which damages you (“Purchaser”), and not mophie llc (“Manufacturer”) are responsible.
- Page 16 Do not direct heated air from the vent onto the vent mount while the vent mount is operating. When running the vehicle’s heater, completely close the vent the mount is attached to, or direct the heated air out of the vehicle’s lower vents and entirely away from the upper vents.
- Page 17 your device is excessively hot, is emitting odor, is deformed, abraded, cut, or is experiencing or demonstrating an abnormal phenomenon, immediately stop all product use and contact Manufacturer. To comply with FCC RF exposure compliance requirements, this wireless charging device must be used with a separation distance of at least 10 cm from all persons.
- Page 18 Stay Powerful, mophie loves you, the five-circles design, and the mophie logo are trademarks of mophie inc. Apple is a trademark of Apple Inc. Samsung is a trademark of Samsung Electronics Co., Ltd. The ‘Qi’ symbol is a trademark of the Wireless Power Consortium.
- Page 19 there is no guarantee that interference will not occur in a particular installation. If this equipment does cause harmful interference to radio or television reception, which can be determined by turning the equipment off and on, the user is encouraged to try to correct the interference by one or more of the following measures: •...
- Page 20 For more information about where you can send your waste equipment for recycling, please contact mophie inc. or one of your local distributors.
- Page 21 CRE-0669-A...


Need help?
Do you have a question about the charge stream vent mount and is the answer not in the manual?
Questions and answers