
Related Manuals for Azkoyen t3 hopper


Summary of Contents for Azkoyen t3 hopper
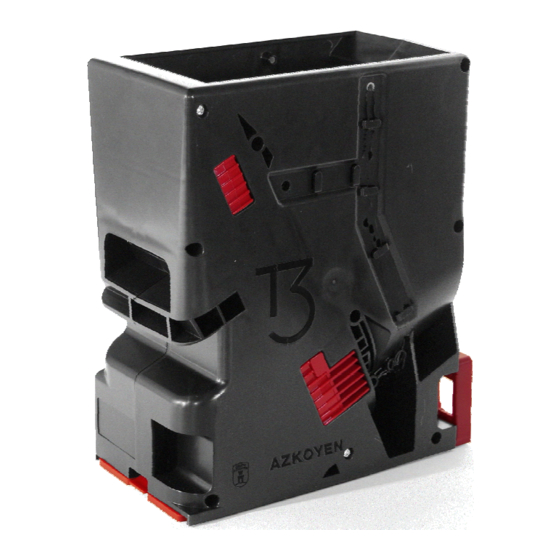
- Page 1 Technical Information: T3 HOPPER AZKOYEN Medios de Pago, S.A TEL.: +34 948 709 709 Avda. San Silvestre, s/n Fax: +34 948 709 709 31350 Peralta (Navarra) Spain www.azkoyen.com...
-
Page 2: Table Of Contents
CONTENTS INDEX 1 INTRODUCTION 2 INSTALLATION AND STARTING UP 3 TECHNICAL CHARACTERISTICS ENVIRONMENT AND CLIMATIC CONDITIONS MECHANICAL CHARACTERISTICS 3.2.1 Dimensions 3.2.2 Weight 3.2.3 Range of coins 3.2.4 Capacity of coins 3.2.5 Locating the reloading and exit areas of the coins 3.2.6 Ergonomic for the user ELECTRICAL CHARACTERISTICS 3.3.1 Power supply and current... - Page 3 CLEANING OF THE OPTIC SENSOR ON THE COIN EXIT MECHANICAL CONFIGURATION OF THE CHANGE RETURN RANGE ADJUSTING THE MAXIMUM AND MINIMUM LEVELS IN THE HOPPER TOOLS PROGRAMMING TOOLS. 7.1.1 HEUS user application 7.1.2 TL20 Tool AZKOYEN SIMULATION TOOLS 7.2.1 Cctalk Manager NORMS 07 - 2009...
-
Page 4: Introduction
INTRODUCTION The coin T3 hopper has been designed to meet the technical specifications for the payment of coins that are required by the different applications of the automatic vending of services or products. The principle characteristics on which its design is based are determined by the following payout needs: high capacity, security of transaction, speed of the payment for demanding sectors such as: parking, ticketing and change, among others. - Page 5 With respect to the capacity of the storage of coins, there are two options: • T3, single bowl • T3 x 2, double capacity storage The T3 hopper incorporates advanced coin detection systems and payment management, which makes them one of the most secure hoppers in the market. 07 - 2009...
-
Page 6: Installation And Starting Up
Figure 1: label with the characteristics 2) Disconnect the machine or system from the mains power supply. ATTENTION: Is very important carry out the installation of the T3 hopper with the machine disconnected from the mains to avoid producing any electrical damage. - Page 7 diameters and thicknesses of the coins. For the Euro currency there is one unique configuration that covers the whole range of coins, except the one cent coin. 5) If the machine is fitted with a base plate for the hopper, place the hopper on the base so that the gaps coincide with the tabs on the T3, then slide the hopper firmly into the base until you hear the clips activate.
- Page 8 Addresing by hardware connections at the main connector ccTalk address Sel. Adr.3 Sel.Adr.2 Sel.Adr.1 ● ● ● ● ● ● ● ● ● ● ● ● ● Conect to +Vs (24V, pin 9) Tabla 3: connections for hardware address setup Dispswitch configuration, through the dipswitches located on the main board.
- Page 9 Table 2: Configuration of the type of coin iii. Address configuration by ccTalk commands Address Change [251] and Address Random [250]. 8) In T3 models using two coins, the coins combination must be configured as by the Table 4. Tabla 4: coins combinations for double coin models 9) In parallel models, configure the working mode by means of the dipswitches, depending on the logic used: positive, negative or pulse mode.
- Page 10 Full sensors Empty sensors Figure 3: Position of the level sensors 11) Fill the hopper. 12) Before connecting the machine to the mains, carry out a visual inspection to determine that there is no interference with either the entry or exit of the coins. 13) Switch on the mains power.
-
Page 11: Technical Characteristics
TECHNICAL CHARACTERISTICS 3.1 ENVIRONMENT AND CLIMATIC CONDITIONS For reasons of safety, this equipment, once installed, should not be directly accessible to the user, being situated at a minimum distance of 10 mm from any electrical part of the hopper and any metal parts. -
Page 12: Weight
3.2.2 Weight Empty T3 hopper, single: 1,850 Kg Empty T3 hopper, double: 1,950 Kg 3.2.3 Range of coins The T3 will allow the payment of any type of coin within the following parameters: Min. Max. 16.25 32.5 Diameter (mm) Thickness (mm) -
Page 13: Capacity Of Coins
Configurations of the range of coins GENERAL RANGE OF COINS Diameter 16,25 - 22,00 ( * ) XS Thickness 1,20 - 3,20 Diameter 18,00 - 26,00 Thickness 1,50 - 3,20 Diameter 24,00 - 32,50 ( * ) XL Thickness 1,50 - 3,20 Figure 5: Diagram of range of coins by CONFIGURATION ( * ) available soon Range of coins for the Standard configuration M... -
Page 14: Locating The Reloading And Exit Areas Of The Coins
Locating the reloading and exit areas of the coins Reloading area. The reloading area of the coins is the total surface area of the upper part of the T3 hopper. This way, integrating the hopper within the machine is more flexible for the location of the coin channels. - Page 15 unit can be transported whether full or empty, or the transport of two units by one person, etc. The following images show the points recommended for their transport, as well as some recommendations of usage. Figure 8: Transport points Figure 9: Recommended transport methods Reloading coins.
-
Page 16: Electrical Characteristics
3.3 ELECTRICAL CHARACTERISTICS 3.3.1 Power supply and current • T3 T3 Cctalk. V power supply. MOTOR POWER SUPPLY V nom. 24 VDC V min. 19 VDC V max. 26 VDC Table 7: Voltage of power supply T3 Cctalk • T3 PARALLEL. V power supply. MOTOR POWER SUPPLY V nom. - Page 17 The hopper is connected to the base by means of a 2x6 way Plug & Play connector doted with a mobile mechanism that means that it adapts to the connector of the position of the hopper without damaging the connectors. Figure 11: Base with Azkoyen connector and details of the front and back 07 - 2009...
- Page 18 The connector that is recommended in the master, in the case of using the Azkoyen solution is a Molex male 2x6 way connector size 2.54 Azkoyen connector in the base plate Connector recommended in the master Type Molex 2x6 female size 2.54 Type Molex 2x6 male size 2.54...
-
Page 19: Pin Out
Figure 13: Dimensions of the Cinch connector 3.3.3 Pin out Independently of the type of connector used, Cinch or Azkoyen, the number of pins and there functions are remain the same. PIN FUNCTION Cctalk 0V (GND) Val. Address 1-LSB DATA (Cctalk) Val. - Page 20 T3 Parallel PIN FUNCTION Pwr. Motor 0 volt. Power supply Logic 0 volt. uP Sensor Exit Exit Security Exit Sensor Full Exit Sensor Empty Pwr. Motor Pwr. Logic Exit Raw Sensor Table 11: Pin out T3 parallel 07 - 2009...
-
Page 21: Electronic Characteristics
The T3 models with double coin, implement an advance version of this sensor wich allows the coin ID by its magnetic and physical characteristics. Connection Cctalk Connection to the main external connector of the T3 hopper. Connection level detectors of the hopper. 07 - 2009... - Page 22 . Connection programming and tools. This connection is for programming the firmware of the T3 hopper. The circuit board is governed by a micro-controller with a flash memory that allows one to update the firmware by means of the user tools.
-
Page 23: Control Board. T3 Parallel
(See description of positions 1, 5 and 6 in the section 3.3.1 Control board T3 Cctalk) Parallel connection The connection between the main external connector of the T3 hopper and the circuit board. Mode selection dipswitches For the definition of the working mode, as well as being able to make a hardware configuration using the entry lines IN1-IN3, you are able to establish the selection of the position of the switches using the following table. -
Page 24: Detection Of Coin Levels
The detection of the level of coins in the hopper is done with two pairs of optic sensors, a photodiode and a phototransistor. The T3 hopper allows you to situate these barriers in any of the available positions, two for the detection of the minimum level and four for the detection of the maximum level. The approximate capacities are shown in following figure. -
Page 25: Double Count
3.4.5 Double count As well as the detection of the coin at the moment of payout, the T3 model of single coin implements a previous stage of sensorisation of the magnetic and physical parameters to previously read the values and therefore confirm the information obtained on exit detection. 3.4.6 Identification of coin The T3 model for 2 coin types is prepared with an advanced version of the Double Count... -
Page 26: How It Works
4.3 SPEED OF EXTRACTION The speed of the payment of coins it is determined by the speed of the extraction system and the diameter of the coin. The T3 hopper is capable of paying out up to 4.5 coin/sec. 07 - 2009... -
Page 27: Detection Of The Presence Of Coins
4.4 DETECTION OF THE PRESENCE OF COINS At the previous sensorisation stage, and depending on whether the model manages one or two coin types, the necessary measurements of the parameters and characteristics of the coins that are being transported the track are done. The parameters obtained by means of the magnetic and optic sensor are contrasted with the data base in the hopper to identify the value when working with two types of coins. - Page 28 prevent the jamming of coins in the extraction system. By means of the current sensor, we monitor the current draw of the motor at all times and activate the reverse movement of the track to remove the jam before an eventual blocking of the hopper. If, in spite of activating the function anti-jamming, it is not possible eliminate the jam, the hopper communicates the error to the master so it can determine further action.
- Page 29 assigned to the position of the coin exit and counting sensors, to make them inaccessible from the exterior. The T3 is the most secure hopper in the market. 07 - 2009...
-
Page 30: Communication Protocols
The master always initiates any communication with any of its slave devices and these respond according to the command and its present state. For more details related to the use of devices in Cctalk ® consult the manual from Azkoyen Medios of Pago: Protocol Cctalk. T3 hopper. -
Page 31: Configuration Of The Coin Type
5.1.2 Configuration of the coin type To indicate the type of coin that is used in each hopper, it is necessary to configure the dipswitches on the control board using the following table: Table 16: Table of configuration of the coin type 5.2 PARALLEL PROTOCOL Parallel protocol is, depending on whether it is managed by the master or not, the most simple to implement and manage. -
Page 32: Working Modes
Configuration by dipswitches Figure 18: Details of the dipswitches on the Table 18: Parallel configuration modes 5.2.2 Working modes When the configuration of the working mode is carried out using the connection with the master (Configuration by hardware), the Working mode is established in the connection of the hopper. Mode 0 –... -
Page 33: Indications Of The Status Leds
When this mode has been selected, if IN3 is connected to low, the coin exit sensor goes inactive (OFF) to be able to carry out a test to see if it is operating. The confirmation of the test is carried out on pins 3 and 11. From the Reset Mode it can be commuted to any of the other modes and vice versa, but it is not possible to commute between Modes 0, 1 and 2 without passing through Reset Mode first. - Page 34 Error 2: 2 flashes, etc…. The Errors that the T3 hopper parallel communicates with the LED are: Error 1 Detection of coin permanently in exit Error 2 Detection of external light in exit sensor Error 3 Fault in the exit sensor. The diode emitter is not detected.
-
Page 35: Service Operations
6 SERVICE OPERATIONS 6.1 DISASSEMBLY AND ASSEMBLY In the design of the T3 hopper, a relevant aspect from a mechanical point of view has been the ease with which the hopper can be dismantled to carry out service operations. In this sense there has been a grouping of modular internal components. - Page 36 Paso 3: Unscrew the full and empty detectors. Remove the cover. The extraction system is now accessible. Paso 2: Disconnect all the cables that come from of the PCB. Remove the mechanical extraction assembly. For this operation you need: • Philips screwdriver with a PH 1 or PH2 point.
-
Page 37: Cleaning Of The Optic Sensor On The Coin Exit
6.2 CLEANING OF THE OPTIC SENSOR ON THE COIN EXIT The optic sensor to count the coins does not require frequent maintenance. Nevertheless, due to the dirt on the coins, it may need cleaning. As prevention, we recommend the cleaning of this sensor every 500,000 coins paid out. -
Page 38: Mechanical Configuration Of The Change Return Range
Cotton cloth or cotton buds. 6.3 MECHANICAL CONFIGURATION OF THE CHANGE RETURN RANGE The standard configuration of the T3 hopper has a very wide range of use and allows the management of the majority of coins in the market. The standard configuration is designed for diameters between 18 and 26 mm and thicknesses of 1.5 to 3.2 mm. - Page 39 Release the two plastic clips that fix the coin concentrator and pull it out. 07 - 2009...
- Page 40 07 - 2009...
- Page 41 With a flat head screwdriver pull apart the coin detection assembly to access the screw below, as shown in the figure. Unscrew the screws marked with the arrow, and turn over the unit to access the electronic board. Unscrew the screw wich fixes the electronic board to the plastic assembly. Release the clips located on the sides.
-
Page 42: Adjusting The Maximum And Minimum Levels In The Hopper
For this operation you need: • A flat screwdriver with a 3 to 5 mm point • The mechanical parts necessary for the configuration chosen: − Track − Coin concentrator − Flap. 6.4 ADJUSTING THE MAXIMUM AND MINIMUM LEVELS IN THE HOPPER To fit the optic sensors in the positions desired, we recommend following these instructions: Select the location for the minimum and maximum sensor with respect to your 3.4.3 Coin level... -
Page 43: Tools
T3 hopper directly, using the connection cable and interface or using the TL20. There is a specific manual for the TL20 and the HEUS, available in the Azkoyen web, you should consult it for the instructions of these devices. -
Page 44: Azkoyen Simulation Tools
Cctalk commands and shows the control to the user, you may create and execute sequences of commands to carry out complex or repetitive operations. For the parallel T3 hopper, there is a simple function that allows you to manage this type of hopper. - Page 45 Figure 24: Main screen on the Cctalk Manager application There are different interfaces that may be used in combination with the Cctalk Manager. Below are details of the main devices: 7.2.1.1 USB Interface – Cctalk. This interface is connected to the USB port of the PC and provides a Cctalk bus to the exterior. This connection may be connected to any Cctalk device that has a ribbon cable connector 2 x 5-way.
- Page 46 7.2.1.3 IS21 Cctalk Interface The IS21 Cctalk interface can work autonomously as an interface of the application Cctalk Manager. To manage the T3 hopper a RS232 – Cctalk interface is used in combination with the application Cctalk Manager Figure 27: IS21 Cctalk interface The IS21 Cctalk interface makes a Cctalk bus using a serial port (COM) on the PC.
- Page 47 connection is with a ribbon cable - 2x5 way. The use of this interface does not require the installation of additional drivers, because the application Cctalk Manager recognises the connection. 07 - 2009...
-
Page 48: Norms
NORMS. CE MARK. The same as all the Azkoyen products, the T3 Hopper complies with the CE marking regulations. 1. Electromagnetic emission: EN 50081-2 (1992), industrial emission. • EN 55011 (1991) Continuous conduced emission. • EN 55011 (1991) Radiated emission.
Need help?
Do you have a question about the t3 hopper and is the answer not in the manual?
Questions and answers