Table of Contents
Advertisement
To prevent accidents and machine damage, read these
instructions before installation or use. Use the washer-dryer
only as instructed in this owner's guide and installation
instructions included with your product. Keep this guide for
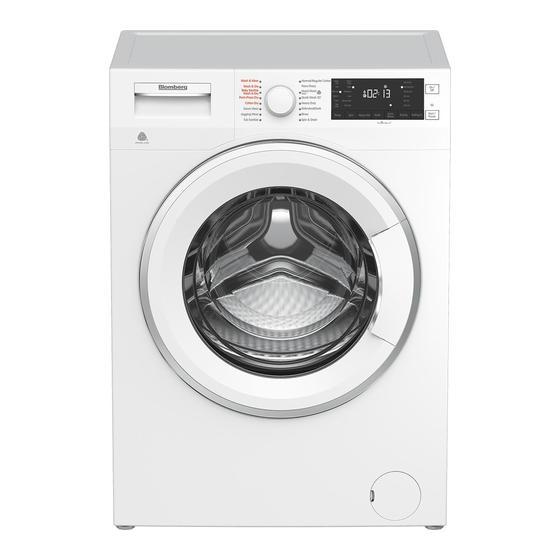
Front-Loading Automatic
Washer-Dryer
Owner's Guide & Installation
Instructions
As an ENERGY STAR® partner,
BLOMBERG has determined that this
product meets the ENERGY STAR®
guidelines for energy efficiency.
future reference
WMD24400W
Advertisement
Table of Contents

Related Manuals for Blomberg WMD24400W


Summary of Contents for Blomberg WMD24400W
- Page 1 Keep this guide for future reference Front-Loading Automatic Washer-Dryer Owner’s Guide & Installation Instructions As an ENERGY STAR® partner, BLOMBERG has determined that this product meets the ENERGY STAR® guidelines for energy efficiency. WMD24400W...
- Page 2 Please read this guide first! Dear Customer, We hope that your product which has been manufactured in modern facilities and passed through a strict quality control procedure will give you the best results. Therefore, we advise you to read through this document carefully before using your product and keep it for future reference.
- Page 3 Explanation of symbols Throughout this guide the following symbols are used: CAUTION • Important information or useful hints about usage. WARNING • Warning for hazardous situations with regard to life and property. WARNING • Warning for electrical shock • Allergy UK, is the brand of British Allergy Association. Their main endorsement is the ‚Seal of Approval‘.
-
Page 4: Table Of Contents
TABLE OF CONTENTS 1 Your Washer-dryer Overview ............6 Specifications . - Page 5 Descaling the washer-dryer ........71 8 Troubleshooting 9 WARRANTY STATEMENT FOR THE BLOMBERG CLOTHES WASHER-DRYER...
-
Page 6: Your Washer-Dryer
1 Your Washer-dryer Overview 1- Power cable 2- Top panel 3- Control panel 4- Drain hose 5- Loading door 6- Filter cap 7- Adjustable feet 8- Detergent drawer 6 / English Front-Loading Automatic Washer-Dryer... - Page 7 Your Washer-Dryer Package contents Power cable Water discharge hose Transit bolts Mains water inlet hose Liquid detergent container (*) User manual Plastic plug group CAUTION • Figures in this manual are schematic and may not match the product exactly. (*) This may be supplied with the machine depending on the model of your product.
-
Page 8: Specifications
Your Washer-Dryer Specifications Front Loading Automatic Washer-Dryer Models WMD24400W Height (in) / (cm) 33.1 / 84 Width (in) / (cm) 23.6 / 60 Depth (in) / (cm) 23.2 / 59 Net Weight (lbs) / (kg) 158.7 / 72 Electricity (V/Hz.) -
Page 9: Important Safety Instructions
2 Important Safety Instructions WARNING • To reduce the risk of fire, electric shock or injury to persons while using your appliance follow basic safety precautions, including the following: • Read all instructions before using the washer-dryer. • Do not wash or dry articles that have been previously cleaned in, washed in, soaked in, or spotted with gasoline, dry-cleaning solvents, or other flammable or explosive substances (acetone, alcohol, kerosene, some liquid household cleaners, some spot removers, turpentine, waxes and wax removers) as they give off... - Page 10 Important Safety Instructions • Do not repair or replace any part of the appliance or attempt any servicing unless specifically recommended in the user-maintenance instructions or in published user-repair instructions that you understand and have the skills to carry out. • This appliance must only be used for the purpose of washing, rinsing and spinning machine-washable items using laundry additives that are suitable for use in washers . The appliance manufacturer cannot be held responsible for damage caused by improper or unintended use of the appliance.
- Page 11 Important Safety Instructions • Store laundry detergents and additives in a cool, dry place out of children’s reach due to danger of chemical poisoning and skin irritation. Follow the manufacturers’ instructions when using laundry products. • Do not wash or dry fiberglass materials. Small particles can stick to fabrics while running and may lead to skin irritation. • Do not wash or dry items stained with vegetable oil, cooking oil or petroleum. These items may contain some flammable oils after laundering and the fabric may smoke or catch fire by itself.
- Page 12 Blomberg Service technician. • Never use an extension cord or adapter to connect the appliance to the electrical power due to the risk of electric shock and/or fire. • All broken and faulty components, panels and parts must only be replaced with original Blomberg spare parts by a Blomberg Service technician. • Do not force the product’s door to open when it is locked. The door must be closed any time during the program cycle.
- Page 13 Important Safety Instructions • Do not use fabric softeners or products to reduce static unless recommended by the manufacturers of the fabric softener product. • Do not use heat to dry articles containing foam rubber or similarly textured rubber-like materials. • Do not place items exposed to cooking oils in your dryer. Items contaminated with cooking oils may contribute to a chemical reaction that could cause a load to catch fire. To reduce the risk of fire due to contaminated loads, the final part of a tumble dryer cycle occurs without heat (cool down period).
-
Page 14: Installation Instructions
3 Installation Instructions Read this first ! Install the clothes dryer according to the manufacturer’s instructions and local codes. This product can be individually installed in free-standing and built- in installations. Before you install your appliance, read the following instructions completely and carefully: • Save these instructions for future reference. -
Page 15: Installation Clearances
Installation Instructions • It is not recommended to install and operate the product on a wooden floor or soft floor. If you have to install your product on a wooden or frame construction floor, the floor must be reinforced properly and the product must be located in the corner of the room if possible. -
Page 16: Allowable Clearances For Undercounter Installation
Installation Instructions Allowable Clearances for Undercounter Installation The dimensions are for the recommended spacing. Counter depth should be 23.5-24.5”(60-62 cm). Custom undercounter installation – Washer-Dryer only Allowable Clearances for Closet Installation When installed in closet: Sides, Rear, Front 1/2 in. (1.27 cm), Top= 1 in. (2.54 cm) Closet door ventilation requirement: A louver having minimum 23 in2 (148 cm2) air opening located at 3 in (7.62 cm) from the bottom of closet door. -
Page 17: Removing Packaging Reinforcement
Installation Instructions Removing packaging reinforcement Tilt the product to remove the packaging reinforcement. Remove the packaging reinforcement by pulling the ribbon. 17 / English Owner’s Guide & Installation Instructions... -
Page 18: Removing Shipping Bolts
Installation Instructions Removing shipping bolts WARNING • Shipping bolts must be removed before operating the product! Otherwise, the appliance will be damaged seriously! 1.Loosen all the bolts with a spanner wrench until they rotate freely. 2.Remove the shipping bolts by turning them gently. 3.Bolt hole covers (supplied in the bag with the owner’s guide) are fitted into the holes on the rear panel with a special lock mechanism. -
Page 19: Leveling The Product
Installation Instructions Leveling the product WARNING • Do not use any tools to loosen the lock nuts. Otherwise, they can be damaged. 1.Manually (by hand) loosen the lock nuts on the feet. 2.Adjust them until the washer stands level and firmly. 3.Important: Tighten all lock nuts up again. - Page 20 Installation Instructions WARNING • Improper connection of the equipment-grounding conductor can result in a risk of electric shock. Check with a qualified electrician or serviceman if you are in doubt as to whether the appliance is properly grounded. • Do not modify the plug provided with the appliance – if it will not fit the outlet, have a proper outlet installed by a qualified electrician.
-
Page 21: Power Supply And Circuit
Installation Instructions Power supply and circuit Important: • Wall power connection should comply with national regulations. • The wiring for the electrical outlet circuit must be sufficient to meet the appliance requirements. Use of a Groud Fault Circuit Interrupter (GFCI) is recommended. • The voltage and maximum total current are specified in the section “Specifications”. • The appliance must not be directly connected to the wall power in case of absence of junction box. • Connection via extension cords or multi-plugs should not be made. WARNING • A damaged power cable must be replaced by a qualified electrician. • The appliance must not be operated unless it is repaired! There is the risk of electric shock! 15 Amp. -
Page 22: Water Supply Connection
Installation Instructions Water Supply Connection Your product comes with both cold and hot water connections. Connect the blue marked cold water supply hose to the cold water inlet valve/faucet and the red marked hot water intake hose to the hot water inlet valve/faucet. Screw the connecting bolts by hand and tighten the connection properly using a plier. - Page 23 • Do not remove the filters located on the water supply hoses (on faucet/hose and hose/inlet valve connections). • Always use genuine “Blomberg” water supply hoses when connecting with this product. Old or worn-out hoses must not be reused. It is not advised to extend inlet or drain hoses, if necessary consult your dealer or technical service about hose extensions.
-
Page 24: Drainage
Installation Instructions Drainage WARNING • Drain hose should not be bent. Be sure that there are no kinks or cuts on it. • Drain hose outlet must not contact the drained water. Drain hose may be connected into a sink, into the drain of a sink, to a standpipe and floor drain. -
Page 25: Installation Checklist
Installation Instructions Installation Checklist • Water inlet hose and accessory bags must be removed from the drum. • Transportation/shipping bolts must be removed. • Product must be properly leveled by using the adjustable feet. • Water inlet hose is connected to the water faucet, secured and checked for any leaks by turning on faucet. • Drain installation is done properly and drain hose is checked and secured to prevent any flooding. • Product has to be plugged to a properly grounded live wall power outlet. -
Page 26: Disposal Information
Installation Instructions Disposal Information Packing Disposal WARNING • Packing materials of the appliance are potentially dangerous for children. Materials such as plastic bags, films or wrappings must be kept away from children or disposed properly to prevent the danger of suffocation. CAUTION • Packing materials are made of biodegradable and recyclable substances. You should consult your local authority or dealer about the environmental-friendly disposal of the packaging of your appliance. -
Page 27: Operating Instructions
4 Operating Instructions First Use WARNING • To reduce the risk of fire, electric shock, or injury to persons, read the IMPORTANT SAFETY INSTRUCTIONS before operating this appliance. Before the first use, • Be sure that the product is installed properly by a qualified installer or service technician in accordance with all national and local codes and requirements. -
Page 28: Laundry Tips
Operating Instructions • Turn on the product, choose “"Tub Clean"” cycle on the program selector knob and start the washer as empty and without any laundry additives. When the cycle is finished, your product is ready for subsequent uses. WARNING • Be sure that siiica gel package, which is located inside the drum, has been removed from the drum before the first use. Granules in this package do not contain poisonous or harmful materials. - Page 29 Operating Instructions LAUNDRY WASH SYMBOLS Machine Wash Symbols WASH Maximum Water Temperatures Symbol(s) Drying Suitable for No Iron Do not dry- Sensitive / Do not dry Do not dry Symbols dryer clean Delicate dry with dryer DRYING Drying Settings Iron - Iron at high Iron at medium Iron at low...
-
Page 30: Preparing The Laundry
Operating Instructions Sort the laundry according to the following fabric types, color groups and wash them separately: • White and color fast fabrics • Non-fast, colored fabrics • Permanent press items(mens shirt, dress pants, poly-cotton blends) • Delicate fabrics (silk, rayon etc.) • Woolens (only wash woolens that are labeled “machine washable” or “hand washable” • Hand knits (They should be placed inside out in the washer) CAUTION • Do not wash dark colors with light colors and whites. Color items may bleed and white and light colored items may be discolored. -
Page 31: Loading The Washer
Operating Instructions • Heavy stains should be pretreated with soapy water appropriately before washing (Do not rub or scratch the stained area). If in doubt, check with a pharmacist or dry-cleaner. • Use only dyes/discoloring and anti-scaling agents suitable for machine wash. Make sure to follow the instructions on the package. Loading the washer Maximum load capacity depends on the fabric type of laundry, soiling amount of laundry and program cycle you wish to use. -
Page 32: Detergent Use
Operating Instructions • In case the door is not locked, door led remains off. In that case, door should be opened and closed again firmly until the door led lights up. • If the door is not closed completely, the machine will not start. This is a safety precaution. The front door is locked until end of the selected program and it can not be opened untill the door led on the panel is off following the end of the program. -
Page 33: Detergent Quantity
Operating Instructions Always follow the instructions and information given by laundry detergent manufacturers when using these products. WARNING • Store laundry detergents and additives in a cool, dry place out of children’s reach due to danger of chemical poisoning and skin irritation. -
Page 34: Detergent Dispenser
Operating Instructions Detergent Dispenser Detergent dispenser of your product has three separate compartments for main wash detergent, fabric softener and liquid bleach. Each of these laundry additives are automatically dispensed at appropriate time during wash program. CAUTION • Do not put laundry additives directly in the wash drum. Always use the detergent dispenser. -
Page 35: (Ii) Main Wash Detergent Compartment
Operating Instructions (II) Main Wash Detergent Compartment Add HE (High efficiency) powder detergent to this compartment numbered as “II” before starting the wash program. Use the detergent manufacturer’s dosing cup and follow the instructions on the package. If you use a liquid detergent, be sure to use a HE (High efficiency) detergent and add detergent directly to main wash compartment before operating your machine. -
Page 36: Using Liquid Detergents
Operating Instructions Using liquid detergents If the product contains a liquid detergent cup: • Make sure that you have placed the liquid detergent cup in compartment no. “2”. • If the liquid detergent has lost its fluidity, dilute it with water before putting in the detergent cup. If the product does not contain a liquid detergent cup: • Do not use liquid detergent for the prewash in a program with prewash. • Liquid detergent stains your clothes when used with Delayed Start function. -
Page 37: Water Consumption
Operating Instructions CAUTION • Be sure that bleach container is present in the right compartment of dispenser before you add liquid bleaching agent. You may remove bleach container if you would not use bleach. However do not put any other laundry additives to the empty compartment. • Be sure to choose extra rinse option if you are using bleach in wash program. -
Page 38: Selecting A Program And Operating Your Washer-Dryer
5 Selecting a Program and Operating Your Washer-Dryer Control panel 1 - Program selection knob 2 - Temperature selection lights 3 - Spin speed selection lights 4 - Display 5 - Drying Program Lights 6 - On / Off button 7 - Start / Pause button 8 - End Time Adjustment button 9 - Drying Level Adjustment button 10 - Auxiliary Function buttons 11 - Spin Speed Adjustment button 12 - Temperature Adjustment button... -
Page 39: Display Symbols
Selecting a Program and Operating Your Washer-Dryer Display symbols Washing indicator Rinsing indicator Spinning indicator Drying indicator End indicator No Water indicator Duration Information display Loading Door Lock indicator Child Lock indicator Preparing the machine 1. Check if the hoses are connected tightly. 2. Plug in your machine. -
Page 40: Program And Consumption Table
Selecting a Program and Operating Your Washer-Dryer Program and consumption table (for washing) Selectable Program Temperature Range Normal / Regular EXTRA EXTRA Extra Hot 0,65 • • • • TAP COLD EXTRA HOT Cotton Load HIGH HIGH Perm Press 1,00 NO SPIN HIGH •... - Page 41 Selecting a Program and Operating Your Washer-Dryer CAUTION • The auxiliary functions in the table may vary according to the model of your machine. • Water and power consumption may vary subject to the changes in water pressure, water hardness and temperature, ambient temperature, type and amount of laundry, selection of auxiliary functions and spin speed, and changes in mains voltage.
-
Page 42: Selecting The Washing Program
Selecting a Program and Operating Your Washer-Dryer Selecting the washing program 1. Determine the program suitable for the type, quantity and soiling level of the laundry in accordance with the "Program and consumption table". 2. Select the desired program with the Program Selection knob. CAUTION • Programs are limited with the highest spin speed appropriate for that particular type of fabric. • When selecting a program, always consider the type of fabric, colour, soiling level and permissible water temperature. - Page 43 Selecting a Program and Operating Your Washer-Dryer • Normal / Regular Cotton You can wash your durable white and colorfast items with this cycle. Washes with vigorous tumbling movements. It is recommended for your cotton or linen items (such as bed sheets, pillowcases,jeans,towels, bathrobes,garments, T-shirts,sweat-shirts , etc.). You can select wash temperature according to care label of items. Heavy soil should be chosen for items that need extra hygiene such as baby clothes, kitchen towels and garments.
- Page 44 Program and consumption table • Perm Press You can wash your easy care items on this cycle. Washes with gentler tumbling movements and in shorter washing cycles. It is recommended for your cotton, synthetic or blended items (such as shirts, pants, wrinkle-free items, etc.). You can select wash temperature according to care label of items. CAUTION • You can dry your laundry after the washing cycle without any interruption (automatic or timed drying can be performed after washing).
- Page 45 Program and consumption table • Quick Wash 25’ Use to wash your lightly soiled and unstained, small amount of cotton laundry in 25 minutes. CAUTION • You can dry your laundry after the washing cycle without any interruption (automatic or timed drying can be performed after washing). For this, you must also select the Drying function before starting the washing program.
- Page 46 Program and consumption table • Delicates&Dark Use this program to protect the colour of your dark-coloured and delicate garments. It has more sensitive tumbling movements and does not do intermediate spinning compared to the permanent program. It may be used for coloured cotton, synthetic or blended clothes for which sensitive washing is recommended.
-
Page 47: Temperature Selection
Selecting a Program and Operating Your Washer-Dryer Temperature selection Whenever a new program is selected, the recommended temperature for the program appears on the temperature indicator. It is possible that the recommended temperature value is not the maximum temperature that can be selected for the current program. Press the Temperature Adjustment button to change the temperature. -
Page 48: Spin Speed Selection
Selecting a Program and Operating Your Washer-Dryer Spin speed selection Whenever a new program is selected, the spin speed recommended for the selected program is displayed on the Spin Speed indicator. CAUTION • It is possible that the recommended spin speed value is not the maximum spin speed that can be selected for the current program. - Page 49 Selecting a Program and Operating Your Washer-Dryer If you want to spin your laundry after the Rinse Hold function: - Adjust the Spin Speed. - Press Start / Pause / Cancel button. The program resumes. Machine drains the water and spins the laundry. If you want to drain the water at the end of the program without spinning, use No Spin function.
- Page 50 Selecting a Program and Operating Your Washer-Dryer Program and consumption table (for drying) Selectable Program Temperature Range EXTRA EXTRA Cotton Dry 3,25 • • • • Load HIGH HIGH Perm Press Dry 2,10 • • • Load SPIN SPIN Baby Sanitize EXTRA EXTRA EXTRA...
-
Page 51: Drying Programs
Selecting a Program and Operating Your Washer-Dryer Drying programs WARNING • Machine cleans the lint coming off the laundry automatically during the drying cycle. Machine uses water during drying. For this reason, water tap of the machine should be open also in the drying programs. -
Page 52: Washing And Drying Programs
Selecting a Program and Operating Your Washer-Dryer • Cotton Dry Use to dry damp cotton laundry equivalent to 5 kg dry weight. This program performs drying only. CAUTION • In order to dry the laundry which contains only towels and bathrobes, load 4 kg laundry maximum. - Page 53 Selecting a Program and Operating Your Washer-Dryer • Wash & Wear Use to wash and dry 0.5 kg laundry (2 shirts) in 40 minutes or 1 kg laundry (5 shirts) in 60 minutes. CAUTION • Wash&Wear program is intended to quickly wash and dry the daily clothes which were worn for a short period of time and are not soiled.
-
Page 54: Auxiliary Function Selection
Selecting a Program and Operating Your Washer-Dryer Auxiliary function selection Select the desired auxiliary functions before starting the program. Whenever a program is selected, lights of the auxiliary functions that can be selected together with that program illuminate. CAUTION • Light of the auxiliary function that cannot be selected with the selected program does not illuminate. - Page 55 Selecting a Program and Operating Your Washer-Dryer CAUTION • If the selected dampness level (Iron Dry, Wardrobe Dry, Extra Wardrobe Dry) cannot be reached at the end of the drying cycle, your machine will extend the program duration automatically. Program will last longer. • If Timed-Drying is selected, program is finished at the end of the drying period even if the laundry does not get dry.
-
Page 56: Drying Steps
Selecting a Program and Operating Your Washer-Dryer Drying steps Damp Dry Drying is performed until the drying level reaches Iron Dry step. Normal Dry Drying is performed until the drying level reaches Wardrobe Dry step. More Dry Drying is performed until the drying level reaches Extra Wardrobe Dry step. -
Page 57: Time Display
Selecting a Program and Operating Your Washer-Dryer Time display Remaining time for the completion of the program while it is running is displayed as “01:30” in hours and minutes format. CAUTION • Program time may differ from the values in section "Program and consumption table" depending on the water pressure, water hardness and temperature, ambient temperature, amount and the type of laundry, auxiliary functions selected and the changes at the mains voltage. - Page 58 Selecting a Program and Operating Your Washer-Dryer If you want to cancel End Time function, press End Time button until the End Time light turns off or press On / Off button to turn off and on the machine. 1. Open the loading door, place the laundry and put detergent, etc. 2.
-
Page 59: Preparation
6 Preparation 1. Turn on both hot and cold water faucets fully. Check and be sure the water connection is tight. 2. Place the laundry in the drum. 3. Add laundry additives (e.g. detergent, fabric softener,bleach). Malzeme rengi ARC 716 Starting the program Colour of material is ARC 716 10.5 INLAY STOCK NO: 2846559001... -
Page 60: Loading Door Locking System
Preparation Malzeme rengi ARC 716 Colour of material is ARC 716 Loading door locking system 10.5 INLAY STOCK NO: 2846559001 1400 1400 Extra Kurutma Extra Kurutma 1000 Dolap Kuruluğu 1000 Dolap Kuruluğu Ütü Kuruluğu Ütü Kuruluğu 30’ 30’ 20° 90’ 20°... -
Page 61: Changing The Selections After Program Has Started
Preparation 5. Make changes in auxiliary functions, temperature and speed settings if necessary. 6. Press the Start / Pause button to then restart the product. 2846559001 1000 Dolap Kuruluğu 1000 Dolap Kuruluğu Ütü Kuruluğu Ütü Kuruluğu 30’ 30’ 20° 90’ 20° 90’ 1400 1400 Extra Kurutma Extra Kurutma Extra Kurutma Extra Kurutma 150’... -
Page 62: Child Lock
Preparation Changing the program selection after program has started: Changing the program is not allowed when a program is already running. If you turn the Program Selection knob while the program is running, buzzer is heard and change is prohibited. You can select the new program after switching the current program to pause mode. - Page 63 Preparation To activate the child lock: Press and hold 2nd and 3rd auxiliary function buttons for 3 seconds. After the countdown as “Child Lock 3-2-1” on the display is over, “Child Lock Enabled” appears on the display. You can release 2nd and 3rd Auxiliary Function buttons when this warning is displayed. To deactivate the child lock: Press and hold 2nd and 3rd auxiliary function buttons for 3 seconds.
-
Page 64: Cancelling The Program
Preparation Malzeme rengi ARC 716 Colour of material is ARC 716 Cancelling the program 10.5 INLAY STOCK NO: 2846559001 1400 1400 Extra Kurutma Extra Kurutma 1000 Dolap Kuruluğu 1000 Dolap Kuruluğu Ütü Kuruluğu Ütü Kuruluğu 30’ 30’ 20° 90’ 20° 90’... -
Page 65: End Of Program
Preparation End of program When the program is over the End of Program indicator illuminates Malzeme rengi ARC 716 Colour of material is ARC 716 10.5 and a buzzer is heard. INLAY STOCK NO: 2846559001 1400 1400 Extra Kurutma Extra Kurutma 1000 1000 Dolap Kuruluğu Dolap Kuruluğu Ütü Kuruluğu Ütü Kuruluğu 30’... -
Page 66: User Maintenance Instructions
7 User maintenance instructions WARNING • Be sure to unplug the power cable before attempting maintenance or cleaning of your appliance to minimize the risk of electric shock. Cleaning detergent dispenser Remove any powder/liquid residue buildup in the dispenser drawer. To do this;... -
Page 67: Cleaning The Door Seal
User maintenance instructions Cleaning the door seal Be sure to check the rubber door seal after unloading your washer. Pull the seal back to search for any foreign objects. Residual metal objects such as pins and coins may form rust stains on rubber seal, and cause the seal to leak. Wipe the stained areas with soapy water using a damp cloth. Then wipe with a dry cloth properly. -
Page 68: Cleaning The Outer Cabinet And Control Panel
User maintenance instructions Cleaning the outer cabinet and control panel When necessary: • Wipe the exterior panels of your machine with soapy water or mild detergent. Dry it with a soft cloth. • Use only a soft and damp cloth to clean the control panel. CAUTION • Never use a sponge or scrubbing material. These will damage the painted and plastic parts. Cleaning the water inlet strainers There is a strainer at the end of each water inlet valve at the back side of the machine and also at the end of each water inlet hose where... -
Page 69: Cleaning The Drain Pump Filter
User maintenance instructions Cleaning the drain pump filter Filter system in your machine prevents solid items such as buttons, coins and fabric fibers clogging the pump impeller during discharging of the washing water. Thus, a good water discharge is achieved and the pump life is extended. - Page 70 User maintenance instructions 3. Follow the below procedures in order to drain water. If the product does not have an emergency water drain hose, in order to drain the water: a. In order to collect the water to flow out of the filter, place a large vessel in front of the filter.
-
Page 71: Descaling The Washer-Dryer
User maintenance instructions Descaling the washer-dryer Hard water can cause scale build-up inside the drum and other parts of your machine in time. Scaling may lead to some serious problems such as clogging in hoses, heater or pump failure eventually. To prevent scaling, wash drum should be cleaned frequently. -
Page 72: Troubleshooting
8 Troubleshooting Problem Reason Solution * Press and hold the On / A program The product may have switched to self protection Off button for 3 seconds to cannot be mode due to a supply problem reset the product to factory started or settings. (See "Canceling the (line voltage, water pressure, selected. - Page 73 Troubleshooting Problem Reason Solution * Stablize the product by Product vibrates Product might be standing unbalanced. adjusting the feet. or makes noise. A hard substance might have * Clean the pump filter. entered into the pump filter. Transportation safety bolts are * Remove the transportation safety bolts.
- Page 74 Troubleshooting Problem Reason Solution * Connect the water draining Product directly Draining hose might not be at an adequate height. hose as described in the discharges the operation manual. water it takes in. No water can be Water is inside the invisible * This is not a failure.
- Page 75 Troubleshooting Problem Reason Solution * Product waits until taking Washing takes Water pressure is low. in an adequate amount longer than of water to prevent poor specified in the washing quality due to the manual.(*) decreased amount of water. Therefore, the washing time extends.
- Page 76 Troubleshooting Problem Reason Solution * Timer indicator will not Program time Timer may stop during water intake. countdown until the product does not takes in an adequate amount countdown. (On of water. The product will models with wait until there is a sufficient display) (*) amount of water to avoid poor washing results due to...
- Page 77 Troubleshooting Problem Reason Solution * Use the recommended Washing Insufficient amount of detergent has been used over amount of detergent performance is a long period of time. appropriate for water poor: Laundry hardness and type of laundry. turns * Select the proper Washing was made at low Grey.
- Page 78 Troubleshooting Problem Reason Solution * Select the proper program Washing Wrong program cycle and cycle and temperature for the performance temperature might have been laundry to be washed (See is poor: Stains “Laundry Tips” & “Program selected. could not Cycle Selection”). be removed. * Use the recommended Laundry could amount of HE detergent...
- Page 79 Troubleshooting Problem Reason Solution * Washer must be operated Washing Oily accumulations of prior wash cycles on the drum may empty at “Tub Sanitize” cycle performance have stuck to the laundry. with detergent. is poor: Oily The detergent may have stains appear on * Softener should not come been placed into the wrong...
- Page 80 Troubleshooting Problem Reason Solution * There may be an imbalance Rinsing of laundry in the machine. performance is The laundry in the drum poor. may be tangled up too much. Laundry should be Intermediate spins may be rearranged and re-spun. No spinning is performed when skipped.
- Page 81 Troubleshooting Problem Reason Solution * If detergent is put in the Laundry does Detergent is put in the wrong compartment. prewash compartment not smell like the when the prewash cycle is softener. (**) not selected, the product can take this detergent during the rinsing or softener step.
- Page 82 Troubleshooting Problem Reason Solution * Use HE detergent. Too much foam Not using HE detergent forms inside the * Use only a sufficient amount Excessive amount of detergent is used. of detergent. product. (**) Detergent was stored under * Store detergent in a closed improper conditions.
- Page 83 Troubleshooting Problem Reason Solution * Do not unload the machine. Operate a quick wash cycle (e.g. Delicates, Wools) without any detergent. Load is still too Add 1-2 tablespoon of soapy / Machine Not using HE detergent / fabric softener into main is full of suds Using excessive amount of wash compartment of...
- Page 84 Troubleshooting Problem Reason Solution * Do not load the machine in Clothes get Excessive laundry might have been loaded in. excess. tangled up too much in the Washing many items of the * Load the wash drum with same type or size of clothes drum when items of different sizes.
- Page 85 Troubleshooting Problem Reason Solution * Do not load the machine in Drying lasts too Excessive laundry loaded. excess. long. Laundry is not spun enough. * Spin at a higher spin speed in washing step in the Dryer- Washing Machine. * Turn on the taps. Tap is turned off.
- Page 86 Troubleshooting Problem Reason Solution * If door locked indicator is still Loading door Your machine’s door is not opened for safety reasons. active on display after drying, cannot be machine keeps the loading opened. door locked until it cools for your safety.
-
Page 87: Warranty Statement For The Blomberg Clothes Washer-Dryer
Service must also be performed by an authorized Blomberg service agency. (Cosmetic defects must be reported within 10 business days from installation) 2 year * ++ limited warranty from date of first installation (Parts only) Blomberg will repair or replace any parts at no cost to the consumer if material defects or workmanship have caused the damage or failure of these components. -
Page 88: How To Get Service
10 HOW TO GET SERVICE Please contact the Distributor for your state as listed on the Distributor Contact List, or call our Toll Free Number at 1 800 459 9848 for direction to an Authorized Blomberg Service Agent. 88 / English Front-Loading Automatic Washer-Dryer... - Page 92 www.blomberginternational.com info@blomberginternational.com Document Number : 2820525511_EN / 11-04-18.(14:40)