
Related Manuals for turbofan EC40D5


Summary of Contents for turbofan EC40D5
- Page 1 EC40 SERIES C OM BI NA TIO N O V E N W I TH D IRE C T S T E A M V E R S I O N D U S E R ’ S M A N U A L CAUTION: Read the instructions prior to using the equipment 240066-1...
- Page 2 NTERNATIONAL CONTACTS AUSTRALIA Moffat Pty Limited Web: www.moffat.com.au E.Mail: vsales@moffat.com.au Main Offi ce: (tel) +61 (03) 9518 3888 (fax) +61 (03) 9518 3833 Service: (tel): 1800 622 216 Spares: (tel): 1800 337 963 Customer Service: (tel): 1800 335 315 (fax): 1800 350 281 CANADA Serve Canada...
- Page 3 Cooking is science, it’s the cook who makes it an art Dear Client, Congratulations on your new oven purchase. Your job will be easier with consistently great results, thanks to the innovative technological solutions featured in the oven. We recommend you carefully read the warnings and advice contained in this manual. This will make it easier to use your new oven and maintain its performance over time.
-
Page 4: Table Of Contents
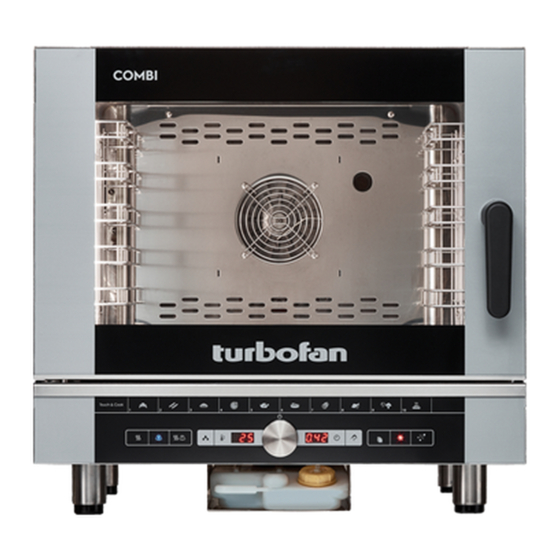
EC40D5 = Turbofan Combi Oven Electric - 5 Tray Digital. EC40D7 = Turbofan Combi Oven Electric - 7 Tray Digital. EC40D10 = Turbofan Combi Oven Electric - 10 Tray Digital. CAPACITY EC40D5 = 5 x GN 1/1 - 5 x 600x400... -
Page 5: General Warnings
1 • GENERAL WARNINGS Interventions that will become necessary over time, as well as special oven maintenance, must only be carried out by the manufacturer's personnel or by an authorised technical help service. • Read the warnings in this manual carefully as they provide important information regarding safe use and maintenance. - Page 6 1 • GENERAL WARNINGS • If technical assistance is required, all information included in the ID plate must be provided, as well as detailed information about the fault so as to make it easier for the help service to understand and resolve the problem.
- Page 7 2 • POINTS TO REMEMBER • Before any food is cooked in a new oven, the interior must be thoroughly cleaned (See “Section 21.Special Programs - Manual Cleaning”). • CAUTION • At the end of the working day, clean the No cooking with alcohol added is oven thoroughly inside and out;...
-
Page 8: Description Of Buttons
3. DESCRIPTION OF DISPLAY & BUTTONS 1 - General switch - setting/selection knob 8 - Cooking time display (none/set), product core 2 - Convection mode button temperature display (real/set), Touch & Cook button 3 - Steam mode button display 4 - Combined convection/steam mode button 9 - Cooking time button 5 - Automatic moisture control activation button, manual 10 - Button to start cooking with core probe... - Page 9 3 • DESCRIPTION OF DISPLAY & BUTTONS 3.1 • GENERAL SWITCH / SCROLL & PUSH 3.5 • AUTOMATIC MOISTURE CONTROL KNOB (KNOB 1) BUTTON (BUTTON 5) Activates control panel, activates self- This button also manually supplies moisture diagnosis. if pressed after cooking has begun (button To turn on, press knob 1 for 3 seconds.
- Page 10 3 • DESCRIPTION OF DISPLAY & BUTTONS 3.6 • TEMPERATURE (BUTTON 6) 3.8 • FAN SPEED (BUTTON 12) Used to set the temperature of the cooking Button to select fan speed; normal with light chamber. off, low speed and low power with light on. Note: Open door rapid cooling 3.7 •...
-
Page 11: Manual Settings For Cooking With Timer
4 • MANUAL SETTINGS FOR COOKING WITH TIMER OPERATIONS 4.1 • TURNING THE OVEN ON Insert products for cooking into cooking Press knob 1 for 3 seconds. If an error chamber. Also see “Section 14 Setting the code appears on displays 7-8, see Core Probe”. -
Page 12: Manual Settings For Cooking With Probe
5 • MANUAL SETTINGS FOR COOKING WITH PROBE OPERATIONS 5.1 • TURNING THE OVEN ON NOTE: While cooking, if it becomes Press knob 1 for 3 seconds. If an error necessary to switch to timed cooking, code appears on displays 7-8, see “Section press button 9 and set the desired time. -
Page 13: Setting A Programme With Sequential Cycles
6 • SETTING A PROGRAMME WITH SEQUENTIAL CYCLES (UP TO 4) OPERATIONS 6.1 • TURNING THE OVEN ON • SETTING THE TEMPERATURE FOR Press knob 1 for 3 seconds. If an error CYCLE 1 code appears on displays 7-8, see “Section Press button 6, the temperature will flash 22 - Self-Diagnosis and Error Guide". - Page 14 6 • SETTING A PROGRAMME WITH SEQUENTIAL CYCLES (UP TO 4) OPERATIONS • SELECTING CYCLE 2 AND 6.8 • STARTING THE SET PROGRAMME SUBSEQUENT (UP TO 4 CYCLES) Press the flashing cooking mode button Press button 11, the second flashing LED (2 - 3 - 4) to start cooking.
-
Page 15: Selecting And Starting A Recorded Programme
7 • SELECTING AND STARTING A RECORDED PROGRAMME OPERATIONS • TURNING THE OVEN ON Viewing and changing saved values Press knob 1 for 3 seconds. If an error If it becomes necessary to check the set code appears on displays 7-8, see “Section values during cooking, press button 11, the 22 - Self-Diagnosis and Error Guide". -
Page 16: Deleting A Recorded Programme
8 • DELETING A RECORDED PROGRAMME • TURNING THE OVEN ON 8.3 • DELETING Press knob 1 for 3 seconds. Press button 11 for 3 seconds, display 8 will read [ESC], turn knob 1 until [DEL] • RECALLING appears on display 8 and confirm the Press Recipe button 11, the display will read deletion by pressing button 9. -
Page 17: Selecting And Starting A Recorded Recipe
10 • SELECTING AND STARTING A RECORDED RECIPE OPERATIONS 10.1 • TURNING THE OVEN ON Press knob 1 for 3 seconds. If an error Viewing the set values code appears on displays 7-8, see “Section If it becomes necessary to check the 22 - Self-Diagnosis and Error Guide". -
Page 18: Temporarily Modifying A Recorded Programme/Recipe
11 • TEMPORARILY MODIFYING A RECORDED PROGRAMME / RECIPE Premise T h i s m a y b e n e c e s s a r y w h e n t h e The oven allows the temporary modification programme/recipe is recorded for a o f t h e re c o rd e d p ro g r a m m e / re c i p e product with a different entity, therefore... -
Page 19: Starting A Touch & Cook Programme
12 • STARTING A TOUCH & COOK PROGRAMME Premise The Touch & Cook function allows 10 pre-set It is possible to select your preferred cooking cooking programmes, identified by icons, programme with just one finger, quickly and which can be instantly started. easily (function ideal for standardised and repetitive cooking). -
Page 20: Modifying A Touch & Cook Programme
13 • MODIFYING A TOUCH & COOK PROGRAMME OPERATIONS 13.1 • TURNING THE OVEN ON 13.3 • RECORDING Press knob 1 for 3 seconds. Press the Touch & Cook button 14 that you intend to link with the Recipe/Programme 13.2 • RECALLING for 3 seconds. -
Page 21: Setting The Core Probe
14 • SETTING THE CORE PROBE Premise The core probe allows cooking regulated The core probe can easily be used as a by the product's core temperature. The portable thermometer. In fact, with the oven oven stops the cooking process as soon on in any time mode, when button 10 is as the core of the product reaches the set pressed, display 8 shows the temperature... - Page 22 14 • SETTING THE CORE PROBE 14.2 • RECOMMENDATIONS FOR USING Optional: on request, it is possible to CORE PROBE select another needle probe to monitor The position of the core probe in cooking a vacuum temperature or that of small- operations using this device is very important: sized products.
- Page 23 14 • SETTING THE CORE PROBE 14.3 • EXAMPLES OF CORE TEMPERATURES BEEF LAMB FILLET from 52°C to 57°C from 72°C to 76°C ROAST BEEF from 48°C to 55°C RACK from 72°C to 76°C ROASTS from 78°C to 84°C POULTRY BOILED from 87°C to 90°C CHICKEN BREAST...
-
Page 24: Automatic Moisture Control System
15 • AUTOMATIC MOISTURE CONTROL SYSTEM Premise This is particularly useful in the case of The AUTOMATIC MOISTURE CONTROL fresh products that may not have the same SYSTEM ensures a constant moisture level moisture characteristics every day, but in the cooking chamber when cooking in which once cooked, will always have the convection or combined cycle modes. -
Page 25: Operating Details
16 • OPERATING DETAILS PREMISE During cooking (fixed led light) the displays It is nonetheless possible to check the set show the real values (of the current values. To do this, perform the following situation). actions: OPERATIONS 16.1 • VIEWING SET 16.3 •... -
Page 26: Useful Tips
17 • USEFUL TIPS 17.1 • PREHEATING THE OVEN 17.3 • FROZEN/DEEP-FROZEN PRODUCTS The oven preheating cycle is extremely The oven must be preheated and loaded important and useful for successful respecting the quality and nature of these cooking. foods. For example, frozen spinach must A s a g e n e r a l r u l e , a l w a y s p re h e a t not be hit with temperatures that are too the cavity when empty, setting the... -
Page 27: Removing The Control Panel (Version D)
18 • REMOVING THE CONTROL PANEL (Version D) The following are the instructions for removing the control panel to replace the control board or the glass panel. 18.1 • REMOVING THE CONTROL PANEL 18.2 • REPLACING THE CONTROL BOARD KEYPAD Disconnect the power supply to the oven. -
Page 28: Routine Maintenance
19 • ROUTINE MAINTENANCE 19.1 • PERIODICALLY ... 19.2 • PROLONGED DISUSE ... It is recommended to clean the If the oven is to stand idle for any length deflector and pan racks as necessary. of time (e.g. holidays or seasonal closing) For this purpose, proceed as follows: it must be cleaned thoroughly, leaving •... - Page 29 21 • SPECIAL PROGRAMMES MANUAL AND AUTOMATIC CLEANING • PROPER CLEANING ... • CAUTION ...is the key to impeccable cooking and Do not throw water or pressurised cleaning improved final products: water directly onto the external walls of the • the flavour of products does not change; oven.
- Page 30 21 • SPECIAL PROGRAMMES MANUAL CLEANING 21.1 • A C T I VAT I N G M A N U A L C L E A N I N G CYCLE [CL] Press button 13, display 7 will read [CL], If consistent dirt residue is deposited on the press knob 1 to confirm.
- Page 31 21 • SPECIAL PROGRAMMES CLEANING KIT The oven is supplied with a Cleaning Kit The display reads [rAF] if the chamber that allows the activation of five cooking temperature is too high, or [Att] if the chamber cleaning cycles: chamber temperature is too low. Cleaning programmes RINSE [riS], ECO •...
- Page 32 21 • SPECIAL PROGRAMMES CLEANING KIT 21.3 • R E P L A C I N G T H E D E T E R G E N T CARTRIDGE If when calling up the automatic wash REPLACING THE CARTRIDGE: p ro c e d u re E C O [ E C o ] , S O F T [ S C ] , Unscrew the cap of the empty cartridge and MEDIUM [MC], or HARD [hC], display 8...
-
Page 33: Self-Diagnosis And Errors Guide
22 • SELF-DIAGNOSIS AND ERROR GUIDE 22.1 • When the oven is turned on via the main 22.2 • If on the other hand the oven detects switch, an electronic check of the main errors, these will be shown on display 7. functions will automatically be performed. - Page 34 22 • SELF-DIAGNOSIS AND ERROR GUIDE The main error messages are: ERROR MESSAGE “ E 1 ” Intervention by motor's thermal protective device. Immediately turn off the oven and call the technical support service. “ E 2 ” Intervention by cooking chamber safety thermostat. Immediately turn off the oven and call the technical support service.
-
Page 35: Pre-Recorded Recipes
23 • PRE-RECORDED RECIPES Cooking Cycle % of humidity / Vent position 100% Vent Closed Mode Vent Open Convection cooking mode Steam cooking mode Ventilation speed (* where present) Combi convection/steam cooking mode Standard speed Reduced speed Oven Temperature Cooking Time Core Temperature 240066-1... - Page 36 24 • PRE-RECORDED RECIPES Frozen patisserie Grilled Mode Mode ∞ ∞ °C 100% °C °C °C 5’ 100% 10’ °C 10’ Meat roasts °C 10’ Mode Frozen bread ∞ °C 100% Mode °C 25’ ∞ °C °C 100% 20’ °C 10’...
- Page 37 NOTES 240066-1...
Need help?
Do you have a question about the EC40D5 and is the answer not in the manual?
Questions and answers