Advertisement
Quick Links
COOKING FUNCTIONS
Make sure to place cooking pot in the main housing at all times, with all cooking functions. When
adding ingredients to pot, do not exceed the Maximum Level marker.
FUNCTION
ADD INGREDIENTS TO
PRESSURE
COOK
STEAM
SLOW COOK
AIR CRISP
ROAST
BROIL
DEHYDRATE
SEAR/SAUTÉ
TENDERCRISP™
TECHNOLOGY
QUESTIONS? We're here to help. Call 1-877-646-5288 or visit ninjakitchen.com
1. Press button of the cooking function
you want to use.
2. To set cooking temperature or pressure,
turn START/PAUSE dial.
3. To set cooking time, press TIME button,
then turn START/PAUSE dial.
4. To begin cooking, press START/PAUSE.
NOTES
There are two ways to release pressure when cooking
is complete. For quick pressure release, press and turn
PRESSURE RELEASE button on pressure cooker lid
clockwise. For natural release, leave the unit untouched
for the amount of time your recipe calls for, then quick
release any remaining pressure.
Place ingredients on reversible layered rack and add
water to cooking pot.
To shake ingredients for even cooking, open lid,
attach handle to basket, pick up basket by attached
handle, and shake. When done, set basket back
down, remove handle, and close lid.
Use the Reversible Layered Rack in the broil
orientation.
Use the bottom of the Cook & Crisp™ basket for
your first layer and the double-layer insert to double
your dehydrating capacity. A 5-layer dehydrating
accessory can be ordered from ninjaccessories.com
Wait for the surface and oil to become hot before
adding ingredients.
Combine two different functions for meals done
quickly that are crispy on the outside and tender
on the inside.
Please make sure to read the enclosed Ninja® Owner's Guide prior to using your unit.
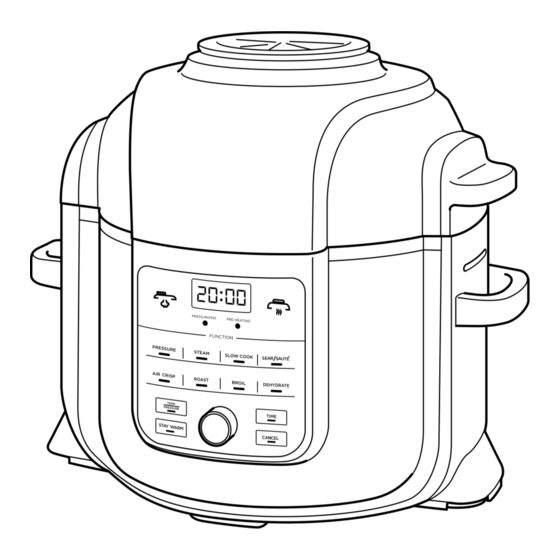
FOODI™ COOKER
QUICK ASSEMBLY AND GETTING STARTED
YOUR FOODI COOKER
A
E
F
G
Pressure Cooker Lid
A
Pressure Release Valve
B
Red Float Valve
C
Pressure Release Button
D
Removable Cooking Pot
E
Hinged Lid
F
NINJA is a registered trademark of SharkNinja Operating LLC.
COOK & CRISP, FOODI, and TENDERCRISP are trademarks of SharkNinja Operating LLC.
QUESTIONS? We're here to help. Call 1-877-646-5288 or visit ninjakitchen.com
OP400Series_QSG_EB0_180126
PARTS
B
C
D
H
J
K
Main Housing
G
Double-Layer Insert
H
Reversible Layered Rack
I
Detachable Handle
J
Cook & Crisp™ Basket
K
Detachable Diffuser
L
I
I
Advertisement

Related Manuals for Ninja Foodi


Summary of Contents for Ninja Foodi
- Page 1 OP400Series_QSG_EB0_180126 Please make sure to read the enclosed Ninja® Owner’s Guide prior to using your unit. COOKING FUNCTIONS Make sure to place cooking pot in the main housing at all times, with all cooking functions. When FOODI™ COOKER adding ingredients to pot, do not exceed the Maximum Level marker.
- Page 2 ASSEMBLY AND USE COOKING FUNCTIONS HINGED LID AND PRESSURE COOKER LID PRESSURE RELEASE BUTTON AND SLOW COOK/STEAM HINGED LID TO SEAL PRESSURE TO PULSE VENT AND QUICK RELEASE BUTTON RELEASE PRESSURE The hinged lid should be used only with the AIR CRISP, BROIL, ROAST and DEHYDRATE functions.
Need help?
Do you have a question about the Foodi and is the answer not in the manual?
Questions and answers