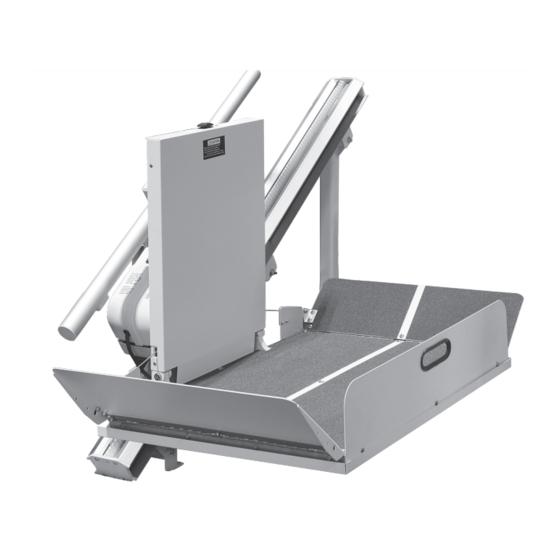
Harmar Mobility IL500 Sierra Inclined Platform Lift Installation & Service Manual
Hide thumbs
Also See for IL500 Sierra Inclined Platform Lift:
- Owner's manual and warranty information (12 pages)
Table of Contents
Advertisement
Quick Links
IL500 Sierra Inclined
Platform Lift
Installation & Service Manual
IMPORTANT: Read and understand this manual thoroughly
before attempting to install or operate the lift. If you have any
questions, please contact your Authorized Harmar Dealer or
Harmar's Technical Service Department.
P 800-833-0478 | F 866-234-5680 | TECH@HARMAR.COM
20180221 PN: 630-00001 REV C
www.harmar.com | 800-833-0478
Dealer Name & Contact Information:
Serial # of Your Lift:
Advertisement
Table of Contents

Related Manuals for Harmar Mobility IL500 Sierra Inclined Platform Lift


Summary of Contents for Harmar Mobility IL500 Sierra Inclined Platform Lift
- Page 1 IL500 Sierra Inclined Platform Lift Installation & Service Manual www.harmar.com | 800-833-0478 IMPORTANT: Read and understand this manual thoroughly Dealer Name & Contact Information: before attempting to install or operate the lift. If you have any questions, please contact your Authorized Harmar Dealer or Harmar’s Technical Service Department.
-
Page 2: Table Of Contents
Contents NOTE: New Control Board & SPECIFICATIONS Charging System On Sierra Inclined PRELIMINARY CHECKS Platform Lifts (IL500) Headroom ..........4 Tools Required ........4 All Sierra Inclined Platform Lifts manufactured since June 30, 2014 were shipped with an Included Parts .........4 improved Control design. INSTALLATION PROCEEDURES 5 The new Control Board affects Sierra Inclined Platform Installation ..........5-13... -
Page 3: Specifications
Upper and Lower Landing Limits Upper and Lower Final Limit Ramp Obstruction Sensors Under Platform Safety Pan Obstruction Sensors Drive Chassis Obstruction Sensors Non-skid Surface Emergency stop IL500 Sierra Inclined Platform Lift - Installation & Service Manual TEC0029 2016SEPT12 PN: 630-00001 REV C... -
Page 4: Preliminary Checks
Preliminary Checks HEADROOM Before beginning installation, ensure that there is an 85-inch vertical clearance top and bottom for the lift. TOOLS REQUIRED • Cordless drill • Nut driver (3/8” and 5/16”) • Phillips screwdriver (#3) • T30 Torx bit (included) •... -
Page 5: Installation Proceedures
#14 wood lags provided with each leg. The top end of the rail will typically stop short of the top landing and never needs to extend beyond. [Figure 5-5] IL500 Sierra Inclined Platform Lift - Installation & Service Manual TEC0029 2016SEPT12 PN: 630-00001 REV C... - Page 6 Installation Procedures 5. Mark the location for the upper guide rail. Measure from the leg base plate up the wall 36.25” (as indicated by the red vertical line). Measure in the center of the leg and use a 3 or 4’ level to ensure that the leg is plumb vertically.
- Page 7 Plug the connectors into each other. 12. Secure cable with wire ties through hole in platform support. [Figure 7-4] Figure 7-4 IL500 Sierra Inclined Platform Lift - Installation & Service Manual TEC0029 2016SEPT12 PN: 630-00001 REV C...
- Page 8 Installation Procedures 13. Connect harnesses to Platform Ramp Circuit Board Connect the communications cable to COMM. Connect the Black/Green wire to ‘BATT+’. Connect the ground wire to ‘BATT‐‘. [Figure 8-1] Connect the ground wire to BATT- Figure 8-1 Connect the Connect the black/green communications...
- Page 9 Install the Hand Rail end plates into each end of the Hand Rail. [Figure 9-3] Figure 9-3 IL500 Sierra Inclined Platform Lift - Installation & Service Manual TEC0029 2016SEPT12 PN: 630-00001 REV C...
-
Page 10: Free Standing Post Install
Installation Procedures 19. Plug in the power supply. The top and bottom of the rail each have a short wire and plug coming from the rail end. Plug the power supply into one of these plugs and plug the other end of the power supply into a wall outlet. - Page 11 Use if no wall is present thru the entire staircase and using free standing post. [Figure 11-2] Attaches to the stair riser. Figure 11-2 IL500 Sierra Inclined Platform Lift - Installation & Service Manual TEC0029 2016SEPT12 PN: 630-00001 REV C...
- Page 12 Installation Procedures Correct and incorrect way of mounting. Incorrect way of mounting. Correct way of mounting. Mounting of handrail, and track. | www.harmar.com | 800-833-0478 TEC0029 2016SEPT12 PN: 630-00001 REV C...
- Page 13 Installation Procedures Example of mounting free standing post on stair treads. IL500 Sierra Inclined Platform Lift - Installation & Service Manual TEC0029 2016SEPT12 PN: 630-00001 REV C...
-
Page 14: Remote Call/Send Controls
Remote Call/Send Controls REMOTE CONTROL PROGRAMMING If there are multiple lifts in the home, the infra-red remote controls can be programmed to work with individual lifts. 1. Remove the battery door on each IR remote. 2. Move the dip switches to a different code. The two remotes must be set to the same code. 3. -
Page 15: Completion Procedures
Repeat the above steps until the lift stops in the desired position. DO NOT ride on the lift until the install is complete. YOUR LIFT IS NOW WARNING READY TO OPERATE. IL500 Sierra Inclined Platform Lift - Installation & Service Manual TEC0029 2016SEPT12 PN: 630-00001 REV C... - Page 16 Notes | www.harmar.com | 800-833-0478 TEC0029 2016SEPT12 PN: 630-00001 REV C...
- Page 17 Notes IL500 Sierra Inclined Platform Lift - Installation & Service Manual TEC0029 2016SEPT12 PN: 630-00001 REV C...
- Page 18 IL500 Sierra Inclined Platform Lift www.harmar.com | 800-833-0478 2075 47th Street Sarasota, Florida 34234 Installation & Service Manual ©2016 HARMAR, LLC, ALL RIGHTS RESERVED 20180221 PN: 630-00001 REV C...
Need help?
Do you have a question about the IL500 Sierra Inclined Platform Lift and is the answer not in the manual?
Questions and answers