Advertisement
Quick Links
For the following models:
8204/8254
8206/8256
8207/8257
SafetyCheCklist
KeeP unqualified/unauthorized personnel away from test area
arrange test stations in a safe and orderly manner
never touch products or connections during a test
StOP the test first in the event of a problem
never perform a ground bond test on energized circuitry or equipment
be Sure to always connect the return test lead first
handle test clips by insulation only, never touch clips directly
WARNING: this GUiDe WAs CReAteD FOR
OPeRAtORs hAViNG sOMe FAMiliARitY With
eleCtRiCAl sAFetY testiNG. AN eleCtRiCAl sAFetY
testeR PRODUCes VOltAGes AND CURReNts thAt
CAN CAUse hARMFUl OR FAtAl eleCtRiC shOCk.
tO PReVeNt ACCiDeNtAl iNJURY OR DeAth, these
sAFetY PROCeDURes MUst Be stRiCtlY OBseRVeD
WheN hANDliNG AND UsiNG A test iNstRUMeNt.
Advertisement

Related Manuals for Associated Research Omnia II Series


Summary of Contents for Associated Research Omnia II Series
- Page 1 For the following models: 8204/8254 8206/8256 8207/8257 SafetyCheCklist KeeP unqualified/unauthorized personnel away from test area arrange test stations in a safe and orderly manner never touch products or connections during a test StOP the test first in the event of a problem never perform a ground bond test on energized circuitry or equipment be Sure to always connect the return test lead first handle test clips by insulation only, never touch clips directly...
-
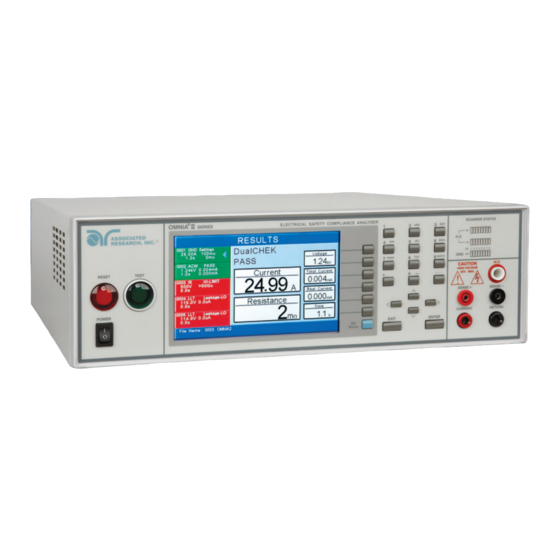
Page 2: Front Panel Controls
frOntPANelcOntrOlS Reset Button: Red momentary contact switch used to reset the instrument in case of a failure or to proceed to the next test. Also serves as an abort signal to stop any test in progress. test Button: Green momentary contact switch used to start a test. GRAPHIC tFt: 800 X 480 Color tFt display. - Page 3 frOntPANelcOntrOlS sense (+) teRMInAL: Connector used to attach the (+) sense lead for 4-wire kelvin current measurement. this connection provides for accurate current measurement during the Ground Bond test. CuRRent outPut teRMInAL: Connector used to attach the high current output lead, adapter box high current lead or test fixture high current lead to the instrument.
-
Page 4: Back Panel Controls
bacKPANelcOntrOlS (Model 8204/8254, Back Panel) CALIBRAtIon Button: to put the instrument into the calibration mode push this button and turn on the power switch simultaneously. sCAnneR ConneCtoR: For connection of optional external scanner. ReMote sIGnAL outPut: 9-Pin D sub-miniature female connector for monitoring PAss, FAil, and PROCessiNG output relay signals. - Page 5 bacKPANelcOntrOlS (Model 8206/8256 & 8207/8257, Back Panel) Dut PoweR InPut: Provides line and neutral input power connections. the input is rated for 0-277 V 50/60 hz. ReMote outPut: Optional connector used to interface the OMNiA ii with an APt AC power source for remote memory selection (option 05). L outPut teRMInAL: Output terminal where the line power connection from the adapter box is plugged in for the Functional Run test or line leakage test.
-
Page 6: Instrument Setup
InStruMentsetUP WarnIng: lOCAte A sUitABle testiNG AReA With A thRee-PRONG, GROUNDeD OUtlet. Be sURe thAt YOUR thRee-PRONG OUtlet hAs BeeN testeD FOR PROPeR WiRiNG. AlsO, MAke sURe YOU ReAD the sAFetY CheCklist OF this GUiDe BeFORe stARtiNG tO test. 1. Connect the line cord into the rear of the instrument and plug the male end of the cord into a grounded power source. - Page 7 changIngthetyPeOFteSt Once the test has been added, the parameters for the chosen test type will appear. Use the soft keys to edit parameters on the right side of the screen (examples: Frequency, Arc Detect and Ramp- hi). Use the arrow keys (up, down, left, right) to scroll between test parameters on the left side of the screen (examples: voltage, hi-limit t, lo-limit t, dwell time, ramp time, etc.).
- Page 8 changIngthetyPeOFteSt Use the soft keys to edit parameters on the right side of the screen. Use the arrow keys (up, down, right, left) to scroll between test parameters on the left side of the screen. Use the numeric keypad to change a parameter value. Once the desired value has been entered, press eXit to go back to the setup tests screen.
-
Page 9: Performing A Test
PerfOrMIngAteSt teSt cOnnectIOnS (8204/8254) the adapter box is an easy way to connect a Device Under test (DUt) that terminates in either a two or three-prong line cord. the following diagram shows how to connect the adapter box to the instrument and the DUt (see Figure 4). if you are testing a Class i product, you may elect to perform a Ground Bond test on the ground circuit of the DUt along with the hipot test. - Page 10 PerfOrMIngAteSt teSt cOnnectIOnS (8206/8256 & 8207/8257) Using the DUt output ports on the back panel, plug the line lead from the adapter box into the l terminal and the neutral lead into the N terminal. Next attach the red ground lead from the adapter box to the GND terminal. Attach the black case return lead into the case terminal.
- Page 11 PerfOrMIngAteSt teSt cOnnectIOnS there is no ground circuit on the DUt of a Class ii product. therefore, test leads may be utilized to connect the OMNiA ii to a DUt. (see Figure 6) Plug the black return lead into the Return terminal and black kelvin lead into the sense (-) lead.
- Page 12 QR code with your smartphone or visit www.asresearch.com/O2support For additional information about these and other key features of the OMNiA ii, please consult the full Operation and service Manual or call us toll-free 1-800-858-test (8378) or +1-847-367-4077 ©2012 Associated Research, inc. www.asresearch.com OMiNA ii 12/12...
Need help?
Do you have a question about the Omnia II Series and is the answer not in the manual?
Questions and answers