
Related Manuals for inbody BSM 370


Summary of Contents for inbody BSM 370
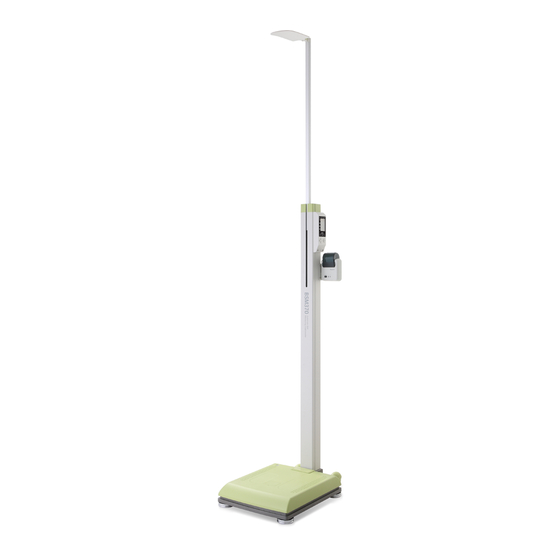
- Page 1 BSM370 USER’S MANUAL Thank you for purchasing the BSM370 automatic BMI measuring stadiometer. Please read manual prior to use and operate with care.
- Page 2 InBody is not liable for any damage caused by failure to meet the requirements in this user’s manual.
- Page 3 Introducing the BSM370 Thank you for purchasing this BSM series device. The BSM series is a sophisticated product line developed by InBody Co., Ltd. This product measures personal weight and height, thereby calculating BMI. It will help to improve health by comparing your BMI to the standards based on gender. It is also used to monitor health and fitness by observing the changes in BMI over the course of time.
-
Page 4: Table Of Contents
Contents Ⅰ How to use this manual Ⅱ Safety Information Ⅴ Indicators & Safety Symbols Ⅵ Workplace Requirements Chapter 1 Installation & Maintenance 1. Contents of the Box 2. Exterior & Functions 3. Installation Instructions 4. Connecting to Optional Equipment 5. - Page 5 1. Please read this manual thoroughly prior to BSM370 operation. 2.Take a few moments to review the manual of this product in order to understand configuration. 3. If you have clinical issues while using the BSM370, please contact InBody customer service. E-mail: info@inbody.com 4.
- Page 6 If the equipment is dismantled, the warranty is void, and service costs will be charged. If service is required, contact InBody or the supplying agency. 9. Follow local governing ordinances and recycling plans regarding the disposal or recycling...
- Page 7 4. This product must be installed on a flat and stable floor. If the floor is not level, it may cause harm or incorrect measurement. 5. Make sure you use the AC adapter provided by InBody. Using other AC adapters may cause malfunction of the product.
- Page 8 Always use the packing material and the original shipping box when moving or transporting this product. 4. Repair and examination should be conducted only by InBody’s professional Customer Service staff. Please contact InBody if needed. 5. The BSM370 fulfills the Standards of IEC61010-1(EN61010-1), Safety requirements of Electrical Equipment.
- Page 9 Indicators & Safety Symbols A. Indicators B. Safety Symbols...
- Page 10 Workplace Requirements A. Operation Environment 10 ~ 40 ℃ (50℉ ~ 104℉) Temperature range Relative humidity 30 ~ 75 % ≤ Atmospheric pressure range 70 ~ 106 kPa Rated operating altitude 2000 m Ⅱ Pollution degree B. Transport and Storage Environment -20 ~ 70 ℃...
-
Page 11: Chapter 1 Installation & Maintenance
Chapter 1. Installation & Maintenance 1. Contents of the Box 2. Exterior & Functions 3. Installation Instructions 4. Connecting to Optional Equipment 5. Transportation 6. Repacking 7. Correct Method for Transporting 8. Maintenance... -
Page 12: Contents Of The Box
1. Contents of the Box When opening the box, make sure all of the following items included. A. Included Items ① BSM370 ② Quick Reference ③ User’s manual CD ④ Adapter (12V, 3.33A) 1EA ⑤ Power cord (AC 250V, 10A, 1.8m (5ft. 10in.)) 1EA ⑥... - Page 13 ② Remote control device, Cable (2m,10cm (6 ft. 7 in., 4 in.)) ③ Y-type cable Remote control device is provided attached to the thermal printer. Always use the ③Y-type cable provided by InBody to ensure proper communication with the InBody and remote control device.
-
Page 14: Exterior & Functions
2. Exterior & Functions Individual part identification and functions with schematic sketches are provided below. Please inspect each component of the BSM370 for damage prior to installation. - Page 15 Do not drop any food or liquid on the BSM370. It may affect the electrical parts in the BSM370 or cause damage. Use only the power cord provided by InBody to connect to the power port. When using the adapter cable, insert the adapter cable tightly into the BSM370.
-
Page 16: Installation Instructions
3. Installation Instructions A. Workplace requirements (1) Location: Indoor only. This device is for indoor use only. (2) Operation environment: 10 ~ 40℃(50 ~ 104 °F), 30 ~ 75%RH, 70 ~ 106kPa (3) Adapter: Power Input 100-240V ~, 50/60Hz, 1.0A Power Output DC 12V, 3.33A Please check the height from the ground to the ceiling before installing BSM370. - Page 17 C. Unpacking & Assembling (1) When opening the box, check to make sure all the items are included. Place the BSM370 horizontal to the ground. (2) Raise the stand of the BSM370 carefully until it stands upright. Tighten the joint screw at the base where the stand and foot plate meet.
- Page 18 (3) After the upper part of the BSM370 is fixed, close the joint cover. (4) Loosen the screws for the head bar and raise until horizontal with floor. Then tighten the screws. Make sure the screw of the head bar is firmly fixed. If it is not, it can make the height measurement inaccurate.
- Page 19 (5) Use the bubble level indicator on the BSM370 to check it is leveled. Use the leveling screws underneath the foot plate of the BSM370 if it is not leveled. <Unleveled state> <Leveled state> <Raise> <Lower> If the equipment is not horizontally leveled, adjust the leveling screw on the opposite side of the bubble to place it at the center of the level indicator.
-
Page 20: Connecting To Optional Equipment
4. Connecting to Optional Equipment The BSM370 can be used with a thermal printer, a remote control device, and the InBody. You have to check the cable when connecting the optional devices to the BSM370. Please refer to the following pictures and connect the optional devices. - Page 21 Place the printer paper as illustrated in the picture. Pull the end of the paper out of the printer by 1cm Only the thermal printer provided by InBody can be used with the BSM370.
- Page 22 B. When you use InBody Necessary cables: Y-type cable, RS-232C cable Y-type Cable ① After connecting the RS-232C cable to the Y-type cable, ② Connect the RS-232C cable to the InBody.
- Page 23 C. When you use thermal printer and InBody Necessary cables: Y-type cable, Thermal printer cable, RS-232C cable Y-type Cable Connect the thermal printer cable to the Y-type cable. ① After connecting the RS-232C cable to the Y-type cable, ② Connect the RS-232C cable to the InBody.
- Page 24 D. When you use remote control device Necessary cables: Remote control device cable 10cm(4in.) Cable 2m(6ft. 7in.) Cable...
- Page 25 E. When you use remote control device and InBody Necessary cables: Y-type cable, Remote control device cable (2m,10cm (6 ft 7 in, 4 in) RS-232C cable 10cm(4in.) Cable 2m(6ft. 7in.) Cable ① After connecting the RS-232C cable to the Y-type cable,...
-
Page 26: Transportation
50 ~ 106kPa (No condensation) B. Transporting Before Installation Before installation, the BSM370 is shipped a packing box provided by InBody. Use a dolly or cart to move the box or have two people from both sides for safe transportation. -
Page 27: Repacking
Repacking Be sure to turn off the power switch and unplug the power cable before repacking. Be careful to avoid severe physical shock, jarring, or other damage while repacking, especially with regard to the head bar and operation panel. (1) In the home screen, press ▼ for 3 seconds until you hear a beep. The head bar will go down automatically. - Page 28 (5) Loosen the screw on the foot plate. Slowly fold the stand of the BSM370 carefully. <side of > the foot plate Use caution when handling screws to avoid injury. Do not touch the joint part by hand or with any other part of the body. Injury may be caused if contact is made with moving parts. (6) Put the BSM370 in the box (7) Seal the box with tape.
-
Page 29: Correct Method For Transporting
7. Correct method for Transporting Shown below is the correct method for transporting BSM370. While moving this product, be sure to protect against any physical shock or damage. (1) On the home screen, press ▼ for 3 seconds. Head bar will go down automatically. Turn off the power switch. -
Page 30: Maintenance
If the BSM370 is dismantled, the warranty is void, and service costs will be charged. If service is required, contact InBody or the supplying agency. (2) Do not place anything on the foot plate or apply any pressure when the BSM370 is not in use. - Page 31 This operation panel includes lithium coin-cell battery. Only for service personnel. Risk of Explosion if battery in the operation panel is replaced by an incorrect type.
-
Page 32: Chapter 2 Management & Results Description
Chapter 2. Management & Results Description 1. Exterior and Functions of Keypad 2. Connecting Power 3. Proper Posture 4. Measurement Mode 5. Results... -
Page 33: Exterior And Functions Of Keypad
1. Exterior and Functions of Keypad 1) LCD Monitor The monitor displays message or test results. Direction Button The directional buttons consist of up, down, left and right. This button is used when set for measurement mode or setting up the BSM370. - Page 34 ENTER/CLEAR Button ① ENTER : This button is used to store modified values at setup menu. ② CLEAR: Pressing this button to erases the result data on LCD right after test completion. Press it for 1 sec to return to the home screen. ③...
-
Page 35: Connecting Power
2. Connecting Power (1) Connect the BSM370 power adapter behind the foot plate. Make sure you use the power adapter provided by InBody, and the power cable provided by InBody. (2) Turn on the power switch. The head bar of BSM370 will automatically raise after turning the device on. -
Page 36: Proper Posture
Proper Posture Observing the following methodology is essential to achieving reliable results and accuracy. Keep the following instructions in mind during testing. As you can see in the picture below, the proper posture for measurement is standing straight and having your arms and legs spread naturally. Remove heavy clothing and accessories in order to achieve an accurate weight measurement. -
Page 37: Measurement Mode
4. Measurement Mode Press the 'MODE' button in the home screen. Using ▲,▼,◀,▶ buttons, select the desired mode. When finished, press 'ENTER' to save. You will return to the measurement home screen. Weight: Weight measurement mode ① : When the examinee steps on the foot plate, the screen shows the weight. - Page 38 Height : Height measurement mode ② : When the examinee steps on the foot plate, the height is automatically measured. ③ : When the examinee steps on the foot plate, you can measure height by pressing the 'ENTER' button.
- Page 39 : Weight and Height measurement mode After weight and height are measured, the screen will show the measured height, weight, and the calculated BMI. ④ : When the examinee steps on the foot plate, the weight and height are automatically measured. ⑤...
-
Page 40: Results
Results A. Weight, Height, BMI results screen When the test completes, the test result displays on LCD screen. The examinee can check the test result on LCD while he or she is on the foot plate. When the examinee steps down from the foot plate, the BSM370 will return to the home screen, which is also the stand-by screen before measurement. - Page 41 B. Output items BMI (Body Mass Index, kg/m Body Mass Index is a convenient way of assessing the degree of obesity. BMI is determined using only weight and height. Formula BMI = weight (kg) / height Determination 1) WHO Standard European weight classification based on the BMI method (WHO, 1998) BMI(kg/㎡) Classification...
-
Page 42: Chapter 3 Setup Establishment
Chapter 3. Setup Establishment 1. Setup 2. Setup Menu... -
Page 43: Setup
1. Setup The BSM370 functions to modify the setting for a user’s preference. The setup menu consists of weight offset, unit and date & time. Press the BSM370 'SETUP(▼)' button bring up the following screen. If you want to save the changes, press the ‘ENTER’... -
Page 44: Setup Menu
2. Setup Menu A. Weight Offset Press the BSM370 'SETUP(▼)' button to bring up the following screen. It is possible to adjust weight offset value. If weight adjustment is needed due to clothes or accessories, use the direction buttons(▲,▼) to select the desired offset value. (Calibration range: 0.0lb. - Page 45 C. Date & Time Press the '▶' button to advance from the unit screen. Use the direction buttons(▲,▼) to set the date and time. (1) Set the current year. (2) Set the current month and date. (3) Set the current hour and minute. D.
-
Page 46: Chapter 4 Problems & Solutions
Chapter 4. Problems & Solutions 1. Error Messages 2. Troubleshooting... -
Page 47: Error Messages
In this case, the height can be measured but the measured data may be incorrect. If you still have the problem after taking the following steps, contact the local distributor or InBody. For more contact information, please refer to page 37. Error Message... -
Page 48: Troubleshooting
If you still experience the problem after taking the following steps, contact the local distributor or InBody. . For more contact information, please refer to page 37. A. The BSM370 does not seem to run, even if the power switch is on. -
Page 49: Chapter 5 Appendix 1. Consumables
Chapter 5. Consumables 1. Consumables 2. Options 3. Specifications 4. Customer Service Information... - Page 50 1. Consumables Roll of Thermal Printer Paper Size : Width 57mm (2.24in.) External diameter 45mm (1.77in.) Only use the thermal printer paper provided by InBody.
-
Page 51: Options
2. Options A. Thermal Printer Only the thermal printer provided by InBody can be used with the BSM370. The thermal printer should be connected to the serial port. Please contact InBody or the local distributor of InBody for further information. -
Page 52: Specifications
DC 12V, 3.33A External Interface RS-232C 1EA Printer Thermal printer (Optional, the printers recommended by InBody) Dimension When Head bar is down : 380(W) X 510(L) X 1350(H) mm 15(W) X 20(L) X 53.1(H) inch When Head bar is up : 380(W) X 510(L) X 2126(H) mm 15(W) X 20(L) X 83.7(H) inch... -
Page 53: Customer Service Information
4. Customer Service Information InBody Co., Ltd. [HEAD OFFICE] InBody Bldg., 54, Nonhyeon-ro 2-gil, Gangnam-gu, Seoul 135-960 KOREA TEL: +82-2-501-3939 FAX: +82-2-578-2716 Website: http://www.inbody.com E-mail: info@inbody.com InBody [USA] 13850 Cerritos Corporate Dr., Unit C, Cerritos, CA 90703, USA TEL: +1-323-932-6503 FAX: +1-323-952-5009 Website: http://www.inbodyusa.com...
Need help?
Do you have a question about the BSM 370 and is the answer not in the manual?
Questions and answers