Samsung CLP-510 Series Setup Manual
Clp-510 series color laser printer
Hide thumbs
Also See for CLP-510 Series:
- Service manual (9 pages) ,
- Brochure & specs (4 pages) ,
- Manual del usuario (270 pages)
Table of Contents
Advertisement
Advertisement
Chapters
Table of Contents
Troubleshooting

Related Manuals for Samsung CLP-510 Series


Summary of Contents for Samsung CLP-510 Series
-
Page 2: Table Of Contents
Step 2. Installing the Transfer Belt and Toner Cartridges 7 Step 3. Loading Paper ... 14 Step 4. Connecting a Printer Cable ... 17 Step 5. For Local Printing ...17 For Network Printing ...18 Turning the Printer On ... 19 Step 6. -
Page 3: Step 1. Unpacking
AUTION and cassette. Use safe lifting and handling techniques. If you need to move the printer it should be moved by two people. Use the lifting handles located, as shown in the diagram (see page 5). Back injury could result if a single person attempts to lift the printer. - Page 4 – Free of temperature, sunlight, and humidity extremes or – Clean, dry, and free of dust AUTION do not, print quality problems can occur. ETUP UIDE ventilators fluctuations : You must place your printer on a level surface. If you...
-
Page 5: Step 2. Understanding Your Printer
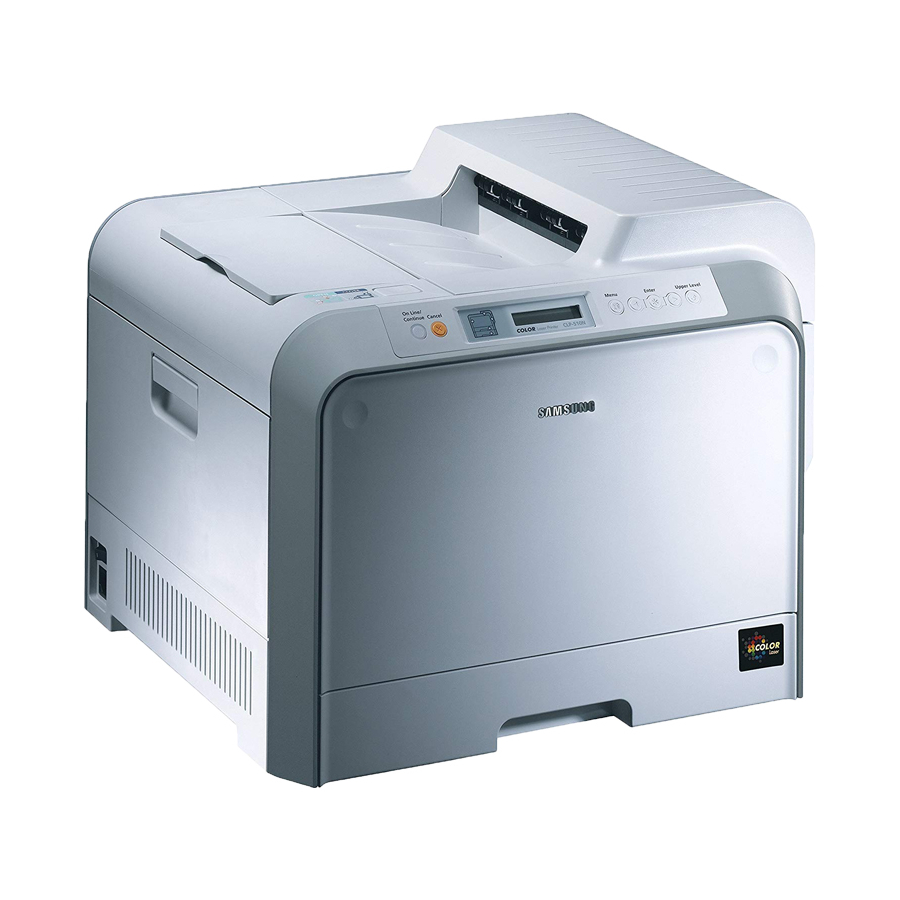
Understanding Your Printer Step 2. These are the main components of your printer: Top Cover (Open to install the transfer belt.) Output Support Top Cover Release Button Handle (Use it to lift the printer. Lifting handles are located at the lower edge of both sides of the printer.) - Page 6 Power Switch Power Receptacle * A wireless network card is not supplied with the printer. It is an option that must be purchased and installed separately. ** The network port is fitted as standard on the CLP-510N. CLP-510 users can purchase and install an optional network card separately.
-
Page 7: Step 3. Installing The Transfer Belt And Toner Cartridges
Installing the Transfer Belt and Toner Step 3. Cartridges Using the handle, completely open the left cover until it is at right angles to the main frame. : If the left cover is not completely open, the top cover AUTION release button will remain locked. - Page 8 Take the transfer belt out of the printer. : The image unit is already installed in your printer. Remove the protective devices on both side of the transfer belt. ETUP UIDE...
- Page 9 Locate the transfer belt slots inside the printer, one on each side. : To prevent damage, do not expose the imaging unit to AUTION light for more than a few minutes. Close the top and left covers should the insallation need to be halted for any reason.
- Page 10 Slide the transfer belt down into the printer and press it firmly into place. Firmly push the lock levers on each side toward the top cover, as shown below, to lock the transfer belt into place. AUTION minutes, the imaging unit can be exposed to light. This causes damage to the imaging unit.
- Page 11 : Do not try to close the left cover with the top cover AUTION open. This may cause damage to the printer. Take the toner cartridges out of their packages. : Do not use sharp objects, such as a knife or scissors, AUTION to open the toner cartridges packages.
- Page 12 Holding both sides of each of the toner cartridges, gently roll them from side to side to evenly distribute the toner. Place the toner cartridges on a flat surface, as shown, and remove the paper covering the toner cartridge by removing the tape.
- Page 13 3,000 pages or 7,000 pages for black and 2,000 pages or 5,000 pages for color. However, the toner cartridge that is shipped with the printer prints 3,000 pages for black and white, 2,000 pages for color.
-
Page 14: Step 4. Loading Paper
You can use A4 and letter-sized paper. To load paper: Pull the tray out of the printer. Push down on the metal plate until it locks into position. Flex the paper sheets back and forth to separate the pages and then fan them while holding one edge. - Page 15 Load paper with the print side facing up. Make sure that all four corners are flat in the tray and under the corner brackets, as shown below. Do not exceed the maximum stack height. Overfilling the tray may cause a paper jam. ETUP UIDE...
- Page 16 Do not press the guide too tightly against the edge of the paper as it will cause the paper to bend. refer to your printer’s User’s Guide on the CD-ROM. Slide the tray back into the printer. OTES •...
-
Page 17: Step 5. Connecting A Printer Cable
3m or less in length. Make sure that both the printer and the computer are turned off. Plug the USB printer cable into the connector on the back of the printer. Connect the other end of the cable to the USB port on your computer. -
Page 18: For Network Printing
The CLP-510N has a built-in network interface card. If you are a CLP-510 user, you need to install an optional network interface card. If you want to use the printer in both wired and wireless network environments, you need to install an optional wired/wireless network interface card. -
Page 19: Step 6. Turning The Printer On
Plug the other end into a properly grounded AC outlet and turn on the power. AUTIONS • Some parts inside of the printer may be hot when power is on, or after printing. Be careful not to burn yourself when working inside the printer. -
Page 20: Step 7. Printing A Demo Page
Printing a Demo Page Step 7. Print a demo page to make sure that the printer is operating correctly. To print a demo page: In ready mode, press and hold the Upper Level button ( the control panel for 2 seconds to print a demo page. -
Page 21: Step 9. Installing The Printer Software
See page 22. • Status Monitor. Appears when printing errors occur. For details, refer to chapter 5 in your printer’s User’s Guide on the CD-ROM. For help in viewing the User’s Guide, see page 30. -
Page 22: Installing Printer Software In Windows
Installing Printer Software in Windows Verify the following before you install the printer software: Operating system Free disk space Internet Explorer OTES • For Windows NT 4.0/2000/XP/2003, the system administrator should install the software. • Windows 95 and Windows NT 4.0 are only supported on the CLP-510N. - Page 23 If your printer is not already connected to the computer, when the following window opens, connect your printer to the computer and turn the printer on. Then click Next. Windows XP If the printer is already connected and turned on, this screen will not appear.
- Page 24 When the test page prints out correctly, click Yes. If not, click No to reprint it. To register yourself as a user of Samsung Printers in order to receive information from Samsung, select the checkbox and click Finish. You are now sent to the Samsung web site.
- Page 25 Otherwise, just click Finish. OTES • If your printer doesn’t work properly, reinstall the printer driver. • You can also print from Macintosh or Linux. For detailed information, refer to your printer’s User’s Guide on the CD-ROM. • After installation of the software, you can reinstall or remove the printer software, if necessary.
-
Page 26: Reinstalling Printer Software
Reinstalling Printer software You can reinstall the software if your installation fails. From the Start menu, select Programs ➔ Samsung CLP- 510 Series. Or place the CD-ROM into the CD-ROM drive. Select Maintenance. Select Repair. the following window will appear. -
Page 27: Removing Printer Software
When the test page prints out correctly, click Yes. If it doesn’t, click No to reprint it. When the reinstallation is done, click Finish. Removing Printer Software From the Start menu, select Programs Samsung CLP- 510 Series. Or place the CD-ROM into the CD-ROM drive. Select Maintenance. -
Page 28: Changing The Display Language
Changing the Display Language After installation of the software, you can change the display language. From the Start menu, select Programs. Select Samsung CLP-510 Series, and Language Selection. Select the desired language from the language selection window and click OK. -
Page 29: Step 10. Viewing The User's Guide
Viewing the User’s Guide Step 10. The Samsung CLP-510 Series User’s Guide, which is on the software CD-ROM, is in Adobe Acrobat PDF format. The manual will provide you flexibility and convenience in accessing information. You can view the manual on-screen in different formats (viewing a single page, continuous single page or continuous facing page, zooming in up to 1600% or out up to 12.5%, scrolling two-up... -
Page 30: In Linux
In Linux When the Administrator Login window appears, type in “root” in the login field and enter the system password. Insert the printer software CD-ROM. Click the terminal screen appears, type in: [root@local /root]# cd /mnt/cdrom [root@local cdrom]# gv manual/EnGuide.pdf : If your ghostscript version is old, you may not be able to see the pdf file. - Page 32 This manual is provided for information purposes only. All information included herein is subject to change without notice. Samsung Electronics is not responsible for any changes, direct or indirect, arising from or related to use of this manual. © 2004 Samsung Electronics Co., Ltd. All rights reserved.
- Page 33 Contact SAMSUNG WORLD WIDE If you have any comments or questions regarding Samsung products, contact the SAMSUNG customer care center. Country CANADA MEXICO U.S.A ARGENTINE BRAZIL CHILE COSTA RICA ECUADOR EL SALVADOR GUATEMALA JAMAICA PANAMA PUERTO RICO REP. DOMINICA TRINIDAD &...
- Page 34 MALAYSIA 1800-88-9999 PHILIPPINES 1800-10-SAMSUNG (7267864) SINGAPORE 1800-SAMSUNG (7267864) THAILAND 1800-29-3232 02-689-3232 TAIWAN 0800-329-999 VIETNAM 1 800 588 889 SOUTH AFRICA 0860 7267864 (SAMSUNG) U.A.E 800SAMSUNG (7267864) Web Site www.samsung.com/hu www.samsung.com/it www.samsung.lu www.samsung.com/nl www.samsung.com/no www.samsung.com/pl www.samsung.com/pt www.samsung.com/sk www.samsung.com/es www.samsung.com/se www.samsung.com/uk www.samsung.ru www.samsung.com/ur...
- Page 35 ONTENTS Introduction Chapter 1 : Special Features ... 1.2 Printer Components ... 1.4 Front View ... 1.4 Right Side View ... 1.5 Rear View ... 1.6 Using the Control Panel Chapter 2 : Understanding the Control Panel ... 2.2 Display ... 2.2 Buttons ...
- Page 36 Printing on Preprinted Paper ... 3.20 Printing on Card Stock or Custom-sized Materials ... 3.21 Printing Tasks Chapter 4 : Printer Driver Features ... 4.2 Printing a Document ... 4.3 Canceling a Print Job ... 4.4 Printer Settings ... 4.5 Layout tab ...
- Page 37 Replacing the Imaging Unit ... 6.14 Replacing the Transfer Belt ... 6.22 Cleaning the Printer ... 6.29 Cleaning the Outside of the Printer ... 6.29 Cleaning the LSU Inside the Printer ... 6.29 Cleaning the Inside of the Printer ... 6.30 Replacement Parts ...
- Page 38 Changing LLPR Properties ... B.10 Using Your Printer on a Network Appendix C : About Sharing the Printer on a Network ... C.2 Setting Up a Locally Shared Printer ... C.3 In Windows 95/98/Me ... C.3 In Windows NT 4.0/2000/2003/XP ... C.4 Setting Up a Network-Connected Printer ...
- Page 39 Supported Sizes of Paper ... E.5 Guidelines for Using Paper ... E.6 Paper Specifications ... E.7 Paper Output Capacity ... E.7 Paper Input Capacity ... E.7 Printer and Paper Storage Environment ... E.8 Envelopes ... E.9 Labels ... E.11 Transparencies ... E.11...
-
Page 40: Laser Safety Statement
Environmental and Safety Consideration Laser Safety Statement The printer is certified in the U.S. to conform to the requirements of DHHS 21 CFR, chapter 1 Subchapter J for Class I(1) laser products, and elsewhere, is certified as a Class I laser product conforming to the requirements of IEC 825. -
Page 41: Ozone Safety
However, it is advisable that the machine be operated in a well ventilated area. If you need additional information about ozone, please contact your nearest Samsung dealer. Recycling Please recycle or dispose of packaging materials for this product in an environmentally responsible manner. -
Page 42: Radio Frequency Emissions
Radio Frequency Emissions FCC regulations This device has been tested and found to comply with the limits for a Class B digital device, pursuant to Part 15 of the FCC rules. These limits are designed to provide reasonable protection against harmful interference in a residential installation. This equipment generates, uses and can radiate radio frequency energy and, if not installed and used in accordance with the instructions, may cause harmful interference to radio communications. - Page 43 This device should be used more than 20 cm (8 inches) from the body when wireless devices are on. The power output of the wireless device (or devices), which may be embedded in your printer, is well below the RF exposure limits as set by the FCC.
- Page 44 Directive 1999/5/EC. The product has been designed to work with the national PSTNs and compatible PBXs of the European countries: In the event of problems, you should contact the Euro QA Lab of Samsung Electronics Co., Ltd. in the first instance.
-
Page 45: Regulatory Compliance Statements
The power output of the wireless device or devices that may be embedded in your printer is well below the RF exposure limits as known at this time. Because the wireless devices (which may be embedded into your printer) emit less energy than is allowed in radio frequency safety standards and recommendations, manufacturer believes these devices are safe for use. - Page 46 extremities) is typical. This device should be used more than 20 cm (8 inches) from the body when wireless devices are on and transmitting. This transmitter must not be collocated or operation in conjunction with any other antenna or transmitter. Some circumstances require restrictions on wireless devices.
- Page 47 (Model Number) Manufactured at : 1) Samsung Electronics Co.,Ltd. #259, Gongdan-Dong, Gumi-City, 2) Shandong Samsung Telecommunications Co., Ltd. Sanxing Road, Weihai Hi-tech, IDZ Shandong Province, 264 209, China Place: M264 (factory name, address) We hereby declare, that all major safety requirements, concerning to CE Marking Directive[93/68/EEC]...
- Page 48 NTRODUCTION Congratulations on the purchase of your printer! This chapter includes: • Special Features • Printer Components...
-
Page 49: Introduction
• You can print up to 1200 x 1200 dpi (effective output). See page 4.9. • In black & white mode, your printer prints A4-sized paper at 24 ppm and letter-sized paper at 25 ppm (pages per minute). In color mode, A4/ letter-sized paper prints at 6 ppm. - Page 50 Expand the printer’s capacity • This printer has 64 MB of memory which can be expanded to 192 MB. • You can install an optional 500-sheet tray in your printer. This tray reduces how often you have to add paper to the printer.
-
Page 51: Printer Components
Printer Components Front View (Open to install the transfer belt.) Output Support Top Cover Release Button Handle (Use it to lift the printer.) Left Cover (Open fully to install toner cartridges and to press the top cover release button.) a large number of pages at once. Please make sure that you don’t touch the surface, and prevent children from approaching it. -
Page 52: Right Side View
Right Side View Handle (Use it to lift the printer.) Optional Tray 2 Jam Cover (Open to remove jams from the optional tray 2.) Right Cover (Open to remove paper jams.) Muti-purpose Tray (Open to load special print materials.) NTRODUCTION... -
Page 53: Rear View
Power Switch * A wireless network card is not supplied with the printer. It is an option that must be purchased and installed separately. ** The network port is fitted as standard on the CLP-510N. CLP-510 users can purchase and install an optional network card separately. -
Page 54: Using The Control Panel
SING THE ONTROL ANEL This chapter describes how to use the printer’s control panel. This chapter includes: • Understanding the Control Panel • Using Control Panel Menus... -
Page 55: Understanding The Control Panel
Understanding the Control Panel The control panel on the top right side of your printer has a display and seven buttons. Display Ready Offline Processing... Sleeping... See “Understanding Display Messages” on page 7.26 for a complete listing of all printer messages. -
Page 56: Buttons
Green Blinking Orange Blinking • The printer is off-line and cannot print. • The printer is in Power Save mode. When data is received, it switches to on-line automatically. • Press to enter menu mode. - Page 57 Button Description In menu mode, press to select the displayed sub menu item or to confirm the changed setting. The selected item is marked with an *. In menu mode, press to scroll through sub menu items or setting options. Pressing moves you to the next option and pressing sends you back to...
-
Page 58: Using Control Panel Menus
Accessing Control Panel Menus You can configure your printer from the printer’s control panel. You can also use the control panel menus while the printer is in use. In ready mode, press the Menu button ( the menu you want on the bottom line of the display. -
Page 59: Overview Of Control Panel Menus
Overview of Control Panel Menus The control panel menus are used to configure the printer. The control panel provides access to the following menus: Information (See page 2.6.) Configuration Menu Map Demo Page Setup (See page 2.9.) LCD Language Power Save... -
Page 60: Layout Menu
Item The demo page allows you to check to see Demo Page if your printer is printing properly. Menu Layout Use the Layout menu to define all settings relating to output. (*: the default setting) Item Options: Off*, Long Edge, Short Edge To print on both sides of paper, choose the edge as follows. -
Page 61: Printer Menu
Duplex Margin Printer This menu allows you to reset the printer settings or cancel the current job. Default Set Current Job SING THE ONTROL ANEL Item In this menu, you can set the margins for double-sided printing. You can increase or decrease the value in 0.1mm increments. -
Page 62: Color Menu
Note : You should use the Default setting for best color quality. Menu Setup Use the Setup menu to configure a variety of printer features. (*: the default setting) Item Options: English*, German, French, Italian, Spanish, Russian, Portuguese LCD Language... - Page 63 Options: 5 Minutes, 10 Minutes, 15 Minutes, 30 Minutes, 45 Minutes, 60 Minutes, 120 Minutes * 30 Minutes for USA, 120 Minutes for Europe When the printer does not receive data for an extended period of time, power consumption is automatically lowered. You can set how long the printer waits before going to power save.
- Page 64 Tray1 Pickroll , Tray2 Pickroll items are only for service technicians. • Alarm Shortage: This item determines how the printer behaves when consumables are low. Off: The printer does not display a warning message. On: The printer displays a warning message. Explanation These 2.11...
- Page 65 Network This menu lets you configure the network interface card installed in your printer according to how the network is set up. You can upgrade the firmware of the network interface card, and print the configuration. (CLP-510N, or CLP-510 with an optional network card).
- Page 66 Item You can select this item only when you IP Get Method to Static . This item lets you enter the IP address manually. Press the scroll button to set the value of IP Address the 1st byte between 1 and 255, and then press the Set the value for the 2nd, 3rd, and 4th byte the same way.
- Page 67 Netware Config Netware IPX Frame Type Reset Network Default Set Print Net CFG 2.14 SING THE ONTROL ANEL Item Options: On*, Off You can select whether or not to use the Netware protocol. If you select On, you can access the Config Netware menu item.
-
Page 68: Using Print Materials
RINT ATERIALS This chapter will help you understand the types of paper you can use with your printer and how to properly load paper in the different paper trays for the best print quality. This chapter includes: • Choosing Paper and Other Materials •... -
Page 69: Choosing Paper And Other Materials
• Size: You can use any size paper that fits easily within the paper adjusters of the paper tray. • Weight: Your printer supports paper weights as follows: • Brightness: Some papers are whiter than others and produce sharper, more vibrant images. -
Page 70: Guidelines For Paper And Special Materials
• Colored paper should be of the same high quality as white photocopy paper. The pigments must be able to withstand the printer’s fusing temperature of 180°C (356°F) for 0.1 seconds without deteriorating. Do not use paper with a colored coating that was added after the paper was produced. -
Page 71: Loading Paper
You can purchase an optional tray, Tray 2, and attach it below Tray 1, to load an additional 500 sheets of paper. Pull the tray out of the printer. Push down on the metal plate until it locks into position. - Page 72 Flex the paper sheets back and forth to separate the pages, and then fan them while holding one edge. Tap the edge of the stack on a flat surface to even it up. Load paper with the print side facing up. Make sure that all four corners are flat in the tray and under the corner brackets as shown below.
- Page 73 3.7. Slide the tray back into the printer. When you print a document, select the paper type, size, and source in your software application. For details, see page 4.7.
-
Page 74: Changing The Size Of The Paper In The Tray
Changing the Size of the Paper in the Tray The tray is preset to Letter or A4 size, depending on your country. To change the size to A4 or Letter, you must adjust the paper length guide properly. Lift the paper length guide and place it in the correct position for the paper size you are loading. -
Page 75: Using The Optional Tray 2
Load paper with the print side facing up. For more information see steps 4 and 5 on page 3.5~3.6. Squeeze the paper guide, as shown and slide it to the stack of paper until it lightly touches the side of the stack. Do not push the guide too tightly against the edge of the paper as it may cause the paper to bend. -
Page 76: Using The Multi-Purpose Tray
Using the Multi-purpose Tray The Multi-purpose Tray is located on the right side of your printer. It can be closed when you are not using it, making the printer more compact. Multi-purpose Tray The Multi-purpose Tray can hold several sizes and types of material, such as transparencies, cards, and envelopes. - Page 77 If you are using paper, flex or fan the edge of the paper stack to separate the pages before loading. For transparencies, hold them by the edges and avoid touching the print side. Oils from your fingers can cause print quality problems. Load the print material with the print side facing down and against the right edge of the tray.
- Page 78 If you want to print on previously printed paper from the Multi-purpose Tray, the printed side should be facing up with the uncurled edge toward the printer. If you experience problems with the paper feeding, turn the paper around. : Make sure that you have not loaded too much print material.
-
Page 79: Using The Manual Feed
Using the Manual Feed If you select Manual in the Source option when changing print settings, you can manually load a sheet of print material in the Multi-purpose Tray. Manually loading paper can be helpful when you want to check the print quality after each page is printed. This loading procedure is almost the same as the procedure for loading in the Multi-purpose Tray, except you load paper sheet-by-sheet in the tray, send print data to print the first page,... - Page 80 The display shows a message prompting you to load paper. Press the On Line/Continue button ( The printer picks up the print material and prints. After one page is printed, the message appears again. Insert the next sheet into the Multi-purpose Tray and press the On Line/Continue button ( Repeat this step for every page to be printed.
-
Page 81: Printing On Special Print Materials
Flex or fan the edge of the envelope stack to separate them before loading. Load the envelopes into the Multi-purpose Tray with the flap side up. The end of the envelope with the stamp area enters the printer first. 3.14 SING RINT... - Page 82 Squeeze the paper width guide and slide it to the right to touch lightly against the edge of the stack without causing it to bend. When you print, set the paper source to MP Tray and the paper type to Envelope, and select the correct paper size in the software application.
-
Page 83: Printing On Labels
Exposed areas can cause labels to peel off during printing, which can cause paper jams. Exposed adhesive can also cause damage to printer components. • Never print on the same sheet of labels more than once, or print on a partial sheet of labels. -
Page 84: Printing On Transparencies
When you print, set the paper source to MP Tray and the paper type to Labels, and select the correct size in the software application. For details, see page 4.7. Printing on Transparencies • Only use transparencies recommended for use in laser printers. - Page 85 Open the Multi-purpose Tray and unfold the paper support. Load transparencies into the Multi-purpose Tray only. They must be loaded with the print side downwards and the top with the white leading edge entering the printer first. Adjust the guide to fit the width of the transparencies. 3.18...
- Page 86 For details, see page 4.7. OTES • To prevent transparencies from sticking together, do not let the printed sheets stack up as they are printed out. • Place transparencies on a flat surface after removing them from the printer. 3.19 SING RINT ATERIALS...
-
Page 87: Printing On Preprinted Paper
Printing on Preprinted Paper • Preprinted paper is paper that has some type of printing on it before it is sent through the printer (paper that has a preprinted logo at the top of the page, for example). • Letterhead must be printed with heat-resistant ink that will not melt, vaporize, or release hazardous emissions when subjected to the printer’s fusing temperature of 180°C... -
Page 88: Printing On Card Stock Or Custom-Sized Materials
Materials • Postcards, 3.5in. by 5.5in. (index) cards, and other custom- sized materials can be printed with your printer. The minimum size is 90mm by 140mm (3.5in. by 5.5in.) and the maximum size is 216mm by 356mm (8.5in. by 14in.). - Page 89 To print on card stock: Open the Multi-purpose Tray and unfold the paper support. Load print material in the Multi-purpose Tray only, with the print side down and the short edge first. Slide the guide until it lightly touches the stack without causing it to bend.
- Page 90 When you print, set the paper source to MP Tray and select the correct paper size and type in the software application. For details, see page 4.7. If the size of your print material is not listed in the Size box in the Paper tab, click the Custom button and set the size manually.
- Page 91 MEMO 3.24 SING RINT ATERIALS...
-
Page 92: Printing Tasks
RINTING ASKS This chapter explains printing options and common printing tasks. This chapter includes: • Printer Driver Features • Printing a Document • Printer Settings... -
Page 93: Printer Driver Features
Printer Driver Features Your printer drivers will support the following standard features: • Paper source selection • Paper size, orientation, and media type • number of copies The table below lists a general overview of features supported by your printer drivers. -
Page 94: Printing A Document
Properties or Peferences in the application’s Print window. For details, see “Printer Settings” on page 4.5 If you see a Setup, Printer, or Options button in your Print window, click it instead. Then click Properties on the next screen. -
Page 95: Canceling A Print Job
• Pressing the Cancel button ( in the printer. If more than one print job is in the printer’s memory, you must press the Cancel button once for each job, after the job starts printing. -
Page 96: Printer Settings
Printer Settings You can use the Samsung CLP-510 Series printer properties window, which allows you to access all of the printer options you need when using your printer. When the printer properties are displayed, you can review and change whatever settings are needed for your print job. -
Page 97: Layout Tab
The Layout Options includes Multiple Pages per Side, Booklet Printing, and Poster. You can also use Duplex[Double-Sided Printing] in this tab. See page 4.3 for more information on accessing printer properties. Click the Layout tab to display the layout properties shown below. -
Page 98: Paper Tab
Paper tab You can use the following options for basic paper handling. See page 4.3 for more information about accessing printer properties. Click the Paper tab to display the paper properties shown below. Property Copies allows you to choose the number of Copies copies to be printed. - Page 99 Source option and MP Tray in the Different Source for First Page option. Scaling allows you to automatically or manually scale your printer job on a page. You can choose from None, Scale Printing, and Fit to Page. For details, see page 5.4 and page 5.5.
-
Page 100: Graphics Tab
Graphics tab Use the following graphic options to adjust the print quality for your specific printing needs. See page 4.3 for more information about accessing printer properties. Click the Graphics tab to display the graphics properties shown below. Property You can select the printing resolution by... - Page 101 TrueType Options This option is only avaliable when you use Windows 9x. This option determines what the driver tells the printer about how to image the text in your document. Select the appropriate setting according to the status of your document.
- Page 102 Property Advanced • Print as Graphics: When this option Options is selected, the driver will download any (Continued) fonts as graphics. When printing documents with high graphic content and relatively few TrueType fonts, printing performance (speed) may be enhanced in this setting. •...
-
Page 103: Extras Tab
Extras tab See page 4.3 for more information about accessing printer properties. Click the Extras tab to access the following features: Watermark Overlay Output Options 4.12 RINTING ASKS Option You can create a background image of text to print on each page of your document. See “Using Watermarks”... -
Page 104: About Tab
If you have an Internet browser, you can connect to the Internet by clicking the website icon. See page 4.3 for more information about accessing printer properties. Using a Favorite Setting The Favorites option, which is visible on each tab, allows you to save the current properties settings for future use. -
Page 105: Using Help
To use a saved setting, select the item from the Favorites drop down list. The printer is now set to print according to the Favorites setting you selected. To delete a Favorites item, select it from the list and click Delete. -
Page 106: Advanced Printing
DVANCED RINTING This chapter explains printing options and advanced printing tasks. This chapter includes: • Printing on Both Sides of Paper • Scaling Your Document • Fitting Your Document to a Selected Paper Size • Printing Multiple Pages on One Sheet of Paper •... -
Page 107: Printing On Both Sides Of Paper
• Short Edge, which is the type often used with calendars. OTES • Do not print on both sides of labels, transparencies, envelopes, or thick paper. Paper jamming and damage to the printer may result. • To use double-sided printing, you can use only the following... -
Page 108: From The Software Application
Click OK and print the document. OTES • The settings in the software application override those on the control panel. • When you select the Reverse Duplex option, your printer reverses the order of the printed pages. DVANCED RINTING... -
Page 109: Scaling Your Document
You can change the size of a page’s content to appear larger or smaller on the printed page. To change the print settings from your software application, access the printer properties. See page 4.3. From the Paper tab, select Scale Printing from the Type drop-down list. -
Page 110: Fitting Your Document To A Selected Paper Size
Fitting Your Document to a Selected Paper Size This printer feature allows you to scale your print job to any paper size regardless of the digital document size. This can be useful when you want to check the fine details on a small document. -
Page 111: Printing Multiple Pages On One Sheet Of Paper
You can print up to 16 pages on one sheet. To change the print settings from your software application, access the printer properties. See page 4.3. From the Layout tab, choose Multiple Pages per Side from the Type drop-down list. -
Page 112: Printing Posters
9, or 16 sheets of paper, for the purpose of pasting the sheets together to form one poster-sized document. To change the print settings from your software application, access the printer properties. See page 4.3. From the Layout tab, select Poster from the Type drop- down list. - Page 113 Configure the poster option: You can select the page layout from 2x2, 3x3, or 4x4. If you select 2x2, the image is automatically stretched to cover 4 physical pages. Specify an overlap in millimeters or inches to make it easier to pasting the sheets together.
-
Page 114: Printing Booklets
Printing Booklets This printer feature allows you to print your document on both sides of the paper and arranges the pages so that the paper can be folded in half after printing to produce a booklet. To change the print settings from your software application, access the printer properties. -
Page 115: Using Watermarks
“DRAFT” or “CONFIDENTIAL” printed diagonally across the first page or all of the pages of a document. There are several predefined watermarks that come with your printer, and they can be modified or you can add new ones to the list. Using an Existing Watermark To change the print settings from your software application, access the printer properties. -
Page 116: Creating A Watermark
Creating a Watermark To change the print settings from your software application, access the printer properties. See page 4.3. Click the Extras tab and click the Edit Watermarks button in the Watermark section. The Watermarks window appears. Enter a text message in the Watermark Message box. -
Page 117: Editing A Watermark
Editing a Watermark To change the print settings from your software application, access the printer properties. See page 4.3. Click the Extras tab and click the Edit Watermarks button in the Watermark section. The Watermarks window appears. Select the watermark you want to edit from the Current Watermarks list to change the watermark message and the options. -
Page 118: Using Overlays
To print a letter with your company’s letterhead, you need only tell Regards the printer to print the letterhead overlay on your document. WORLD BEST Creating a New Page Overlay To use a page overlay, you must create a new page overlay containing your logo or image. - Page 119 In the Overlays window, click Create Overlay. In the Create Overlay window, type a name of up to eight characters in the File name box. Select the destination path, if necessary. (The default is C:\Formover). Click Save. The name appears on the Overlay List box. Click OK or Yes to finish creating.
-
Page 120: Using A Page Overlay
To print an overlay with a document: Create or open the document you want to print. To change the print settings from your software application, access the printer properties. See page 4.3. Click the Extras tab. Select an overlay from the Overlay drop-down list box. -
Page 121: Deleting A Page Overlay
Deleting a Page Overlay You can delete page overlays that you no longer use. In the printer properties window, click the Extras tab. Click the Edit Overlays button in the Overlay section. Select the overlay you want to delete from the Overlay List box. -
Page 122: Using Status Monitor
Setup Guide supplied with your printer. If you selected Typical while installing the software, you can install Status Monitor as follows: From the Start menu, select Programs ➔ Samsung CLP- 510 Series. Or place the CD-ROM into the CD-ROM drive. -
Page 123: Opening The Troubleshooting Guide
Setup Guide supplied with your printer. Opening the Troubleshooting Guide Double click the Status Monitor icon on the Windows task bar. Or, from the Start menu, select Programs ➔ Samsung CLP- 510 Series ➔ Troubleshooting guide. Changing the Status Monitor Program... - Page 124 If you select Cancel Printing, turn the printer off and then click OK. It may take several minutes. Note that this will cause a loss of the data which is being sent to the printer via the network.
- Page 125 5.20 DVANCED RINTING...
-
Page 126: Maintaining Your Printer
AINTAINING RINTER This chapter provides information for maintaining your printer and suggestions for high-quality and economical printing. This chapter includes: • Printing a Configuration Page • Replacing Supplies • Managing Toner Cartridges • Replacing Toner Cartridges • Replacing the Waste Toner Container •... -
Page 127: Printing A Configuration Page
Printing a Configuration Page You can print a configuration page from the printer’s control panel. Use the configuration page to view the current settings, to help troubleshoot problems, or to verify the installation of optional accessories, such as memory or an optional tray. -
Page 128: Replacing Supplies
Replacing Supplies From time to time, you need to replace the following items to maintain top performance and to avoid print quality problems. Refer to the table below: Item(s) Printer Message Black toner Black Toner Empty cartridge Color toner [Color] Toner... -
Page 129: Managing Toner Cartridges
• Do not remove toner cartridges from their packages until you are ready to use them. • Do not refill toner cartridges. The printer warranty does not cover damage caused by using a refilled cartridge. • Store toner cartridges in the same environment as the printer. -
Page 130: Redistributing Toner
“Ready [Color] Low Toner” appears on the display. The printer is able to continue to print using the current toner cartridge until the control panel displays a message telling you to replace the cartridge. - Page 131 First, gently pull the cartridge by its handle to erase it out of its slot, but when you are ready to lift it out of the printer, transfer your grip to the body of the cartridge, and lift it out with both hands.
- Page 132 Slide the toner cartridge back into the printer. Close the left cover. Make sure that the cover is securely latched. If you have installed the toner cartridges incorrectly, the left cover will not close properly. Check again to make sure the cartridge colors correspond to those marked on the right hand side.
-
Page 133: Replacing Toner Cartridges
First, gently pull the cartridge by its handle to erase it out of its slot, but when you are ready to lift it out of the printer, transfer your grip to the body of the cartridge, and lift it out with both hands. - Page 134 Take a new toner cartridge out of its package. : Don’t use sharp objects, such as a knife or scissors, to AUTION open the toner cartridge package. You could damage the surface of the toner cartridge. Holding both sides of each of the toner cartridge, gently roll it from side to side to evenly distribute the toner.
- Page 135 Make sure that the color of the toner cartridge matches the color slot and then slide the new toner cartridge into the printer. Using both hands, insert the cartridge into the slot. Then use the handle to slide the cartridge in.
-
Page 136: Replacing The Waste Toner Container
Replacing the Waste Toner Container The life of the waste toner container is approximately 12,000 pages for black and 3,000 pages for color. Replace the waste toner container when the control panel displays “Replace/Install Waste Toner Tank”. Unlatch the front cover by quickly pressing and releasing it, using the depressions at the top. - Page 137 Remove the container’s attached caps, as shown below, and use them to close the waste toner container. Take a new waste toner container out of its package. Insert the lower end of the new container into place and then push the upper end. Make sure that it is seated in place.
- Page 138 Close the front cover. Make sure that the cover is securely latched. Using the handle, completely open the left cover until it is at right angles to the main frame. The toner cartridges will disengage automatically. Close the left cover firmly. 6.13 AINTAINING RINTER...
-
Page 139: Replacing The Imaging Unit
12,500 pages for color. Replace the imaging unit when the printer control panel displays “Replace Imaging Unit”. Turn the printer off, then wait a few minutes for the printer to cool. Using the handle, completely open the left cover until it is at right angles to the main frame. - Page 140 Press the top cover release button to unlatch the top cover and open it all the way. Pull the lock levers on each side toward you, as shown below, to release the transfer belt. 6.15 AINTAINING RINTER...
- Page 141 Using the handle, lift the transfer belt out of the printer by lightly pulling it toward the left of the printer. Set it on a clean flat surface. Lift the handle of the used imaging unit and use it to lift the imaging unit out of the printer.
- Page 142 • Close the top and left covers should the insallation needs to be halted for any reason. • Do not touch the surface of the green roller on the imaging unit, or print quality problems can occur. Locate the imaging unit slots inside the printer, one on each side. 6.17 AINTAINING...
- Page 143 Hold the handle of the new imaging unit with the green roller facing you. Align the imaging unit with the slots in your printer so that the colors on both sides of the imaging unit slide into the corresponding colors of the slots.
- Page 144 To reinstall the transfer belt, hold its handle and then align it with the slots on either side of the inside of your printer. : Do not turn the transfer belt over, or loose toner may be spilled. Slide the transfer belt down into the printer and press it firmly into place.
- Page 145 After making sure that the left cover is open, close the top cover. Make sure that it is securely latched. AUTION open. This may cause damage to the printer. 6.20 AINTAINING RINTER...
- Page 146 Close the left cover firmly. Turn the printer on. : After replacing the imaging unit, your printer will automatically reset the image counter for the imaging unit. 6.21 AINTAINING RINTER...
-
Page 147: Replacing The Transfer Belt
12,500 color pages. Replace the transfer belt when the control panel displays “Replace Transfer Belt”. To replace the transfer belt: Turn the printer off, then wait a few minutes for the printer to cool. Using the handle, completely open the left cover until it is at right angles to the main frame. - Page 148 Press the top cover release button to unlatch the top cover and open it all the way. Pull the lock levers on each side toward you, as shown below, to release the transfer belt. 6.23 AINTAINING RINTER...
- Page 149 Using the handle, lift the used transfer belt out of the printer by lightly pulling it toward the left of the printer. over, or loose toner may be spilled. Take a new transfer belt out of the package. Remove the paper covering the transfer belt by removing the tape.
- Page 150 Pinch the transfer belt tension levers on both sides of the transfer belt. Then, pull them out as shown below. Locate the transfer belt slots inside the printer, one on each side. : To prevent damage, do not expose the imaging unit to AUTION light for more than a few minutes.
- Page 151 Hold the handle on the new transfer belt and then align it with the slots on either side of the inside of your printer. over, or loose toner may be spilled. Slide the new transfer belt down into the printer and press it firmly into place.
- Page 152 After making sure that the left cover is open, close the top cover. Make sure that it is securely latched. : Do not try to close the left cover with the top cover AUTION open. This may cause damage to the printer. 6.27 AINTAINING RINTER...
- Page 153 Close the left cover firmly. Turn the printer on. automatically reset the image counter for the transfer belt. 6.28 AINTAINING RINTER : After replacing the transfer belt, your printer will...
-
Page 154: Cleaning The Printer
Cleaning the Outside of the Printer Clean the cabinet of the printer with a soft and lint-free cloth. You can dampen the cloth slightly with water, but be careful not to let any water drip onto the printer or inside of it. -
Page 155: Cleaning The Inside Of The Printer
Oil from your fingers can cause print quality problems. Turn the printer off and unplug the power cord, then wait a few minutes for the printer to cool. Using the handle, completely open the left cover until it is at right angles to the main frame. - Page 156 First, gently pull the cartridges by their handle to erase them out of their slot, but when you are ready to lift them out of the printer, transfer your grip to the body of the cartridges, and lift them out with both hands. Set them on a clean flat surface.
- Page 157 Pull the lock levers on each side toward you, as shown below, to release the transfer belt. Using the handle, lift the transfer belt out of the printer by lightly pulling it toward the left of the printer. Set it on a clean flat surface. 6.32...
- Page 158 Lift the handle of the imaging unit and use it to lift the imaging unit out of the printer. Set it on a clean flat surface. AUTIONS • To prevent damage, do not expose the imaging unit to light for more than a few minutes.
- Page 159 Insert the imaging unit back into the printer. Make sure you hear it click, and then fold the handle down. For details, see steps 9 to 10 on page 6.17~6.18. AUTION or damage the surface of the green roller on the imaging unit.
- Page 160 After making sure that the left cover is open, close the top cover. Make sure that it is securely latched. : Do not try to close the left cover with the top cover AUTION open. This may cause damage to the printer. 6.35 AINTAINING RINTER...
- Page 161 Look inside the printer on the right and then locate the colors of the toner cartridges that matches the colors of the slots. Holding each toner cartridge with both hands, insert them into their corresponding positions in the following order: Cyan, Magenta, Yellow, and then Black.
- Page 162 Check again to make sure the cartridge colors correspond to those marked on the right hand side. Never force the cover closed. Plug the power cord in and turn the printer on. 6.37 AINTAINING RINTER...
-
Page 163: Replacement Parts
See the table below. Pick-up roller Transfer roller Fuser unit To purchase replacement parts, contact your Samsung dealer or the retailer where you bought your printer. We strongly recommend that items be installed by a trained service professional. -
Page 164: Setting Up E-Mail Notification
For further details about each setting, see the following sections. Server Information Configure the settings for your printer to send an e-mail through the SMTP server. The following items can be configured: • IP Address or Host Name: select IP Address or Host Name. If you select host name, you need to enter your DNS setting in the TCP/IP of Network Settings tab. - Page 165 • Phone number: Enter the Samsung dealer’s or the retailer’s phone number. • E-mail address: Enter the Samsung dealer’s or the retailer’s e-mail address. • URI: Enter the Samsung dealer’s or the retailer’s URI.
-
Page 166: Setting The Contact Information Tab
Setting the Contact Information tab Select the Support tab to know and enter some information in the Contact Information section. • Name: enter the e-mail sender’s name like your office name. • Phone Number: enter a phone number recorded in the E-mail Notification mail. - Page 167 6.42 AINTAINING RINTER...
-
Page 168: Solving Problems
OLVING ROBLEMS This chapter provides helpful information for what to do if you encounter an error while using your printer. This chapter includes: • Troubleshooting Checklist • Solving General Printing Problems • Clearing Paper Jams • Solving Print Quality Problems •... -
Page 169: Troubleshooting Checklist
• If a demo page does not print, check the paper supply in the paper tray. • If the paper jams in the printer, go to “Clearing Paper Jams” on page 7.6. • If an error message appears on the display, go to “Understanding Display Messages”... -
Page 170: Solving General Printing Problems
Solving General Printing Problems For problems with the operation of your printer, refer to the table for suggested solutions. Problem Possible Cause The printer The printer is not does not print. receiving power. The printer is not selected as the default printer. - Page 171 & white mode. In color mode, A4/ letter-sized paper prints at 6 ppm. From the Start menu, choose Settings and Printers. Right-click the Samsung CLP- 510 Series printer icon, choose Properties, click the Details tab, and then choose the Spool Settings button. Select the desired spool setting.
- Page 172 Disconnect the printer cable and reconnect. Try a print job that you have already printed successfully. If possible, attach the cable and printer to another computer and try a print job that you know works. Finally, try a new printer cable.
-
Page 173: Clearing Paper Jams
After printing about 100 color pages, there will be no more smell. It is a temporary problem. : When removing paper that is jammed in the printer, if Message Location of Jam In the paper feed area... -
Page 174: In The Paper Feed Area
In the Paper Feed Area If paper is jammed in the paper feed area, “Jam0 In Tray1” appears on the display. Using the handle, open the right cover. Carefully remove the misfed paper in the direction as shown below. Go to step 6. If you cannot find the jammed paper, or if there is any resistance removing the paper, stop pulling and go to step 3. - Page 175 Remove the jammed paper by gently pulling it straight out as shown below. To replace the tray, lower the rear edge, align it with the slot, and slide it into the printer. Close the right cover. The printer will resume printing. OLVING ROBLEMS...
-
Page 176: In The Multi-Purpose Tray
In the Multi-purpose Tray “Jam0 In MP Tray” appears on the display when you print using the Multi-purpose Tray and the printer detects that there is either no paper or the paper is improperly loaded. If the paper is not feeding properly, pull the paper out of the printer. -
Page 177: In The Paper Exit Area
Close the right cover. The printer will resume printing. In the Paper Exit Area If paper is jammed in the paper exit area, “Jam In Exit Area”... - Page 178 Using the handle, completely open the left cover until it is at right angles to the main frame. The toner cartridges will disengage automatically. : If the left cover is not completely open, the top cover AUTION release button will remain locked. Press the top cover release button to unlatch the top cover and open it all the way.
- Page 179 Carefully take the jammed paper out of the printer. The fuser AUTION The fuser’s operating temperature is 180°C (356° F). Take care when removing paper from the printer. After making sure that the left cover is open, close the top cover.
-
Page 180: In The Duplex Area
Close the left cover firmly. Open and close the right cover to resume printing. In the Duplex Area If paper is jammed in the duplex area, “Jam In Duplex Path” appears on the display. Using the handle, open the right cover. 7.13 OLVING ROBLEMS... - Page 181 Locate the jammed paper, and then pull it out gently and slowly to avoid the paper tearing. Go to step 8. fragments are removed from the printer. If you cannot find the jammed paper, or if there is any resistance removing the paper, stop pulling and go to step 3.
- Page 182 Locate the jammed paper, and then carefully take it out of the printer. The fuser is hot! : Do not touch the fuser. It is hot and could cause burns! AUTION The fuser’s operating temperature is 180°C (356°F). Take care when removing paper from the printer. 7.15 OLVING ROBLEMS...
- Page 183 Make sure that it is securely latched. AUTION open. This may cause damage to the printer. Close the left cover firmly. Close the right cover. The printer will resume printing. 7.16 OLVING ROBLEMS : Do not try to close the left cover with the top cover...
-
Page 184: In The Optional Tray2
Remove the jammed paper in the direction shown below. To avoid the paper tearing, pull it out gently and slowly. Close the right cover. The printer will resume printing. If you cannot find the jammed paper, or if there is any resistance removing the paper, stop pulling and go to step 3. - Page 185 Open the outer jam cover in Tray 2. Open the inner cover of Tray 2. Pull the jammed paper out in the direction shown. To avoid the paper tearing, pull it out gently and slowly. 7.18 OLVING ROBLEMS...
- Page 186 7. Pull the optional tray2 open. After you pull it all the way out, lift up the front part of the tray slightly to release the tray from the printer. 7.19 OLVING ROBLEMS...
- Page 187 If you see the jammed paper, remove the paper from the printer by gently pulling it straight out as shown below. Slide the tray back into the printer and close the two jam covers. Open and close the right cover. The printer will resume printing.
-
Page 188: Tips For Avoiding Paper Jams
Tips for Avoiding Paper Jams By selecting the correct paper types, most paper jams can be avoided. If a paper jam occurs, follow the steps outlined in “Clearing Paper Jams” on page 7.6. • Follow the procedures on page 3.4. Ensure that the adjustable guides are positioned correctly. -
Page 189: Solving Print Quality Problems
Solving Print Quality Problems Dirt inside of the printer or improper paper loading may reduce print quality. See the table below to troubleshoot the problem. Problem Light or faded print AaBbCc AaBbCc AaBbCc AaBbCc AaBbCc Toner specs AaBbCc AaBbCc AaBbCc... - Page 190 AaBbCc “Replacing the Imaging Unit” on page 6.14. Toner smear • Clean the inside of the printer. See “Cleaning the Inside of the Printer” on page 6.30 • Check the paper type and quality. See “Paper Specifications” on page E.4.
- Page 191 • If background scatter covers the entire surface area of a printed page, adjust the print resolution through your software application or via the printer properties window. • If characters are improperly formed and producing hollowed images, the paper stock may be too slick. Try a different paper.
- Page 192 • The transfer roller may be dirty. See “Cleaning the Inside of are dirty the Printer” on page 6.30. • Check for leaking toner. Clean the inside of the printer. Solid Color or • The imaging unit may not be installed properly. Remove the imaging unit and reinsert.
-
Page 193: Understanding Display Messages
Understanding Display Messages Messages appear on the control panel display to indicate the printer’s status or errors. Refer to the tables below to understand the messages’ meaning and correct the problem if necessary. Messages and their meanings are listed in alphabetical order. - Page 194 Install the corresponding color toner cartridge. Install the imaging unit. Install the transfer belt. Only install a Samsung-approved imaging unit, designed for your printer. If you have installed an approved imaging unit and this error still occurs, contact an authorized service agent.
- Page 195 If the problem persists, call for service. The job automatically clears and the printer returns to Standby Mode. • Expand the memory in your printer. See “Installing Additional Printer Memory” on page D.2. Load paper in the paper tray. See page 3.4.
- Page 196 An IP address conflicts IP Conflict with other devices on the network. Replace [Color] The corresponding toner Toner cartridge in your printer is nearly empty. However, the printer continues printing, even though print quality is not optimal. Replace Fuser The life span of the fuser has expired.
-
Page 197: Common Windows Problems
Close all other applications, reboot Windows and try printing again. These messages may appear during printing. Just keep waiting until the printer finishes printing. If the message appears in standby mode or after printing is complete, check the connection and/or whether an error occurred. -
Page 198: Common Macintosh Problems
When you change a setting and the Printer Package detects printer settings. such a conflict, the conflicting option is changed to a “No Choice”... - Page 199 The default queue in LPRng is defined as the first queue in /etc./printcap, therefore it is not possible for the Linux Printer Package to change the default when some queues have otherwise been defined using printtool.
- Page 200 These options are always used if not overridden by even though I don’t choose LLPR settings. To get rid of all options for a printer, run the them in LLPR. following command, replacing “printer” with the name of the...
- Page 201 Problem Some color images come out all black. 7.34 OLVING ROBLEMS Possible Cause and Solution This is a known bug in Ghostscript (until GNU Ghostscript version 7.05) when the base color space of the document is indexed color space and it is converted through CIE color space.
- Page 202 SING ACINTOSH Your printer supports Macintosh systems with a built-in USB interface or 10/100 Base-TX network interface card (option for CLP-510). When you print a file from a Macintosh computer, you can use the CUPS driver by installing the PPD file.
-
Page 203: Installing Software For Macintosh
The CD-ROM that came with your printer provides you with the PPD file to use the CUPS driver, Apple LaserWriter driver, for printing on a Macintosh computer. Refer to the table below for the driver available for your printer, and for system requirements. Your... -
Page 204: Uninstalling The Software
The Samsung SPLC Installer window opens. Select Easy Install. Click Install. After the installation is finished, click Quit. Uninstalling the Software Uninstall is required if you are upgrading the software, or if your installation fails. Insert the CD-ROM which came with your printer into the CD-ROM drive. -
Page 205: Setting Up The Printer
Enter the queue name in the Queue Name field. If you cannot determine the queue name for your printer server, try using the default queue first. Select Samsung in Printer Model and CLP-510 in Model Name. Click Add. Your printer’s IP address appears on the Printer List, and is set as the default printer. -
Page 206: For A Usb-Connected Macintosh
For Macintosh OS 10.3.x, open Print Setup Utility from the Utilities folder. Click Add on the Printer List. Select the USB tab. Select Samsung in Printer Model and CLP-510 in Model Name. Click Add. Your printer appears on the Printer List, and is set as the default printer. -
Page 207: Printing A Document
Printing a Document When you print with a Macintosh, you need to check the printer software setting in each application you use. Follow these steps to print from a Macintosh. Open a Macintosh application and select the file you want to print. -
Page 208: Using Advanced Printing Features
Select the page order on the Layout Direction option. To print a border around each page on the sheet, select the option you want on the Border drop-down list. Click Print, and the printer prints the selected number of pages on one side of each page. SING... -
Page 209: Duplex Printing
Select the Layout. ▲ Mac OS 10.3 Select a binding orientation from Two Sided Printing option. Click Print and the printer prints on both sides of the paper. SING RINTER WITH A If you have selected duplex printing and then try to... -
Page 210: Scheduling A Print Job
•Now: The printer prints a job immediately. •At: The printer prints a job at the time you set in the field. •On Hold: The printer holds a print job in the print queue until you are ready to release it. - Page 211 A.10 SING RINTER WITH A ACINTOSH...
-
Page 212: Using Your Printer In Linux
SING RINTER IN INUX You can use your printer in a Linux environment. This chapter includes: • Installing the Printer Driver • Using the Configuration Tool • Changing LLPR Properties... -
Page 213: Installing The Printer Driver
“root” in the Login field and enter the system password. software. If you are not the super user, ask your system administrator. SING RINTER IN : You must log in as a super user (root) to install the printer INUX... - Page 214 Insert the printer software CD-ROM. The CD-ROM automatically runs. : If the CD-ROM does not automatically run, click the icon at the bottom of the window. When the Terminal screen appears, type in: [root@local /root]# cd /mnt/cdrom (the CD-ROM directory) ./setup.sh...
- Page 215 Start. The Linux Printer Configuration window opens. Click the Add Printer icon on the tool bar at the top of the window. Login window may appear. Type in “root” in the Login field and enter the system password.
- Page 216 If necessary, you can change the settings. : The options may differ depending on the printer in use. The Description and the Location field in the Queue screen may not appear depending on the printing system in use.
-
Page 217: Changing The Printer Connection Method
When the Administrator Login window appears, type in “root” in the Login field and enter the system password. printer to the printing system. If you are not the super user, ask your system administrator. From the Startup Menu icon at the bottom of the desktop, select Linux Printer and then Configuration Tool. -
Page 218: Uninstalling The Printer Driver
Login field and enter the system password. Click Proceed. : You must log in as a super user (root) to uninstall the printer software. If you are not the super user, ask your system administrator. A message window appears asking you to confirm the uninstallation. -
Page 219: Using The Configuration Tool
Using the Configuration Tool The configuration tool accesses administrative tasks, including adding and removing a new printer, and changing their global settings. Regular users can also run it to easily inspect job queues, examine the printer properties and change their local preferences. - Page 220 You can suspend, resume, or delete a specific job(s) in the queue. If you drag a specific job(s), you can drop it into the print queue of another printer. The Properties tab allows you to change the default printer settings.
-
Page 221: Changing Llpr Properties
Changing LLPR Properties You can fine-tune the printer’s properties by opening the LLPR Properties window. To open the LLPR Properties window: From the application you are using, select the Print command. When the Linux LPR window opens, click Properties. You can also open the LLPR window: •... - Page 222 HP-GL/2 format, which is used by some plotters. • Advanced - allows you to override the default settings for the printer. If you click the Save button at the bottom of the window, the options are kept between LLPR sessions.
- Page 223 MEMO B.12 SING RINTER IN INUX...
- Page 224 SING ETWORK If you work in a networked environment, the printer can be shared by other users on the network. This chapter includes: • About Sharing the Printer on a Network • Setting Up a Locally Shared Printer • Setting Up a Network-Connected Printer : If you are a CLP-510 user, you need to install an optional network interface card.
-
Page 225: Appendix C : Using Your Printer On A Network
See page D.7. Printing Across a Network Whether the printer is locally connected or network-connected, you need to install the CLP-510 series printer software on each computer that prints documents using the printer. SING RINTER ON A... -
Page 226: Setting Up A Locally Shared Printer
Select the port you want, check the Reconnect at log on box, and click OK. From the Start menu, select Settings and then Printers. Double-click your printer icon. From the Printer menu, select Properties. From the Details tab, select the printer port and click OK. SING RINTER ON A ETWORK... -
Page 227: In Windows Nt 4.0/2000/2003/Xp
From the Printer menu, select Sharing. For Windows NT 4.0, check the Shared box. For Windows 2000, check the Shared As box. For Windows XP/2003, check the Share this printer box. Fill in the Shared Name field and click OK. SING RINTER ON A : Windows NT 4.0 is only supported on the CLP-510N. - Page 228 For Windows XP/2003, select Printers and Faxes from the Start menu. Double-click your printer icon. From the Printer menu, select Properties. From the Ports tab, click Add Port. Select Local port and click New Port. Fill in the Enter a port name field with the shared name.
-
Page 229: Setting Up A Network-Connected Printer
Setting Up a Network-Connected Printer You have to set up the network protocols on the printer to use it as your network printer. Setting protocols can be accomplished by using the supplied network program. Please refer to SyncThru User’s Guide. -
Page 230: Printing A Network Configuration Page
Setting Network Protocols When you first install the printer, all supported network protocols are enabled. If a network protocol is enabled, the printer may actively transmit on the network even when the protocol is not in use. This may increase network traffic slightly. To eliminate unnecessary traffic, you can disable unused protocols. -
Page 231: Static Addressing
Configuring TCP/IP Your printer can be set up on a variety of TCP/IP networks. There are several ways in which your printer can be assigned a TCP/IP address, depending on your network. • Static Addressing: TCP/IP address is assigned manually by the system administrator. - Page 232 An IP address consists of 4 bytes. Enter a number between 0 and 255 for each byte. Press the scroll button ( between 0 and 255 and press the Enter button ( Repeat step 12 to complete the address from the 1st byte to the 4th byte.
-
Page 233: Configuring Ipx Frame Types
On IPX/SPX protocol networks (for example, Novell NetWare), the format of the network communication frames must be specified for the printer. In most cases, you can keep the default setting “Auto”. However, you can manually set the frame type format, if required. - Page 234 Take the following steps to change the frame type format: In ready mode, press the Menu button ( “Network” on the bottom line of the display. Press the Enter button ( ) to access the menu. Press the Enter button ( displays on the bottom line.
-
Page 235: Restoring The Network Configuration
Press scroll button ( displays on the bottom line. Press the Enter button ( Press the Enter button ( The printer resets the network interface card. Configuring the Wireless Network See the instructions supplied with the wireless network interface card you purchase. - Page 236 The default setting is 10. • Authentication: “Open System” or “Shared Key”. The Samsung print server is not configured for network authentication (Open System). If required by your network, the proper authentication method must be configured on the print server.
- Page 237 • Encryption: “None”, “64-bit WEB”, or “128-bits WEB”. Default setting is “None”. If your network uses WEP encryption keys, you must configure the encryption keys. You can configure up to four keys. The active key must match the value and active key position (for example, Key 1) configured on other wireless devices.
-
Page 238: Installing Printer Options
Your printer is a full-featured laser printer that has been optimized to meet most of your printing needs. Recognizing that each user may have different requirements, however, Samsung makes several options available to enhance your printer’s capabilities. This chapter includes: •... -
Page 239: Installing Additional Printer Memory
Your printer has a dual in-line memory module (DIMM) slot. Use this DIMM slot to install more memory for the printer. to 192 MB. Use only Samsung-approved DIMM, part numbers ML- 00MC (64MB), or ML-00MD (128MB). Contact your Samsung dealer. - Page 240 Completely open the latches on each side of the DIMM slot. Remove the memory DIMM from its antistatic package. Locate the alignment notches on the bottom edge of the DIMM. Connection points : Avoid touching the connection points along the edge of the memory DIMM.
- Page 241 Holding the memory DIMM by the edges, align the notches on the memory DIMM with the grooves at the top of the memory DIMM slot. Insert the ends of the memory DIMM into the slots on the latches. Push the DIMM straight into the DIMM slot until it snaps into place.
- Page 242 Replace the metal cover, as shown below, and replace the two screws you removed in step 3. Replace the control board cover. Reconnect the power cord and printer cable and turn the printer on. NSTALLING RINTER PTIONS...
-
Page 243: Removing A Memory Dimm
Removing a Memory DIMM Follow steps 1 through 3 on page D.2 to access the control board. Push the latches at both ends of the DIMM slot away from the DIMM. Pull out the DIMM. Place the DIMM in its original packaging or wrap it with a sheet of thin metal, such as aluminium foil, and store it in a box. -
Page 244: Installing A Network Interface Card
The CLP-510N has a built-in network interface card. If you are a CLP-510 user, you need to install an optional network interface card. If you want to use the printer in both wired and wireless network environments, you need to install an optional wired/wireless network interface card. - Page 245 To remove the control board cover, press down on the tabs at the top and take it off. Remove the two screws holding the metal plate in place, and then remove the metal cover, as shown below. NSTALLING RINTER PTIONS...
- Page 246 Using a pointed tool, carefully punch out the wireless network antenna port and the Ethernet network port covers, and other covers, as shown below. If you are replacing an existing network interface card with a new one, remove the two screws and the old card. Align the connector on the network interface card with the connector on the control board.
- Page 247 Insert the two screws included with the interface card package into the appropriate holes above and below the Ethernet network port, as shown below. Carefully tighten them. Replace the metal cover, as shown below, and replace the two screws you removed in step 3. D.10 NSTALLING RINTER...
- Page 248 Replace the control board cover. Plug one end of the Ethernet cable into the Ethernet network port on the printer and the other end of the cable into a network LAN connection. Reconnect the power cord and turn the printer on.
-
Page 249: Installing An Optional Tray
Installing an Optional Tray You can increase the paper handling capacity of your printer by installing an optional Tray2. This tray holds 500 sheets of paper. Turn the printer off and unplug all cables from the printer. Remove the packing tape and the packing material inside of the tray. - Page 250 AUTION and cassette. Use safe lifting and handling techniques. If you need to move the printer, it should be moved by two people. Use the lifting handles located as shown in the diagram. Back injury could be caused if a single person attempts to lift the printer.
- Page 251 Right-click on the printer icon and select Properties . Click the Printer tab, and select Tray 2 from the Optional Tray drop-down list. Click OK and print the document. D.14 NSTALLING RINTER PTIONS...
-
Page 252: Specifications
PECIFICATIONS This chapter includes: • Printer Specifications • Paper Specifications... -
Page 253: Printer Specifications
Printer Specifications Item Black: Up to 24 PPM in A4 (25 PPM in Letter); Color: Up to 6 PPM in A4 (6 PPM in Letter) Print Speed Duplex: Up to 11.6 IPM in A4/Letter (Black); Up to 6 IPM in... - Page 254 Item Printer Language SPL-C (Samsung Printer Language Color) 64 MB (Max. 192 MB) 64, 128 MB optional memory available Memory Use only the Samsung-approved DIMM. 64 MB: ML-00MC; 128 MB: ML-00MD Fonts Windows font CLP-510: USB 2.0 Interface CLP-510N: USB 2.0, Ethernet 10/100 Base TX Windows 95/98/Me/NT 4.0/2000/XP/2003, Various Linux OS,...
-
Page 255: Paper Specifications
This may be the result of improper handling, unacceptable temperature and humidity levels, or other variables over which Samsung has no control. • Before purchasing large quantities of paper, ensure that the paper meets the requirements specified in this User’s Guide. -
Page 256: Supported Sizes Of Paper
Labels listed above. Envelopes *The printer supports a wide range of media sizes. See “Printing on Card Stock or Custom-sized Materials” on page 3.21. **Capacity may vary depending on media weight and thickness, and environmental conditions. ***Smoothness: 100 to 250 (Sheffield) : You may experience jams when using print materials with a length of less than 140mm (5.5in.). -
Page 257: Guidelines For Using Paper
• Do not use raised or embossed letterhead. • The printer uses heat and pressure to fuse toner to the paper. Ensure that any colored paper or preprinted forms use inks that are compatible with this fusing temperature (180°C or 356°F for... -
Page 258: Paper Specifications
Paper Specifications Category Acid Content 5.5 ~ 8.0pH Caliper 0.094 ~ 0.18mm (3.0 ~ 7.0mils) Curl in Ream Flat within 5mm (0.02in.) Cut with sharp blades with no visible Cut Edge Conditions fray. Must not scorch, melt, offset, or release Fusing Compatibility hazardous emissions when heated to 180°C (356°F) for 0.1 second. -
Page 259: Printer And Paper Storage Environment
Paper storage environmental conditions directly affect the feed operation. Ideally, the printer and paper storage environment should be at or near room temperature, and not too dry or humid. Remember that paper is hygroscopic; it absorbs and loses moisture rapidly. -
Page 260: Envelopes
140mm paper that has been affected by environmental conditions. For optimum performance, make sure you are storing and handling the paper correctly. Please refer to “Printer and Paper Storage Environment” on page E.8. Maximum 216 X 356mm (8.5 X 14in.) -
Page 261: Envelopes With Double Side Seams
Envelopes with a peel-off adhesive strip or with more than one flap that folds over to seal must use adhesives compatible with the heat and pressure in the printer. The extra flaps and strips might cause wrinkling, creasing, or even jams and may even damage the fuser. -
Page 262: Labels
See “Printing on Envelopes” on page 3.14. Labels AUTIONS • To avoid damaging the printer, use only labels recommended for laser printers. • To prevent serious jams, always use the Multi-purpose Tray to print labels and always use the rear output tray. - Page 263 5.9 cancel, print jobs 4.4 card stock, print 3.21 clean inside the printer 6.30 LSU 6.29 outside of the printer 6.29 color mode 4.9 4.10 components 1.4 configuration page, print 6.2 connect Ethernet D.11 control panel 2.2 buttons 2.3 display 2.2...
- Page 264 D.7 network printing card, install D.7 locally shared printer, set C.3 network-connected printer, set C.6 parameters, configure C.6 n-up printing 5.6 option, install memory DIMM D.2 network interface card D.7 paper tray 2 D.12 optional tray, install D.12 orientation, select 4.6...
- Page 265 toner cartridge maintain 6.4 redistribute 6.5 replace 6.8 transfer belt, replace 6.22 transparencies, print 3.17 Tray1, use 3.4 uninstall Linux B.7 waste toner container, replace 6.11 watermarks, use 5.10...
- Page 266 Visit us at: www.samsungprinter.com Home Rev.3.00...