Huawei eSpace 7910 User Manual
Hide thumbs
Also See for eSpace 7910:
- User manual (78 pages) ,
- Product overview (22 pages) ,
- Quick start manual (10 pages)

Related Manuals for Huawei eSpace 7910


Summary of Contents for Huawei eSpace 7910
- Page 1 7910&7950 IP Phone V200R003C30 User Guide Issue Date 2017-06-30 HUAWEI TECHNOLOGIES CO., LTD.
- Page 2 Notice The purchased products, services and features are stipulated by the contract made between Huawei and the customer. All or part of the products, services and features described in this document may not be within the purchase scope or the usage scope. Unless otherwise specified in the contract, all statements, information, and recommendations in this document are provided "AS IS"...
-
Page 3: Preface
7910&7950 IP Phone User Guide Preface Preface Overview This document covers the following information about eSpace 7910&7950 IP Phone: overview, configuration, usage, and common troubleshooting methods. Intended Audience This document is intended for: End users. Symbol Conventions The symbols that may be found in this document are defined as follows. - Page 4 OCB, Linkage, 7.5 Instant Conference 7.7 Converged Conference. Issue 02 (2017-04-17) This issue is the first official release for eSpace 7910&7950 V200R003C30, and includes the following changes: Added the content about 6.39 ICP Linkage. Updated the content about 6.18 Call Forward, 6.21.1...
-
Page 5: Table Of Contents
4.2.5 Bluetooth (only for eSpace 7950 IP Phone)......................39 4.2.6 Phone Lock................................40 4.2.7 Restart..................................41 4.3 Status.................................... 41 4.3.1 Peripheral Status (only for eSpace 7950 IP Phone)....................41 Issue 03 (2017-06-30) Huawei Proprietary and Confidential Copyright © Huawei Technologies Co., Ltd. - Page 6 6.4.1 Answering Calls Manually............................62 6.4.2 Answering Calls Automatically..........................63 6.4.3 Call Deflection................................63 6.4.4 One Button to Voicemail............................64 6.4.5 Ignoring Calls................................64 6.4.6 Rejecting Calls................................64 6.4.7 Muting the Phone...............................64 Issue 03 (2017-06-30) Huawei Proprietary and Confidential Copyright © Huawei Technologies Co., Ltd.
- Page 7 6.15 Phone Unlock................................81 6.16 Call Hold..................................81 6.17 Call Transfer................................81 6.18 Call Forward................................83 6.19 Deny Call Forward..............................86 6.20 Call Waiting................................86 6.21 Call Pickup................................. 87 Issue 03 (2017-06-30) Huawei Proprietary and Confidential Copyright © Huawei Technologies Co., Ltd.
- Page 8 7.1 Linkage..................................117 7.2 Directory..................................121 7.3 Extension Mobility..............................122 7.4 One-Key Switch................................. 123 7.5 Instant Conference..............................123 7.6 Group Conference...............................127 7.7 Converged Conference............................... 131 7.8 Presence..................................134 Issue 03 (2017-06-30) Huawei Proprietary and Confidential Copyright © Huawei Technologies Co., Ltd.
-
Page 9: Safety Precautions
Do not allow children to play with the device or accessories. Swallowing the accessories may be fatal. Use only accessories (such as the power adapter and the battery) provided or authorized only by the manufacturer. Issue 03 (2017-06-30) Huawei Proprietary and Confidential Copyright © Huawei Technologies Co., Ltd. - Page 10 Do not dispose of the device and the accessories in a garbage can. Dispose of the device according to the local regulations on disposing of packing materials, exhausted batteries and abandoned devices, and support the recycling activity. Issue 03 (2017-06-30) Huawei Proprietary and Confidential Copyright © Huawei Technologies Co., Ltd.
-
Page 11: Legal Statement
Access the phone web page, choose View Status > About Phone, and view information in the Legal Statement area. For details about how to access the phone web page, see Logging In to the Web Page. Issue 03 (2017-06-30) Huawei Proprietary and Confidential Copyright © Huawei Technologies Co., Ltd. -
Page 12: Ip Phone Overview
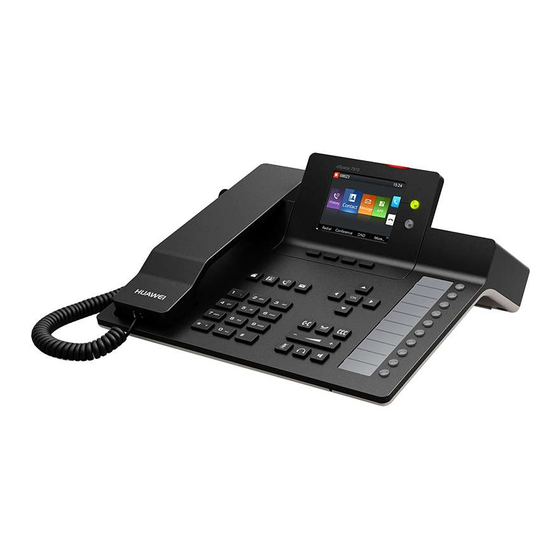
3 IP Phone Overview IP Phone Overview 3.1 Appearance 3.1.1 Button Figure 3-1 shows the appearance of the eSpace 7910 IP Phone. Figure 3-1 Appearance of the eSpace 7910 Figure 3-2 shows the appearance of the eSpace 7950 IP Phone. Issue 03 (2017-06-30) Huawei Proprietary and Confidential Copyright ©... - Page 13 Preferences button for displaying the Preferences screen. For details, consult your system administrator. Keypad Allows you to enter digits, lowercase or uppercase letters, and special characters. Issue 03 (2017-06-30) Huawei Proprietary and Confidential Copyright © Huawei Technologies Co., Ltd.
- Page 14 Icon. Programmable button (with an LED) Can be set as the shortcut button of multiple functions such as Speed Dial, XML App, and Phone Lock for eSpace 7910 IP Phone users. For details about the button LED status, see 3.1.2 LED.
-
Page 15: Led
User Guide 3 IP Phone Overview Button Description Volume button (only for eSpace 7910) When the phone is idle or ringing, you can: l Press + to turn up the volume of the ringtone. l Press - to turn down the volume of the ringtone. - Page 16 LED is steady red. Mute LED When the phone is muted, the LED is steady red. Call History LED When there is a missed call, the LED is steady red. Issue 03 (2017-06-30) Huawei Proprietary and Confidential Copyright © Huawei Technologies Co., Ltd.
- Page 17 When the call forward function is enabled LED when the programmable button or line on the phone, the LED is steady green. button is set as the Call Forward button Issue 03 (2017-06-30) Huawei Proprietary and Confidential Copyright © Huawei Technologies Co., Ltd.
-
Page 18: Screen
Contacts, History, Message, or Apps screen. l By default, the Classic mode is used. The following figures show the home screens in different modes. Figure 3-3 eSpace 7910 home screen in classic mode Issue 03 (2017-06-30) Huawei Proprietary and Confidential... -
Page 19: Icons In The Status Bar
3.2.2 Icons in the Status Bar The status bar on your phone screen displays a maximum of five icons. For eSpace 7910, when more than three icons are displayed, the date is automatically hidden. In the IMS+UC network environment, the icon for the current phone status (for example, idle, busy, or DND) is displayed all the time. - Page 20 Voice quality during a call. Voice output in headset mode. Voice output in hands-free mode. The phone is in idle state. This icon is supported only in the IMS+UC network environment. Issue 03 (2017-06-30) Huawei Proprietary and Confidential Copyright © Huawei Technologies Co., Ltd.
-
Page 21: Line Button Icon
The account is in a conference call. The line button is set as the Speed Dial button. The line button is set as the XML App button. Issue 03 (2017-06-30) Huawei Proprietary and Confidential Copyright © Huawei Technologies Co., Ltd. -
Page 22: Service
7910/eSpace 7950 on different networks. NOTE Y: The service is supported. N: The service is available in the solution but is not supported by eSpace 7910/eSpace 7950. NA: The service is not available in the solution. Y*: The service is supported in dialing mode. - Page 23 Alarm clock Emergenc y Calls Called party control Malicious caller identificat Call divert Y Button to Voicemail Consult transfer Semi- consult transfer Blind transfer Issue 03 (2017-06-30) Huawei Proprietary and Confidential Copyright © Huawei Technologies Co., Ltd.
- Page 24 (CFU) Call forwardin g offline (CFO) Call forwardin g rejection Designate d pickup Co-group pickup Call park Directed call park Hunt group Paging Group Callback on busy Issue 03 (2017-06-30) Huawei Proprietary and Confidential Copyright © Huawei Technologies Co., Ltd.
- Page 25 6 parties 6 parties 6 parties 6 parties 3 parties conferenc parties parties Creating an instant voice parties parties parties conferenc Creating an instant video conferenc Issue 03 (2017-06-30) Huawei Proprietary and Confidential Copyright © Huawei Technologies Co., Ltd.
- Page 26 Viewing participan t list Adding/ Deleting participan ts as the moderator Muting/ Unmuting participan ts as the moderator Opening/ Closing a participan t's video as the moderator Issue 03 (2017-06-30) Huawei Proprietary and Confidential Copyright © Huawei Technologies Co., Ltd.
- Page 27 Selecting participan t's video to view as moderator participan Exiting a conferenc e as a participan Dismissin conferenc e as the moderator Issue 03 (2017-06-30) Huawei Proprietary and Confidential Copyright © Huawei Technologies Co., Ltd.
- Page 28 Joining a conferenc e from an email Answerin g an invitation call for a scheduled conferenc Adding/ Deleting participan ts as the moderator Issue 03 (2017-06-30) Huawei Proprietary and Confidential Copyright © Huawei Technologies Co., Ltd.
- Page 29 Opening/ Closing the local video as moderator participan Exiting a conferenc e as the moderator participan Dismissin conferenc e as the moderator Intercom Voice mailbox Issue 03 (2017-06-30) Huawei Proprietary and Confidential Copyright © Huawei Technologies Co., Ltd.
- Page 30 (CTVMN Call transfer to voice mailbox on busy (CTVMB) Call transfer to voice mailbox offline (CTVMO Huawei directory LDAP directory Issue 03 (2017-06-30) Huawei Proprietary and Confidential Copyright © Huawei Technologies Co., Ltd.
- Page 31 V300R0 V100R (IMS) 01C00(U 001C00 C2.X) (CC) Directory server redundanc Extension mobility One-Key Switch Presence Default Sequenti Sequenti Sequenti Simulta Sequenti Sequent Sequenti redundanc neous y mode Issue 03 (2017-06-30) Huawei Proprietary and Confidential Copyright © Huawei Technologies Co., Ltd.
-
Page 32: Phone Settings
You can press App on the home screen to access the phone setting menus, where you can check and customize your phone settings. NOTE In the corresponding setting menu, you can press a key in the keypad to quickly select the corresponding item. Issue 03 (2017-06-30) Huawei Proprietary and Confidential Copyright © Huawei Technologies Co., Ltd. -
Page 33: Preferences
Hunt Group (For UC2.X and Asterisk): This ringtone is played when a call comes in to a hunt group. Step 2 Select a ringtone type and press Modify. Step 3 Select a ringtone to use and press Select. Issue 03 (2017-06-30) Huawei Proprietary and Confidential Copyright © Huawei Technologies Co., Ltd. -
Page 34: Key Tone
The Wallpaper screen is displayed. Step 2 Press Import. Step 3 Select a wallpaper to import and press Select. You can press Clear to deselect a wallpaper. Issue 03 (2017-06-30) Huawei Proprietary and Confidential Copyright © Huawei Technologies Co., Ltd. -
Page 35: Call Settings
For details about how to use the auto answer service, see 6.4.2 Answering Calls Automatically. Auto Dial After the auto dial function is enabled, the phone automatically dials a number within a specified time. Issue 03 (2017-06-30) Huawei Proprietary and Confidential Copyright © Huawei Technologies Co., Ltd. -
Page 36: Buttons
Programmable buttons are arranged from top to bottom. The following describes how to set a programmable button to a Speed Dial button: Step 1 On the home screen, choose Apps > Pref. > Buttons. Select Expansion Module (for eSpace 7950) or Programmable Buttons (for eSpace 7910) to access the programmable button setting screen. NOTE To access the programmable buttons setting screen, press and hold a programmable button for at least 3 seconds. - Page 37 However, on the phone web page, you cannot add speed dial numbers from the directory or call history. Label Displays the function name of the programmable button. Issue 03 (2017-06-30) Huawei Proprietary and Confidential Copyright © Huawei Technologies Co., Ltd.
- Page 38 File name, for specified website. example, http:// 192.168.1.72/ Menu.xml. Label Displays the function name of the programmable button. Issue 03 (2017-06-30) Huawei Proprietary and Confidential Copyright © Huawei Technologies Co., Ltd.
- Page 39 6.18 Call Forward. Press the programmable button to enable or disable DND. For details about DND-related operations, see 6.30 DND. Issue 03 (2017-06-30) Huawei Proprietary and Confidential Copyright © Huawei Technologies Co., Ltd.
- Page 40 Hunt Group Access Code Indicates the access Press the code of the programmable configured hunt button to sign in to group. or sign out of the hunt group. Issue 03 (2017-06-30) Huawei Proprietary and Confidential Copyright © Huawei Technologies Co., Ltd.
- Page 41 Step 2 Select a line button to use and press Modify. Step 3 Select a function to use and set the parameters. For details, see Programmable Buttons. ----End Issue 03 (2017-06-30) Huawei Proprietary and Confidential Copyright © Huawei Technologies Co., Ltd.
-
Page 42: Audio Source
Step 2 Select Speaker, Bluetooth earphone, USB earphone, or Headset(RJ-9). NOTE l eSpace 7910 IP Phone does not support the Bluetooth headset or USB headset. l If your IP phone is not connected to a Bluetooth headset or USB headset, you can only select either Speaker or Headset (RJ-9) as the audio source. -
Page 43: Date And Time
Headset button, or the Speaker button to directly access the dialing screen; you can press the Contact button, Call History button, or Message button to access the contacts, call history, or message screen. Issue 03 (2017-06-30) Huawei Proprietary and Confidential Copyright © Huawei Technologies Co., Ltd. - Page 44 Step 1 On the home screen, choose Apps > System > Power Saving > Auto Brightness. The Auto Brightness screen is displayed. Step 2 Press Enable. The Adjustment Time field is displayed. Step 3 Select a value and press Select. Issue 03 (2017-06-30) Huawei Proprietary and Confidential Copyright © Huawei Technologies Co., Ltd.
-
Page 45: Wi-Fi (Only For Espace 7950 Ip Phone)
Before using the Wi-Fi function, ensure that the USB port is enabled. For any questions, contact your system administrator. Enabling and Connecting Wi-Fi Step 1 Connect the Wi-Fi Dongle to the USB port. Issue 03 (2017-06-30) Huawei Proprietary and Confidential Copyright © Huawei Technologies Co., Ltd. - Page 46 Step 2 Optional: Press IP Setting. According to the network planning, set a static IP address or enable DHCP to automatically allocate an IP address. ----End Clearing Networks Clear networks in the Wi-Fi list. Issue 03 (2017-06-30) Huawei Proprietary and Confidential Copyright © Huawei Technologies Co., Ltd.
-
Page 47: Bluetooth (Only For Espace 7950 Ip Phone)
The Bluetooth screen is displayed. Step 2 Press Search. NOTE Before the phone searches for Bluetooth devices, ensure that Bluetooth is enabled for the device to be paired. Issue 03 (2017-06-30) Huawei Proprietary and Confidential Copyright © Huawei Technologies Co., Ltd. -
Page 48: Phone Lock
Step 1 On the home screen, choose Apps > System > Phone Lock. The Phone Lock screen is displayed. Step 2 Select Phone Lock and press Disable. ----End Issue 03 (2017-06-30) Huawei Proprietary and Confidential Copyright © Huawei Technologies Co., Ltd. -
Page 49: Restart
Step 2 Select Peripheral Status and press View. ----End 4.3.2 Network You can perform the following steps to view network information about the phone, including the IP address, gateway address, and subnet mask: Issue 03 (2017-06-30) Huawei Proprietary and Confidential Copyright © Huawei Technologies Co., Ltd. -
Page 50: About Phone
Step 2 Select Log Out and press Select. The Log out? dialog box is displayed. NOTE If the Log Out option is not available, contact your system administrator. Issue 03 (2017-06-30) Huawei Proprietary and Confidential Copyright © Huawei Technologies Co., Ltd. - Page 51 7910&7950 IP Phone User Guide 4 Phone Settings Step 3 Press OK. The Log In screen is displayed. ----End Issue 03 (2017-06-30) Huawei Proprietary and Confidential Copyright © Huawei Technologies Co., Ltd.
-
Page 52: Web Page Settings
Step 1 On the PC, open a browser and enter the IP address of the phone, for example, http:// 192.168.1.72. For details about how to query the IP address of the phone, see 4.3.2 Network. The login page is displayed. Issue 03 (2017-06-30) Huawei Proprietary and Confidential Copyright © Huawei Technologies Co., Ltd. -
Page 53: Preferences
You can click Export to export a contact file in .CSV or .vCard format. After you modify the exported contact file, you can import it as a new one. Issue 03 (2017-06-30) Huawei Proprietary and Confidential Copyright © Huawei Technologies Co., Ltd. - Page 54 Default primary number: l 0: office number l 1: home number l 2: mobile number l 3: soft client number CONTYPE Contact method type. The default value is 1. Issue 03 (2017-06-30) Huawei Proprietary and Confidential Copyright © Huawei Technologies Co., Ltd.
- Page 55 Company N-Department Department N-Position Position N-Id Employee ID CATEGORIES Group X-DEFAULTNUM Default primary number TEL;TYPE=WORK Office number TEL;TYPE=HOME Home number TEL;TYPE=CELL Mobile number TEL;TYPE=TERMINAL Soft client number Issue 03 (2017-06-30) Huawei Proprietary and Confidential Copyright © Huawei Technologies Co., Ltd.
- Page 56 All contacts will be deleted! You can perform the following steps to clear contacts: Step 1 On the web page, choose Preferences > Contacts. Step 2 Click Clear. Issue 03 (2017-06-30) Huawei Proprietary and Confidential Copyright © Huawei Technologies Co., Ltd.
- Page 57 Step 1 On the web page, choose Preferences > Contacts. Step 2 Click Groups. The Groups page is displayed. Step 3 Select a group to delete and click Delete. Issue 03 (2017-06-30) Huawei Proprietary and Confidential Copyright © Huawei Technologies Co., Ltd.
-
Page 58: Ringtone
When you place the pointer on a ringtone or select a ringtone, is displayed for you to delete the ringtone. The system ringtones cannot be deleted. ----End Issue 03 (2017-06-30) Huawei Proprietary and Confidential Copyright © Huawei Technologies Co., Ltd. -
Page 59: Key Tone
You can perform the following steps to set the audio source: Step 1 On the web page, choose Preferences > Audio Source. Step 2 Select Speaker, Bluetooth earphone, USB earphone, or Headset(RJ-9). Issue 03 (2017-06-30) Huawei Proprietary and Confidential Copyright © Huawei Technologies Co., Ltd. -
Page 60: Theme
5 Web Page Settings NOTE l eSpace 7910 IP Phone does not support the Bluetooth headset or USB headset. l If your IP phone is not connected to a Bluetooth headset or USB headset, you can only select either Speaker or Headset (RJ-9) as the audio source. -
Page 61: Buttons
On the web page, choose Call Settings > Intercom and set auto answer and auto mute for intercom calls. For details about how to use the intercom service, see 6.33 Intercom. 5.4 Buttons Issue 03 (2017-06-30) Huawei Proprietary and Confidential Copyright © Huawei Technologies Co., Ltd. -
Page 62: Line & Programmable Buttons
It is recommended that you not use a line button as a programmable button. l Only unused line buttons can be set to shortcut buttons. Step 1 (For eSpace 7910) On the web page, choose Buttons > Line & Programmable Button. (For eSpace 7950) On the web page, choose Buttons > Line Buttons. -
Page 63: As Dial
You can perform the following operations to set the input method. Step 1 On the web page, choose System > Input Method. Step 2 Select the input methods you want to use. Step 3 Click Save. ----End Issue 03 (2017-06-30) Huawei Proprietary and Confidential Copyright © Huawei Technologies Co., Ltd. -
Page 64: Power Saving
If the value for Sleep After is the same as the value for Adjustment Time, the phone automatically changes to the sleep state at the appointed time. ----End Issue 03 (2017-06-30) Huawei Proprietary and Confidential Copyright © Huawei Technologies Co., Ltd. -
Page 65: Phone Lock
Step 3 Select a value for Lock After. Step 4 Click Save. NOTE The default phone lock delay is 30 minutes. For details about how to unlock a phone, see 6.15 Phone Unlock. ----End Issue 03 (2017-06-30) Huawei Proprietary and Confidential Copyright © Huawei Technologies Co., Ltd. -
Page 66: Restart
5.6.3 About Phone On the web page, choose View Status > About Phone to view basic information about the phone, including the software version, boot version, and hardware version. Issue 03 (2017-06-30) Huawei Proprietary and Confidential Copyright © Huawei Technologies Co., Ltd. -
Page 67: Phone Usage
You can log in to your phone using the phone number. During the login, you need to enter the account, user name, and password. Issue 03 (2017-06-30) Huawei Proprietary and Confidential Copyright © Huawei Technologies Co., Ltd. -
Page 68: Input Method
You can perform the following steps to change the input method or delete characters: Press the input method softkey to switch between different input methods. Press to delete the character on the left of the cursor. Issue 03 (2017-06-30) Huawei Proprietary and Confidential Copyright © Huawei Technologies Co., Ltd. -
Page 69: Multiple Lines
Line buttons: located on the right side of your phone screen. Each line button corresponds to only one account, but can support multiple lines. eSpace 7910 IP Phone provides 6 line buttons and supports 3 registered accounts. Each line button can be assigned a maximum of 12 lines. -
Page 70: Answering Incoming Calls
6.4.2 Answering Calls Automatically. Use your phone to answer a call that rings Enable the call pickup function. For detailed elsewhere operations, see 6.21 Call Pickup. Issue 03 (2017-06-30) Huawei Proprietary and Confidential Copyright © Huawei Technologies Co., Ltd. -
Page 71: Answering Calls Automatically
Step 2 Enter the number of a contact, press the Up or Down arrow button to select a contact, press Contact to select a contact in the contact list, or press History to select a contact in the call history. Step 3 Press Transfer. ----End Issue 03 (2017-06-30) Huawei Proprietary and Confidential Copyright © Huawei Technologies Co., Ltd. -
Page 72: One Button To Voicemail
Consult your system administrator about how to obtain the recordings. Recording During a Call During a call, you can perform the following operations to use the call recording function: Issue 03 (2017-06-30) Huawei Proprietary and Confidential Copyright © Huawei Technologies Co., Ltd. -
Page 73: Placing Calls
After a contact is selected, you can press Edit Dial to change the number of the contact. l If the plus sign (+) is required when you enter a number, press the * key twice. ----End Issue 03 (2017-06-30) Huawei Proprietary and Confidential Copyright © Huawei Technologies Co., Ltd. -
Page 74: Placing Calls Using The Redial Button
When a contact is selected, press Details to display the details of the contact. Press the arrow buttons to select any number to call. Issue 03 (2017-06-30) Huawei Proprietary and Confidential Copyright © Huawei Technologies Co., Ltd. -
Page 75: Making Calls Using The Call History
After the programmable button or the line button is set as the Speed Dial button, you can dial a specified number by pressing the programmable button or line button. For details about how to set the Speed Dial button, see 4.1.6 Buttons. Issue 03 (2017-06-30) Huawei Proprietary and Confidential Copyright © Huawei Technologies Co., Ltd. -
Page 76: Placing Emergency Calls
You can also enter the emergency call dial screen by picking up the phone, or pressing the Headset button. Step 2 Enter an emergency number. Step 3 Press Call. ----End Issue 03 (2017-06-30) Huawei Proprietary and Confidential Copyright © Huawei Technologies Co., Ltd. -
Page 77: Auto Dial
6.5.10 Abbreviated Dialing With abbreviated dialing enabled, the phone allows you to dial an abbreviated number instead of a complete called number to connect to the called party. Issue 03 (2017-06-30) Huawei Proprietary and Confidential Copyright © Huawei Technologies Co., Ltd. -
Page 78: Ocb
Step 5 Press OK. ----End Disabling OCB Step 1 On the home screen, choose Apps > Preferences > Call Settings > OCB. The OCB screen is displayed. Issue 03 (2017-06-30) Huawei Proprietary and Confidential Copyright © Huawei Technologies Co., Ltd. -
Page 79: Anonymous Call
You also need to enable CLIR on eSpace Portal. For detailed operations, see the eSpace UC Product Documentation. 6.7 Centrex Number You can use a Centrex number to place a call. Issue 03 (2017-06-30) Huawei Proprietary and Confidential Copyright © Huawei Technologies Co., Ltd. -
Page 80: Reminder Call
If you are engaged in an ongoing call with user A and if user A is the calling party and has the calling party control service rights, Issue 03 (2017-06-30) Huawei Proprietary and Confidential Copyright © Huawei Technologies Co., Ltd. -
Page 81: Called Party Control
In the IMS network environment, the MCID softkey is not displayed. You can place the call on hold and dial an access code to identify the call as a malicious one. Issue 03 (2017-06-30) Huawei Proprietary and Confidential Copyright © Huawei Technologies Co., Ltd. -
Page 82: Switching Between Handset, Speaker, And Headset Modes
To change the profile picture for a contact, select the profile picture and press Modify. Only the default profile pictures can be used. Step 4 Press Done. ----End Issue 03 (2017-06-30) Huawei Proprietary and Confidential Copyright © Huawei Technologies Co., Ltd. -
Page 83: Searching For Contacts
6.13.2 Searching for Contacts. Step 3 Press More to navigate to Delete and press Delete. The message "Delete the contact?" is displayed. Step 4 Press Delete. ----End Issue 03 (2017-06-30) Huawei Proprietary and Confidential Copyright © Huawei Technologies Co., Ltd. -
Page 84: Importing Contacts (Only For Espace 7950 Ip Phone)
Step 2 Press the Right arrow button to switch to the Groups screen. Step 3 Press Add. Step 4 Enter a group name, select Ringtone, and press Add. The Add screen is displayed. Issue 03 (2017-06-30) Huawei Proprietary and Confidential Copyright © Huawei Technologies Co., Ltd. -
Page 85: Modifying Groups
Step 6 Press Done. The contact is added to the group. Step 7 Press Done to save the settings. ----End Deleting Group Members Step 1 Press the Contacts button. The Contacts screen is displayed. Issue 03 (2017-06-30) Huawei Proprietary and Confidential Copyright © Huawei Technologies Co., Ltd. -
Page 86: Deleting Groups
Step 2 Press the Right arrow button to switch to the Missed screen. ----End NOTE After you check the missed calls, the call history LED turns off and the icon indicating the number of missed calls disappears. Issue 03 (2017-06-30) Huawei Proprietary and Confidential Copyright © Huawei Technologies Co., Ltd. -
Page 87: Querying Call Details
All and Missed screens. Step 2 Press More to navigate to Clear and press Clear. The message "Clear all call records?" is displayed. Step 3 Press Clear. ----End Issue 03 (2017-06-30) Huawei Proprietary and Confidential Copyright © Huawei Technologies Co., Ltd. -
Page 88: Adding Contacts
If no number exists for the selected number type, press Select to save the number under this type. The Edit Contact screen is displayed. Step 7 Edit the contact information and press Done. ----End Issue 03 (2017-06-30) Huawei Proprietary and Confidential Copyright © Huawei Technologies Co., Ltd. -
Page 89: Phone Unlock
A call is transferred to a third party after the phone of the third party rings. Consult transfer A call is transferred to a third party after the third party answers the call. Issue 03 (2017-06-30) Huawei Proprietary and Confidential Copyright © Huawei Technologies Co., Ltd. - Page 90 Contact to select a contact in the contact list, or press History to select a contact in the call history. Step 3 Press Call. After the third party answers the call, ask him or her whether to answer the call. Issue 03 (2017-06-30) Huawei Proprietary and Confidential Copyright © Huawei Technologies Co., Ltd.
-
Page 91: Call Forward
From V200R003C00SPCb00, Forward Mode and Call Forward in Call Settings are combined into Call Forward. Step 2 Select Server or Local. NOTE In an IMS+UC network environment, the call forward mode cannot be set. ----End Issue 03 (2017-06-30) Huawei Proprietary and Confidential Copyright © Huawei Technologies Co., Ltd. - Page 92 1. On the home screen, press the Forward softkey or choose Apps > Preferences > Call Settings > Call Forward. 2. Select a forward mode, and click Select. 3. Select Disable and press Select. Issue 03 (2017-06-30) Huawei Proprietary and Confidential Copyright © Huawei Technologies Co., Ltd.
- Page 93 After the call is ended, phone C's call history adds a call record with phone A, and phone A's call history adds a call record with phone B. Issue 03 (2017-06-30) Huawei Proprietary and Confidential Copyright © Huawei Technologies Co., Ltd.
-
Page 94: Deny Call Forward
Before using the call waiting function, ensure that at least two lines have been configured for the account. Setting Call Waiting You can set the call waiting function on your phone LCD screen or web page. For detailed operations, see Table 6-7. Issue 03 (2017-06-30) Huawei Proprietary and Confidential Copyright © Huawei Technologies Co., Ltd. -
Page 95: Call Pickup
Answer the calls of the other accounts in the same pickup group. 6.21.1 Pickup NOTE Before using the pickup function, ensure that your account has been assigned the call pickup rights. For any questions, contact your system administrator. Issue 03 (2017-06-30) Huawei Proprietary and Confidential Copyright © Huawei Technologies Co., Ltd. -
Page 96: Group Pickup
6.22 Call Park You can hold an active call and retrieve the call on another phone that has been assigned the call park rights within 5 minutes. Issue 03 (2017-06-30) Huawei Proprietary and Confidential Copyright © Huawei Technologies Co., Ltd. -
Page 97: Directed Call Park
Step 1 On the home screen of the phone corresponding to the specified number, press Unpark. Step 2 Enter the number of the user who has parked the call and press Unpark. ----End Issue 03 (2017-06-30) Huawei Proprietary and Confidential Copyright © Huawei Technologies Co., Ltd. -
Page 98: Hotline
Hunt group members can ask their system administrator for the authentication password. l A maximum of three password attempts are allowed. If an incorrect password is entered for three consecutive times, the sign-in or sign-out fails. Issue 03 (2017-06-30) Huawei Proprietary and Confidential Copyright © Huawei Technologies Co., Ltd. -
Page 99: Paging Group
The number of recipients is restricted by conference resources. Multicast: The system creates a virtual participant to join a conference and enable voice broadcast through IP multicast of switches or routers. Issue 03 (2017-06-30) Huawei Proprietary and Confidential Copyright © Huawei Technologies Co., Ltd. -
Page 100: Auto Callback
When the number you dial is unreachable, you can enable the auto Callback (ACB) function so that the system automatically calls you and the desired number to set up a call once the desired number is idle. Issue 03 (2017-06-30) Huawei Proprietary and Confidential Copyright © Huawei Technologies Co., Ltd. - Page 101 Table 6-8. Step 2 When the peer party becomes idle, your phone displays the callback list, and an announcement is played. Issue 03 (2017-06-30) Huawei Proprietary and Confidential Copyright © Huawei Technologies Co., Ltd.
- Page 102 Step 3 Press the Up arrow or Down arrow button to select a number available for callback, and press Call to initiate a call. After the call is initiated, the callback record is deleted from the callback list. Issue 03 (2017-06-30) Huawei Proprietary and Confidential Copyright © Huawei Technologies Co., Ltd.
-
Page 103: Distinctive Ring
After the BLF function is enabled, the status of the monitored accounts is displayed on the programmable and line buttons. You can press a programmable button to dial a monitored number. Issue 03 (2017-06-30) Huawei Proprietary and Confidential Copyright © Huawei Technologies Co., Ltd. -
Page 104: Dnd
The following uses a programmable button on the expansion module as an example. Step 1 (For eSpace 7910) On the home screen, choose Apps > Preferences > Buttons > Programmable Buttons. (For eSpace 7950) On the home screen, choose Apps > Preferences > Buttons > Expansion Module. - Page 105 DND. When DND is enabled, DND enabled is displayed on the home screen and is displayed in the status bar. Issue 03 (2017-06-30) Huawei Proprietary and Confidential Copyright © Huawei Technologies Co., Ltd.
-
Page 106: Absence Service
Press Merge to create a local conference, when the call between you and user B is ongoing and the call between you and user C is placed on hold. Issue 03 (2017-06-30) Huawei Proprietary and Confidential Copyright © Huawei Technologies Co., Ltd. -
Page 107: Managing A Local Conference
1. Press the arrow buttons to select a participant to remove. 2. Press More to navigate to Remove and press Remove. The message "Remove the participant?" is displayed. 3. Press Yes. Issue 03 (2017-06-30) Huawei Proprietary and Confidential Copyright © Huawei Technologies Co., Ltd. -
Page 108: Intercom
NOTICE The intercom function takes precedence over DND and call waiting, but call forward all takes precedence over intercom. Issue 03 (2017-06-30) Huawei Proprietary and Confidential Copyright © Huawei Technologies Co., Ltd. - Page 109 Step 1 Choose Call Settings > Intercom. Step 2 Select Enable or Disable for Auto mute. Step 3 Click Save. ----End Table 6-13 lists the detailed operations for answering intercom calls. Issue 03 (2017-06-30) Huawei Proprietary and Confidential Copyright © Huawei Technologies Co., Ltd.
-
Page 110: Group Intercom
After a non-initiator presses the Hangup softkey, the non-initiator can press the intercom line button to rejoin the group intercom. After the initiator presses the Hangup softkey, the group intercom is ended. Issue 03 (2017-06-30) Huawei Proprietary and Confidential Copyright © Huawei Technologies Co., Ltd. -
Page 111: Advanced Secretary
Assume that user A is the manager of a company, and user B and user C are user A's secretaries. Figure 6-2 shows the mapping relationships between the lines of manager A and secretaries B and C. Figure 6-2 Manager-Secretary line mappings Issue 03 (2017-06-30) Huawei Proprietary and Confidential Copyright © Huawei Technologies Co., Ltd. - Page 112 When the Secretary Answering the Call (Available only in EC6.X) Third-party user D calls manager A. When the secretary B answers the call, the manager barges into the call. Issue 03 (2017-06-30) Huawei Proprietary and Confidential Copyright © Huawei Technologies Co., Ltd.
- Page 113 Step 2 The peer end of the shared line presses the line button corresponding to the shared line to check the calling status of the shared line and presses the Retrieve softkey to retrieve the conference. Issue 03 (2017-06-30) Huawei Proprietary and Confidential Copyright © Huawei Technologies Co., Ltd.
-
Page 114: Mla
IP phones, indicating that the line is occupied. Step 3 When the call is ended, the indicator is off on all IP phones, indicating that the line is idle again. ----End Issue 03 (2017-06-30) Huawei Proprietary and Confidential Copyright © Huawei Technologies Co., Ltd. -
Page 115: Voicemail
Enable the call forward function and set the call forward to voicemail. For details, see 6.18 Call Forward. In the IMS+UC network environment, visual voicemails are used, on which you can perform operations such as fast forward, rewind, pause, and resume. Issue 03 (2017-06-30) Huawei Proprietary and Confidential Copyright © Huawei Technologies Co., Ltd. - Page 116 NOTE The phone supports a maximum of 256 voice messages, and you can query the information about a maximum of 40 voice messages at a time. Issue 03 (2017-06-30) Huawei Proprietary and Confidential Copyright © Huawei Technologies Co., Ltd.
- Page 117 The clear operation is unavailable when you are listening to a voice message. Step 1 Press the Message button. The Voicemail screen is displayed. Step 2 Select a voice message and press Call. Issue 03 (2017-06-30) Huawei Proprietary and Confidential Copyright © Huawei Technologies Co., Ltd.
-
Page 118: Virtual Voicemail
You can perform the following operations to enable the linkage function: Log in to the PC Client. Click and select Enable IP Phone Linkage, as shown in Figure 6-3. Issue 03 (2017-06-30) Huawei Proprietary and Confidential Copyright © Huawei Technologies Co., Ltd. - Page 119 When the linkage-enabled account of your IP phone is engaged in a call, your IP phone and the linked PC Client both display the talking screen/window. Click Hangup on the linked PC Client. Issue 03 (2017-06-30) Huawei Proprietary and Confidential Copyright © Huawei Technologies Co., Ltd.
- Page 120 The phone linkage service does not work for the automatic outbound and Callback services. Enable or disable the DND service on the linked PC Client. The IP phone automatically enables or disables the DND service. Issue 03 (2017-06-30) Huawei Proprietary and Confidential Copyright © Huawei Technologies Co., Ltd.
-
Page 121: Ipcc Linkage
7910&7950 IP Phone has been installed. The linkage service rights have been configured on the IP phone and server. The network environment for eSpace 7910&7950 IP Phone has been set to CC. NOTE l For details about how to configure an agent user, see "Configuring Agent Users" in the eSpace CC Solution Product Documentation. - Page 122 The agent performs the call hold operation on the IP phone, and the window indicating that the call is placed on hold is displayed on the Agent Client system. Issue 03 (2017-06-30) Huawei Proprietary and Confidential Copyright © Huawei Technologies Co., Ltd.
- Page 123 Client system. The IP phone also automatically changes to on-hook state. l Press the Hangup softkey on the IP phone. The Agent Client system also automatically releases the call. Issue 03 (2017-06-30) Huawei Proprietary and Confidential Copyright © Huawei Technologies Co., Ltd.
- Page 124 Directly dial the customer number on the IP phone. NOTE The phone linkage service does not work for the automatic outbound and Callback services. Issue 03 (2017-06-30) Huawei Proprietary and Confidential Copyright © Huawei Technologies Co., Ltd.
-
Page 125: Espace Uc-Related Functions
Access the phone web page, choose Call Settings > Linkage > Desktop Linkage, and click Save. Enabling Linkage Click and select Enable IP Phone Linkage, as shown in Figure 7-1. Figure 7-1 Enabling linkage Issue 03 (2017-06-30) Huawei Proprietary and Confidential Copyright © Huawei Technologies Co., Ltd. - Page 126 IP phone is engaged in a call, your IP phone and the linked eSpace Desktop both display the talking screen/window. Open the keypad for two-stage dialing on the linked eSpace Desktop and perform two-stage dialing. Issue 03 (2017-06-30) Huawei Proprietary and Confidential Copyright © Huawei Technologies Co., Ltd.
- Page 127 Desktop both display the talking screen/window. Click on the linked eSpace Desktop. The call is held on the corresponding line on the IP phone. Issue 03 (2017-06-30) Huawei Proprietary and Confidential Copyright © Huawei Technologies Co., Ltd.
- Page 128 IP phone in real time. During phone login, the online status of the linkage-enabled account is automatically synchronized. Issue 03 (2017-06-30) Huawei Proprietary and Confidential Copyright © Huawei Technologies Co., Ltd.
-
Page 129: Directory
You can perform the following operations to add a contact in the directory to my contacts: Step 1 Press the Contacts button. The Contacts screen is displayed. Issue 03 (2017-06-30) Huawei Proprietary and Confidential Copyright © Huawei Technologies Co., Ltd. -
Page 130: Extension Mobility
In the IMS+UC network environment, if the phone has registered an account before the roaming account is logged in, the phone is automatically logged in using the registered account after the roaming account is logged out. ----End Issue 03 (2017-06-30) Huawei Proprietary and Confidential Copyright © Huawei Technologies Co., Ltd. -
Page 131: One-Key Switch
Create an instant conference using Conf on User A and user B are engaged in a call, and the talking screen the initiator (user A or B) presses More and then Conf. Issue 03 (2017-06-30) Huawei Proprietary and Confidential Copyright © Huawei Technologies Co., Ltd. - Page 132 NOTE During a conference, a conference participant can perform only the following operations: placing the conference on hold, viewing participant details, mute himself/herself, and leaving the conference. Issue 03 (2017-06-30) Huawei Proprietary and Confidential Copyright © Huawei Technologies Co., Ltd.
- Page 133 Turning mute on: Press the Mute button during a call. is then displayed on the status bar of your phone. l Turning mute off: Press the Mute button if your phone is muted. Issue 03 (2017-06-30) Huawei Proprietary and Confidential Copyright © Huawei Technologies Co., Ltd.
- Page 134 (for example, Conference 1), this conference initiator can only perform the conference split operation. Issue 03 (2017-06-30) Huawei Proprietary and Confidential Copyright © Huawei Technologies Co., Ltd.
-
Page 135: Group Conference
Deleting participants: Select a participant to delete, press More to navigate to Delete and press Delete. Step 4 Press Done. The conference screen is displayed, on which you can see the security conference ID. Issue 03 (2017-06-30) Huawei Proprietary and Confidential Copyright © Huawei Technologies Co., Ltd. - Page 136 More to navigate to Delete and press Delete. 4. Press Done NOTE Select a participant, and press Other Tel to change the invitation number. Issue 03 (2017-06-30) Huawei Proprietary and Confidential Copyright © Huawei Technologies Co., Ltd.
- Page 137 3. Press OK. Exit actively 1. Press More to navigate to Exit and press Exit. The message "Exit the conference?" is displayed. 2. Press OK. Issue 03 (2017-06-30) Huawei Proprietary and Confidential Copyright © Huawei Technologies Co., Ltd.
- Page 138 The hold operation does not take effect on the merged conference (for example, Conference 1). l Resuming a conference: Press Resume to resume a conference in hold state. Issue 03 (2017-06-30) Huawei Proprietary and Confidential Copyright © Huawei Technologies Co., Ltd.
-
Page 139: Converged Conference
Ensure that SRTP under Settings > ADVANCED > Network Security is set to Mandatory or Optional if you need to join an encrypted conference. You can join a converged conference in any of the ways listed in Table 7-5. Issue 03 (2017-06-30) Huawei Proprietary and Confidential Copyright © Huawei Technologies Co., Ltd. - Page 140 Turning mute off: Press the Mute button if your phone is muted. Exit actively Hang up. Issue 03 (2017-06-30) Huawei Proprietary and Confidential Copyright © Huawei Technologies Co., Ltd.
- Page 141 2. Press More to navigate to Remove and press Remove. 3. Press OK. Exit actively 1. Press More to navigate to Exit and press Exit. 2. Press OK. Issue 03 (2017-06-30) Huawei Proprietary and Confidential Copyright © Huawei Technologies Co., Ltd.
-
Page 142: Presence
The phone is in DND state. Viewing the status of your contacts Issue 03 (2017-06-30) Huawei Proprietary and Confidential Copyright © Huawei Technologies Co., Ltd. - Page 143 Idle (IP phone's idle icon) Idle, offline, Offline Offline unknown, or NA Idle, offline, or Idle (IP phone's idle , or no icon unknown icon), offline, or unknown Issue 03 (2017-06-30) Huawei Proprietary and Confidential Copyright © Huawei Technologies Co., Ltd.