Huawei eSpace 7910 User Manual
Vodafone one net business
Hide thumbs
Also See for eSpace 7910:
- User manual (143 pages) ,
- Product overview (22 pages) ,
- Quick start manual (10 pages)

Related Manuals for Huawei eSpace 7910


Summary of Contents for Huawei eSpace 7910
- Page 1 7910 IP Phone USER GUIDE VODAFONE ONE NET BUSINESS Issue 05 Date 14/09/2017 HUAWEI TECHNOLOGIES CO., LTD. The future is exciting. Ready?
- Page 2 NOTICE The purchased products, services and features are stipulated by the contract made between Huawei and the customer. All or part of the products, services and features described in this document may not be within the purchase scope or the usage scope.
-
Page 3: About This Document
7910 IP Phone User Guide One Net About This Document OVERVIEW This document covers the following information about eSpace 7910: overview, configuration, usage, and common troubleshooting methods. INTENDED AUDIENCE This document is intended for the end user of Vodafone’s One Net Business service. -
Page 4: Table Of Contents
7910 IP Phone User Guide One Net TABLE OF CONTENTS About this document ........ - Page 5 7910 IP Phone User Guide One Net 4.2 System ..........
- Page 6 7910 IP Phone User Guide One Net 4.8.2 Searching for contacts ....... . 45 4.8.3 Modifying contacts .
-
Page 7: Safety Precautions
Safety precautions... - Page 8 When installing the device, comply with Limited Power Source (LPS) and local electric security standards, and use the power supply of Safety Extra Low Voltage (SELV). • Before connecting or disconnecting any cable, shut down the device and disconnect the power supply. eSpace 7910 IP Phone User Guide One Net...
- Page 9 Do not dispose of the device and the accessories in a garbage can. Dispose the device according to local regulations on disposing of packing materials, exhausted batteries and abandoned devices, and support recycling activities. eSpace 7910 IP Phone User Guide One Net...
-
Page 10: Legal Statement
Legal statement... - Page 11 Read the legal information before using the phone. Access the phone web page, choose View Status > About Phone, and view information in the Legal Statement area. eSpace 7910 IP Phone User Guide One Net...
-
Page 12: Ip Phone Overview
IP Phone overview... -
Page 13: Appearance
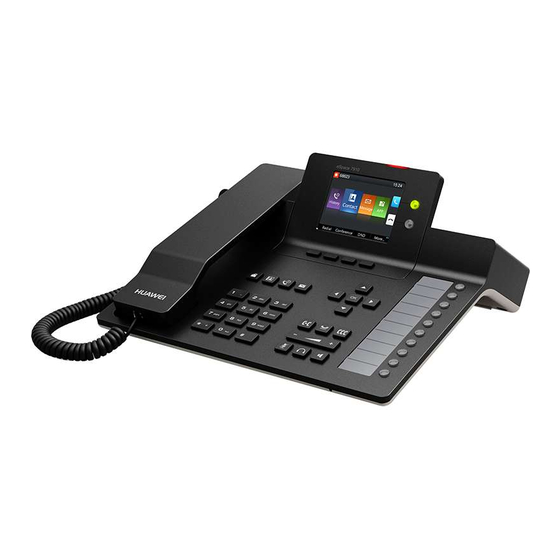
Appearance... - Page 14 Appearance 3.1.1 BUTTON Figure 3-1 shows the appearance of the eSpace 7910. Figure 3-1 Appearance Softkeys Corresponding to buttons beneath the screen. Line button Speaker Navigation buttons Message button Programmable buttons Call History button Tramsfer buttons Home button Hold buttons...
- Page 15 With mute enabled, you Mute button can hear other parties on the call but they cannot hear you. (with an LED) For details about the button LED status, see 3.1.2 LED. eSpace 7910 IP Phone User Guide One Net...
-
Page 16: Buttons
Speed Dial button and the When the phone is in speed dial or talking state, the LED is steady red. BLF function is disabled (For details about how to disable the BLF function, see 4.1.5 Buttons.) eSpace 7910 IP Phone User Guide One Net... - Page 17 LED when the programmable button or When the phone is in DND state, the LED is steady red. line button is set as a Do Not Disturb (DND) button eSpace 7910 IP Phone User Guide One Net...
-
Page 18: Screen
Screen... -
Page 19: Home Screen
By default, the Simple mode is used, but this may differ depending on your administrator’s settings Figure 3-2 and Figure 3-3 shows the home screen. Status Bar Main Menu Line Button Status Details Softkey Status Bar Line Button Status Details Softkey eSpace 7910 IP Phone User Guide One Net... -
Page 20: Icons In The Status Bar
The account is in a conference call. The line button is set as the Speed Dial button. The line button is set as the Call Forward button. The line button is set as the DND button. eSpace 7910 IP Phone User Guide One Net... -
Page 21: Service
Service... - Page 22 Service This section describes the services supported by eSpace 7910 on One Net. Table 3-5 lists the services supported by eSpace 7910 on One Net. Y: The service is supported. Table 3-5 List of services supported by eSpace 7910 SERVICE...
-
Page 23: Phone Settings
Phone settings... -
Page 24: Preferences
Preferences... -
Page 25: Ringtone
The Wallpaper screen is displayed. Step 2 Select a wallpaper to use and press Select. NOTE The Preview softkey allows you to preview the wallpaper display effect without exiting the wallpaper setting screen. eSpace 7910 IP Phone User Guide One Net... -
Page 26: Buttons
Call Forward. Press the programmable button to enable or disable DND. For details about DND-related operations, see 6.19 DND. Press the programmable button to enable real-time status monitoring of the corresponding number. eSpace 7910 IP Phone User Guide One Net... -
Page 27: Audio Source
You can perform the following steps to set a theme: Step 1 On the home screen, choose Apps > Preferences > Theme. Step 2 Select Classic or Simple. Step 3 Press Select. eSpace 7910 IP Phone User Guide One Net... -
Page 28: System
System... -
Page 29: Date And Time
Headset button, or the Speaker button to directly access the dialing screen; you can press the Contact button, Call History button, or Message button to access the contacts, call history, or message screen. eSpace 7910 IP Phone User Guide One Net... - Page 30 On the home screen, choose Apps > System > Power Saving > Screensaver. The Screensaver screen is displayed. Step 2 Press Enable. The Delay field is displayed. Step 3 Set a value and press Select. eSpace 7910 IP Phone User Guide One Net...
-
Page 31: Restart
On the home screen, choose Apps > System. Step 2 Select Restart and press Select. The message “Are you sure you want to restart the phone?” is displayed. Step 3 Press Restart. eSpace 7910 IP Phone User Guide One Net... -
Page 32: Status
Status... -
Page 33: Network
You can perform the following steps to view basic information about the phone, including the software version, boot version, and hardware version: Step 1 On the home screen, choose Apps > Status. Step 2 Select About Phone and press View. eSpace 7910 IP Phone User Guide One Net... -
Page 34: Advanced
Advanced... - Page 35 IP phone to factory defaults. NOTE A password authenticated by the administrator is required for advanced settings. This option is reserved for Vodafone technical staff only. eSpace 7910 IP Phone User Guide One Net...
-
Page 36: Answering Incoming Calls
Answering... -
Page 37: Answering Calls Manually
Muting: During a call, press the Mute button. Then, the peer party cannot hear you but you can still hear the peer party. is displayed in the status bar. • Unmuting: When a phone is muted, press the Mute button to unmute the phone. eSpace 7910 IP Phone User Guide One Net... -
Page 38: Placing Calls
Placing calls... -
Page 39: Placing Calls By Entering Numbers Directly
Step 2 Press Redial. If Redial Button is set to Display redial list, a list of dialled numbers is displayed. You can select a number to dial, and press Call. eSpace 7910 IP Phone User Guide One Net... -
Page 40: Placing Calls Using Contacts
You can also press Call or Edit dial on the call details screen to make a call. 4.6.5 PLACING CALLS USING THE CORPORATE DIRECTORY Step 1 Press the Contacts button. The Contacts screen is displayed. Step 2 Press the Right button to switch to the Corporate screen. eSpace 7910 IP Phone User Guide One Net... - Page 41 Search text box to search for a contact Step 4 Select a contact and press Details. Step 5 Press Call. NOTE • The Corporate Directory is managed by your systems administrator, please contact them with any queries. eSpace 7910 IP Phone User Guide One Net...
-
Page 42: Switching Between Handset, Speaker, And Headset Modes
Switching between Handset, Speaker, and Headset modes... - Page 43 Switching to headset mode In speaker or handset mode, you can press the Headset button to switch to headset mode. After the switching, is displayed in the status bar of the phone screen. eSpace 7910 IP Phone User Guide One Net...
-
Page 44: Contacts
Contacts... -
Page 45: Adding Contacts
The phone searches for the contacts that match the keywords in the contact list. NOTE If contact groups have been created, you can press the Right arrow button to display the Groups screen and search for contacts by group. eSpace 7910 IP Phone User Guide One Net... -
Page 46: Modifying Contacts
A contact can be added to a group after added to my contacts. Step 5 Press Select to select a contact. You can press Clear to deselect a contact Step 6 Press Done to add a contact to a group. eSpace 7910 IP Phone User Guide One Net... -
Page 47: Modifying Groups
Select a group from which you want to delete contacts, press More to navigate to Edit, and press Edit. The Edit page is displayed. Step 4 Select a contact to delete, and press Delete. A “Delete the group member?” message is displayed. Step 5 Press Delete. eSpace 7910 IP Phone User Guide One Net... -
Page 48: Deleting Groups
Step 3 Select a group to delete, press More to navigate to Delete, and press Delete. The message “Are you sure you want to delete the group?” is displayed. Step 4 Press Delete. eSpace 7910 IP Phone User Guide One Net... -
Page 49: History
History... -
Page 50: Querying Missed Calls
Press the Call History button. The All screen is displayed. You can press the Left or Right arrow button to switch between the All and Missed screens. Step 2 Select a record to delete. eSpace 7910 IP Phone User Guide One Net... -
Page 51: Adding Contacts
The Select a number save type dialog box is displayed. Step 5 Select a number type and press Select. The Add Contact screen is displayed. Step 6 Edit the contact information and press Done. eSpace 7910 IP Phone User Guide One Net... - Page 52 • If no number exists for the selected number type, press Select to save the number under this type. The Edit Contact screen is displayed. Step 7 Edit the contact information and press Done. eSpace 7910 IP Phone User Guide One Net...
-
Page 53: Call Hold
4.10 Call hold... - Page 54 If the call placed on hold is the only call on your phone, the phone reminds you that there is a call on hold by means of periodic sound notifications and the MWI. eSpace 7910 IP Phone User Guide One Net...
-
Page 55: Call Transfer
4.11 Call transfer... - Page 56 Press Call. After the third party answers the call, ask him or her whether to answer the call. Step 4 If the third party accepts the call, press Done or directly hang up. eSpace 7910 IP Phone User Guide One Net...
-
Page 57: Call Forward
4.12 Call forward... - Page 58 Assume that call forward all has been enabled on phone B and the call forward destination is phone C. When phone A calls phone B, (for internal One Net calls only). • Phone A's screen displays a message indicating that the call has been forwarded. This message disappears in 5s. eSpace 7910 IP Phone User Guide One Net...
- Page 59 B. • After the call is ended, phone C's call history adds a call record with phone A, and phone A's call history adds a call record with phone B. eSpace 7910 IP Phone User Guide One Net...
-
Page 60: Call Waiting
4.13 Call waiting... - Page 61 Stop the ring of the new call. If the calling party does not hang up, you still can press Answer to answer the call. • Press Reject. Reject the new call and display the original call screen. eSpace 7910 IP Phone User Guide One Net...
-
Page 62: Distinctive Ringing
4.14 Distinctive ringing... - Page 63 You can set distinctive rings for internal and external calls. For details, see 4.1.1 Ringtone. The ring priorities in descending order are as follows: contact ring, group ring, internal or external ring, ring that matches the ringtone parameter, and default ring. eSpace 7910 IP Phone User Guide One Net...
-
Page 64: Blf
4.15... - Page 65 After the BLF function is enabled, the status of the monitored accounts is displayed on the programmable and line buttons. You can press a programmable button to dial a monitored number. For details about the LED status, see 3.1.2 LED. eSpace 7910 IP Phone User Guide One Net...
-
Page 66: Local Conference
4.16 Local conference... -
Page 67: Creating A Local Conference
History to select a contact in the call history. Add a participant 3. Press Call. 4. Press Join after the contact answers the call. NOTE The phone supports a local audio conference involving a maximum of six parties. eSpace 7910 IP Phone User Guide One Net... - Page 68 The message “End t he conference?” is displayed. 2. Press Yes. End a conference NOTE • When the conference initiator presses End, the conference is ended. • When a participant presses End, only the participant leaves the conference. eSpace 7910 IP Phone User Guide One Net...
-
Page 69: Voicemail
4.17 Voicemail... - Page 70 Press the Message button. The Voicemail screen is displayed. Query voice messages NOTE On the home screen, you can select Message and press OK to access the Voicemail screen, when in Classic view mode. eSpace 7910 IP Phone User Guide One Net...
-
Page 71: Corporate Directory
4.18 Corporate Directory... - Page 72 Search for and select the contact that you want to add to my contacts and press +Contacts. The Add Contact screen is displayed. Step 4 Modify the contact information. Step 5 Press Done to save the settings. eSpace 7910 IP Phone User Guide One Net...
- Page 73 Huawei Proprietary and Confidential Copyright © Huawei Technologies Co., Ltd.