Samsung L830 User Manual
Samsung digital camera user manual
Hide thumbs
Also See for L830:
- User manual (111 pages) ,
- Manual del usuario (111 pages) ,
- Service manual (85 pages)
Table of Contents
Advertisement
Advertisement
Chapters
Table of Contents

Related Manuals for Samsung L830


Summary of Contents for Samsung L830
-
Page 2: Getting To Know Your Camera
Please check that the camera is operating properly prior to when you intend to use it (e.g. for a trip or an important event) to avoid disappointment. Samsung takes no responsibility for any loss or damage that may result from camera malfunction. - Page 3 Should any form of liquid or a foreign object enter the camera, do not use it. Switch off the camera, and then disconnect the power source. You must contact your dealer or Samsung Camera Service centre. Do not continue to use the camera as this may cause a fire or electric shock.
-
Page 4: Table Of Contents
Caution CAUTION indicates a potentially hazardous situation which, if not avoided, may result in a minor or moderate injury. Leaking, overheating, or damaged battery could result in fire or injury. ● Use battery with the correct specification for the camera. ●... - Page 5 Contents Pausing while recording a movie clip (Successive Recording) 024 Things to Watch Out for When Taking Pictures 025 Using the camera buttons to set the camera POWER button SHUTTER button ZOOM W / T button Info / Up button Macro / Down button Focus lock Flash / Left button...
- Page 6 Contents AF sound 053 Setup menu 054 Setup menu 1 File name LANGUAGE Setting up the Date / Time / Date type Imprinting the recording date LCD brightness Auto Focus lamp Start up image 056 Setup menu 2 Quick view Auto power off LCD save Selecting Video out type...
- Page 7 096 Setting up the application software 098 Starting PC mode 101 Removing the removable disk 102 Setting up the USB Driver for MAC 102 Using the USB Driver for MAC 102 Removing the USB Driver for Windows 98SE 103 Samsung Master 106 FAQ...
-
Page 8: System Chart
System chart Please check that you have the correct contents before using this product. The contents can vary depending on the sales region. To buy the optional equipment, contact your nearest Samsung dealer or Samsung service centre. <Included items >... -
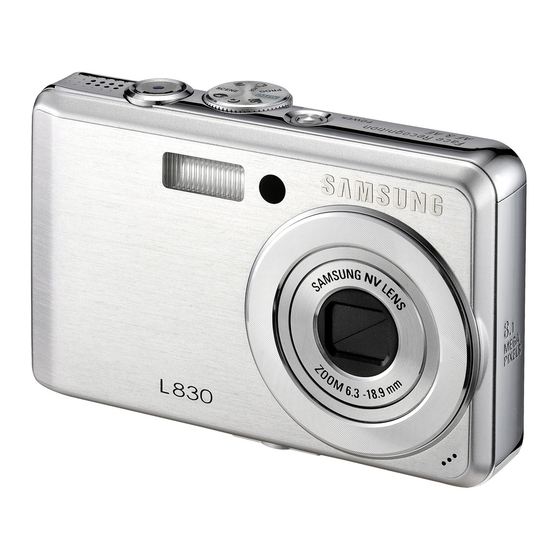
Page 9: Identification Of Features
Identification of features Front & Top Speaker Flash AF sensor/Self-timer lamp << 8 >> Shutter button Mode dial Power button Lens Microphone... -
Page 10: Back
Identification of features Back Camera status lamp Zoom T button (Digital zoom) Zoom W button (Thumbnail) E (Effect) button LCD monitor Fn/Delete button Eyelet for camera strap 5-function button FR (Face Recognition) button Play mode/Print button << 9 >>... -
Page 11: Bottom
Identification of features Bottom Memory card slot USB/AV connection terminal Tripod socket To open the battery chamber cover, slide it in the direction shown above. << 10 >> 5 Function button Battery holder Battery chamber Battery chamber cover Information / Up button Flash / Left button Macro / Down button... - Page 12 Identification of features Self-timer lamp Icon Status For the 2 seconds, the lamp blinks quickly at Blinking 0.25-second intervals. - For the first 8 seconds, the lamp blinks at 1 second intervals. Blinking - For the final 2 seconds, the lamp blinks quickly at 0.25-second intervals.
-
Page 13: Connecting To A Power Source
Using the camera for 5 minutes and then Powering it off for 1 minute. These figures are measured under Samsung’s standard conditions and shooting conditions and may vary depending on the user’s methods. << 12 >>... - Page 14 Connecting to a Power Source You can charge the rechargeable battery SLB-0937 by using the SAC- 46 KIT which consists of the AC adapter (SAC-46) and the USB cable (SUC-C2). When the SAC-46 and SUC-C2 are combined, they can be used as an AC cable.
- Page 15 Connecting to a Power Source How to charge the rechargeable battery (SLB-0937) Charging LED Before inserting any cables or AC adapter, check the directions and do not insert by force. It may cause breakage of cable or camera. If the charging LED of the AC Charger does not turn on or blink after inserting the rechargeable battery, please check whether the battery is inserted correctly.
-
Page 16: Inserting The Memory Card
Connecting to a Power Source Insert the battery as shown - If the camera does not turn on after you have inserted battery, please check whether the battery is inserted with the correct polarity (+ / -). - When the battery chamber cover is opened, do not press the battery chamber cover by force. -
Page 17: Instructions On How To Use The Memory Card
During and after periods of extended use, you may notice that the memory card is warm. This is perfectly normal. Do not use a memory card that is used in another digital camera. To use the memory card in this camera, format the memory card using this camera. - Page 18 When using a 256MB MMC memory, the specified shooting capacity will be as follows. These figures are approximate as image capacities can be affected by variables such as subject matter and memory card type. - L830 Recorded image size Super Fine Fine...
-
Page 19: When Using The Camera For The First Time
When Using the Camera for the First Time Charge the rechargeable battery fully before using the camera for the first time. When the camera is turned on for the first time, a menu will be displayed to set date / time and language in the LCD monitor. This menu will not be displayed after setting up. -
Page 20: Lcd Monitor Indicator
Description Icons Contrast Sharpness Auto Focus Frame Camera shake Warning Date / Time 2007/07/01 01:00 PM Exposure compensation White Balance L830 L730 Drive mode / Stabiliser Metering Image Quality / Frame Rate L830 Image Size L730 Battery Optical / Digital Zoom bar / Digital Zoom rate Voice Memo/Mic. -
Page 21: Starting The Recording Mode
Starting the recording mode How to use the AUTO mode Please select this mode for quick and easy picture taking with minimal user interaction. 1. Insert the batteries (p.15). Insert the batteries taking note of the polarity (+ / -). 2. -
Page 22: How To Use The Asr Mode
- As the ASR uses the camera's digital signal processor, it may take a little longer for the camera to process and save the images. - L830 : If the image size is , the ASR mode can't be selected. -
Page 23: How To Use The Scene Modes
Starting the recording mode How to use the SCENE modes Use the menu to easily configure optimal settings for a variety of shooting situations. 1. Select the Scene mode by rotating the Mode dial. 2. Point the camera towards the subject and compose the image by using the LCD monitor. -
Page 24: How To Use The Movie Clip Mode
Starting the recording mode How to use the MOVIE CLIP mode A movie clip can be recorded for as long as the available recording time of the memory capacity allows. 1. Select the Movie clip mode by rotating the Mode dial. 2. -
Page 25: Things To Watch Out For When Taking Pictures
Things to Watch Out for When Taking Pictures Pressing the shutter button down half way. Lightly press the shutter button to confirm focus and flash battery charge. Press the shutter button all way down to take the picture. [Lightly press the shutter button] [Press the shutter button] The available memory capacity may vary depending on shooting conditions and camera settings. -
Page 26: Using The Camera Buttons To Set The Camera
Using the camera buttons to set the camera The recording mode function can be set up by using the camera buttons. POWER button Used for turning the camera’s power on / off. If there is no operation during the specified time, the camera's power will be turned off automatically to save battery life. - Page 27 ZOOM W / T button WIDE Zoom Optical zoom WIDE : Pressing the ZOOM W button. This will zoom out from the subject i.e. the subject will appear further away. Pressing the ZOOM W button continuously will set the camera to its minimum zoom setting i.e.
-
Page 28: Info / Up Button
Info ( ) / Up button While the menu is showing, the Up button operates as a direction button. In the recording modes or playback mode, pressing this button will display the image information. Info ( ) button Macro ( ) / Down button While the menu is showing, press the DOWN button to move from the main menu to a sub menu, or to move down the sub menu. -
Page 29: Down Button
Macro ( ) / Down button Types of focus mode and focus range (W : Wide, T : Tele) Mode Auto ( Focus Type Auto macro ( Normal W : 10~Infinity W : 80~Infinity Focus range T : 50~Infinity T : 80~Infinity When the macro mode is selected, be particularly careful to avoid camera shake. -
Page 30: Focus Lock
Focus lock To focus on a subject not positioned in the centre of the picture, use the focus lock function. Using the Focus Lock 1. Ensure the subject is in the centre of the autofocus frame. 2. Press the SHUTTER button halfway. When the green auto focus frame lights up, it means the camera is focused on the subject. -
Page 31: Left Button
Flash ( ) / Left button If you press the shutter button after selecting the Auto, Fill-in, Slow synchro flash, the first flash fires to check the shooting condition (Flash range and Power ratio of flash). Do not move the camera until the second flash fires. Using the flash frequently will reduce the life of the battery. -
Page 32: Self-Timer / Right Button
Flash ( ) / Left button Available flash mode, by recording mode Self-timer ( When the menu is displayed on the LCD monitor, pressing the Right ( : Selectable) button makes the cursor shift to the right tab. When the menu is not displayed on the LCD monitor, the RIGHT button operates as the Self-timer ( photographer would also like to be in the image. -
Page 33: Right Button
Self-timer ( ) / Right button Selecting the self-timer 1. Select a RECORDING mode with the exception of VOICE RECORDING mode. 2. Press the SELF-TIMER ( ) button until the desired mode indicator displays on the LCD monitor. A 10 second, 2 second, or Double self- timer icon appears on the LCD monitor. -
Page 34: Face Recognition(Fr) Button
Face recognition(FR) button This mode detects the face position of the subject automatically and then sets the focus and exposure. Select this mode for quick and easy face portraits. Selectable modes : Auto, Program, ASR, Manual, Portrait, Scene modes (Children, Beach & Snow ) 1. -
Page 35: E (Effect) Button
Even if the camera is turned off, the effect setting will be preserved. To cancel the special effect, select the Colour menu and select the menus. ( : Selectable) L830 : If the image size is selected. L730 : If the image size is selected. sub menu in... -
Page 36: E (Effect) Button : Colour
E (Effect) button : Colour By using the camera’s digital processor, it is possible to add special effects to your images Press the E button in an available recording mode. (p.34) COLOR Move Exit [Still image mode] 1. Select a desired sub menu by pressing the Up/Down button and press the OK button. -
Page 37: E (Effect) Button : Saturation
E (Effect) button : Saturation You can change the saturation of the image. Press the E button in an available recording mode. (p.34) IMAGE ADJUST Select Saturation menu ( a bar for changing the saturation will be displayed. Move Exit Press the Shutter button to take a picture. -
Page 38: E (Effect) Button : Fun
E (Effect) button : FUN Pre-set focus frame You can make the subject stand out from its surroundings. The subject will be sharp and in focus while making the rest out of focus. Press the E button in an available recording mode. (p.34) Move Exit 1. -
Page 39: Composite Shooting
E (Effect) button : FUN Composite shooting You can combine 2 ~ 4 different shots in a still image. Press the E button in an available recording mode. (p.34) Move Exit 1. Select a desired menu by pressing Left/Right button and press the OK button. - Page 40 E (Effect) button : FUN Changing a part of composite shot before taking the last shot Before taking the last composite shot, you can change a part of composite shot. 1. During the composite shots, press the Fn button. 2. A previous image will be deleted and new frame will be displayed. To delete a previously taken image, press the Fn button again.
-
Page 41: Photo Frame
E (Effect) button : FUN Photo Frame You can add 9 types of frame-like borders to a still image you want to capture. Date & Time information will not be printed on the stored image taken with Photo Frame menu. Press the E button in an available recording mode. -
Page 42: Fn Button
Fn button You can use the Fn button to set the following menus. Size Quality/ Frame rate Metering Drive White Balance Stabilisation *1. This menu is only available in the Children scene mode ( How to use the Fn menu ( : Selectable) 1. -
Page 43: Quality / Frame Rate
Size You can select the image size appropriate for your application. - L830 Icon Still image 3264 x 3264 x 3264 x Size mode 2448 2176 1836 Icon Movie clip mode 800 x 592 Size - L730 Icon Still image... -
Page 44: Metering
Metering If you cannot obtain suitable exposure conditions, you can change the metering method to take brighter pictures. [Multi] : Exposure will be calculated based on an average of the available light in the image area. However, the calculation will be biased towards the centre of the image area. -
Page 45: Iso
Drive mode Wise Shot 2 images are taken at a time. One is taken in the Fill-In Flash mode and the other is taken in the ASR mode. How to use the wise shot 1. Select the ASR mode by rotating the mode dial and press the Fn button. -
Page 46: White Balance
White balance The white balance control allows you to adjust the colours to appear more natural. [Auto WB] : The camera automatically selects the appropriate white balance settings, depending on the prevailing lighting conditions. [Daylight] : For taking images outside. [Cloudy] : For taking images under a cloudy and overcast sky. -
Page 47: Exposure Compensation
Exposure compensation This camera automatically adjusts the exposure according to the ambient lighting conditions. You can also select the exposure value by using the Fn button. Compensating Exposure 1. Press the Fn button, and then use the UP and DOWN buttons to select the exposure compensation icon ( The exposure compensation menu bar will appear as shown. -
Page 48: Using The Lcd Monitor To Adjust The Camera Settings
Using the LCD monitor to adjust the camera settings You can use the menu on the LCD monitor to set up recording functions. The items indicated by are default settings. Menu Sub menu Soft+ Soft Normal Vivid Sharpness Vivid+ High Normal Contrast Focus Area... -
Page 49: Sharpness
Sharpness You can adjust the sharpness of the picture you are about to take. You cannot check the sharpness effect on the LCD monitor before you take a picture, because this function is applied only when the captured image is stored on the memory. -
Page 50: Voice Memo
Voice Memo You can add your voice-over to a stored still image. (Max. 10 sec.) - If the voice memo indicator is displayed on the LCD monitor, the setting is completed. - Press the shutter button and take a picture. The picture is stored on the memory card. -
Page 51: Recording The Movie Clip Without Voice
Voice Recording Pausing while recording a voice Using this function, you can record your favourite voice clips into a voice recording file without having to create multiple voice recording files. 1. Press the Pause button ( ) to pause recording. 2. -
Page 52: Scene Mode
SCENE mode Use the menu to easily configure optimal settings for a variety of shooting situations. Press the MENU button and select a desired sub menu. Refer to page 22 for more information. Sound menu In this mode, you can set up sound settings. You can use the setup menu in all camera modes, except Voice Recording mode. -
Page 53: Sound
Sound ( Volume You can select a volume of start up sound, shutter sound, beep sound and AF sound. - [Volume] sub menu : [Off], [Low], [Medium], [High] Start up sound You can select the sound that is activated whenever the camera is turned on. - Start up sound : [Off], [Sound 1], [Sound 2], [Sound 3] Shutter sound... -
Page 54: Setup Menu
Setup menu In this mode, you can set up basic settings. You can use the setup menu in all camera modes, except Voice Recording mode. The items indicated by are default settings. Menu tab Main menu Reset File Language (Setup 07/07/01 menu 1) Date &... -
Page 55: File Name
- The first stored folder name is 100SSCAM, and the first file name of L830 is SL380001. (The first file name of L730 is SL370001.) - File names are assigned sequentially from SL380001 SL380002 SL389999. -
Page 56: Imprinting The Recording Date
Setup menu 1 ( Imprinting the recording date There is an option to include DATE / TIME on still images. - Sub menus [Off] : The DATE & TIME will not be imprinted on the image file. [Date] : Only the DATE will be imprinted on the image file. -
Page 57: Setup Menu 2
Setup menu 2 ( Quick view If you enable Quick View before capturing an image, you can view the image you just captured on the LCD monitor for the duration set in the [Quick View] setup. Quick view is possible only with still images. - Sub menus [Off] : The quick view function... -
Page 58: Selecting Video Out Type
Setup menu 2 ( Selecting Video out type The Movie output signal from the camera can be NTSC or PAL. Your choice of output will be governed by the type of device (monitor or TV, etc.) to which the camera is connected. PAL mode can support only BDGHI. Connecting to an external monitor When the camera is connected to an external monitor, the image and menus... -
Page 59: Formatting A Memory
Setup menu 2 ( Formatting a memory This is used for formatting the memory. If you run [Format] on the memory, all images, including the protected images, will be deleted. Be sure to download important images to your PC before formatting the memory. - Sub menus [No] : The memory will not be formatted. -
Page 60: Starting Play Mode
Starting play mode Turn the camera on and select Play mode by pressing the play mode button ). The camera can now play back the images stored in the memory. If the memory card is inserted in the camera, all the camera functions apply only to the memory card. -
Page 61: Movie Clip Capture Function
Starting play mode Movie clip capture function You can capture still images from the movie clip. How to capture the movie clip 1. Press the Play / Pause button ( while playing the movie clip. Then press the E button. 2. -
Page 62: Playing Back A Recorded Voice
Starting play mode Playing back a recorded voice 1. Select the recorded voice that you want to play back by using the Left/Right button. 2. Press the play & pause button ( play back a recorded voice file. - To pause a recorded voice file, while playing it back, press the play &... -
Page 63: Lcd Monitor Indicator
LCD monitor Indicator The LCD monitor displays shooting information about the displayed image. Description Battery Folder name & File name Memory card indicator Playback mode Voice Memo Protect DPOF Recording date Image size 3264x2448 ~ 256X192 Flash Shutter speed Aperture value <<... -
Page 64: Thumbnail / Enlargement Button
- Movie clips and WAV files can’t be enlarged. - If an image is enlarged, a loss of quality may occur. ) button The maximum enlargement rate in proportion to the image size - L830 Image size Maximum X12.8 enlargement... -
Page 65: Info / Up Button
Info ( ) / Up button When the menu is displayed on the LCD monitor, the UP button operates as a direction button. When the menu is not displayed on the LCD monitor, pressing the Info button will display image information on the LCD monitor. Info ( ) button Info (... -
Page 66: Left / Right / Menu / Ok Button
Left / Right / Menu / OK button LEFT / RIGHT / MENU / OK buttons activate the following. - LEFT button : While the menu is showing, the LEFT button operates as a direction button. While the menu is not showing, press the LEFT button to select the previous image. -
Page 67: E (Effect) Button : Resize
[RESIZE] ( ) menu tab. 3. Select a desired sub menu by pressing the Up / Down button and press the OK button. Image Resize Types - L830 << 66 >> - L730 RESIZE Move Exit - A large sized image can be resized to a smaller sized image, but not ( : Selectable) vice versa. -
Page 68: E (Effect) Button : Colour
E ( Effect ) button : Rotating an image You can rotate the stored images by various degrees. 1. Press the play mode button and press the E button. 2. Press the LEFT / RIGHT button and select the [ROTATE] ( ) menu tab. -
Page 69: E (Effect) Button : Special Colour
E ( Effect ) button : Colour Custom colour You can change the R (Red), G (Green) and B (Blue) values of the image. - OK button : Select / setup the Custom Colour - Up / Down button : Selects R, G, B - Left / Right button : Change the values <<... -
Page 70: Colour Mask
E (Effect) button : Special Colour Colour mask With this menu, you can select a part you want to highlight. The rest of the image will be in black and white. SPECIAL COLOR Select ( ) the selected area will be shown. -
Page 71: E (Effect) Button : Image Editing
E ( Effect ) button : Image editing 1. Press the play back button and press the E button. 2. Select ( ) menu tab by pressing the Left/Right button. Red eye Removal Red eye effect can be removed from the captured image. 1. -
Page 72: E ( Effect ) Button : Fun
E ( Effect ) button : FUN Cartoon You can add a text box to the image to make the image cartoon like. The cartoon image is saved as 1M image size. Select Cartoon ( Move Exit Press the OK button and the image is saved. -
Page 73: Preset Focus Frames
E ( Effect ) button : FUN Before saving the cartoon image, you can change the selected image. 1. Pressing the Fn button deletes the images in order. 2. Press the OK button and you can select images. Pressing the Fn button Save Delete... -
Page 74: Composite Image
E ( Effect ) button : FUN Moving and changing the focus frame You can change the focus frame after selecting a Range menu. 1. Select a focus frame by pressing the Left/Right button and press the OK button. 2. Move the location of the frame by pressing the Up/Down/Left/Right button. - Page 75 E ( Effect ) button : FUN Selecting 2 composite shots Pressing the Up/Down/Left/Right button Move Pressing the OK button Select Back [Selecting the second image] Select an image by pressing the 5 function button and press the OK button Change the location of second image by pressing the Up/Down/Left/Right button and press the OK button to save the image.
-
Page 76: Photo Frame
E ( Effect ) button : FUN Photo Frame You can add 9 types of frame-like borders to a still image you want to capture. Date & Time information will not be printed on the stored image taken with Photo Frame menu. Move Exit Select a desired sub menu by pressing the Left/Right button. -
Page 77: Sticker
E ( Effect ) button : FUN Sticker You can add various stickers to the image. Select ( Move Exit Select a location of sticker by pressing the Up/Down/ Left/Right button Save Move ※ You can add additional stickers by pressing the Fn button. -
Page 78: Setting Up The Play Back Function Using The Lcd Monitor
Setting up the play back function using the LCD monitor This menu is available while the camera is connected to a PictBridge supporting printer (direct connection to the camera, sold separately) with a USB cable. Menu Tab Main Menu Sub Menu One Pic Images All Pics... -
Page 79: Starting The Slide Show
Starting the slide show ( Images can be displayed continuously at pre-set intervals. You can view the slide show by connecting the camera to an external monitor. 1. Press the play mode button and press the menu button. 2. Press the LEFT / RIGHT button and select the [SLIDE SHOW] menu tab. -
Page 80: Configure Slide Show Effects
Starting the slide show ( Configure slide show effects Unique screen effects can be used for the slide show. 1. Select the [Effect] sub menu by pressing the UP / DOWN button and press the RIGHT button. 2. Use the Up / Down button to select the type of effect. -
Page 81: Playback
Playback ( Voice memo You can add your voice to a stored still image. PLAYBACK Voice Memo Protect Delete DPOF Copy to Card Back Start : Shutter Start : Shutter [Voice memo menu] [Ready for recording] - Press the shutter button to take a picture. The images are saved on the memory. -
Page 82: Deleting Images
Playback ( Deleting images This deletes images stored on the memory. If the memory card is inserted, images on the memory card are deleted. Otherwise, images in the internal memory are deleted. 1. Press the Up / Down button and select the [Delete] menu tab. - Page 83 Playback ( Standard This function allows you to embed printing quantity information on a stored image. 1. Press the Up / Down button and select the [DPOF] menu tab. And then press the Right button. 2. Press the Right button again and [Standard] sub menu will display.
-
Page 84: Copy To Card
Playback ( Print size You can specify the print size when printing images stored on the memory card. The [Size] menu is available only for DPOF 1.1 compatible printers. 1. Press the Up / Down button and select the [DPOF] menu tab. And then press the Right button. -
Page 85: Pictbridge
Playback ( [Copy To Card] will not be selected without inserting a memory card. If there is not enough space available in the memory card to copy saved images in the internal memory (10 MB), the [Copy To Card] command will copy only some of the images and display [Memory Full!] message. -
Page 86: Pictbridge : Picture Selection
PictBridge Easy printing When you connect the camera to printer in the Play back mode, you can print a picture easily. - Pressing the Left / Right button : Selects a previous / next image. - Pressing the printer ( ) button : Currently displayed image will be printed with the printer’s default setting. -
Page 87: Pictbridge : Print Setting
PictBridge : Print Setting You can select the Paper Size, Print Format, Paper Type, Print Quality, Date Print, and File Name Print menus for printed pictures. 1. Press the Menu button and the PictBridge menu will display. 2. Use the Up / Down buttons to select the desired menu, and then press the Right button. -
Page 88: Important Notes
- Take care not to get fingerprints or foreign substances on the surface of the lens. If the digital camera is not used for a long period, an electric discharge can occur. It is a good idea to remove the battery and the memory card if you do not intend using the camera for an extended period of time. -
Page 89: Warning Indicator
- Take a picture for testing the camera condition and prepare extra battery. - Samsung cannot be held responsible for camera malfunctions. << 88 >> Warning indicator There are several warnings that may appear on the LCD display. -
Page 90: Before Contacting A Service Centre
Warning indicator [ File Error! ] ᆞFile error → Delete the file. ᆞMemory card error → Contact a camera service centre. [ Low Battery! ] ᆞThere is low battery capacity → Insert fresh batteries. [ Low Light! ] ᆞWhen taking pictures in dark places →... - Page 91 Before contacting a service centre Camera does not take images when pressing the Shutter button There is insufficient memory capacity Delete unnecessary image files The memory card has not been formatted → Format the memory card (p.58) The memory card is exhausted →...
-
Page 92: Specifications
(35mm film equivalent : 38 ~ 114mm) - F No. : F 3.0 ~ F 7.7(Wide), F 5.6~F 14.1(Tele) - Digital Zoom : L830 : ·Still Image mode : 1.0X ~ 5.0X ·Play mode : 1.0X ~ 12.8X L730 : ·Still Image mode : 1.0X ~ 5.0X ·Play mode : 1.0X ~ 12.0X... - Page 93 - Control : Program AE - Metering : Multi, Spot, Face Recognition - Compensation : ±2EV (1/3EV steps) - ISO : L830 : Auto, 80, 100, 200, 400, 800, 1600 L730 : Auto, 80, 100, 200, 400, 800, 1600 Flash - Modes : Auto, Auto &...
- Page 94 Fine Normal · L730 Super Fine Fine Normal These figures are measured under Samsung standard conditions and may vary depending on shooting conditions and camera settings. “E” Button - Effect : Color, Image Adjust, Fun ( Highlight, Composite, Photo Frame)
-
Page 95: Software Notes
- Using a Hand-made PC or a PC and OS that has not been guaranteed by the manufacturer is not covered by the Samsung warranty. - Before reading this manual, you should have a basic knowledge of computers and O/S (Operating Systems). -
Page 96: About The Software
Windows. A USB Driver for MAC is not included with the Application CD. You can use the camera with Mac OS 10.0~10.4. Samsung Master : This is the all-in-one multi media software solution. You can download, view, edit and save your digital images and movie clips with this software. -
Page 97: Setting Up The Application Software
Click the [Install] menu in the Auto run frame. 2. Install the camera driver, DirectX, XviD, Samsung Master and Adobe Reader by selecting a button shown on the monitor. If a latest version of DirectX was installed on your computer, DirectX may not be installed. - Page 98 If your OS is Windows XP/ Vista, an image viewer program will open. If the download window of Samsung Master opens after starting Samsung Master, the camera driver was set up successfully.
-
Page 99: Starting Pc Mode
Setting up the application software If you have installed the camera driver, the [Found New Hardware Wizard] may not open. On a Windows 98SE system, the Found New Hardware Wizard dialog box opens and a window asking you to select a driver file may appear. - Page 100 Starting PC mode Connecting the camera to a PC If you selected [Printer] in Step 5, when you connect the camera to your computer, the [Connecting Printer] message will display and the connection will not be established. In this case, disconnect the USB cable, and then follow the procedure from Step 2 and onward.
- Page 101 7. An image file is transferred from the camera to your PC. << 100 >> - By using [Samsung Master], you can see the stored images in the memory directly on the PC monitor and you can copy or move the image files.
-
Page 102: Removing The Removable Disk
Removing the removable disk Windows 98SE 1. Check whether the camera and PC are transferring a file. If the camera status lamp blinks, please wait until the lamp has finished blinking and is constantly on. 2. Unplug the USB cable. Windows 2000/ME/XP/Vista (The illustrations may differ from those shown depending on the Windows O/S.) -
Page 103: Setting Up The Usb Driver For Mac
1. Connect the camera to your PC and turn them on. 2. Check whether the Removable Disk is on the [My Computer]. 3. Remove the [Samsung Digital Camera] on the Device manager. 4. Disconnect the USB cable. 5. Remove the [Samsung USB Driver] on the Add/Remove Programs Properties. -
Page 104: Samsung Master
Samsung Master You can download, view, edit and save your images and movies with this software. This software is only compatible with Windows. To start the program, click [Start Programs Master Samsung Master]. Downloading images 1. Connect the camera to your PC. - Page 105 Image display window : A selected image displays in this window. Preview window : You can preview the changed image. A still image edited with Samsung Master can’t be played back on the camera. Refer to the [Help] menu in Samsung Master for further information.
- Page 106 Frame display window : You can insert multi media in this window. Some movie clips that were compressed with a codec that is not compatible with the Samsung Master can’t play back in the Samsung Master. Refer to the [Help] menu in Samsung Master for further information.
-
Page 107: Faq
Please check the following if the USB connection malfunctions. Case 1 USB cable is not connected or it is not the supplied USB cable. Connect the supplied USB cable. Case 2 The camera is not recognised by your PC. Sometimes, the camera may appear under [Unknown Devices] in Device Manager. - Page 108 If you install only the Samsung Master, the problems mentioned above occasionally happen. - Close the Samsung Master program by clicking the Samsung Master icon on the Taskbar. - Install all the application programs included in the software CD.
-
Page 109: Correct Disposal Of This Product
The Eco mark represents Samsung Techwin's will to create environment-friendly products, and indicates that the product satisfies the EU RoHS Directive. - Page 110 MEMO << 109 >>...
Need help?
Do you have a question about the L830 and is the answer not in the manual?
Questions and answers